
Sway bar DIY?


Thread Starter
Cruisin'
Joined: May 2011
Posts: 21
Likes: 0
From: Vernon Hills, IL
Sway bar DIY?
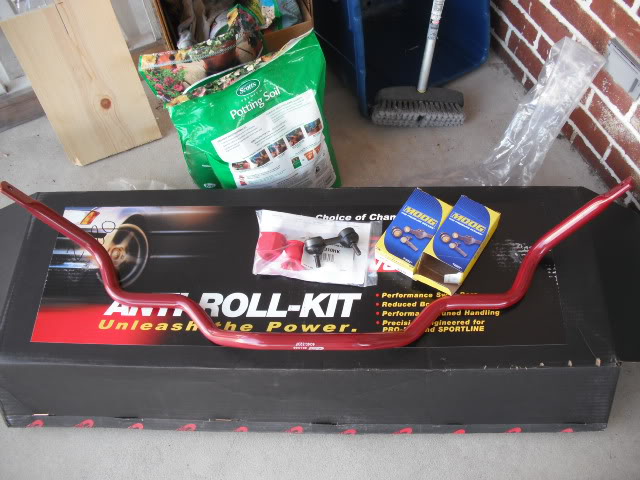
I bought the Eibach front and rear sways & all 4 new moog end links. My question is... Is the install pretty straight forward becuase I did not see a DIY out there unless I missed it. Any advise for when I do the install? Thanks in advance.
kill you till you die
Joined: Jun 2010
Posts: 669
Likes: 46
From: Charlotte, NC
Definitely straight forward, take a look at the stock ones...pull off a wheel and take a close look at the endlinks, sometimes when you try to break a nut free the whole assembly will spin so you have to hold it with some pliers. The rear should come right off, I'm not sure if anything blocks the front one.

the front is going to be a pain!!!!!!!!!!!!!!!!!!!!!!!!!!!!!!!!!!!!!!!!!!!!!! !!!!!!!!!!!!!!!!!!!!!!!!!!!!!!!!!!!!!!!!!!!!!!!!!! !!!!!!!!!!!!!!!!!!!!!!!!!!!!!!!!!!!!!!!!!!!!!!!!!! !!!!!!!!!!!!!!!!!!!!!!!!!!!!!!!!!!!!!!!!!!!!!!!!!! !!!!!!!!!!!!!!!!!!!!!!!!!!!!!!!!
the rear is easy.
the rear is easy.
I really enjoyed doing mine. Exactly the same upgrade.
I knicked the front control arm while cutting the end link off.
Expect your own learning curve, but safety first.
Car stands and a nice tree stump was my safety factor.
I knicked the front control arm while cutting the end link off.
Expect your own learning curve, but safety first.
Car stands and a nice tree stump was my safety factor.
Thread Starter
Cruisin'
Joined: May 2011
Posts: 21
Likes: 0
From: Vernon Hills, IL
the front is going to be a pain!!!!!!!!!!!!!!!!!!!!!!!!!!!!!!!!!!!!!!!!!!!!!! !!!!!!!!!!!!!!!!!!!!!!!!!!!!!!!!!!!!!!!!!!!!!!!!!! !!!!!!!!!!!!!!!!!!!!!!!!!!!!!!!!!!!!!!!!!!!!!!!!!! !!!!!!!!!!!!!!!!!!!!!!!!!!!!!!!!!!!!!!!!!!!!!!!!!! !!!!!!!!!!!!!!!!!!!!!!!!!!!!!!!!
the rear is easy.
the rear is easy.
Also is there any hardware (bolts that will be reused that may be rusted that I can prepare for and buy in advance in order to put on new when reinstalling?)
Thanks!
Get the car as high as you can, safely. The front is a bit harder than the rear. Getting it in and out is like a puzzle, but absolutely doable.
I'm 99% sure sway bars are technically suppose to be installed with the suspension loaded. I did it without load (I'm sure others have also) and it was fine.
If you live in a rust prone area, be prepared to cut your endlinks off and replace. Moog is a very good beefier replacement.
Good luck!
I'm 99% sure sway bars are technically suppose to be installed with the suspension loaded. I did it without load (I'm sure others have also) and it was fine.
If you live in a rust prone area, be prepared to cut your endlinks off and replace. Moog is a very good beefier replacement.
Good luck!
Trending Topics
Senior Moderator


Joined: Aug 2002
Posts: 81,385
Likes: 3,068
From: Appleton WI
Front is not a pain. It like said above with all its bends needs to be twisted (you will see as you are removing it) to get it out.
As for the car. Jack it up from the front lift pad (on the subframe just below the front engine mount, and in the rear the little loop that hangs down on the spare tire well) and place jack stands on the factory lift points.
As for the car. Jack it up from the front lift pad (on the subframe just below the front engine mount, and in the rear the little loop that hangs down on the spare tire well) and place jack stands on the factory lift points.
Thread Starter
Cruisin'
Joined: May 2011
Posts: 21
Likes: 0
From: Vernon Hills, IL
Completed it on Saturday and all I can say is WOW. Feels like a whole different car. Best $250 I have ever spent on a car.
The rear was easy. Front did take a bit of time to wiggle back in (and finding it was easier to put the endlinks on the front sway bar before trying to do it once in place.)
Found it was much easier to heat the endlink joint to the point of it poping out and then using a vice on one side, and an impact on the other to get the bolt out.
Senior Moderator
Joined: Aug 2002
Posts: 81,385
Likes: 3,068
From: Appleton WI
 springs and shocks made a big difference for me, BUT Front and Rear sways made an even bigger difference.
 to get mine off i just hit them with a hammer separating the end from the link allowing me to get a vicegrips on it to hold it from spinning.
Thread Starter
Cruisin'
Joined: May 2011
Posts: 21
Likes: 0
From: Vernon Hills, IL
Instructor
Joined: Mar 2011
Posts: 105
Likes: 4
difference btw Sway Bars & Sway Bar links?
I am trying to replace my sway bars, for my 01 RL.
Whats the difference between sway bars and sway bar links?
Does anyone have some Pictures of these 2 items?
These noise is driving me crazy.!
Thank you
Whats the difference between sway bars and sway bar links?
Does anyone have some Pictures of these 2 items?
These noise is driving me crazy.!
Thank you
Nice job!!! Yea I did the progress rear sway and moog end links a few weeks back.... Such an awesome mod, wish I did it sooner.. But jus got the eibach front sway trying to do it this weekend, but snow in the forecast for my NY so who knows 

AZ Community Team
Joined: May 2007
Posts: 32,488
Likes: 7,771
From: N35�03'16.75", W 080�51'0.9"
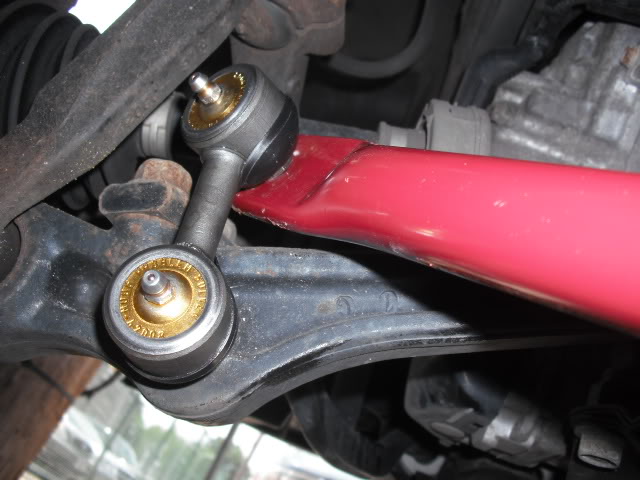
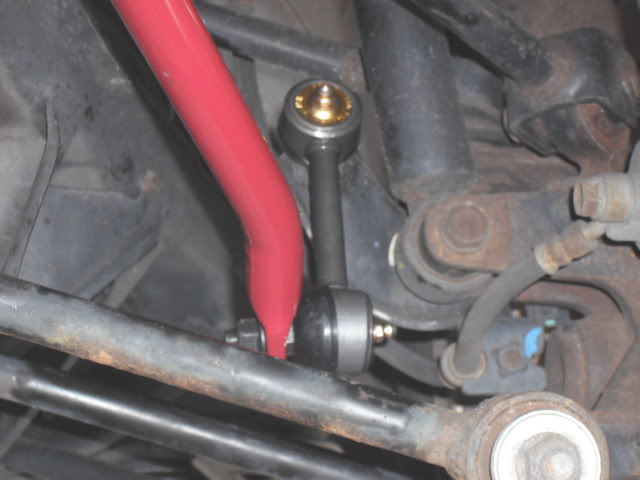
Sway Bar:
A sway bar or anti-roll bar or stabilizer bar is a part of an automobile suspension that helps reduce the roll of a vehicle that is induced by cornering or road irregularities. It connects opposite (left/right) wheels together through short lever arms linked by a torsion spring. A sway bar increases the suspension's roll stiffness�its resistance to roll in turns, independent of its spring rate in the vertical direction.
.... A sway bar is usually a torsion spring that resists body roll motions. It is usually constructed out of a U-shaped steel bar that connects to the body at two points, and at the left and right sides of the suspension. If the left and right wheels move together, the bar rotates about its mounting points. If the wheels move relative to each other, the bar is subjected to torsion and forced to twist. Each end of the bar is connected to an end link through a flexible joint. The sway bar end link in turn connects to a spot near a wheel or axle, permitting forces to be transferred from a heavily-loaded axle to the opposite side.
....
The end links connect the sway bar to the rest of the chassis/suspension.
BTW - if you're driving an RL, you probably want to post in the appropriate RL section.
https://acurazine.com/forums/
Def go with moog, nice beefy replacements... Did my front eibach this weekend... Def a lot easy with 2 people.. Actually took less time then my rear because my end links came out first try... Got lucky... Let some pb blaster soak in for 10 mins and held the end links side with pliers while taking off nut... Also jus twisted out like a corkscrew towards one side.. Nice and easy!!!

Chapter Leader (Southeast Region)
Joined: Jan 2012
Posts: 2,355
Likes: 451
From: Jacksonville, FL


Advanced
Joined: Dec 2017
Posts: 98
Likes: 2
From: Seattle, WA
Completed it on Saturday and all I can say is WOW. Feels like a whole different car. Best $250 I have ever spent on a car.
The rear was easy. Front did take a bit of time to wiggle back in (and finding it was easier to put the endlinks on the front sway bar before trying to do it once in place.)
Found it was much easier to heat the endlink joint to the point of it poping out and then using a vice on one side, and an impact on the other to get the bolt out.
The rear was easy. Front did take a bit of time to wiggle back in (and finding it was easier to put the endlinks on the front sway bar before trying to do it once in place.)
Found it was much easier to heat the endlink joint to the point of it poping out and then using a vice on one side, and an impact on the other to get the bolt out.

Racer


Joined: Jan 2016
Posts: 357
Likes: 42
the front is going to be a pain!!!!!!!!!!!!!!!!!!!!!!!!!!!!!!!!!!!!!!!!!!!!!! !!!!!!!!!!!!!!!!!!!!!!!!!!!!!!!!!!!!!!!!!!!!!!!!!! !!!!!!!!!!!!!!!!!!!!!!!!!!!!!!!!!!!!!!!!!!!!!!!!!! !!!!!!!!!!!!!!!!!!!!!!!!!!!!!!!!!!!!!!!!!!!!!!!!!! !!!!!!!!!!!!!!!!!!!!!!!!!!!!!!!!
the rear is easy.
the rear is easy.
The front is just a little weird to route but not that bad.
The hardest part is to remove the old links if their rusted on.
I just broke the old ones off the bar and put a vice grip on the ball socket and just break that nut off with an impact.
Advanced
Joined: Dec 2017
Posts: 98
Likes: 2
From: Seattle, WA
Both are pretty easy to do since it�s bolt off bolt on.
The front is just a little weird to route but not that bad.
The hardest part is to remove the old links if their rusted on.
I just broke the old ones off the bar and put a vice grip on the ball socket and just break that nut off with an impact.
I do agree, the other big concern is being able to remove the endlinks, which I've see the DIYs, but can be a pain to break off.
Advanced
Joined: Dec 2017
Posts: 98
Likes: 2
From: Seattle, WA
also, what year and trim TL do you have? just making sure it is consistent.
Racer
Joined: Jun 2012
Posts: 377
Likes: 84
From: New Jersey
2003 TL-S
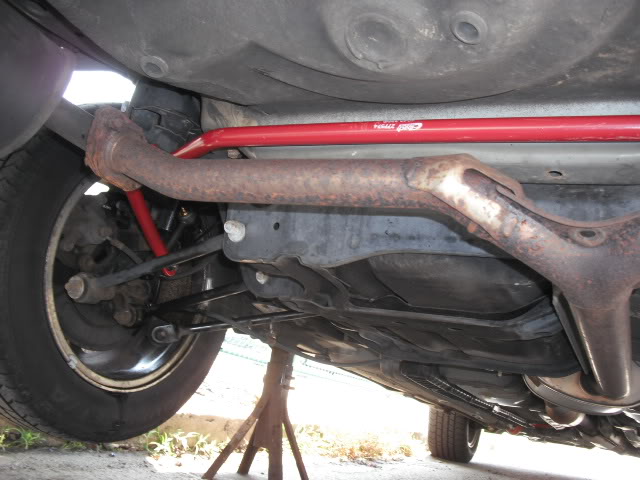
Disconnect the end links and then unbolt the stabilizer bar bushing brackets from the rear subframe. The bar will then drop down and rest on the exhaust pipe.
The hardest part is maneuvering the old stabilizer bar out and the new one in around the exhaust pipe and suspension components. I did it with the front of the car up on jack stands.

Thread
Thread Starter
Forum
Replies
Last Post