carbon fiber interior part
 10-13-2005, 08:58 PM
#1
Pro
Thread Starter
carbon fiber interior part
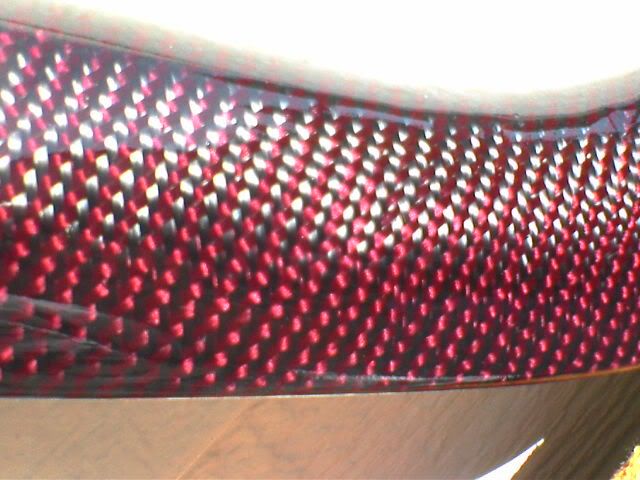
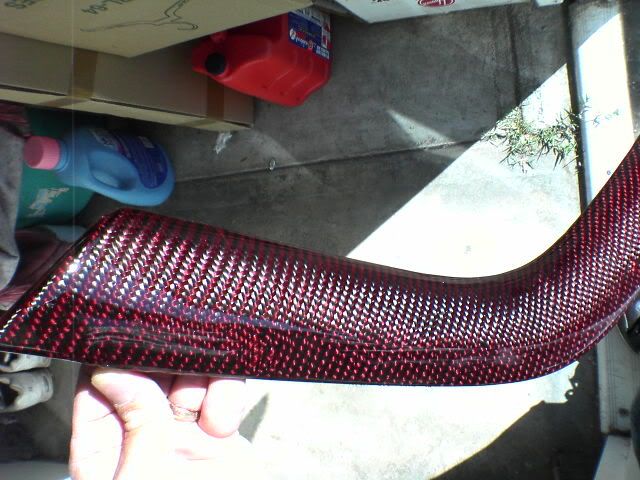
Here some pics i took of the part i wraped in carbon. Its red cabon, sorry for bad quality pic i just took those with my camera phone.


 10-13-2005, 10:19 PM
#3
Pro
Thread Starter
Originally Posted by UglyPsycho
Looks nice but I think you should of used black/black CF. What resin did you use? Thats one good ass camera phone  .
.
.The resin i used was the silmar 249 dries clear. and as for the camera phone it my sony ericsson s710a
 10-13-2005, 11:18 PM
#6
Pro
Thread Starter
Originally Posted by prjctTL
are you making any for sale, this would be a nice upgrade

Trending Topics
10-14-2005, 11:12 AM
#8
99TL-p 114K
Join Date: Mar 2005
Location: South Florida
Age: 37
Posts: 1,455
Likes: 0
Received 2 Likes
on
2 Posts
Aight, that looks so hot. I was gona paint my wood grain pieces silver to match my car but now that i see what u have done with the wood grain piece by wrapping it in carbon fiber, NOW THATS WHAT I DEFF WANT TO DO. IT would look perfect inside. Damn. Aight, on a scale from 1 - 10 how hard would u say it is to wrap a wood grain piece in carbon fiber for someone like me who has never done that before??? If its not that hard i want to do it, and where can i buy the sheets of real carbon fiber?
10-14-2005, 01:21 PM
#9
Pro
Thread Starter
Originally Posted by dvsxlt247
Aight, that looks so hot. I was gona paint my wood grain pieces silver to match my car but now that i see what u have done with the wood grain piece by wrapping it in carbon fiber, NOW THATS WHAT I DEFF WANT TO DO. IT would look perfect inside. Damn. Aight, on a scale from 1 - 10 how hard would u say it is to wrap a wood grain piece in carbon fiber for someone like me who has never done that before??? If its not that hard i want to do it, and where can i buy the sheets of real carbon fiber?
If you have no experiance don't try this. I wasted alot of money just on trial and error. i'll give it a 10 that if you have no experiance. But if you want try to play with fiberglass first or just do lil project with the cf. Since cf is hard to get now because there is a shortage and prices are high. To do say all 6 wooden piece will cost about 150 in material and this is if you don't mess up. So i recommend doing something small or flat first.
10-14-2005, 01:30 PM
#11
Pro
Thread Starter
Originally Posted by car_lost
can you list how you did it? what materials did you need? was it a CF sheet? mnore details please! 
I'll try to do a Dyi for you guys later today. but as for material i uses Carbon fiber fabris raw, silmar 249 risin this resin drys clear, and this is not a cf sheet its real fabric.
10-14-2005, 02:31 PM
#13
99TL-p 114K
Join Date: Mar 2005
Location: South Florida
Age: 37
Posts: 1,455
Likes: 0
Received 2 Likes
on
2 Posts
Aight well, do u think you might want to do some the same nice way u did them and sell them. If so, how much would u charge to do all 6 wood grain pieces in real carbon fiber? In Original regular Carbon fiber? I really would like to have mine like that. Looks sharp and clean.
10-16-2005, 03:28 AM
#14
Pro
Thread Starter
How to overlay part
First you guy will need the material and time lots of time. This is very time consuming. I am not responsible for anything you do.
1. Resin I used the Silmar 249 resin reason is that this resin dries clear. And also a wax additive.
2. Carbon fabric your choice pick something between 5.7oz to 10oz weight. Most common one use are the Twill it�s a pattern and about 5.7oz, there is also plain pattern and so forth. When you use twill as you fabric be very careful. This material it vary hard to work with since it shift a lot. Unless your doing a flat surface.
you will need a adhesive you can pick this up at you local home depot. It�s the 3m super 77. This is to hold the fabric down to the part.
3. get some disposable gloves and cheap brushes, since you will need to throw them away. And some mixing sticks you can use a Popsicle stick to mix the resin. And work at a well venerated area. Be sure to have goggle and breathing mask. You don�t want to breath this stiff it�s not good for you.
4. DO NOT DO THIS INSIDE YOUR HOUSE!!!!!!
Cost for parts
-Resin-$30 and wax additive $10 total = $40 not included shipping
-Carbon depends and where and kind. Usually cost is bout $40-$50 a yd and since carbon is going up in price might be more and harder to get a hold of.
-3m adhesive $10
-gloves , brushes and etc about $20-$40
-Clear coat $15
so total material for the project I did is around $155 or so might be a little more and you will have extra fabric left for little project, or another piece if you mess up. 1 pcs not both
Start
1. find a piece you want to work on. For beginner I recommend a flat piece or something small. Don�t jump into big piece or you will waste money and time.
 my piece. Sanded and painted.
2. sand your piece down with 100 grid sand paper.
3. spray the part with black paint if your part is a different color. Reason for this is if you overlay and the carbon shift you cant see it so much since the under piece is black. Example if the under piece is white you will see it if the carbon shift and this will not look good.
4. after you sand the piece measure the carbon and cut it. Leave bout 1in-2inches all around you will need the 2� to wrap underneath the part.
5. spray the 3m little parts at a time make sure you get the edges good. Then put the carbon on the part you sprayed and hold it till its stick to the part this can get a little messy don�t over spray or the 3m will leak through the cf and leave a stick white part. Continue this till you wrap the whole piece. After that spray the 3m underneath the piece and wrap the bottom. With the extra 1-2inch cf.
6. mix your resin to spec. you don�t need to mix a lot just enough for that part. Lay one coat. Then brush it on the part. Let it dry till it comes tacky. Usually take 30 min to 1hr depending on weather. If its cold forget it, it will take forever. Once it�s tacky repeat the steps. Brush another coat of resin, lay about 4 coats of resin. The last coat requires a wax additive which will make sanding easier and yes you need this. Mix to right ratio. If you mess up and mix too much it will leave a white milky spot you can sand it but going to take forever and might over sand the piece. So basically if this happens with the milky spot your piece is gone no use. You will not see the milky spots till you sand.
Last coat with wax additive.
 Underside look.
7. let part cure might be over night or might be days depending on weather. Even if its hot just let it dry for about 2 days. After that start sanding
8. THIS IS THE MOST INPORTANT PART
9. sand 100 grid, do not sand one place too long or it will eat the carbon and there will be a messed up look area there. Sand till the whole part is flat no uneven bumps. Then sand 150 then 250 then wet sand 400 then 1000 and if you want 1500 after sand wash the part clean.also sand the back side down. The sand process will take a long time depending on how big the part is. Take your time don�t rush.
 This is how sanding looks don�t worry about the look.
 Underside after some sanding and trimming but not done.
10. go to a local paint shop buy clear coat. The one I brought is call U-POL its in a can and cost about $15. Do not buy the clear at you local autozone and any place like that unless you don�t mind the not so glossy look. U-POL is uv protected or buy a clear that is UV proteced. When the part is cleaned and dryed spray a good lay of clear then you should be done or you can do 2 layers of clear. Spay in a area where this is less dust or particle if not you might see little dust specs on the part after clear.
finished piece and cleared coated.
BAM YOUR DONE WITH YOUR FIRST PROJECT
Hope this helps everyone happy wraping . If you guys need info about stuff. or need help or want me to do your part of course not free hahah just pm me or post here.
First you guy will need the material and time lots of time. This is very time consuming. I am not responsible for anything you do.
1. Resin I used the Silmar 249 resin reason is that this resin dries clear. And also a wax additive.
2. Carbon fabric your choice pick something between 5.7oz to 10oz weight. Most common one use are the Twill it�s a pattern and about 5.7oz, there is also plain pattern and so forth. When you use twill as you fabric be very careful. This material it vary hard to work with since it shift a lot. Unless your doing a flat surface.
you will need a adhesive you can pick this up at you local home depot. It�s the 3m super 77. This is to hold the fabric down to the part.
3. get some disposable gloves and cheap brushes, since you will need to throw them away. And some mixing sticks you can use a Popsicle stick to mix the resin. And work at a well venerated area. Be sure to have goggle and breathing mask. You don�t want to breath this stiff it�s not good for you.
4. DO NOT DO THIS INSIDE YOUR HOUSE!!!!!!
Cost for parts
-Resin-$30 and wax additive $10 total = $40 not included shipping
-Carbon depends and where and kind. Usually cost is bout $40-$50 a yd and since carbon is going up in price might be more and harder to get a hold of.
-3m adhesive $10
-gloves , brushes and etc about $20-$40
-Clear coat $15
so total material for the project I did is around $155 or so might be a little more and you will have extra fabric left for little project, or another piece if you mess up. 1 pcs not both
Start
1. find a piece you want to work on. For beginner I recommend a flat piece or something small. Don�t jump into big piece or you will waste money and time.
my piece. Sanded and painted.2. sand your piece down with 100 grid sand paper.
3. spray the part with black paint if your part is a different color. Reason for this is if you overlay and the carbon shift you cant see it so much since the under piece is black. Example if the under piece is white you will see it if the carbon shift and this will not look good.
4. after you sand the piece measure the carbon and cut it. Leave bout 1in-2inches all around you will need the 2� to wrap underneath the part.
5. spray the 3m little parts at a time make sure you get the edges good. Then put the carbon on the part you sprayed and hold it till its stick to the part this can get a little messy don�t over spray or the 3m will leak through the cf and leave a stick white part. Continue this till you wrap the whole piece. After that spray the 3m underneath the piece and wrap the bottom. With the extra 1-2inch cf.
6. mix your resin to spec. you don�t need to mix a lot just enough for that part. Lay one coat. Then brush it on the part. Let it dry till it comes tacky. Usually take 30 min to 1hr depending on weather. If its cold forget it, it will take forever. Once it�s tacky repeat the steps. Brush another coat of resin, lay about 4 coats of resin. The last coat requires a wax additive which will make sanding easier and yes you need this. Mix to right ratio. If you mess up and mix too much it will leave a white milky spot you can sand it but going to take forever and might over sand the piece. So basically if this happens with the milky spot your piece is gone no use. You will not see the milky spots till you sand.
Last coat with wax additive.
Underside look.7. let part cure might be over night or might be days depending on weather. Even if its hot just let it dry for about 2 days. After that start sanding
8. THIS IS THE MOST INPORTANT PART
9. sand 100 grid, do not sand one place too long or it will eat the carbon and there will be a messed up look area there. Sand till the whole part is flat no uneven bumps. Then sand 150 then 250 then wet sand 400 then 1000 and if you want 1500 after sand wash the part clean.also sand the back side down. The sand process will take a long time depending on how big the part is. Take your time don�t rush.
This is how sanding looks don�t worry about the look.Underside after some sanding and trimming but not done.10. go to a local paint shop buy clear coat. The one I brought is call U-POL its in a can and cost about $15. Do not buy the clear at you local autozone and any place like that unless you don�t mind the not so glossy look. U-POL is uv protected or buy a clear that is UV proteced. When the part is cleaned and dryed spray a good lay of clear then you should be done or you can do 2 layers of clear. Spay in a area where this is less dust or particle if not you might see little dust specs on the part after clear.
finished piece and cleared coated.BAM YOUR DONE WITH YOUR FIRST PROJECT
Hope this helps everyone happy wraping
. If you guys need info about stuff. or need help or want me to do your part of course not free hahah just pm me or post here.


Thread
Thread Starter
Forum
Replies
Last Post
Yumcha
Automotive News
3
09-14-2015 10:48 AM
oyayjoe
Member Cars for Sale
1
09-12-2015 04:40 PM
Yumcha
Automotive News
2
09-04-2015 08:03 AM