When you click on links to various merchants on this site and make a purchase, this can result in this site earning a commission. Affiliate programs and affiliations include, but are not limited to, the eBay Partner Network.
So I just tried taking a crack at changing out my passenger side headlight bulb and seems impossible to do without taking off the bumper. Could this be because my car, being equipped with AFS, has some extra junk back there that makes everything inaccessible? I literally can't seen anything I'm doing, which scares me. I've tried searching the board for illustrated instructions on front bumper removal which I thought I saw before, but haven't had any luck finding. Can anyone help?
the passenger one was the easiest, so you're in luck! remove the black plastic cover above the fender (it goes around the wiper fluid filler lid). the wiper fluid filler neck comes off - you need to remove the mounting clip, a wiring harness clip and the washer line snakes thru it, too. now look up inside the open cavity and you'll see the round cover of the headlight housing (it has a yellow sticker and is about 4" in diameter). it unscrews (i used a couple of "taps" on a flat blade screw driver that was against one of the tabs) and exposes the igniter (silver box about 1"). turn the igniter about a quarter of a turn and it will come off of the back of the bulb.
the bulb has a metal brakcet with two metal tabs holding it in place. this was probably the hardest part...on the top of the metal brkt there are two tabs (loops) that are locked into place. feel around and you'll know what i mean. i did the driver's side first so i already knew what i was looking for on this side. the loops need to be pushed together and slightly towards the front of the car. once they are released the brkt will pivot towards the engine and swing down to let the bulb fall out. make sure none of the metal straps from the ingiter get in the way (that was by far the most difficult part).
once i had the old bulb out, i practiced a couple of times putting it back into place (i didn't use the clips) to make sure i was familar with the orientation of the bulb placement. look at the bulb and you'll notice it is "keyed" (so it only goes in one way). the two small notches on the bulb housing face upward.
that's it! my local dealer quoted me $276 each side for the bulb and labor...i saved $430 doing both myself. let me know if you need more info and/or pics. if you're willing to do it yourself i'll happily help you "beat the system/dealer"
That's exactly the post I was following, but it just seems like my car, having h AFS, seems like it's so much bulkier behind the headlights. I simply couldn't get enough of a grasp to actually remove the bulb. Since one side is out and the other side is flickering, it just seems that it would be easier to do all this with the bumper off. Does anyone have the honda tech's guide to removing the bumper and changing the bulbs?
armashi, all our cars have the AFS. Just follow those directions, relax your hand and you'll get it. Once things mentally click, you'll chuckle over how easy it is and grumble over that dealer fee.
Success! Thanks for everything guys. Did Passenger's side this afternoon, tackling driver's side tomorrow. You think it's doable without taking out the battery? Looks like it'll be an awful tight fit...
i did it without taking out the battery but it was a pain! yes, it will be cramped but i didn't want to have all the problems associated with removing the battery.
Just take out the battery hold downs, and slide the battery toward the motor. That will give you plenty of room to reach in, turn the socket and remove the bulb, etc...
let me tell you the driver side took a long time to install, taking the battery out and the air filter just so i could have some room to snake my way into to pull the light out....i didn't change the passanger light because the colors match sooooo lucky me.
anyways i know headlights are expensive i just wanted to share this with you
so, there's been no activity on this thread for about 4 years... but no one has addressed whether the ballast needs to be disconnected in order to change the bulbs i.e. both the DRL and low beams, you know the whole 25K volts of electrocution warning... I need to change all the lights in the front ASAP; DRL, HID/low beams and fogs... Can anyone advise if this could all be accomplished without disconnecting the ballast?
The easiest way to overcome that would be to disconnect the battery, that should also help you in changing the driver side since it will let you shift the battery out of the way.
The easiest way to overcome that would be to disconnect the battery, that should also help you in changing the driver side since it will let you shift the battery out of the way.
cheers for the reply, mate. I read on this forum somewhere something about idle relearn hence other things, issues perhaps? when it comes to battery disconnect. I don't mind doing it but by doing so, will any unforeseen issues arise? So much to learn... Guess I should just go for it. Rather that than pay hundreds of 💵
cheers for the reply, mate. I read on this forum somewhere something about idle relearn hence other things, issues perhaps? when it comes to battery disconnect. I don't mind doing it but by doing so, will any unforeseen issues arise? So much to learn... Guess I should just go for it. Rather that than pay hundreds of 💵
cheers
so, I've decided to have a go at it. At some point it will need to be disconnected anyway, may as well learn now. Cheers, mate.
so, I've decided to have a go at it. At some point it will need to be disconnected anyway, may as well learn now. Cheers, mate.
I changed my HID bulbs out yesterday as my driver side bulb was starting to turn pink (sure sign it's failing). I bought a pair of 5000k D2S bulbs for a little more white light on the road.
Changing them took me about 80 minutes as I was figuring out the best way to do it. It's definitely more of a pain than it should be. I dropped the top of the bumper down and dismounted the lights, then pivoted the rear of them outward to access the back of the housings. Not hard this way and it was easy to swap them.
I understand that Acura wanted the hood's cut line to line up with the grille edges for style but burying so much stuff under the fenders was stupid.
Wow!! Definitely a different approach... Removing the headlight housing adds a level of pain in the behind for sure. I've found it do-able to shift the battery out of the way and reach back in there. I've worked with D2S bulbs in the past so I can do some things by feel, and my hands aren't terribly large either.
Wow!! Definitely a different approach... Removing the headlight housing adds a level of pain in the behind for sure. I've found it do-able to shift the battery out of the way and reach back in there. I've worked with D2S bulbs in the past so I can do some things by feel, and my hands aren't terribly large either.
Yup if I could've gotten my hands in there it would've been a different story but I have big hands (they can span across the length of a full size iPad) so there was no way. Adapt and overcome, right?
the passenger one was the easiest, so you're in luck! remove the black plastic cover above the fender (it goes around the wiper fluid filler lid). the wiper fluid filler neck comes off - you need to remove the mounting clip, a wiring harness clip and the washer line snakes thru it, too. now look up inside the open cavity and you'll see the round cover of the headlight housing (it has a yellow sticker and is about 4" in diameter). it unscrews (i used a couple of "taps" on a flat blade screw driver that was against one of the tabs) and exposes the igniter (silver box about 1"). turn the igniter about a quarter of a turn and it will come off of the back of the bulb.
the bulb has a metal brakcet with two metal tabs holding it in place. this was probably the hardest part...on the top of the metal brkt there are two tabs (loops) that are locked into place. feel around and you'll know what i mean. i did the driver's side first so i already knew what i was looking for on this side. the loops need to be pushed together and slightly towards the front of the car. once they are released the brkt will pivot towards the engine and swing down to let the bulb fall out. make sure none of the metal straps from the ingiter get in the way (that was by far the most difficult part).
once i had the old bulb out, i practiced a couple of times putting it back into place (i didn't use the clips) to make sure i was familar with the orientation of the bulb placement. look at the bulb and you'll notice it is "keyed" (so it only goes in one way). the two small notches on the bulb housing face upward.
that's it! my local dealer quoted me $276 each side for the bulb and labor...i saved $430 doing both myself. let me know if you need more info and/or pics. if you're willing to do it yourself i'll happily help you "beat the system/dealer"
so I just attempted this on the driver side, without taking off bumper... I'm able to squeeze those two tabs, loops, together, even tried pushing and pulling every which way possible, being careful of course. But no go, it's just not snapping out... Was at it for about an 1.5 hours... Attempted the passenger side but started to rain... Will try another day
any advice would be great.
FYI, after I disconnected the battery, connected jumper cables to my girl's car to keep it charged.
The drivers side is the hardest to be honest, especially removing the cover. I just did this last week and I was able to do it on the drivers side by removing the battery tie downs and shifting the battery over.
If this is your first time attempting to work with D2S projectors and changing the bulbs, I would start with the passenger side as you have more room to see how everything is put together. The drivers side is mostly done by feel for me.
there's actually less room on the passenger, without going through the wheel well. I removed the battery and had ample space on the drv.sde, the bloody 💡 just won't snap out. But I was researching further on this site... there's a diagram of the tabs, loops shifting to the left, together, whether squeezed or not, I will try that; see what happens. Either way I'm determined to get this done before the ham is ready this evening..Cheers again, mate.
Do you remove the windshield washer reservoir filler neck on the passenger side? I usually do, and i can see how it would be a pain without doing that.
Do you remove the windshield washer reservoir filler neck on the passenger side? I usually do, and i can see how it would be a pain without doing that.
I disconnected it from the frame... Did try sliding it out but no go. Tomorrow there's no rain in the forecast, so I'll be tacking it all then, as well as the license plate bulbs that just went. That one, from what I've read is not done by removing the exterior plastic covers but from the upper liner, that seems simple enough, as I did install the bluetooth module. Fun times, mate. But one of learning.
Here's some irony though... After I reconnected the HID connector on the driver side, the flickering has stopped and it no longer sporadically goes out... Which leads me to think it was loose, perhaps wishful thinking. Got the osram cbi so I intend to install those nonetheless - man, their shipping turnaround is awesome! Will report back once I have everything installed. Cheers
Last edited by 6socio6path6; 04-17-2017 at 10:37 PM.
Reason: correction
I removed the washer fluid neck to gain access to passenger side however driver side I tried slide battery out but unfortunate I drop the bulb inside the housing so I end up remove bumper and headlight to swap the bulb. I replace the OEM with CBI along with Opt-7 LED foglight.
Last edited by truonghthe; 04-18-2017 at 05:36 PM.
I removed the washer fluid neck to gain access to passenger side however driver side I tried slide battery out but unfortunate I drop the bulb inside the housing so I end up remove bumper and headlight to swap the bulb. I replace the OEM with CBI along with Opt-7 LED foglight.
Beautiful, mate. I might upgrade my fogs again after just replacing them with some sylvanias...
But anyway, what a PITFA that was! But I am happy to report that I have sucessfully changed my HIDs to the Osram CBIs. What a bloody difference. Cheers mates, for your knowledgeable input.
Last edited by 6socio6path6; 04-22-2017 at 11:53 AM.
Reason: Correction
I just replaced the bulb in the passenger side on my 2006 RL this weekend, using a Philips DS2 that I bought off Amazon for ~$40. I followed the instructions quoted near the top of this thread, and it went fairly quickly.
Once I removed the neck of the washer reservoir (I had to slide some of the washer hose through it to get enough slack to raise it enough to pull it off), there was a reasonable amount of space to get my hand in behind the headlight assembly to make the change.
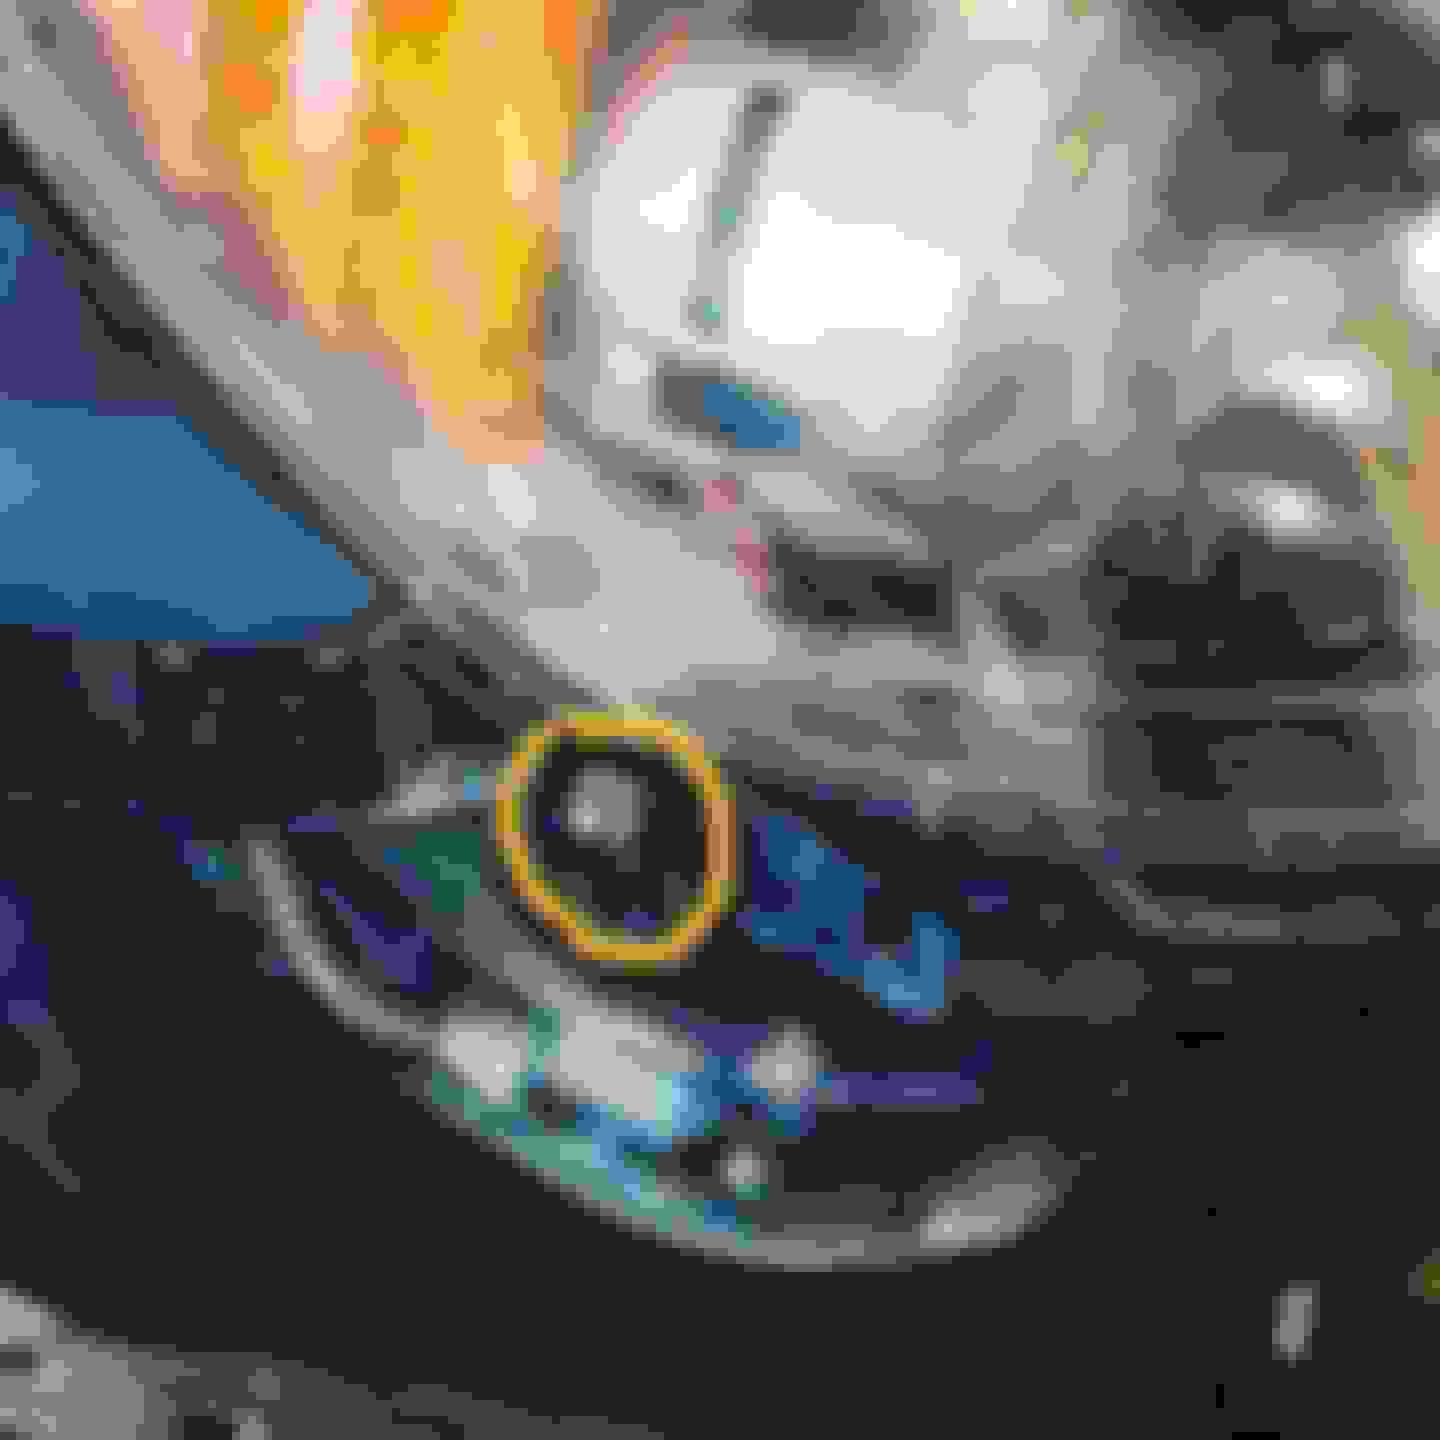
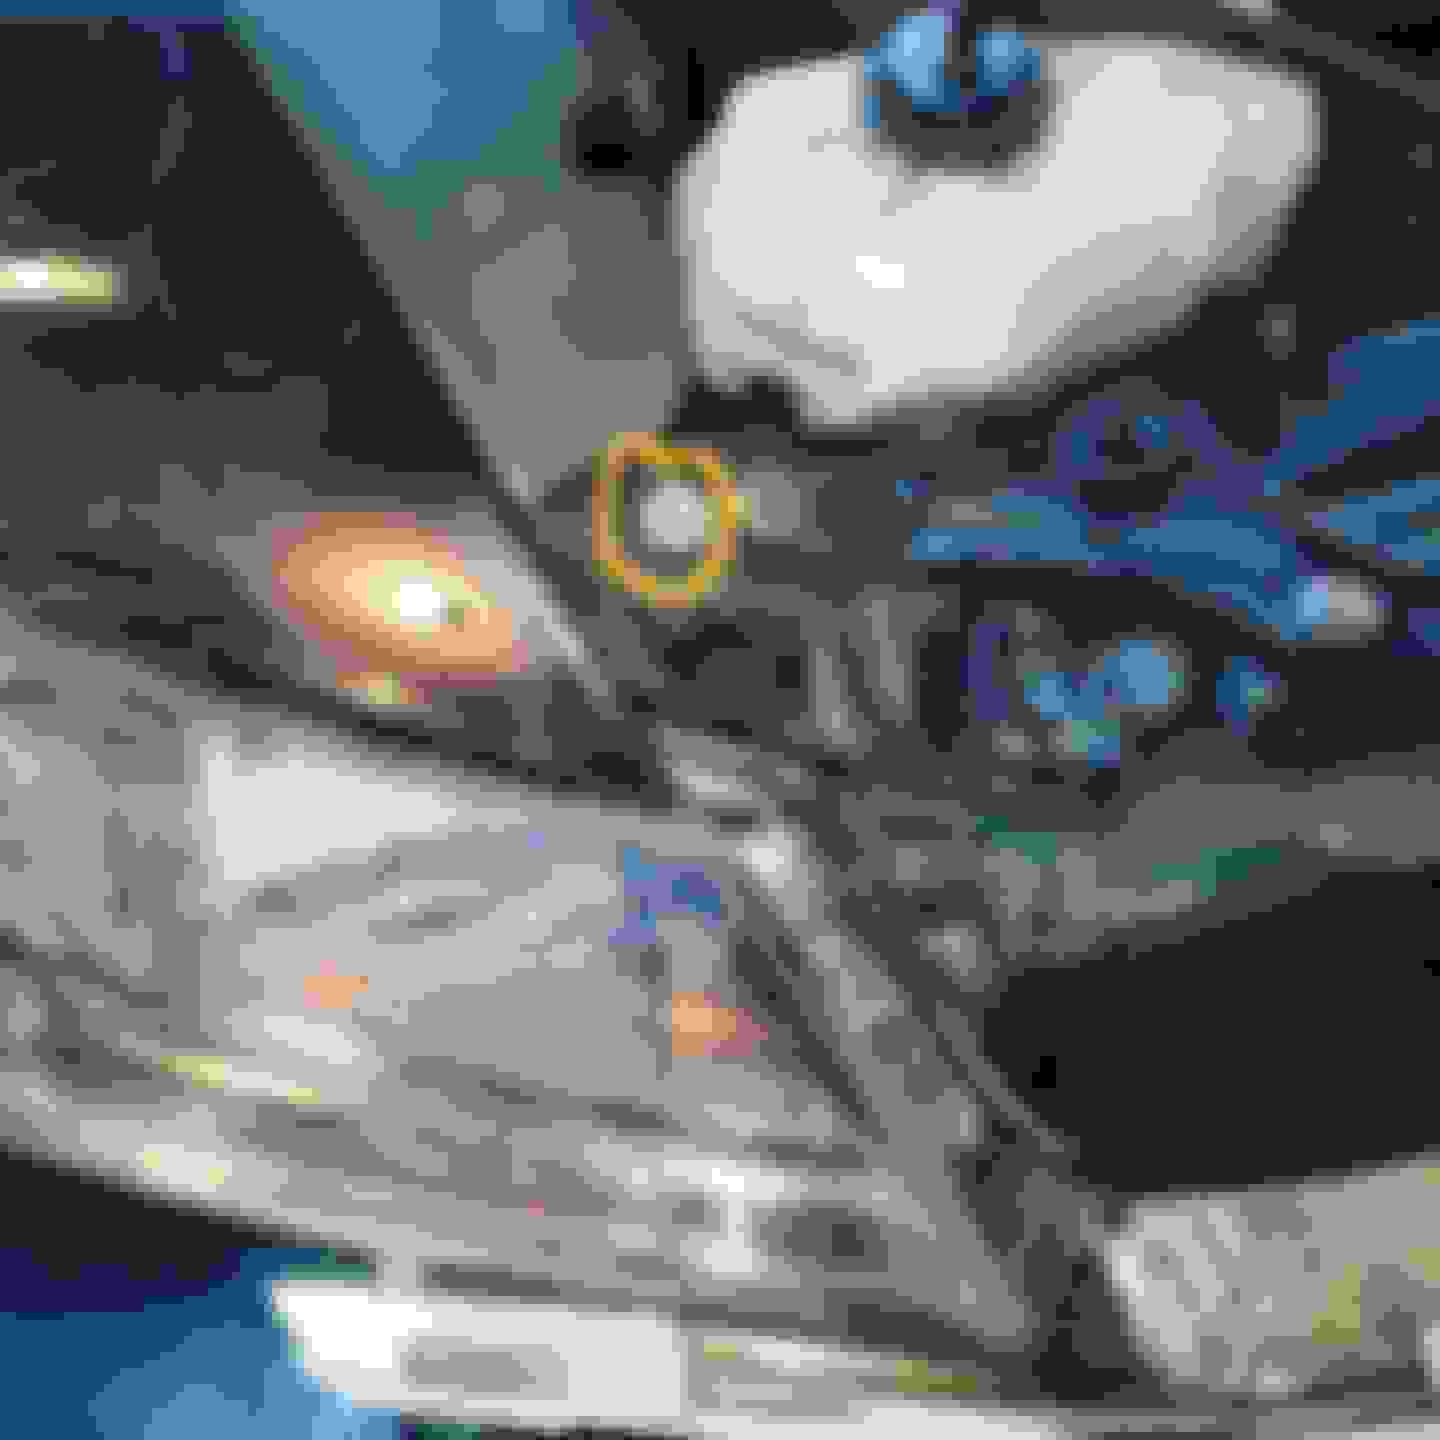
As mentioned in the earlier post, the tricky piece is pulling off the retaining clips. I couldn't see in there easily, but managed to get my phone in to take a picture to help me see what I needed to do, and thought that would be useful to post here.
Rear of passenger side headlight assembly
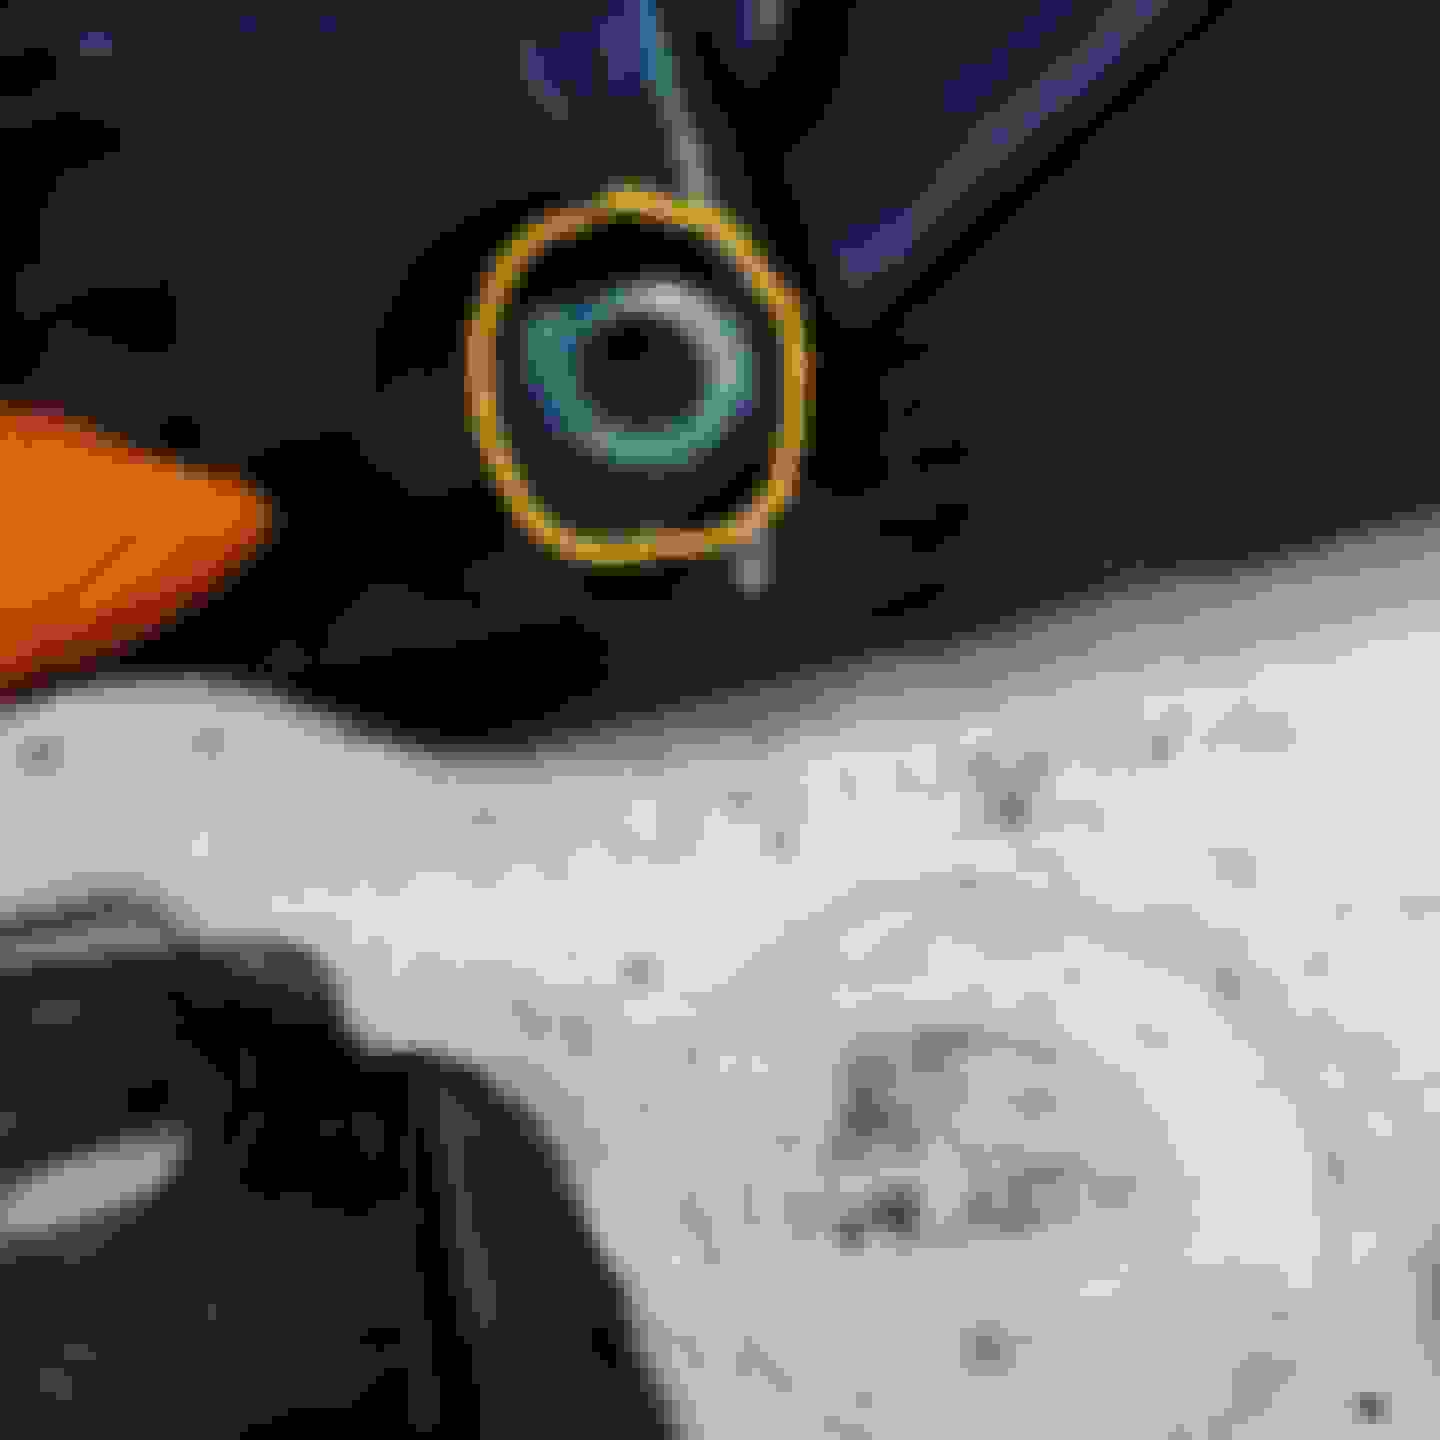
Those metal loops need to be pushed inwards, and forwards to free them from slots in that larger metal bracket at the top (note, that's the already removed igniter cap hanging to the right side).
However, I found that they didn't clear that bracket on their own, and I had to push them forward, and then pull them outwards a little, before finally pulling them back to allow them to release the bulb.
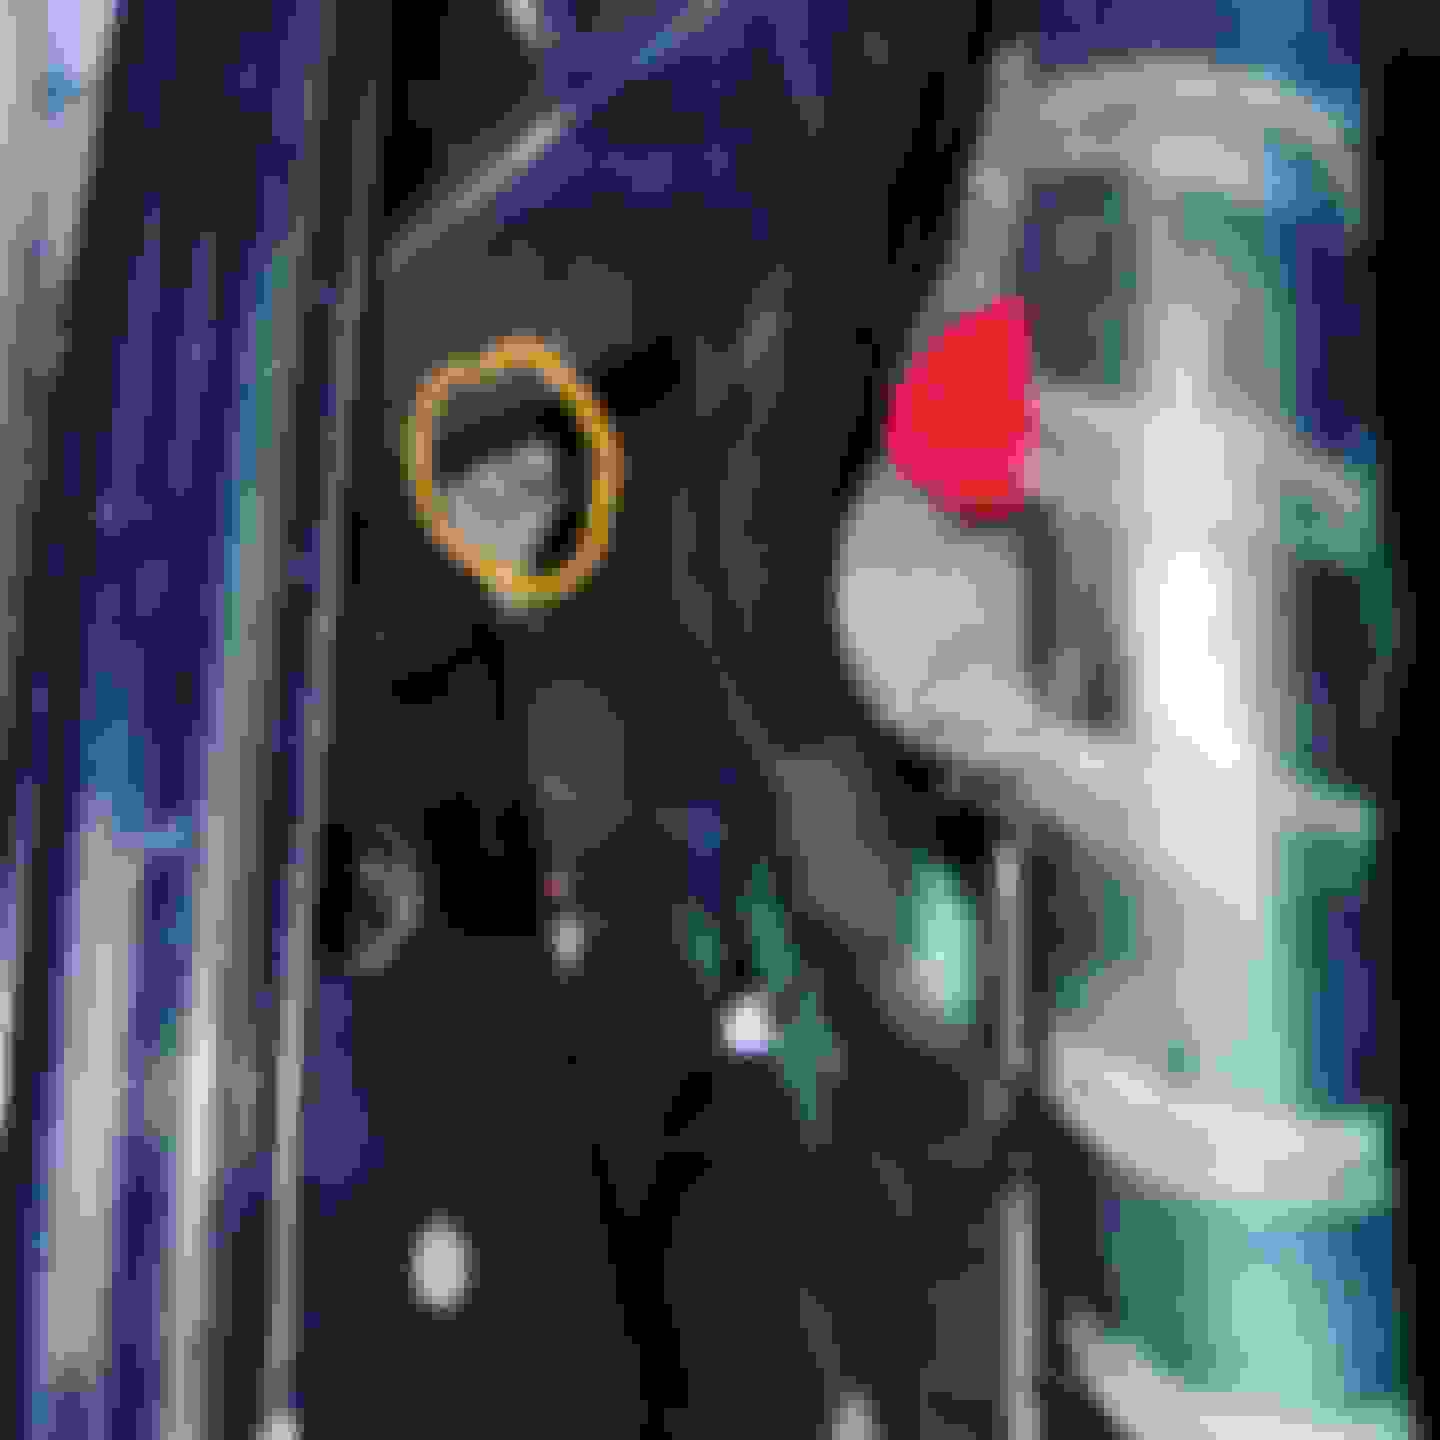
Once free of the clips, the bulb comes out easily, and replacing it is simple (in the picture, you can see how the keyed slot in the top of the bulb fits in the housing).
All-in-all, it was a lot easier than I was expecting. Thanks for your help!
I just replaced the bulb in the passenger side on my 2006 RL this weekend, using a Philips DS2 that I bought off Amazon for ~$40. I followed the instructions quoted near the top of this thread, and it went fairly quickly.
Once I removed the neck of the washer reservoir (I had to slide some of the washer hose through it to get enough slack to raise it enough to pull it off), there was a reasonable amount of space to get my hand in behind the headlight assembly to make the change.
As mentioned in the earlier post, the tricky piece is pulling off the retaining clips. I couldn't see in there easily, but managed to get my phone in to take a picture to help me see what I needed to do, and thought that would be useful to post here.
Rear of passenger side headlight assembly
Those metal loops need to be pushed inwards, and forwards to free them from slots in that larger metal bracket at the top (note, that's the already removed igniter cap hanging to the right side).
However, I found that they didn't clear that bracket on their own, and I had to push them forward, and then pull them outwards a little, before finally pulling them back to allow them to release the bulb.
Once free of the clips, the bulb comes out easily, and replacing it is simple (in the picture, you can see how the keyed slot in the top of the bulb fits in the housing).
All-in-all, it was a lot easier than I was expecting. Thanks for your help!
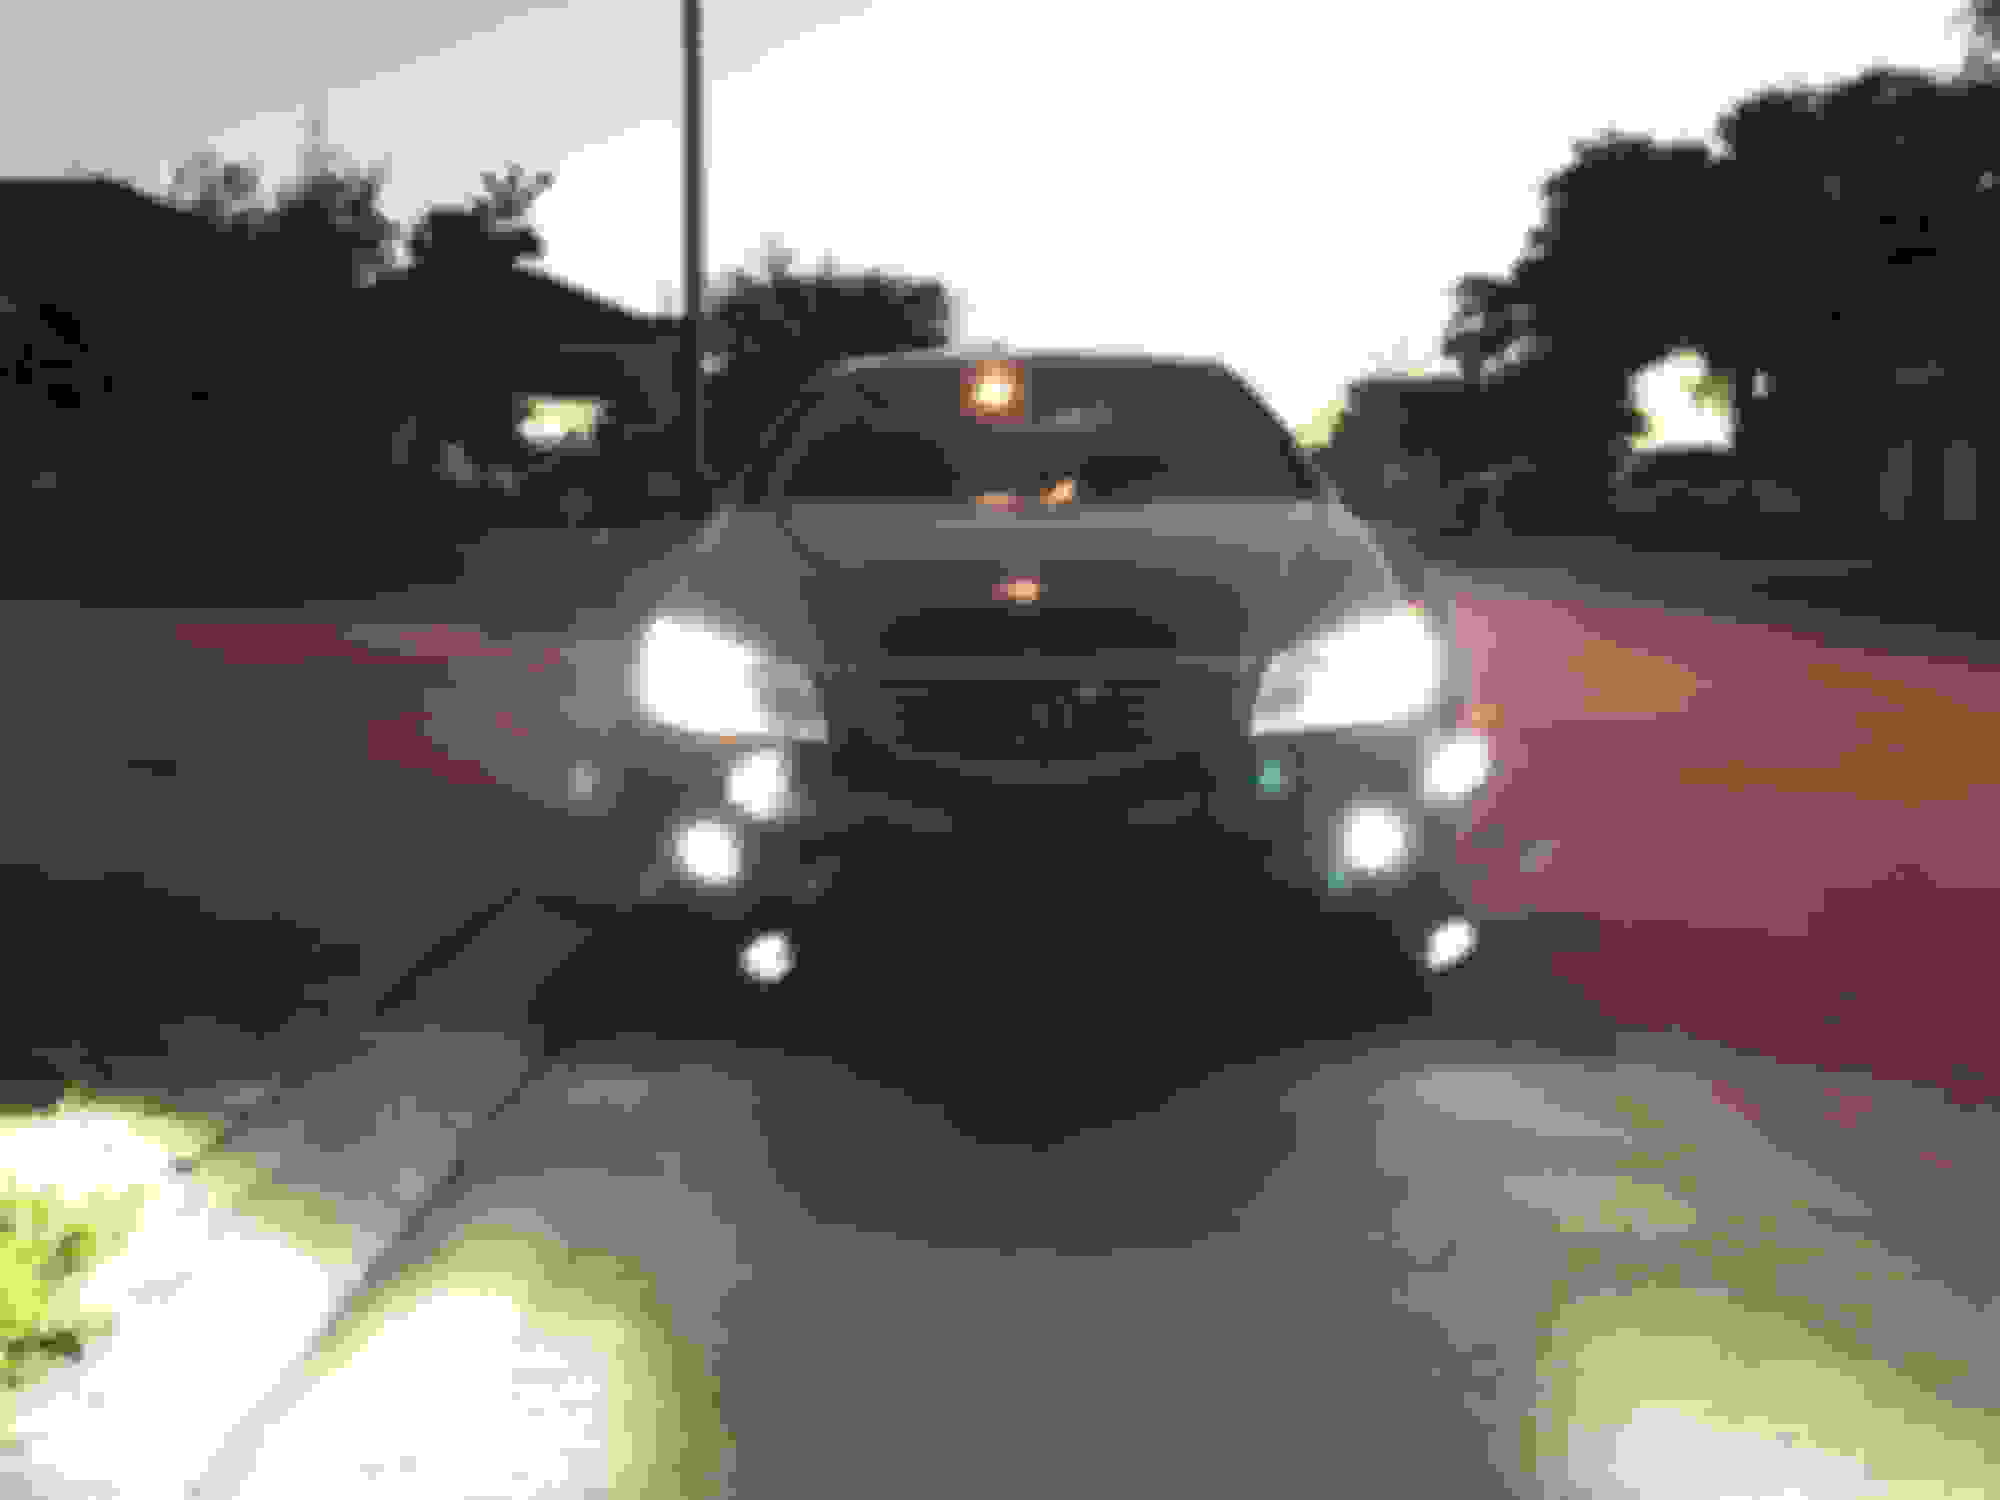
Hey guys! Tonight I was going back home from relative's house and noticed that one side of the car didn't illuminate the road as passenger side did. It was kind of wet on the ground after the rain, so I didn't really pay attention to that. When I parked, headlights were against a building wall and I saw that driver side was not white(as usual) but had a different, dimmer light than the passenger. I turned off lights switch, then turned it back on, the left headlight would light white for few seconds, then become dim. I did this few more times and got same result. I can't really say if the light was pink as the building wall is almost yellow color. Could it be an indication of bulb going out or it could of been a glitch?
I restored my head lights with the 3M kit and then applied LaminX covers onto them for added protection against UV rays. Also installed Osram HIDs and Beamtech LEDs for fog lights. They are very bright! I took the bumper and head lights off and maneauver in position where I could install the bulbs.
I mostly hate the headlight restoration kits, takes all day to do buffing and shit. Always try Mother's Mag and aluminum polish with a foam pad and buffer, if you don't have a buffer do it with a microfiber towel and elbow grease. It works wonders on oxidized headlights. Check out this guy
I mostly hate the headlight restoration kits, takes all day to do buffing and shit. Always try Mother's Mag and aluminum polish with a foam pad and buffer, if you don't have a buffer do it with a microfiber towel and elbow grease. It works wonders on oxidized headlights. Check out this guy https://youtu.be/A_yd1bbXswM
Agreed! I have used this method before, but this time I decided to use 3M and LaminX covers since the Mother's mag polish will yellow again after a couple of months but maybe it wouldn't have if I also used LaminX covers after polishing with the mag.

 10-06-2010 | 06:51 PM


 , taking the battery out and the air filter just so i could have some room to snake my way into to pull the light out....i didn't change the passanger light because the colors match sooooo
  lucky me.
 reflectors/ignitors.