


C-001: How to change air filter in 2G RL


Thread Starter
6th Gear
Joined: Feb 2009
Posts: 6
Likes: 0
From: Garner, NC
C-001: How to change air filter in 2G RL
OK, so after getting a quote from my local dealer of $180 to replace the cabin filter and air filter, I decided to get handy.
I purchased the new filter elements for $62.68 (tax and shipping included) from www.acuraautomotiveparts.org. This is the second time I've bought something from them and they are the least expensive place I've found to get OEM parts.
The cabin filter was a piece of cake. 5 minutes and done. Plenty of threads out there on how to do this.
But, no threads on how to change the engine air filter. After some exploration, the mystery is solved.
Remove the black plastic trim piece immediately under and at the edge of the hood, drivers side. It is held in by (5) plastic phillips head screws with inserts, easy removal. The hose going to the manifold is coming from the assembly that houses the filter. The top of this assembly is held down by (4) screws, one in each corner. A long nut driver will loosen these. The screws are held into the top of the assembly, so no worries of dropping them into the abyss. You may have to pull the hose loose from the assembly (not the manifold) to wiggle the top of the assembly loose and to expose the filter. Simply remove the old filter, drop in the new one and reverse the process. Total time after discovering what to do was about 45 min, and most of that was fighting the hose.
Hope this helps any DIY'ers.
Man, Acura service depts must think everyone who owns an Acura is rich and stupid.
I purchased the new filter elements for $62.68 (tax and shipping included) from www.acuraautomotiveparts.org. This is the second time I've bought something from them and they are the least expensive place I've found to get OEM parts.
The cabin filter was a piece of cake. 5 minutes and done. Plenty of threads out there on how to do this.
But, no threads on how to change the engine air filter. After some exploration, the mystery is solved.
Remove the black plastic trim piece immediately under and at the edge of the hood, drivers side. It is held in by (5) plastic phillips head screws with inserts, easy removal. The hose going to the manifold is coming from the assembly that houses the filter. The top of this assembly is held down by (4) screws, one in each corner. A long nut driver will loosen these. The screws are held into the top of the assembly, so no worries of dropping them into the abyss. You may have to pull the hose loose from the assembly (not the manifold) to wiggle the top of the assembly loose and to expose the filter. Simply remove the old filter, drop in the new one and reverse the process. Total time after discovering what to do was about 45 min, and most of that was fighting the hose.
Hope this helps any DIY'ers.
Man, Acura service depts must think everyone who owns an Acura is rich and stupid.
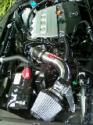
I just changed my air filter for the RL and my wifes air filter for her 07 Pilot. The pilot was a piece of cake.
The RL on the other hand was an exercise in frustration management. No wonder the quicky oil change places never offer to replace it!
The RL on the other hand was an exercise in frustration management. No wonder the quicky oil change places never offer to replace it!



Advanced
Joined: Jan 2009
Posts: 73
Likes: 0
From: Franklin, CT
Just changed mine for the first time today... after ready several threads on how hard it is I expected the worse, but really it wasn't that bad and only took 20 minutes. You're better off removing the rubber intake piece where it goes onto the air box and then don't be afraid to bend it back towards the engine to get the plastic airbox cover off and then do the same thing in reverse. It just slips on and off and aligns with the notch.
Also I thought the top instructions were a little misleading:
"Remove the black plastic trim piece immediately under and at the edge of the hood, drivers side."
At the edge of the hood I was looking just below where the wipers sit at the rear edge of the hood. It may be better written as:
"After opening the hood, remove the black plastic cover along the top of the fender on the drivers side."
Not a big deal... and thanks, this did help me out.
Also I thought the top instructions were a little misleading:
"Remove the black plastic trim piece immediately under and at the edge of the hood, drivers side."
At the edge of the hood I was looking just below where the wipers sit at the rear edge of the hood. It may be better written as:
"After opening the hood, remove the black plastic cover along the top of the fender on the drivers side."
Not a big deal... and thanks, this did help me out.

Pro
Joined: Feb 2002
Posts: 500
Likes: 8
From: C. Florida - Orlando
Where are the filters on that site?
I found the engine air filter on that site (pn # 17220-RDA-A00 - ELEMENT ASSY., AIR CLEANER - $27.31)
But cant find the cabin filters. Do you have those by chance?
Thanks!
I found the engine air filter on that site (pn # 17220-RDA-A00 - ELEMENT ASSY., AIR CLEANER - $27.31)
But cant find the cabin filters. Do you have those by chance?
Thanks!
Thread Starter
6th Gear
Joined: Feb 2009
Posts: 6
Likes: 0
From: Garner, NC
pickn-
Yep, I probably could've worded that little differently. Sorry about that. Hopefully not too confusing.
woodek-
Part number 80292-SHJ-A41 for the cabin filter. Or if this helps:
http://www.acuraautomotiveparts.org/...s=&view=normal
It's under "Heater Blower" in the categories of parts, if you can get to that page.
Yep, I probably could've worded that little differently. Sorry about that. Hopefully not too confusing.
woodek-
Part number 80292-SHJ-A41 for the cabin filter. Or if this helps:
http://www.acuraautomotiveparts.org/...s=&view=normal
It's under "Heater Blower" in the categories of parts, if you can get to that page.

Trending Topics


Instructor


Joined: Mar 2004
Posts: 101
Likes: 12
From: Silver Spring, MD
I've done this a few times, the directions look great. Just one extra tip, have your shop vac handy to suck up dirt and leaves that have settled to the bottom of the air cleaner case. There is always something there and you don’t want it clogging up your new filter.




Thread
Thread Starter
Forum
Replies
Last Post
Abe_Froman
Car Parts for Sale
1
Sep 16, 2015 01:27 PM
HydrasunGQ
Member Cars for Sale
0
Sep 14, 2015 10:14 PM
