DIY: 2nd Gen CL Projector Retrofit

 09-28-2010, 12:46 PM
#122
Whats up with RDX owners?
Thread Starter
iTrader: (9)

All four. And thats rock bottom prices finding a deal.
The S2ks generally go for $2-225. The TLs with the fresnel lenses sell for around $210. The ZKW-R lenses are $40. Add in bulbs, which are another $95 per pair and youre pushing $640 in parts, not including shipping, any shrouds or other supplies needed.
The S2ks generally go for $2-225. The TLs with the fresnel lenses sell for around $210. The ZKW-R lenses are $40. Add in bulbs, which are another $95 per pair and youre pushing $640 in parts, not including shipping, any shrouds or other supplies needed.
09-28-2010, 03:42 PM
#123
Can we get a mod to change the title of this tread to something more clear?? Like "2nd gen CL projector retrofit thread".
I also think it's worthy of being added to the 2nd gen info thread. There is no link to anything similar in that thread. Just a thought.
This turned out to be a great thread with lots of examples of members retrofits, and a great diy write-up by civicdrivr. Also there's plenty of discussion on how much and where to get the parts needed to perform this retrofit.
09-28-2010, 04:02 PM
#124
Whats up with RDX owners?
Thread Starter
iTrader: (9)
I agree about the name change.
Can we change it to:
DIY: 2nd Gen CL Projector Retrofit
Thanks
Can we change it to:
DIY: 2nd Gen CL Projector Retrofit
Thanks
09-28-2010, 05:00 PM
#126
Whats up with RDX owners?
Thread Starter
iTrader: (9)
Oh damn, did even notice that. 
 09-28-2010, 06:04 PM
#128
Whats up with RDX owners?
Thread Starter
iTrader: (9)
All four. And thats rock bottom prices finding a deal.
The S2ks generally go for $2-225. The TLs with the fresnel lenses sell for around $210. The ZKW-R lenses are $40. Add in bulbs, which are another $95 per pair and youre pushing $640 in parts, not including shipping, any shrouds or other supplies needed.
The S2ks generally go for $2-225. The TLs with the fresnel lenses sell for around $210. The ZKW-R lenses are $40. Add in bulbs, which are another $95 per pair and youre pushing $640 in parts, not including shipping, any shrouds or other supplies needed.
BUT! The TL projector is HUGE.
Max Depth: 158.75mm (6.25 inches)
Max Height: 112mm (4.40 inches)
Max Width: 108mm (4.25 inches)
Lens Diameter: 3 inches
To put it in comparison, my TSX projectors are:
Max Depth: 145mm (5.70 inches)
Max Height: 80mm (3.15 inches)
Max Width: 115mm (4.52 inches)
Lens Diameter: 2.5 inches
And the TSX projectors have a hard time fittin within the headlight. Im sure you can make it work if you add extensions to the back of the housing, but even then youre going to cut so much from the reflector to mount it (because of the solenoid) that it may not be able to withstand the weight.
Another issue with running quads in the CL housing is the high beam area is very shallow. You wont be able to run anything there without an extension, and due to how shallow the high beam reflector is, you wont be able to mount the projector using JnCs method (the same method I used). So your cuts and mounting locations need to be very precise.
09-29-2010, 09:29 PM
#129
What are the smallest and cheapest projectors too use that will fit?
And do you think it would be possible to buy cheap whole lamp assemblies that have projector setups and just rip them apart and mold them with them mounted in the bezel set up they came out of and into the stock bezels.
Seams like it would take alot of guess work out of the shrouds but,it would add work molding them together to look nice.
Last edited by richardparker; 09-29-2010 at 09:37 PM.
09-30-2010, 02:29 PM
#130
Whats up with RDX owners?
Thread Starter
iTrader: (9)
Cheap assemblies out of aftermarket headlights are garbage.
Get some Morimoto Mini H1s if you want the smallest projector that still has great output. They come with shrouds for $120. Thats what Im using on my motorcycle.
Get some Morimoto Mini H1s if you want the smallest projector that still has great output. They come with shrouds for $120. Thats what Im using on my motorcycle.
11-13-2012, 02:51 PM
#132
@Mikeshlong On IG
iTrader: (3)
Join Date: Jan 2012
Location: Henderson, Nevada
Age: 30
Posts: 1,139
Received 139 Likes
on
126 Posts
I know this is dead , but Morgan you have anywhere I can see your pictures so I can put this together a little better in my head ? Everyone elses pics helped though, so its n ot necessary .
11-14-2012, 10:38 PM
#133
Whats up with RDX owners?
Thread Starter
iTrader: (9)
Part 1 - Mods, if you dont mind replacing the first post with this one, since the image links have been fixed.
...At least I think so, Ive never seen one with this mod.
**DISCLAIMER** The following stunts were performed by trained professionals. I take no responsibility for anything, including, but not limited to, destroying your headlights, setting fire to your car, or killing kittens. The following is merely suggestions. Use at you own risk. This is also a long post. So if you're at work reading this, you might get fired. That's not my fault either.
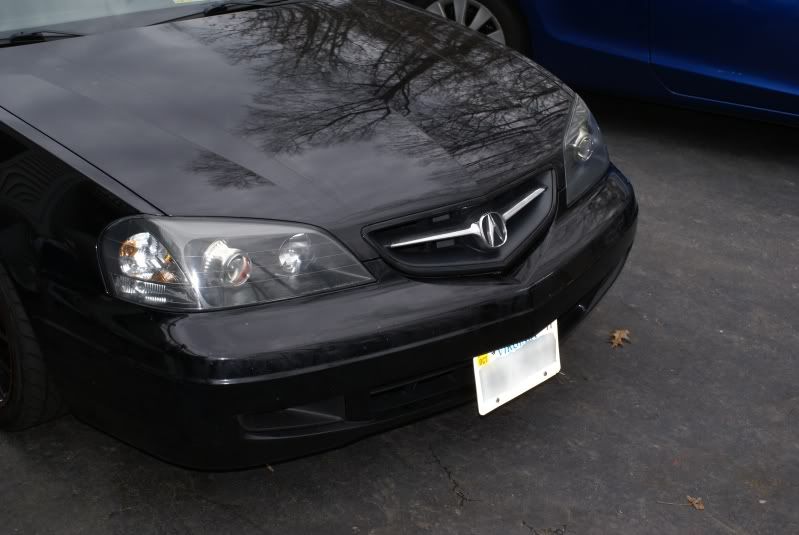
When I first got my CL, the lights were great. But lately, when I drive down the highway and an M45 or TL passes me, I get very jealous of their lights. So what is a man to do?
One word: Retrofit.
I started this about 5 months ago with a set of headlights, TSX projectors, Phillips 85122+ bulbs and some Crossfire shrouds. To make a long story very short, I practically destroyed my first set of headlights. My dumbass thought "it seems simple enough, just mount them and seal it up. Done!.
I was very wrong. I had no plan on mounting them, I didnt take any measurements, and I sure as hell didnt even check to see if the projector was straight in the housing. So I hit the interwebz and started reading - ALOT (did you know people in India are successfully retrofitting, and yet I managed to completely fuck up a set of headlights?)
Fast foward to November 26, 2009; Judgement day. Luckily I managed to get a 4 day weekend, so I thought it would be a great time to start the retrofit. I took all the knowledge I gained from the aforementioned interwebz and applied every ounce of it to this project. Lets start with the shrouds.
I had originally purchased some Crossfire shrouds:
[link broken]
But those didnt cover the entire projector so I picked up some E46 shrouds:
[link broken]
They looked pretty good, but they just werent doing it for me. So I took a trip to Home Depot and Lowes and scoured every isle for the perfect solution - and I found it.
There they were, in the ceiling fan section of Lowes. Two fan cover bezel thingies on clearance (open box item, cha-ching!). They wanted $5 each, so I scooped them up with the quickness and made my way to the register. I then ran to Wal-Mart to pick up a pair of $9 mugs (for a grand total of $19 for some nice, metal shrouds). I could care less about the mug itself, its the top chrome ring I want. So I broke out the heat gun and melted one side of each mug, then pulled the ring off. That got me a shroud that, when assembled, looks like this:
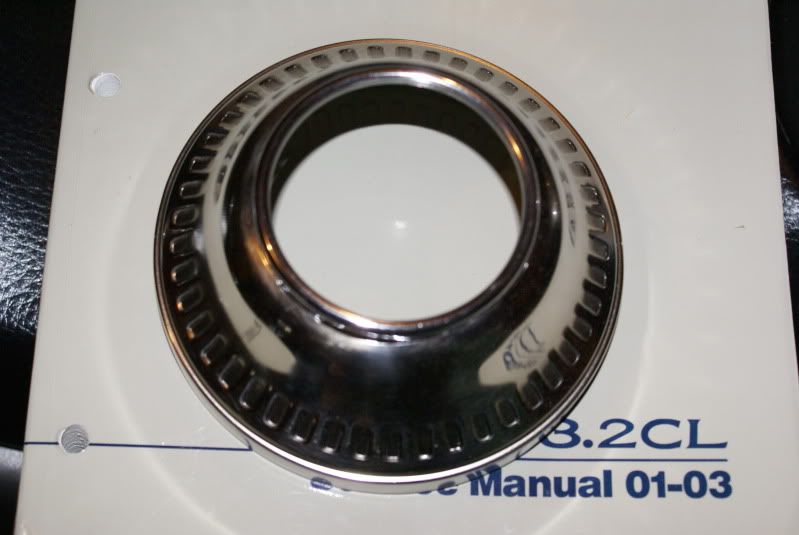
The most tedious part of this project had to to be polishing those damn things. They were originally a very cheap looking silver. Alot of sanding plus Mothers metal polish got me that finish, and Im am very happy with it.
Moving on. The next thing on my to-do list before even touching the headlights on my car was to make some brackets. My first attempt (the one that resulted in me being envious of Indian people) involved 4 long bolts straight through the back of the reflector. That's a horrible idea for a few reasons; adjustment is difficult and thats alot of weight on one area.
So I "borrowed" an idea from a gentleman on the HID forum (who happens to have a 2g TL). It involves a few pieces of aluminum stock bent at strategic spots, three per light. There were two at the bottom that went through the bottom of the reflectors and adjusted the level, and one on the top that went out the rear that adjusted pitch. The brackets were tapped for the screws I have, so viola! Instant adjustability!
So that stuff was taken care of. Thursday morning I went outside (it was a bitter 67*) and pulled the headlights off the car.
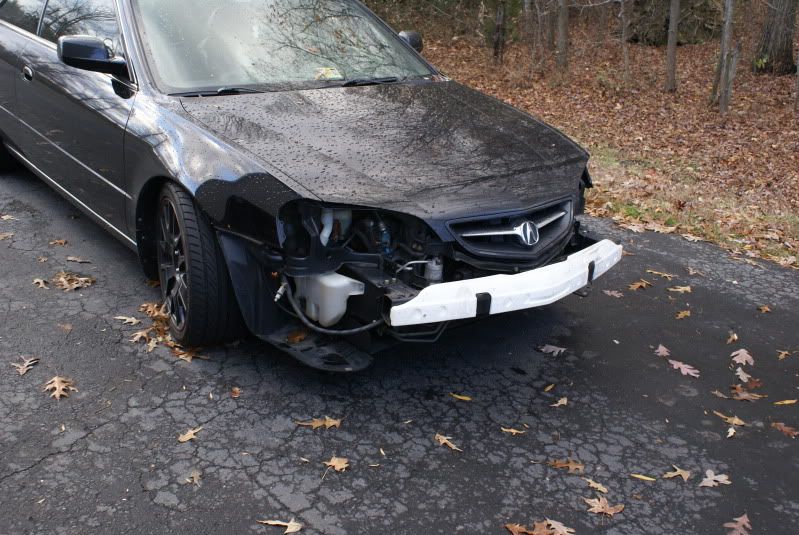
Ill spare you the tedious task of pulling the headligts apart as the clearing DIY will cover it ( found here: https://acurazine.com/forums/showthr...d.php?t=421142 ; there was a better DIY, but Im too lazy to find it, so search N00B!)
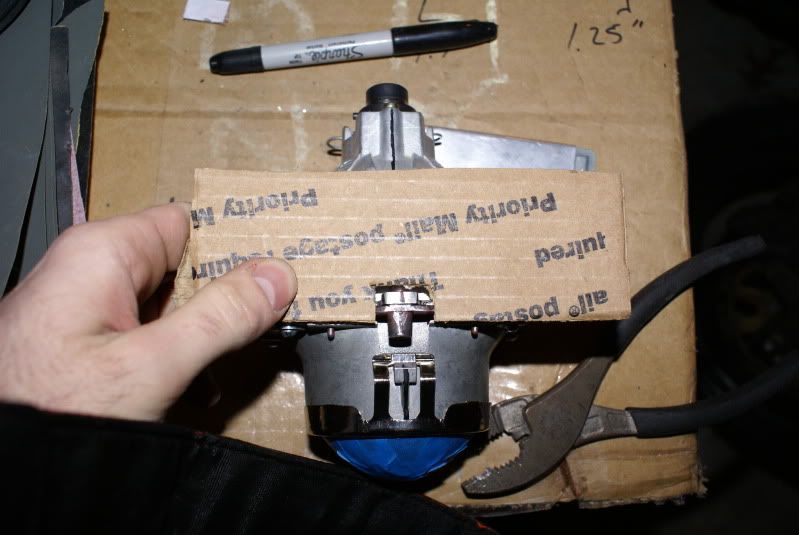
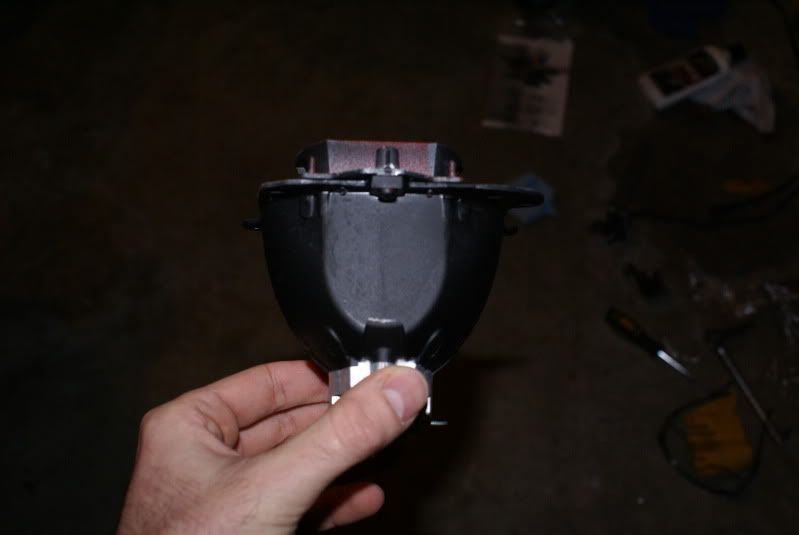
Now that your headlights are apart, remove the bucket from the housing via these two screws.
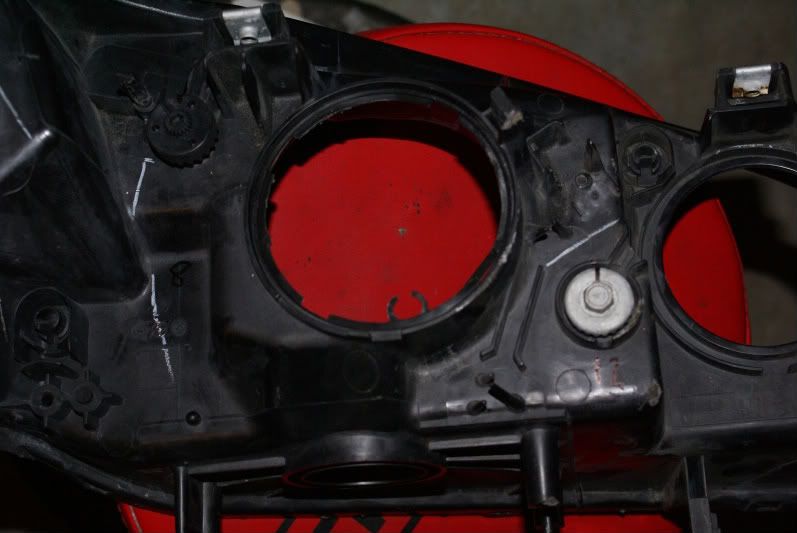
One is a 10mm socket (bottom right), the other is an allen key (top left). I dont know what size allen key, just find one that fits. Be very careful with it though, Honda thought using plastic would be an excellant idea. It's not. You can strip it very easily. You can use a screwdriver to loosen it, but that takes too long. I also marked the screws and counted how many turns so when putting things back together I had a baseline for the alignment.
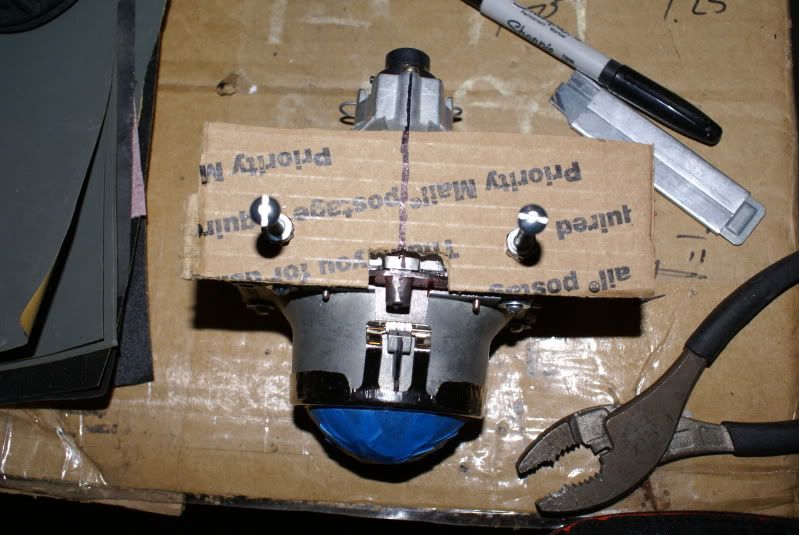
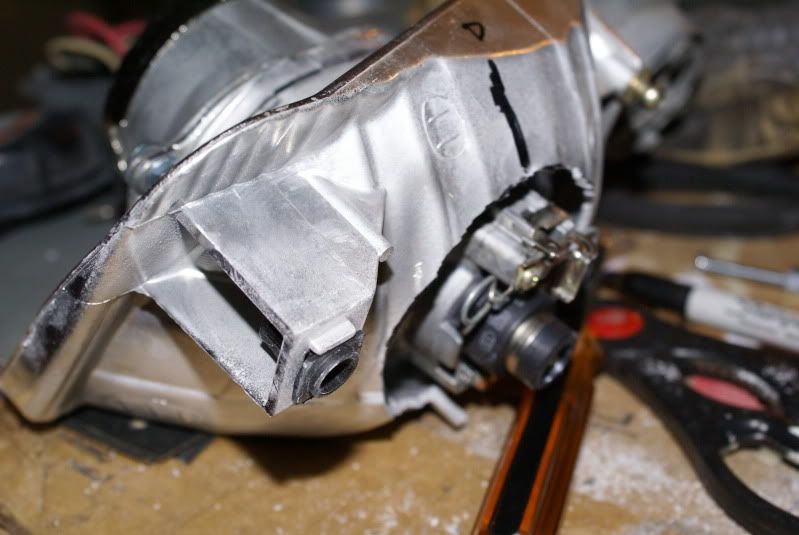
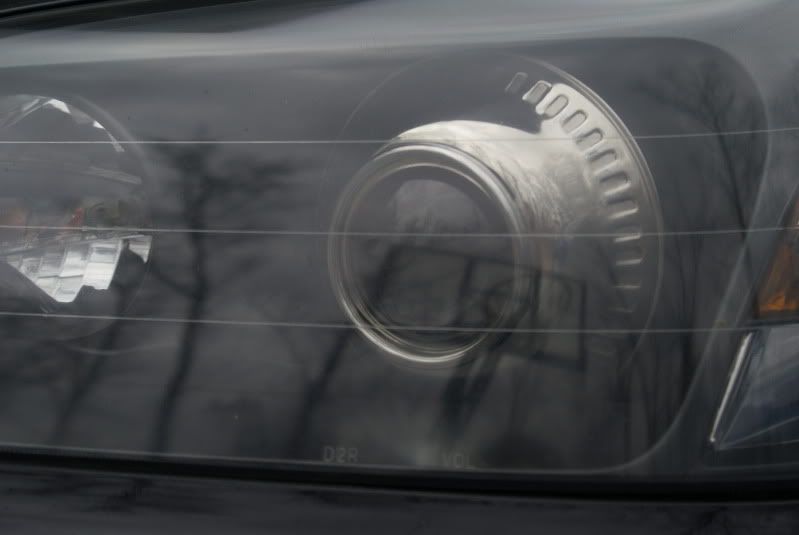
Now that you have your buckets out, you can remove the bulb holder as well as the shield. Now, you can draw some lines. I put the bulb back in to make it clearer for me, but basically you want to mark the path of the bulb. It conveniently lines up with the "v" in the reflector.
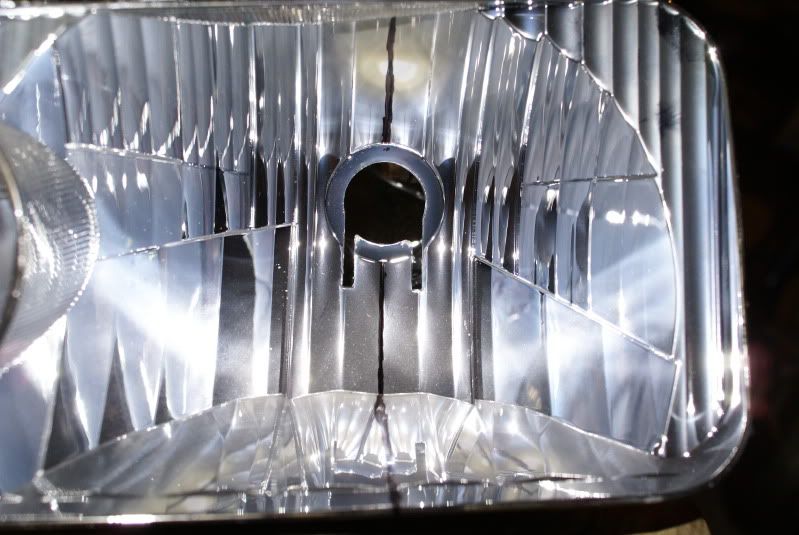
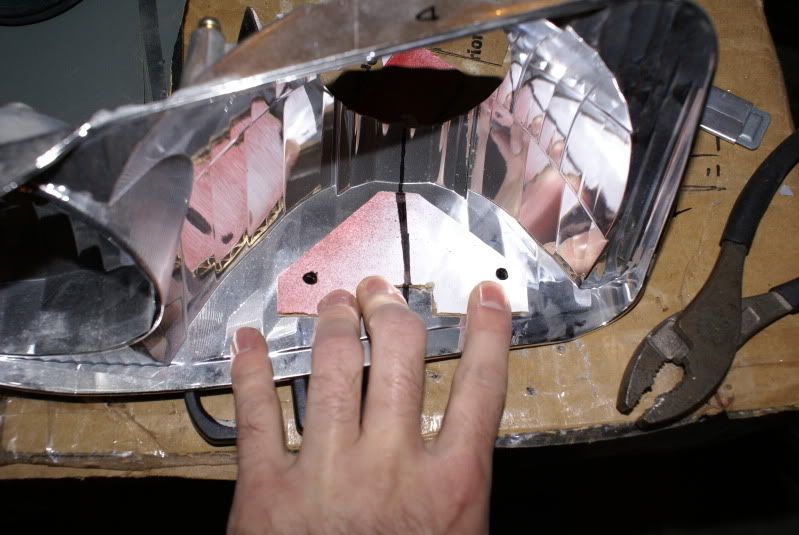
Now flip it over. Honda was nice enough to give us an outline to cut along, so my suggestion is use it. But for your own safety, wear some goggles and a mask, these reflectors produce so much white dust it would make Tyrone Biggums cream his pants.
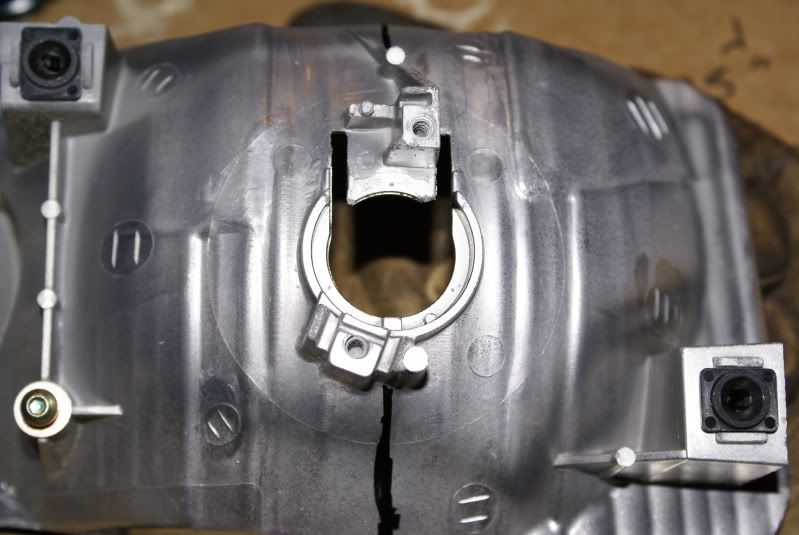
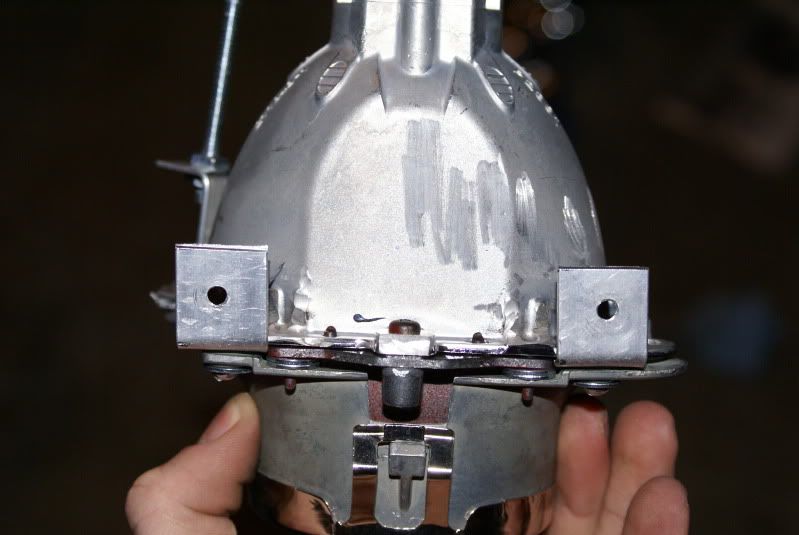
You should be left with this:
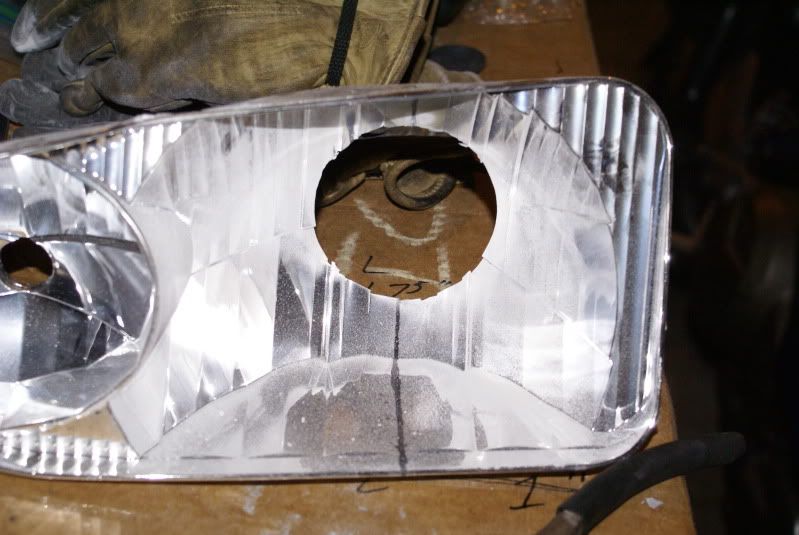
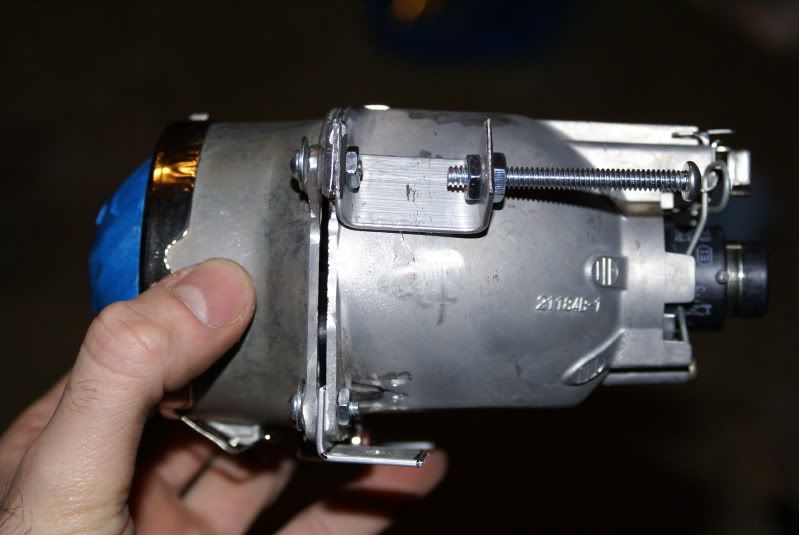
At this point I made a quick template for the brackets and drew it out on the reflector, then drilled the mounting holes.
Now test fit. By the way, either remove the lense from the projector during this phase or cover it with tape, that way it wont get scratched.
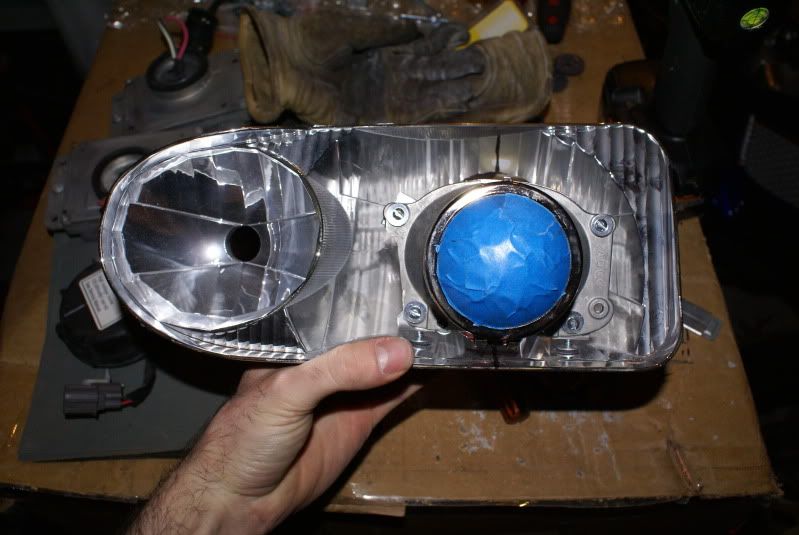
Once everything looks acceptable, you can paint it, or toss the shrouds on it and seal it up. But I wanted to paint the reflector as well as the projector and shrouds. Painting the reflectors black reduces the possibility of stray light escaping. Painting the exterior of the bowl was just for aesthetics, and painting the rear of the shrouds was to cut down any possible reflections. Use high heat paint. I used Rustoleum Engine Enamel. Also, if you are inclined to do so, you can pull the shield off and paint the side that faces the bulb black. If you look at some TSX cutoff lines, you'll see an odd rainbow output, painting them black mostly eliminates it. DO NOT paint the inside (shiny part) of the reflector bowl. Its the, uh, reflector. And it needs to be shiny.

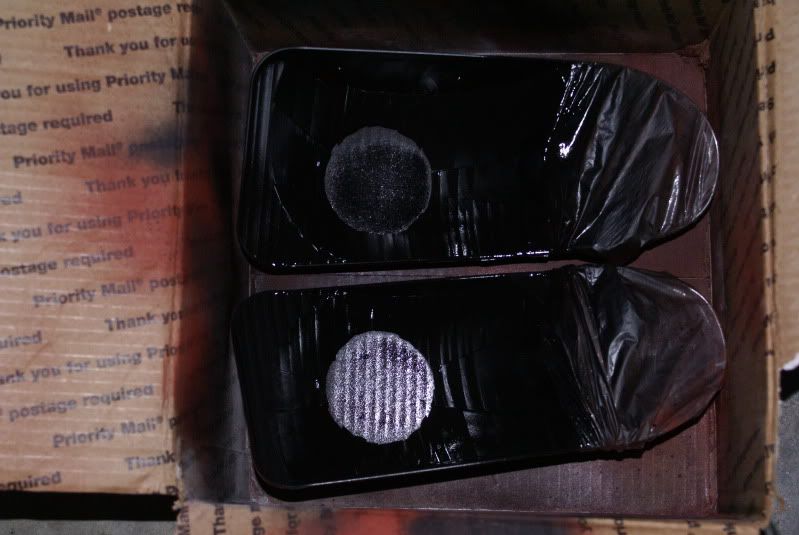
Notice how I dont have tape over the highbeam reflector? Thats because tape will peel the chrome away. I REPEAT, TAPE WILL PEEL THE CHROME OFF THE REFLECTOR!! Do not use tape. Use celophane. It sticks nicely, and peels off with nothing more then the overspray.
Once everything has dried take some aluminum tape (I dont know the official name, but one side is shiny and the other side is sticky) and cover the seam on the projector with it (sorry, no pic), It would be the seam where the two halfs meet.
Now you can mount the buckets back into the housings. If you used the same mounting method as I did, drill some holes in the housing directly behind the screws. That makes aiming a shit-ton easier.
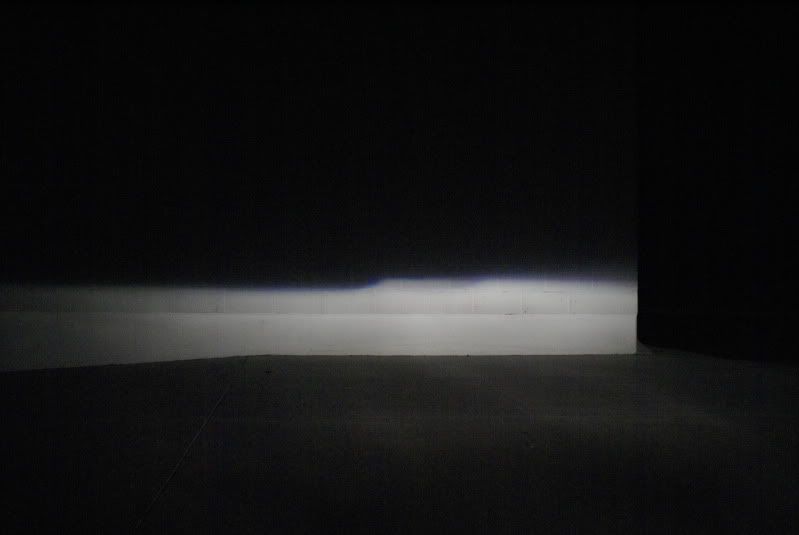
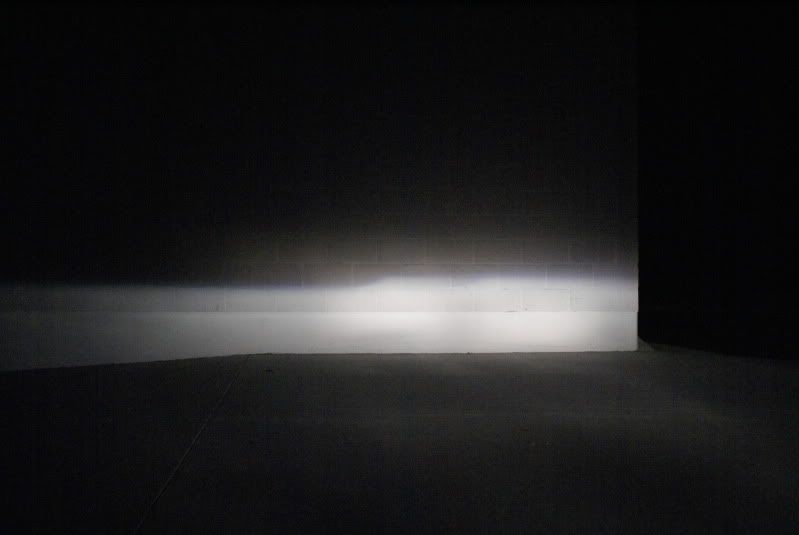
Speaking of aiming; measure the height of the lights from the ground. Subtract 2 inches. Whatever number you come up with is how high it is supposed to shine on a wall that is 25 feet (300 inches) away. Also measure the distance (center to center) of the projectors. You have a total of 5 adjustments per light, so determine what works best for you. Also, remember the cutoff should look like this:
Once they are aimed correctly, attach your shrouds. I used JB Weld putty. You knead it together and then apply it to whatever youre working on; theres no mess, no clamps. It dries in 5 minutes, and its ready to be drilled/sanded/painted in an hour. My shroud was oversized, so I had to trim it down (sorry, no pics). If you are using JB Weld, and you have any on your fingers DO NOT touch anything chrome, shiny, or glass. You will leave a fingerprint thats hard [read: painstakingly difficult] to clean off.
You may need to trim just a tiny amount from the headlight bezel so the projector wont contact it. These headlights arent small, but they arent exactly spacious either, so you need to measure wisely. I had to shave about 1/8" off the bezel. You should be able to use the stock rear bulb cap as long as you placed the projectors in the housings correctly. Again, theres not much room front to back, so be wary or space. Luckily mine fit, but the ignitors dont fit during reinstallation so I had to take apart the plug and feed the wires through, then reconnect everything.
Before putting everything back together, blow out all the dust that accumulated in the lights, and use the alcohol prep pads supplied with your projectors (if you dont have them, Isopropyl Alcohol on a soft tissue works just as well) to wipe down the bulbs and the lenses. Put everything together and seal it up. You can use silicone sealant to close the holes you drilled to access the adjustment screws. Let the headlights air out for about 24
hours, then install the ballasts and seals.
Congratulations, you just completed your first retrofit. You will no longer look at headlights the same way again. You will no longer say are these halogens, but instead Can I fit a TL/ZKW bixenons in there? And trust me, you will want to.
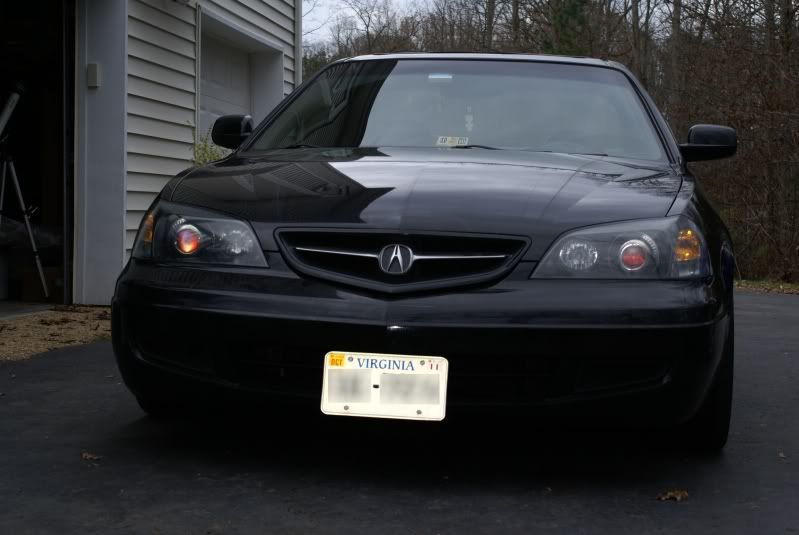
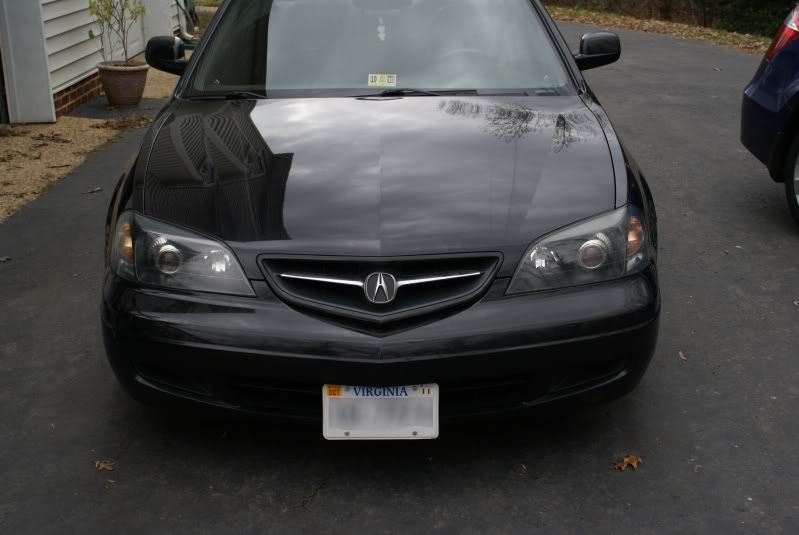
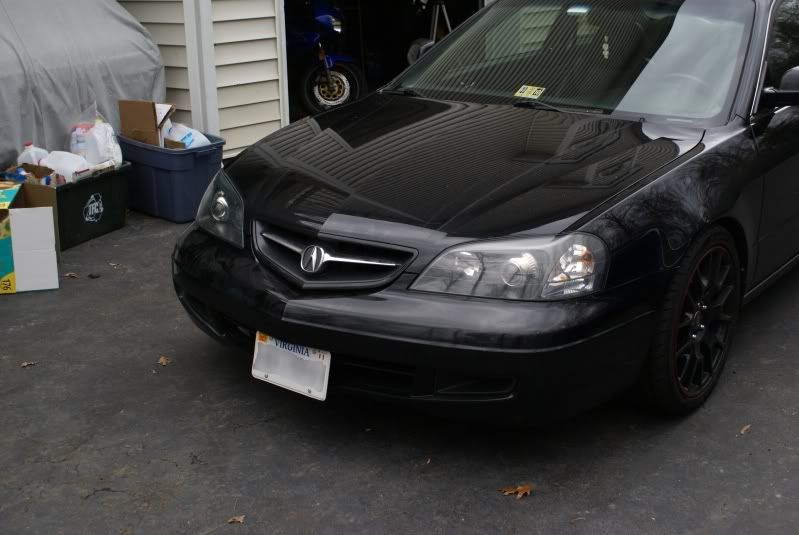
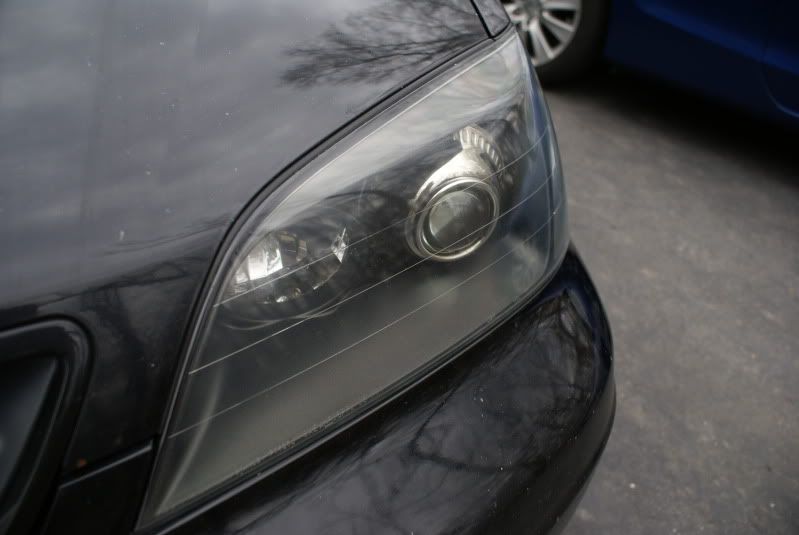
And what Im sure all of you have been waiting for:
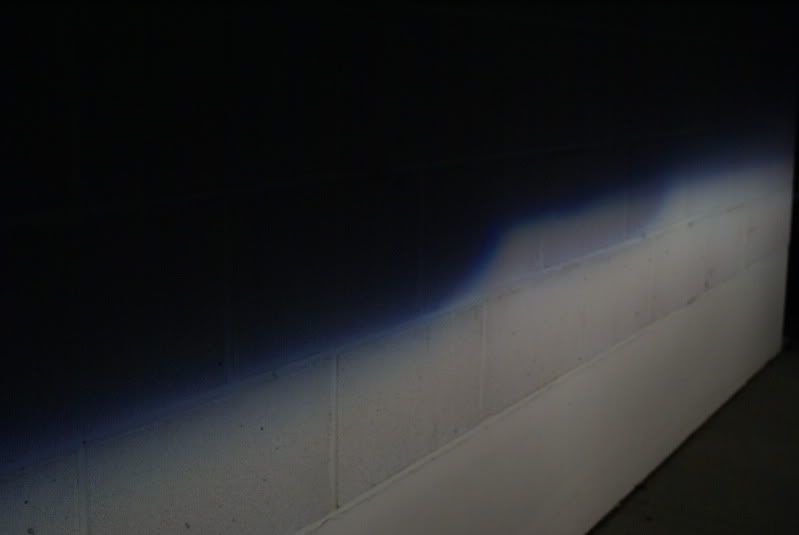
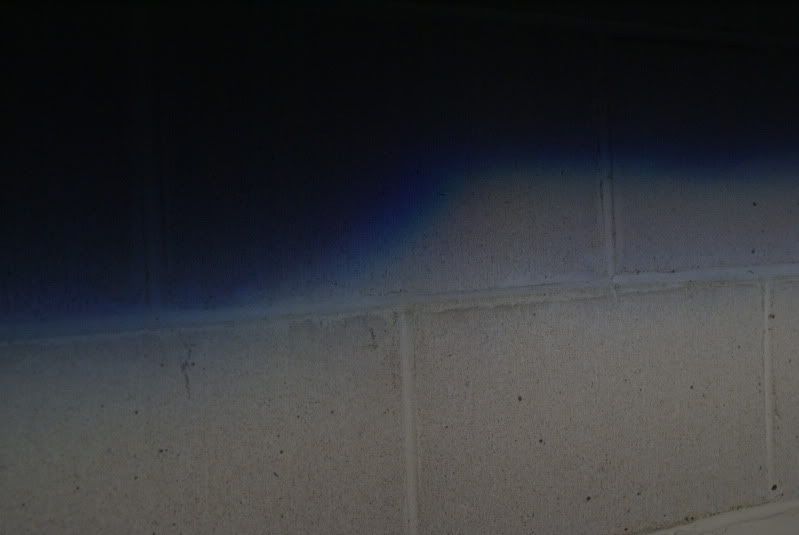
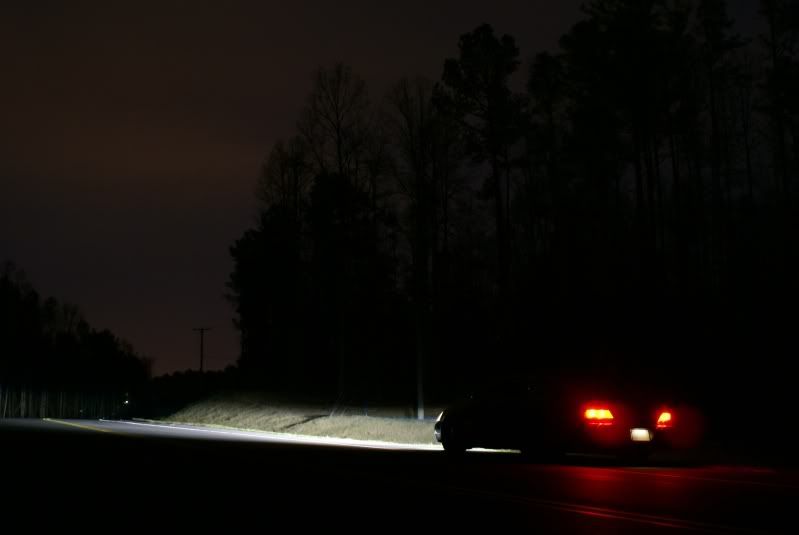
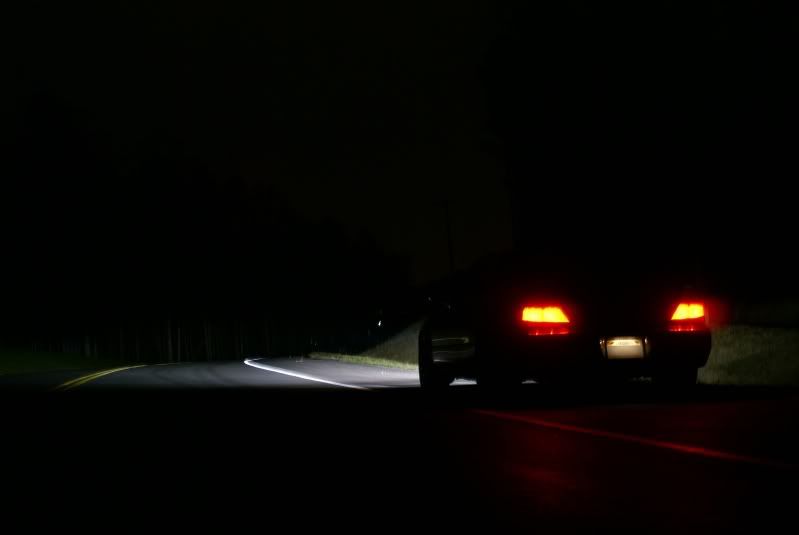
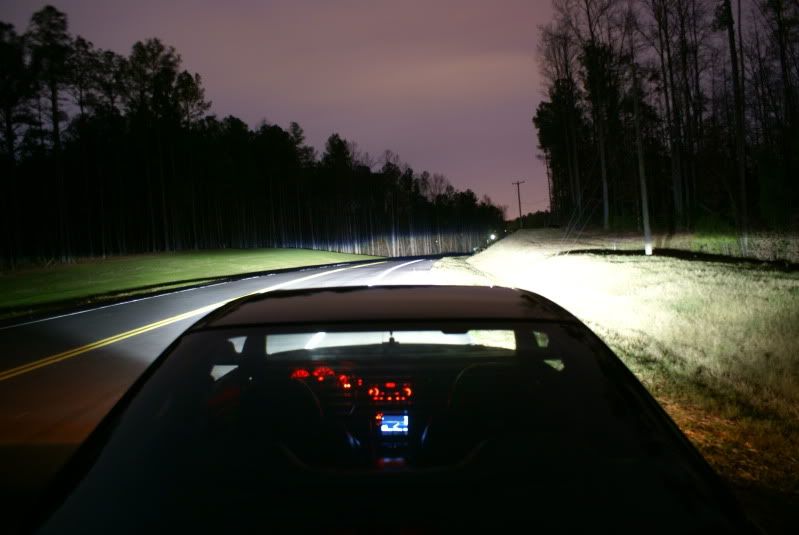
I had the exposure set a bit too high on that last one, but I decided to post it anyway. The other two pictures before it show the actual output as seen in person.
Cost:
TSX Clear Lense Projectors : $200
Crossfire shrouds : $45
Phillips 4300k bulbs : $60 (had a few hours on them)
E46 shrouds : $26.99 (used a coupon)
First set of headlights : Traded with e30cabrio for them
Paint, sealants, JB Weld : $20
Custom shrouds : $20
Grand total : $371.99
Since I wanted everything to come out perfectly, I spent alot of time on these; 30 hours total to be exact. Whats sad is Im already thinking about another setup, so these may be up for sale in the near future
More pictures will be added.
**DISCLAIMER** The following stunts were performed by trained professionals. I take no responsibility for anything, including, but not limited to, destroying your headlights, setting fire to your car, or killing kittens. The following is merely suggestions. Use at you own risk. This is also a long post. So if you're at work reading this, you might get fired. That's not my fault either.
When I first got my CL, the lights were great. But lately, when I drive down the highway and an M45 or TL passes me, I get very jealous of their lights. So what is a man to do?
One word: Retrofit.
I started this about 5 months ago with a set of headlights, TSX projectors, Phillips 85122+ bulbs and some Crossfire shrouds. To make a long story very short, I practically destroyed my first set of headlights. My dumbass thought "it seems simple enough, just mount them and seal it up. Done!.
I was very wrong. I had no plan on mounting them, I didnt take any measurements, and I sure as hell didnt even check to see if the projector was straight in the housing. So I hit the interwebz and started reading - ALOT (did you know people in India are successfully retrofitting, and yet I managed to completely fuck up a set of headlights?)
Fast foward to November 26, 2009; Judgement day. Luckily I managed to get a 4 day weekend, so I thought it would be a great time to start the retrofit. I took all the knowledge I gained from the aforementioned interwebz and applied every ounce of it to this project. Lets start with the shrouds.
I had originally purchased some Crossfire shrouds:
[link broken]
But those didnt cover the entire projector so I picked up some E46 shrouds:
[link broken]
They looked pretty good, but they just werent doing it for me. So I took a trip to Home Depot and Lowes and scoured every isle for the perfect solution - and I found it.
There they were, in the ceiling fan section of Lowes. Two fan cover bezel thingies on clearance (open box item, cha-ching!). They wanted $5 each, so I scooped them up with the quickness and made my way to the register. I then ran to Wal-Mart to pick up a pair of $9 mugs (for a grand total of $19 for some nice, metal shrouds). I could care less about the mug itself, its the top chrome ring I want. So I broke out the heat gun and melted one side of each mug, then pulled the ring off. That got me a shroud that, when assembled, looks like this:
The most tedious part of this project had to to be polishing those damn things. They were originally a very cheap looking silver. Alot of sanding plus Mothers metal polish got me that finish, and Im am very happy with it.
Moving on. The next thing on my to-do list before even touching the headlights on my car was to make some brackets. My first attempt (the one that resulted in me being envious of Indian people) involved 4 long bolts straight through the back of the reflector. That's a horrible idea for a few reasons; adjustment is difficult and thats alot of weight on one area.
So I "borrowed" an idea from a gentleman on the HID forum (who happens to have a 2g TL). It involves a few pieces of aluminum stock bent at strategic spots, three per light. There were two at the bottom that went through the bottom of the reflectors and adjusted the level, and one on the top that went out the rear that adjusted pitch. The brackets were tapped for the screws I have, so viola! Instant adjustability!
So that stuff was taken care of. Thursday morning I went outside (it was a bitter 67*) and pulled the headlights off the car.
Ill spare you the tedious task of pulling the headligts apart as the clearing DIY will cover it ( found here: https://acurazine.com/forums/showthr...d.php?t=421142 ; there was a better DIY, but Im too lazy to find it, so search N00B!)
Now that your headlights are apart, remove the bucket from the housing via these two screws.
One is a 10mm socket (bottom right), the other is an allen key (top left). I dont know what size allen key, just find one that fits. Be very careful with it though, Honda thought using plastic would be an excellant idea. It's not. You can strip it very easily. You can use a screwdriver to loosen it, but that takes too long. I also marked the screws and counted how many turns so when putting things back together I had a baseline for the alignment.
Now that you have your buckets out, you can remove the bulb holder as well as the shield. Now, you can draw some lines. I put the bulb back in to make it clearer for me, but basically you want to mark the path of the bulb. It conveniently lines up with the "v" in the reflector.
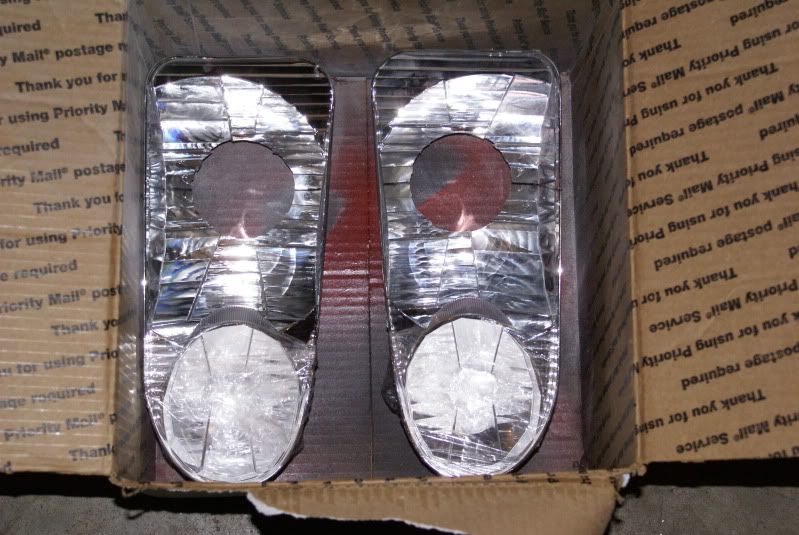
Now flip it over. Honda was nice enough to give us an outline to cut along, so my suggestion is use it. But for your own safety, wear some goggles and a mask, these reflectors produce so much white dust it would make Tyrone Biggums cream his pants.
You should be left with this:
At this point I made a quick template for the brackets and drew it out on the reflector, then drilled the mounting holes.
Now test fit. By the way, either remove the lense from the projector during this phase or cover it with tape, that way it wont get scratched.
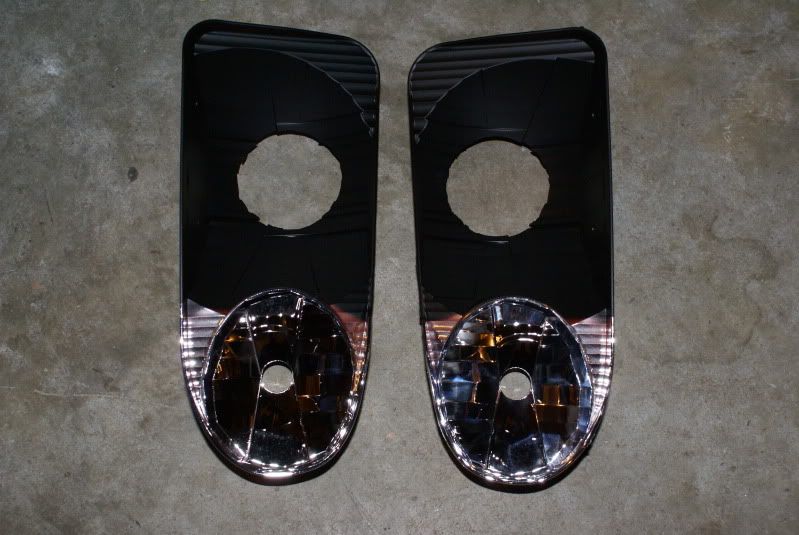
Once everything looks acceptable, you can paint it, or toss the shrouds on it and seal it up. But I wanted to paint the reflector as well as the projector and shrouds. Painting the reflectors black reduces the possibility of stray light escaping. Painting the exterior of the bowl was just for aesthetics, and painting the rear of the shrouds was to cut down any possible reflections. Use high heat paint. I used Rustoleum Engine Enamel. Also, if you are inclined to do so, you can pull the shield off and paint the side that faces the bulb black. If you look at some TSX cutoff lines, you'll see an odd rainbow output, painting them black mostly eliminates it. DO NOT paint the inside (shiny part) of the reflector bowl. Its the, uh, reflector. And it needs to be shiny.
Notice how I dont have tape over the highbeam reflector? Thats because tape will peel the chrome away. I REPEAT, TAPE WILL PEEL THE CHROME OFF THE REFLECTOR!! Do not use tape. Use celophane. It sticks nicely, and peels off with nothing more then the overspray.
Once everything has dried take some aluminum tape (I dont know the official name, but one side is shiny and the other side is sticky) and cover the seam on the projector with it (sorry, no pic), It would be the seam where the two halfs meet.
Now you can mount the buckets back into the housings. If you used the same mounting method as I did, drill some holes in the housing directly behind the screws. That makes aiming a shit-ton easier.
Speaking of aiming; measure the height of the lights from the ground. Subtract 2 inches. Whatever number you come up with is how high it is supposed to shine on a wall that is 25 feet (300 inches) away. Also measure the distance (center to center) of the projectors. You have a total of 5 adjustments per light, so determine what works best for you. Also, remember the cutoff should look like this:
Once they are aimed correctly, attach your shrouds. I used JB Weld putty. You knead it together and then apply it to whatever youre working on; theres no mess, no clamps. It dries in 5 minutes, and its ready to be drilled/sanded/painted in an hour. My shroud was oversized, so I had to trim it down (sorry, no pics). If you are using JB Weld, and you have any on your fingers DO NOT touch anything chrome, shiny, or glass. You will leave a fingerprint thats hard [read: painstakingly difficult] to clean off.
You may need to trim just a tiny amount from the headlight bezel so the projector wont contact it. These headlights arent small, but they arent exactly spacious either, so you need to measure wisely. I had to shave about 1/8" off the bezel. You should be able to use the stock rear bulb cap as long as you placed the projectors in the housings correctly. Again, theres not much room front to back, so be wary or space. Luckily mine fit, but the ignitors dont fit during reinstallation so I had to take apart the plug and feed the wires through, then reconnect everything.
Before putting everything back together, blow out all the dust that accumulated in the lights, and use the alcohol prep pads supplied with your projectors (if you dont have them, Isopropyl Alcohol on a soft tissue works just as well) to wipe down the bulbs and the lenses. Put everything together and seal it up. You can use silicone sealant to close the holes you drilled to access the adjustment screws. Let the headlights air out for about 24
hours, then install the ballasts and seals.
Congratulations, you just completed your first retrofit. You will no longer look at headlights the same way again. You will no longer say are these halogens, but instead Can I fit a TL/ZKW bixenons in there? And trust me, you will want to.
And what Im sure all of you have been waiting for:
I had the exposure set a bit too high on that last one, but I decided to post it anyway. The other two pictures before it show the actual output as seen in person.
Cost:
TSX Clear Lense Projectors : $200
Crossfire shrouds : $45
Phillips 4300k bulbs : $60 (had a few hours on them)
E46 shrouds : $26.99 (used a coupon)
First set of headlights : Traded with e30cabrio for them
Paint, sealants, JB Weld : $20
Custom shrouds : $20
Grand total : $371.99
Since I wanted everything to come out perfectly, I spent alot of time on these; 30 hours total to be exact. Whats sad is Im already thinking about another setup, so these may be up for sale in the near future
More pictures will be added.
The following users liked this post:
mikebikelife (11-15-2012)
11-14-2012, 10:42 PM
#134
Whats up with RDX owners?
Thread Starter
iTrader: (9)
Mods, this is post 2, if you dont mind replacing it.
The red shield seemed like a good idea at the time
Also, this project is the easiest way to make your high beams look like candles:
WEAK! But I rarely use my highbeams so it's no big deal.
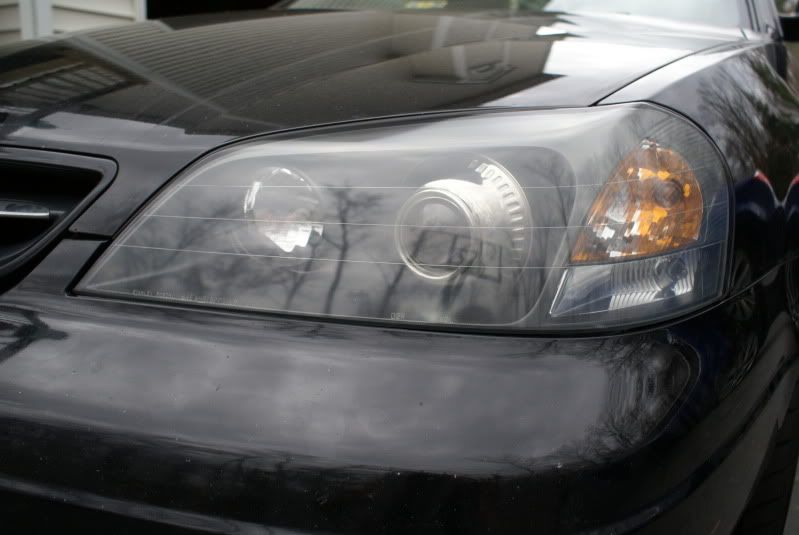
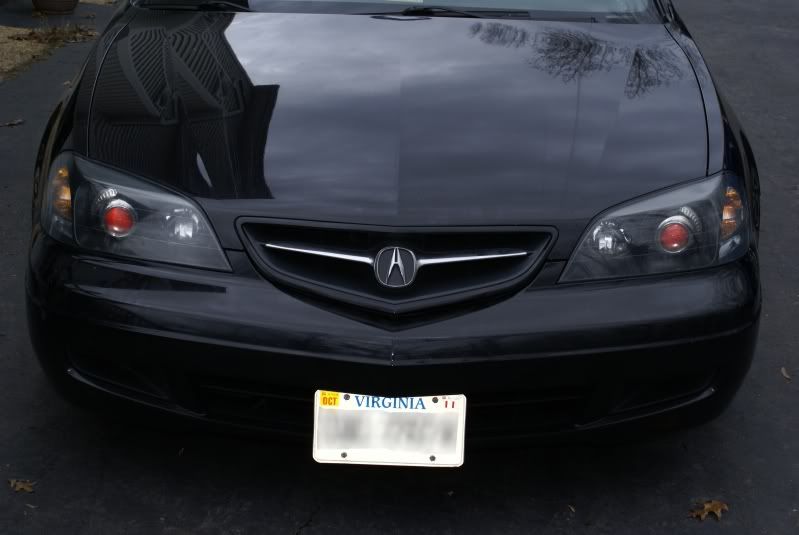
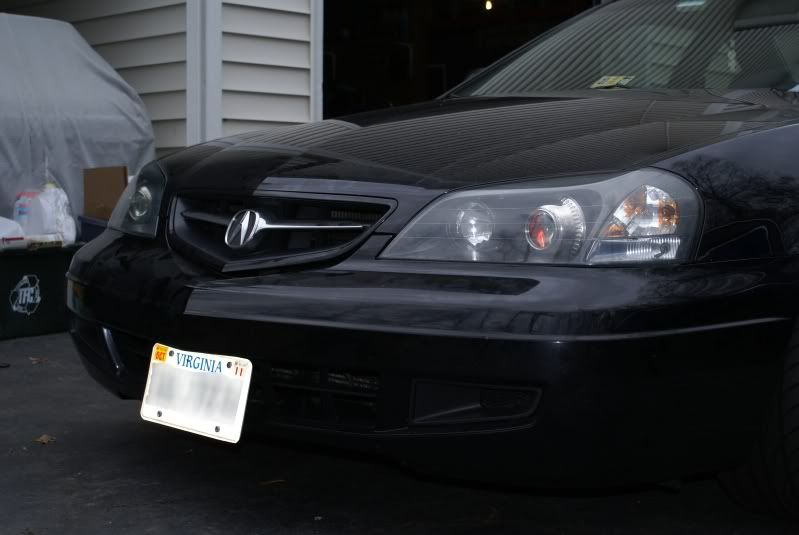
You may have noticed a hint of red in the lenses. Thats what happens when you paint the other side of the shield.
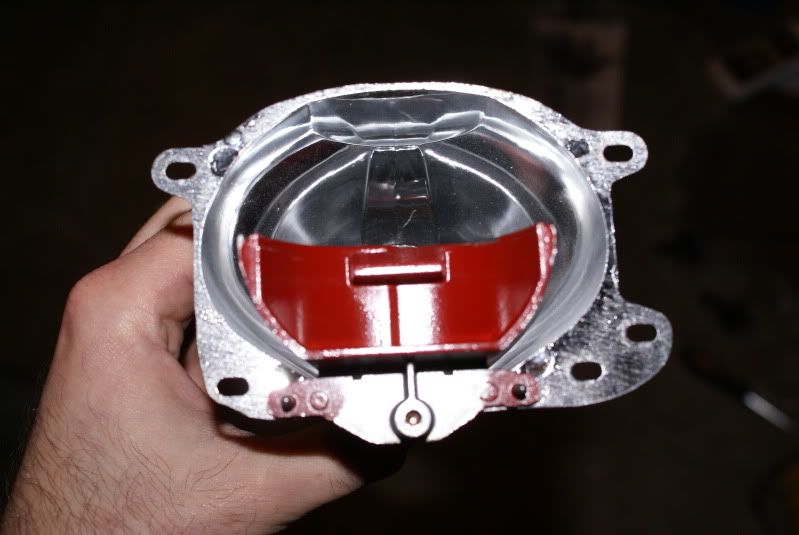
You can paint it whatever color you like, it doesnt interfere with light output at all. And it doesnt show up all the time. Light has to hit it at the right angle to see the color.
Im thinking about painting the shrouds black now too, but leaving the ring around the lense chrome. What do you guys think? Its more work because Ive gotta tear the lights apart again, but I think it would look better.
Im already in love with these lights. I almost met a deer tonight, and had it not been for the brighter lights I wouldnt have seen him.
WEAK! But I rarely use my highbeams so it's no big deal.
You may have noticed a hint of red in the lenses. Thats what happens when you paint the other side of the shield.
You can paint it whatever color you like, it doesnt interfere with light output at all. And it doesnt show up all the time. Light has to hit it at the right angle to see the color.
Im thinking about painting the shrouds black now too, but leaving the ring around the lense chrome. What do you guys think? Its more work because Ive gotta tear the lights apart again, but I think it would look better.
Im already in love with these lights. I almost met a deer tonight, and had it not been for the brighter lights I wouldnt have seen him.
The following users liked this post:
mikebikelife (11-15-2012)
11-15-2012, 03:46 AM
#136
Whats up with RDX owners?
Thread Starter
iTrader: (9)
Np
11-19-2012, 12:41 AM
#138
Whats up with RDX owners?
Thread Starter
iTrader: (9)
Yep, I havent gotten rid of them yet.

Thread
Thread Starter
Forum
Replies
Last Post
SidhuSaaB
3G TL Problems & Fixes
18
05-30-2020 12:40 AM
emailnatec
5G TLX Tires, Wheels & Suspension
29
09-28-2018 04:27 PM
RSpyder
Car Parts for Sale
5
09-30-2015 12:46 AM