
Blackout headlights...


says "hello to my TLX".


Joined: Feb 2005
Posts: 5,789
Likes: 17
From: San Diego, Ca
Ho-lee smokes! that looks friggin awesome. i've been thinking of getting that done since i never found a pic of a black cl w/that done. did u take pics of this during the process? did u have to use paint? what tools did you use? what did you use for the corners? are those 2003 headlights?
I also want to hit up the chrome around the side windows. btw, the chrome emblem still looks fine. the black emblem would look nice too but that'll do.
you did a heck of a job, mang!
I also want to hit up the chrome around the side windows. btw, the chrome emblem still looks fine. the black emblem would look nice too but that'll do.
you did a heck of a job, mang!
Thread Starter
Racer
Joined: Jul 2005
Posts: 317
Likes: 0
From: glendale, CA
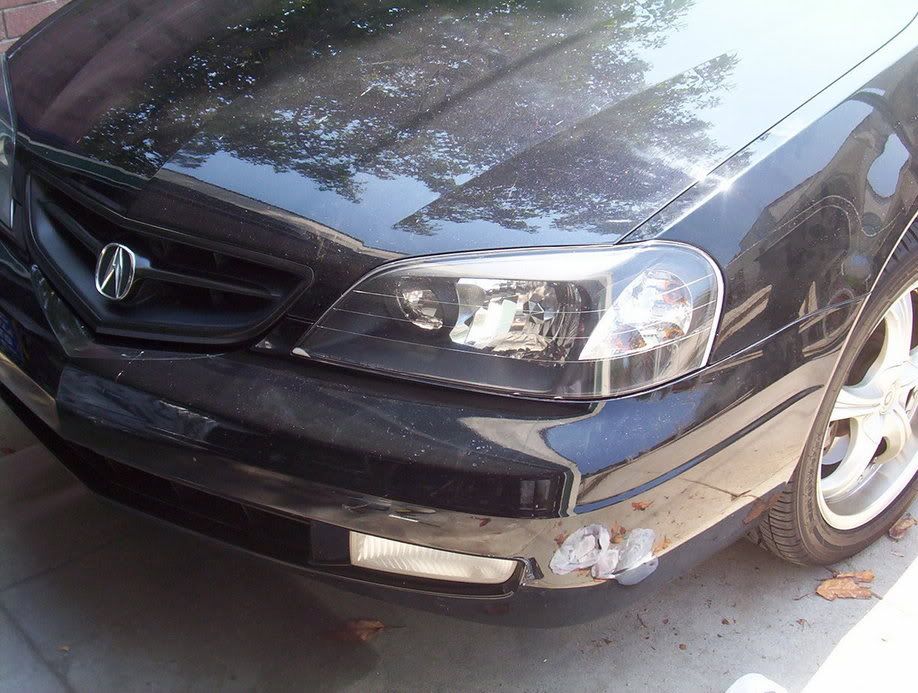
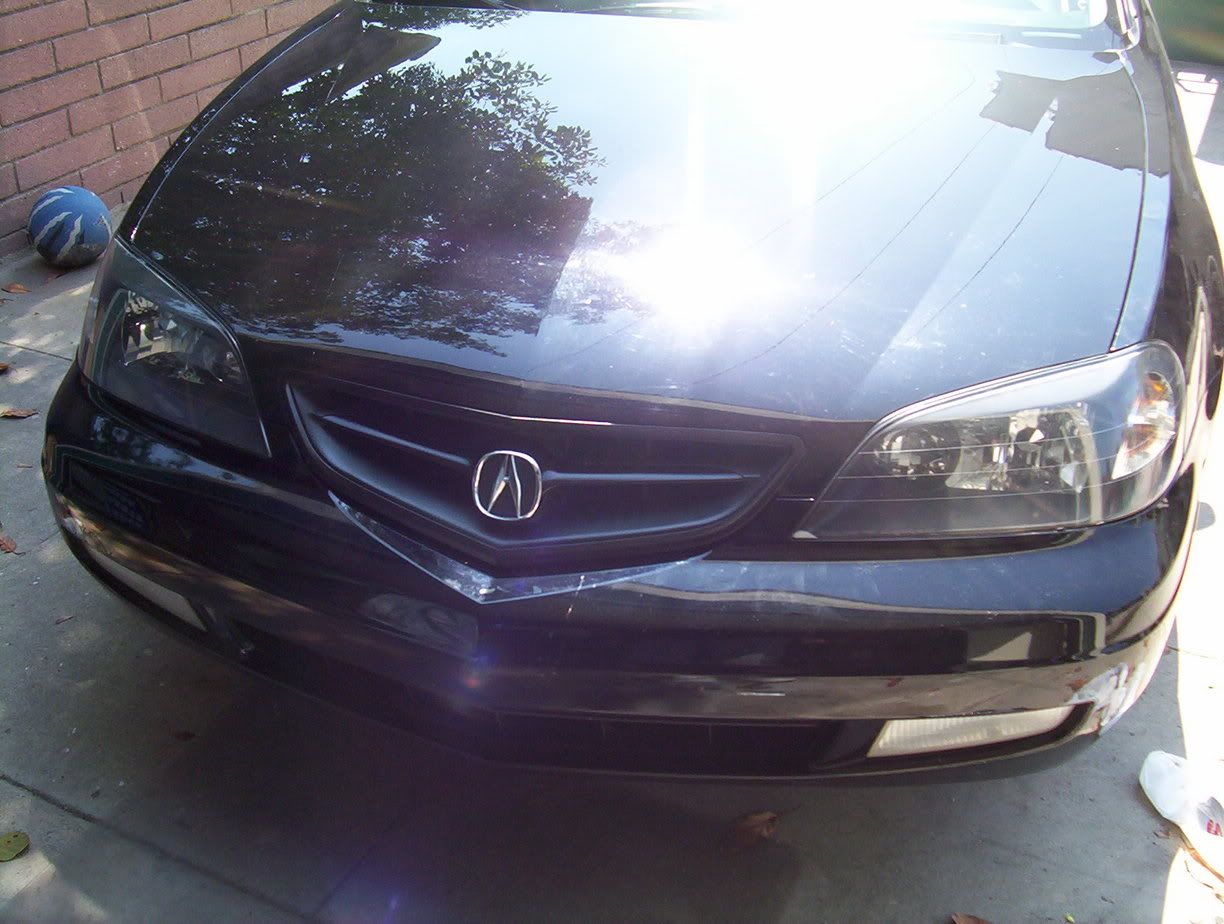
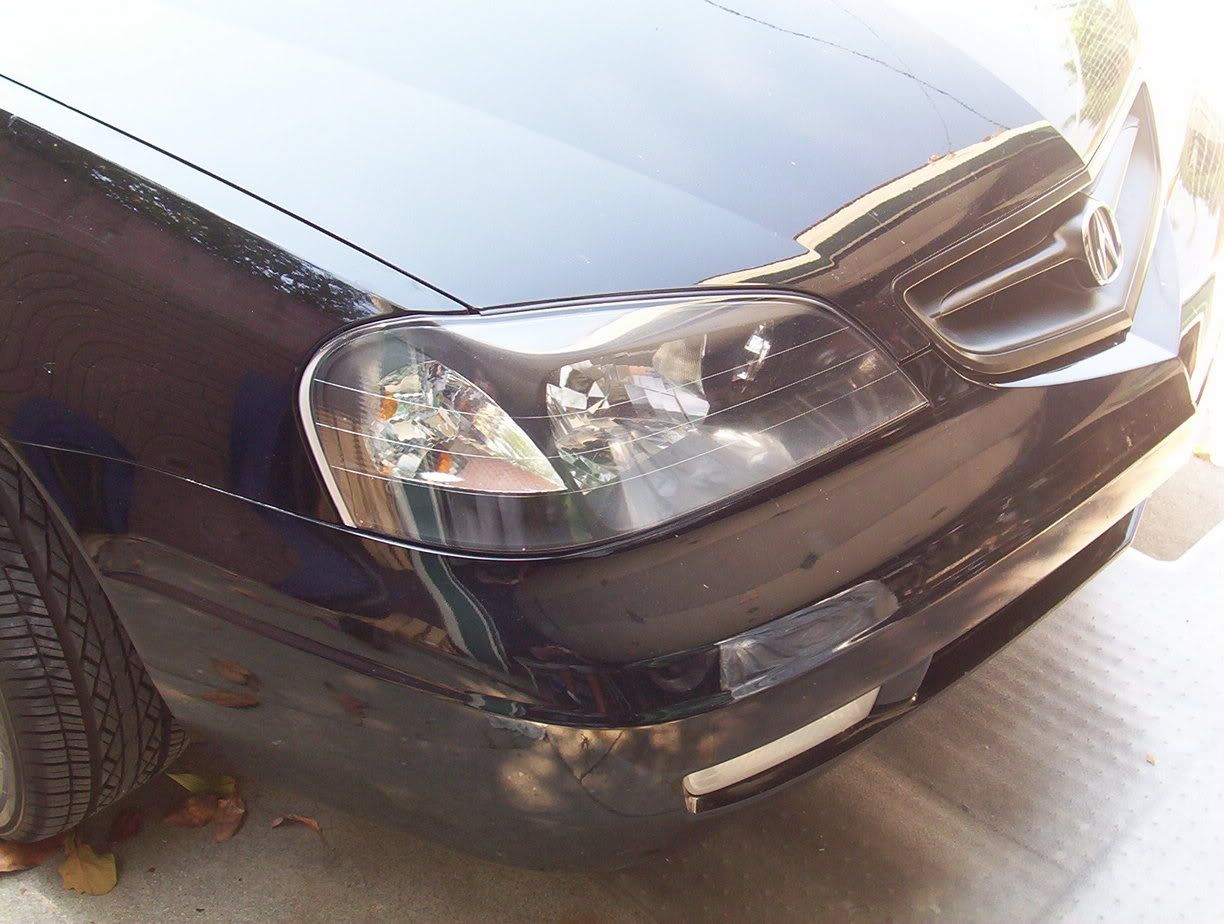
Thanks guys... Unfortunantly when i was taking the 3m masking tape off the corner blinker part and some of the sticky residue stayed on the chrome part. So me being the idiot that I am sometimes I thought WD40 would clean it off. Boy was I wrong, it cleaned the chrome right off. So if you look at my right headlight some of the blinker chrome is white because of the WD40. As for the paint, I used just regular flat black paint without that high temp crap. I thought it looked really clean so I left it like that. I was going to use my black metal flake which I used for the grill but I thought flat black looked much nicer.
Trending Topics
Thread Starter
Racer
Joined: Jul 2005
Posts: 317
Likes: 0
From: glendale, CA
Originally Posted by All Mine
Spray or brush paint? Would a glossy black paint work well, too?
Only spray comes out that clean, glossy works too but I love the way flat black looks because it wont glare due to the fact that the cover is plastic and its shiny as well.
Thread Starter
Racer
Joined: Jul 2005
Posts: 317
Likes: 0
From: glendale, CA
Actually the part you want to paint is a seperate piece its not connected to the chrome inside housing. So you can use the 3m tape and then cut just cut out the edges of the shapes you want. The bumper and headlights are actually fairly easy to take out, the most time consuming part is the headlight being in the oven. Make sure to take the HID ballast and bulb out and also any other light bulb off before putting the headlight in the oven. Also put foil underneath the headlight when you place it in the oven so the plastic doesnt melt if it touches the metal grill part. Someone did a good writeup on this once they said put it in there for 30 mins at 200 degrees. Thats exactly what I did and it came out perfect.
I'm here in spirit...
Joined: Mar 2005
Posts: 7,607
Likes: 0
From: CO
Originally Posted by racersky
i wish I could do that but I'm still afraid to put my headlight in an oven. 
I'm a wuss I guess.
I'm a wuss I guess.
 I guess it's a good thing I like mine the way they are just as much. One thing for sure though, as soon as I see condensation actually living in there permanately. I'm doing it!
Thread Starter
Racer
Joined: Jul 2005
Posts: 317
Likes: 0
From: glendale, CA
Originally Posted by chriskh
^^^ Mee too.. I guess it's a good thing I like mine the way they are just as much. One thing for sure though, as soon as I see condensation actually living in there permanately. I'm doing it!
I guess it's a good thing I like mine the way they are just as much. One thing for sure though, as soon as I see condensation actually living in there permanately. I'm doing it!B A N N E D
Joined: Jan 2004
Posts: 977
Likes: 0
From: Jersey P-town
Looks really good,  job!
job!
I see your oven got to your lights before you got to it (melted the bottom of your housing)
FYI tip for you guys doing this, if your going to bake your lights wet a towel and put it where you lay the headlamp, do one at a time, and keep them in there for no more than 3 mins. Very easy, just a pain in the @ss to clean that gunk residue.
job!I see your oven got to your lights before you got to it (melted the bottom of your housing)
FYI tip for you guys doing this, if your going to bake your lights wet a towel and put it where you lay the headlamp, do one at a time, and keep them in there for no more than 3 mins. Very easy, just a pain in the @ss to clean that gunk residue.
Thread Starter
Racer
Joined: Jul 2005
Posts: 317
Likes: 0
From: glendale, CA
Originally Posted by KahRupt-CL-S03
Looks really good, job!
I see your oven got to your lights before you got to it (melted the bottom of your housing)
FYI tip for you guys doing this, if your going to bake your lights wet a towel and put it where you lay the headlamp, do one at a time, and keep them in there for no more than 3 mins. Very easy, just a pain in the @ss to clean that gunk residue.
job!I see your oven got to your lights before you got to it (melted the bottom of your housing)
FYI tip for you guys doing this, if your going to bake your lights wet a towel and put it where you lay the headlamp, do one at a time, and keep them in there for no more than 3 mins. Very easy, just a pain in the @ss to clean that gunk residue.

Thread Starter
Racer
Joined: Jul 2005
Posts: 317
Likes: 0
From: glendale, CA
Originally Posted by nxthole72
This is my first post just got a 01 CL-Type S Black on Black. I want to Black out my Grill like yours. How do you do that and same with the headlights?
Thanks
Jeff
Thanks
Jeff

Intermediate
Joined: Aug 2005
Posts: 33
Likes: 0
From: sacramento
i just did my lights, its good to put a wet towel under the light while its in thw oven,also I
noticed you painted the light under the blinker, looks cool. I used silverstar 1157's looks
awesome
noticed you painted the light under the blinker, looks cool. I used silverstar 1157's looks
awesome

Thread
Thread Starter
Forum
Replies
Last Post
wong05tsx
Car Parts for Sale
3
Jun 6, 2008 03:14 AM