
Clutch click repair how to do it with pictures
 09-28-2008, 09:53 AM
#1
Intermediate
Thread Starter
Join Date: Jun 2007
Location: Northern Kentucky, USA
Age: 70
Posts: 29
Likes: 0
Received 0 Likes
on
0 Posts
Clutch click repair how to do it with pictures
Though many owners have written about the “clutch click,” I am unable to find a how-to-do-it thread on the clutch click repair. My clutch had a pronounced click near the bottom of the travel.
It took me about 30 minutes to do this repair and take pictures with my phone. I suspect that this repair is similar to the dealer’s “lubricate clutch linkage.” If this procedure stops the click, you do not need a clutch master cylinder replacement.
In addition to some lubricant, you will need a light and a Philips screwdriver. Here, remove the one screw in the cover below the steering column. (The two metal fingers in the right bottom is the light's hook.)
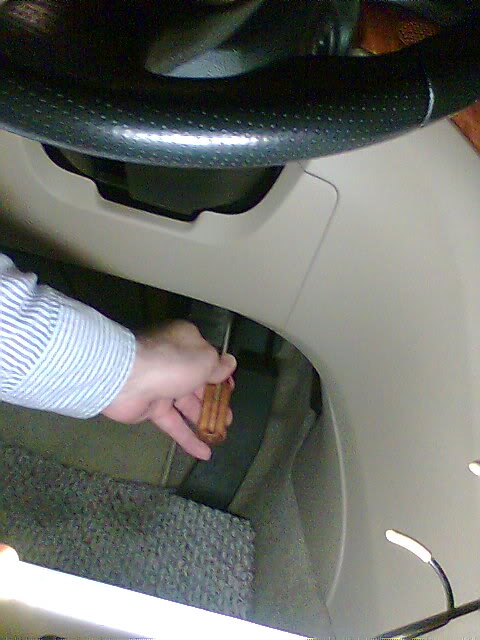
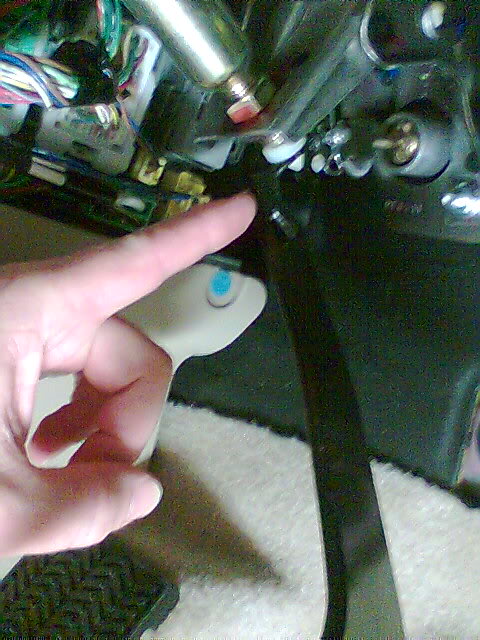
This cover is held in place by this screw and 3 or 4 plastic clips (my index finger) which are inserted in the square holes (my pinky). I pulled the cover off being careful not to twist the cover and break the clips.
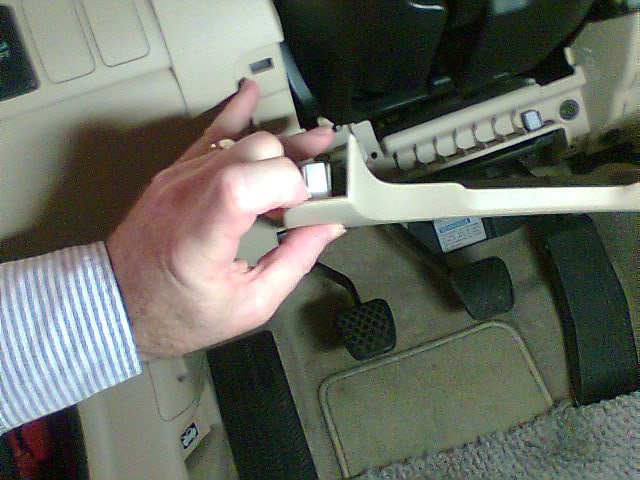
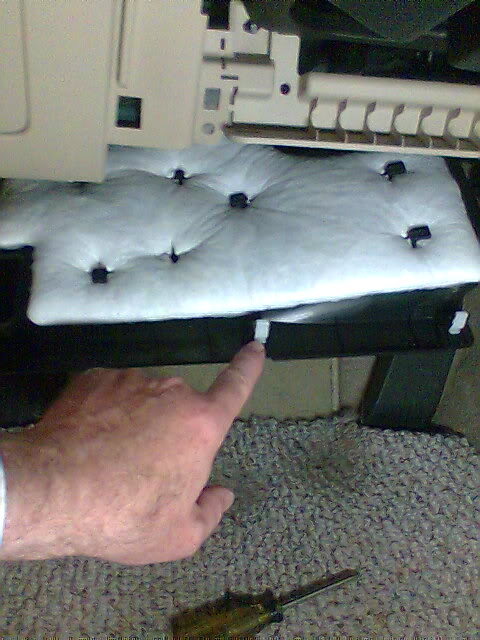
The kick panel over the footwell is held in place with the same kind of clips. Carefully pull it down at the clips at the edge closest to you.
When this edge is down, you can pull the kick panel toward you. The attachment at the firewall is just two pins that slide slots attached to the firewall.
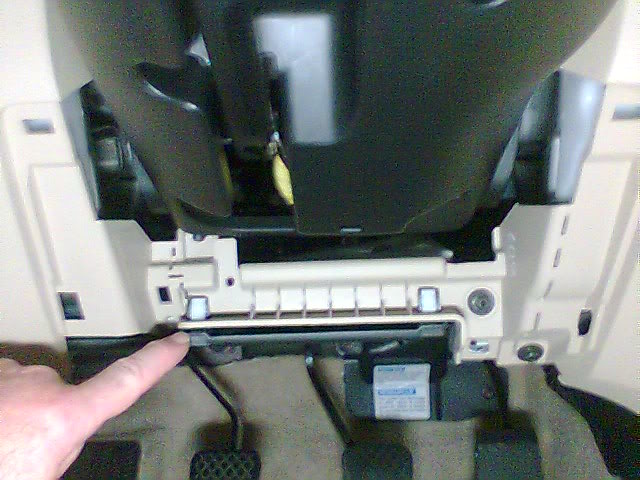
I needed a light to see the clutch linkage while lying on my back in the footwell. My index finger points to the pad for the top switch (cruise control release). This switch made an audible click. There was no lack of yellow grease on the joints of the clutch linkage. I just smeared the grease that was there back into the link pins. This did not help the click at the bottom of the travel.
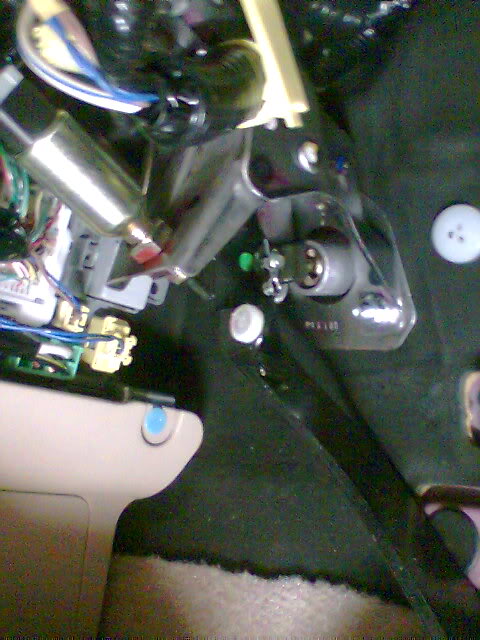
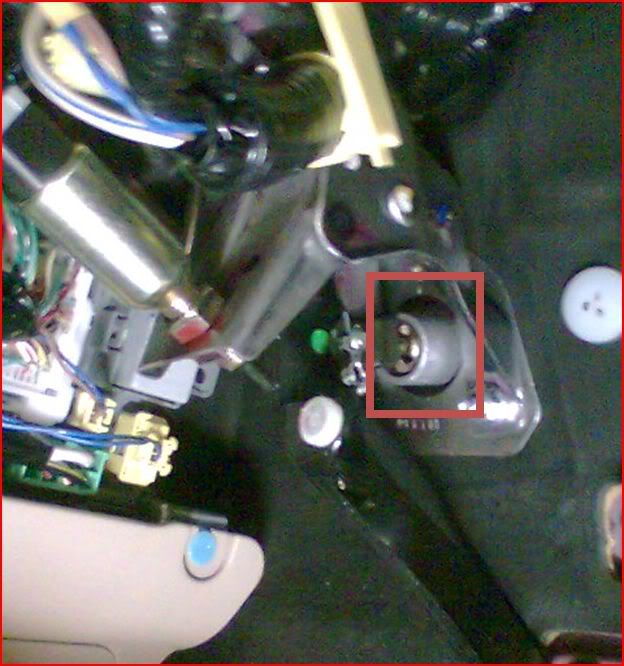
Here the clutch pedal is depressed. I also smeared the grease into the top switch (at the center of the picture, the switch pushrod is extended). This is probably not recommended, but it did make the switch click much softer. Here you can see the base of the clutch master cylinder (about three inches to the right and above the pad for the top switch). I squirted silicone spray lubricant into the base of the clutch pushrod using a tube from a can of WD-40 to keep from spraying the stuff all over the car’s interior. (Note that there is almost no chance of contaminating the clutch fluid doing this.) I suppose that about any lubricant would work; though some would last longer than others would. (Think Lubriplate, WD-40, lithium grease, Vaseline, wheel bearing grease, etc). You save yourself the pain of disassembling and reassembling the linkage if you can squirt something into the clutch master cylinder where the pushrod goes in. (I suspect the fix would last for years if you can get some wheel bearing grease where the clutch pushrod meets the base of the clutch master cylinder piston.) Without a doubt, other posters will provide some suggestions on appropriate lubricant.
The closest dealer is a 50-mile round trip and takes the better part of a morning for any task. Even if this fix is temporary, it would only take me ten minutes to do it again. However, the next time I would get a more durable lubricant before I started.
I hope this helps.
It took me about 30 minutes to do this repair and take pictures with my phone. I suspect that this repair is similar to the dealer’s “lubricate clutch linkage.” If this procedure stops the click, you do not need a clutch master cylinder replacement.
In addition to some lubricant, you will need a light and a Philips screwdriver. Here, remove the one screw in the cover below the steering column. (The two metal fingers in the right bottom is the light's hook.)
This cover is held in place by this screw and 3 or 4 plastic clips (my index finger) which are inserted in the square holes (my pinky). I pulled the cover off being careful not to twist the cover and break the clips.
The kick panel over the footwell is held in place with the same kind of clips. Carefully pull it down at the clips at the edge closest to you.
When this edge is down, you can pull the kick panel toward you. The attachment at the firewall is just two pins that slide slots attached to the firewall.
I needed a light to see the clutch linkage while lying on my back in the footwell. My index finger points to the pad for the top switch (cruise control release). This switch made an audible click. There was no lack of yellow grease on the joints of the clutch linkage. I just smeared the grease that was there back into the link pins. This did not help the click at the bottom of the travel.
Here the clutch pedal is depressed. I also smeared the grease into the top switch (at the center of the picture, the switch pushrod is extended). This is probably not recommended, but it did make the switch click much softer. Here you can see the base of the clutch master cylinder (about three inches to the right and above the pad for the top switch). I squirted silicone spray lubricant into the base of the clutch pushrod using a tube from a can of WD-40 to keep from spraying the stuff all over the car’s interior. (Note that there is almost no chance of contaminating the clutch fluid doing this.) I suppose that about any lubricant would work; though some would last longer than others would. (Think Lubriplate, WD-40, lithium grease, Vaseline, wheel bearing grease, etc). You save yourself the pain of disassembling and reassembling the linkage if you can squirt something into the clutch master cylinder where the pushrod goes in. (I suspect the fix would last for years if you can get some wheel bearing grease where the clutch pushrod meets the base of the clutch master cylinder piston.) Without a doubt, other posters will provide some suggestions on appropriate lubricant.
The closest dealer is a 50-mile round trip and takes the better part of a morning for any task. Even if this fix is temporary, it would only take me ten minutes to do it again. However, the next time I would get a more durable lubricant before I started.
I hope this helps.

 09-28-2008, 05:52 PM
#3
Three Wheelin'
Join Date: Feb 2007
Location: Rockville, MD
Age: 40
Posts: 1,554
Likes: 0
Received 0 Likes
on
0 Posts
nm, just did this and it worked  . took no longer than 20 minutes. I used wd-40 so I'm thinking it will not last too long. i will probably end up using a better lubricant like you mentioned above. thanks for the step-by-step instructions
. took no longer than 20 minutes. I used wd-40 so I'm thinking it will not last too long. i will probably end up using a better lubricant like you mentioned above. thanks for the step-by-step instructions
03-01-2010, 12:38 PM
#6

Don't bother trying to do this if all you have on hand is wd-40. It does not lubricate but instead works as a great degreaser. You will contaminate the lubricant that is currently in there and will make it difficult to grease the area in the future (because of the contamination).

Trending Topics
05-28-2010, 01:47 PM
#8
Instructor

Join Date: Mar 2010
Age: 38
Posts: 111
Likes: 0
Received 0 Likes
on
0 Posts

Thread
Thread Starter
Forum
Replies
Last Post
SidhuSaaB
3G TL Problems & Fixes
18
05-30-2020 12:40 AM
detailersdomain
Wash & Wax
3
10-09-2015 10:13 PM