Acura TL: How to Replace Brake Line
There is probably no worse feeling in the world than to be driving your vehicle down the road, step on the brakes and nothing happens. The braking system is arguably the most important single system in the vehicle. It provides safety for you and your passengers. Replacing these should not be procrastinated, so read this article to find out the how.
This article applies to the 3rd/4th Gen Acura TL (2004-2014).
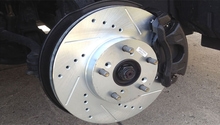
There are several different reasons for changing out the brake lines on any vehicle. The main point being safety if there is a bulge in one of the original rubber lines or the brakes feel a little bit too soft. The brake lines are the part of the braking system which allows the brake fluid to flow at a flexible point, namely where the suspension moves up and down. These stock rubber hoses can become weak over time and start losing integrity. Changing them is relatively straightforward and easy, but remember to purge the brake system to remove any air which may be left behind. The only reason to not do this job is if you don't have the necessary tools to complete.

Materials Needed
- Jack, jack stands, and wheel chocks
- Nitrile gloves
- 19mm socket for wheel removal
- 10mm and 17mm open end wrenches (line wrenches may be preferable)
- 12mm, 14mm, 15mm sockets and accompanying ratchet
- 3" socket extension
- Vice-Grips
- Large flat tip screwdriver
- Shop rags
- Replacement brake fluid (DOT3, DOT4, or DOT5.1)
- Clear bleeder tubing, vacuum bleeder, or pressure bleeder
The difference in price between regular OEM style lines and stainless steel braided brake lines is negligible. The SS lines will provide the driver with added firmness and pedal response. This is something the installer should consider when the need to replace brake lines occurs. It is also recommended to replace all four brake lines instead of just replacing a single one. If one line goes bad, it won't be long until the next one goes in most cases. The braking system is only as strong as the weakest link and cascade failure of brake parts is a reality in most situations.
Notes
- If brake fluid spills on any painted part, remove quickly or it will destroy regularly painted surfaces.
- Use either DOT3, DOT4, or DOT5.1 brake fluid. If using anything other than DOT3, do a complete brake system flush. Do not purchase DOT5 brake fluid by mistake. It is silicone based and is not compatible with anti-lock braking systems.
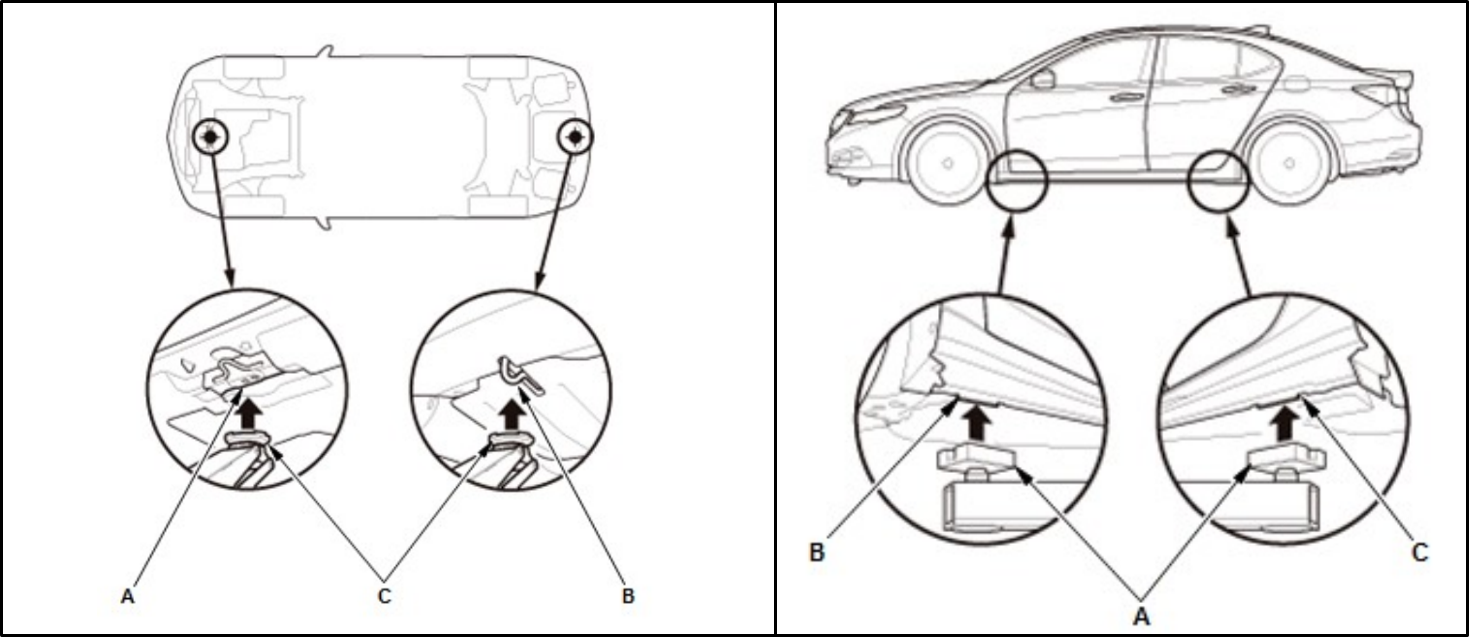
Step 1 – Jack up and support vehicle
Place wheel chocks to the front and rear of a single rear tire. Crack loose the lug nuts on the front end for both sides of the vehicle. Jack up and support the front end of the vehicle with jack stands. Remove the lug nuts, then the wheels on both sides of the vehicle.
Step 2 – Remove and replace front brake lines
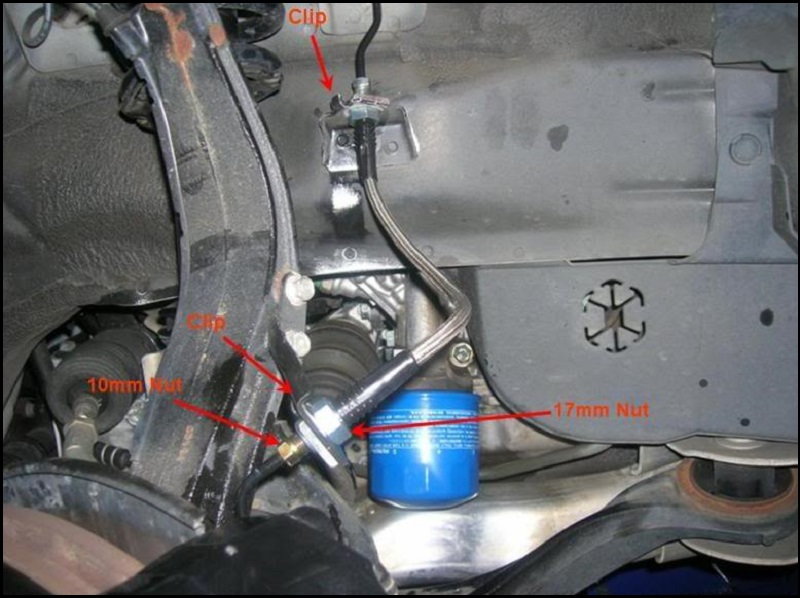
On one side of the vehicle, ensure brake lines are clean and free of dirt/grime/etc. Brake cleaner works really well for this. Ensuring this is clean will prevent any dirt/debris from entering into the brake system and causing issues down the road.
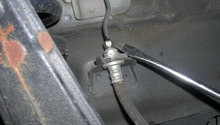
Starting at the top, use a 10mm line wrench on the smaller connection at the top, then a 17mm line wrench at the larger connection (at the flexible brake line), pry the two wrenches to break the connection of the joint. Do the same for the bottom connection. Using Vice-Grips, securely latch onto the clip tab and work the clip away from the brake line. This may take a little bit of work, depending on the amount of corrosion on the clip and brake line. Some penetrating oil may be of assistance in breaking this free. Remove both clips. Place rags under work area to catch any dripping brake fluid. Finish disconnecting brake line at both the top and bottom. Attach new brake line and snug the connection at both ends. Place the brake line in mounts and re-insert clips. Tap them with a soft hammer or wiggle them back into place using the Vice-Grips. Finish tightening both ends using the line wrenches. Complete this same action on both sides of the vehicle.
Pro Tip
Always use two wrenches against each other to loosen lines and tubing. The line will twist and deform if you don't. Using quality line wrenches instead of the open end of combination wrenches will help ensure the nut on the line does not become rounded off.
Step 3 – Set vehicle on ground
After the front axle is done, replace wheels back onto vehicle and hand-tighten the lug nuts. Set the vehicle back down onto the ground. Torque the wheel nuts to 85 lb-ft.
Step 4 – Remove and replace rear brake lines
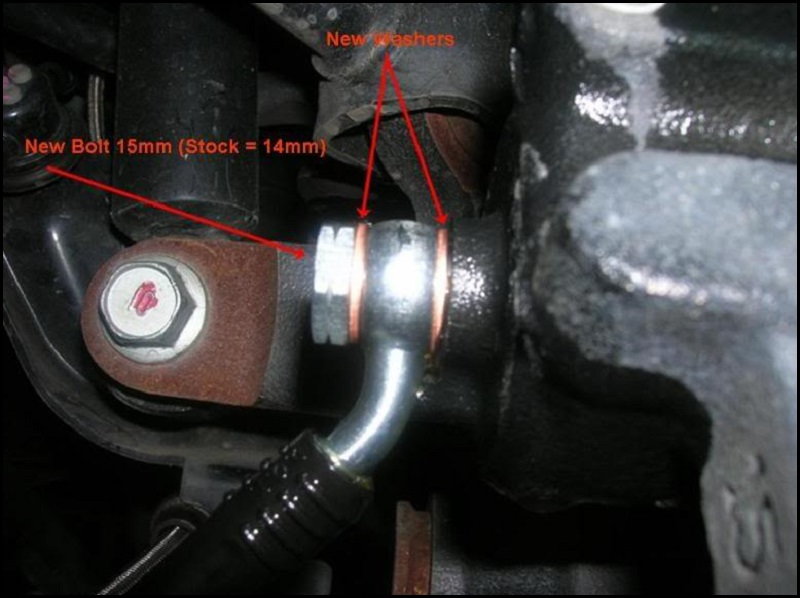
The rear brake lines are a little different from the front lines. The end, which connects to the caliper, has a different connection, using a "banjo bolt" to connect it (Figure 3). Ensure new bolts and washers were provided with the new brake lines. If not, purchase replacements because reusing old parts will not allow the brakes lines to seal correctly. The other end, which attaches at the body side, should be just like the front end.
Step 5 – Bleed brakes
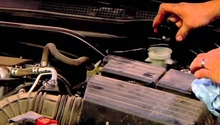
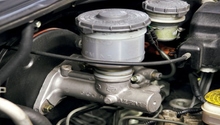
After vehicle is flat on the ground and all wheels lugs torqued, raise and support the hood. If present, remove engine cover over the driver's side rear to reveal the brake master cylinder reservoir cap. Clean the cap area so no dirt/debris/grime may enter into the reservoir. Read and follow instructions for bleeding brakes in other how-to in this same section. Caliper bleeding rotation for the TL is to start at the left front (driver's side), then right front, right rear, and finally left rear. Observe during bleeding to ensure no leakage is recognized. Test drive to ensure proper operation, being careful during initial braking to get a feel for the new brake lines and how the brakes react.
(Related Article: How to Replace Brake Fluid - AcuraZine.com)

Related Discussions
- DIY Brake Line Replacement - AcuraZine.com