Acura MDX: How to Install Double DIN Stereo
Putting a double DIN stereo in your MDX offers a ton of benefits: a nice big screen, improved sound, and even the option for a backup camera. This article will walk you through the process of installation.
This article applies to the Acura MDX (2000-2006).
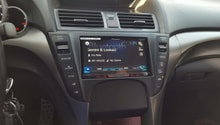
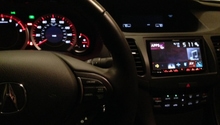
Most of us are used to the old school, single DIN stereos that don't offer much room for a touchscreen or video display, but many newer cars offer big touchscreens from the factory, and for good reason. They are easier to use and see, often giving you the ability to watch movies or TV, and provide a nice platform for connecting a rearview camera if you so desire. Installing a double DIN stereo in an MDX is a doable job, with the most difficult part coming in routing the backup camera wire if you choose to add it. Keep reading and we'll walk you through the process.
This article uses the 1st generation Acura MDX as its example. The 2nd generation has a similarly designed center stack, with a large CD player stereo head unit in the middle of it, but without the screen pictured here. The installation would be similar otherwise. The 3rd generation has an integrated infotainment unit, and installing an aftermarket stereo to work with it would be much more difficult.

Materials Needed
- Double DIN adapter kit, specific to your model (such as Metra)
- Steering wheel control adapter (optional, if you want to retain controls)
- Wiring harness kit
- Panel removal tool or plastic putty knife
- Phillips head screwdriver
- Small flat head screwdriver
- Wire crimp tool and crimps
Step 1 – Remove the trim and stereo
Before you install a new double DIN stereo, you need to take out the old one; and in order to do that, you need to get to it first. The MDX interior is assembled with a clean modern design without a single fastener visible in normal driving, but they are all there and you don't really need special tools to get to them either. There is a panel removal tool that the pros use, but a simple plastic putty knife will work fine and won't damage anything either.
Use the putty knife or trim removal tool to pry around the edges of the radio display trim panel until you release it from the retaining clips. Remove the six screws holding the radio and display unit in the dash. Remove the eight screws from the radio and four screws from the display screen, then remove the brackets from the assembly. Disconnect the wiring harnesses and antenna wire from the back of the radio, then remove it.
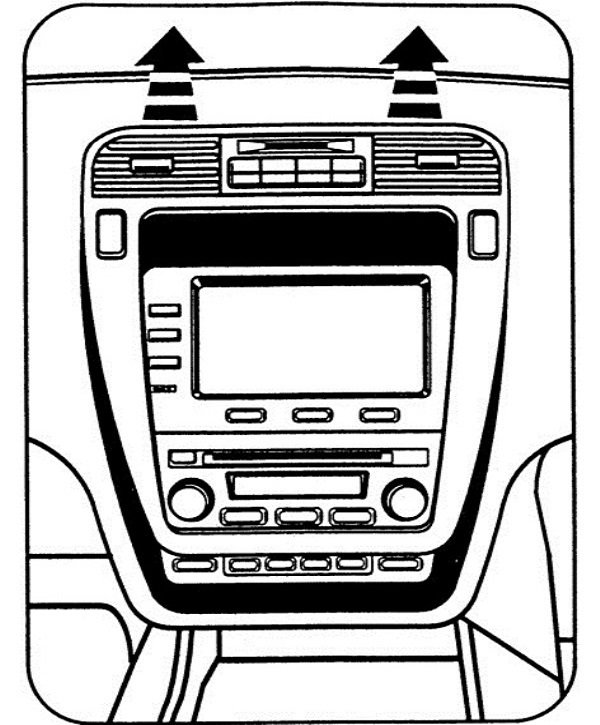
Figure 2. Pry the dash trim loose to remove it. 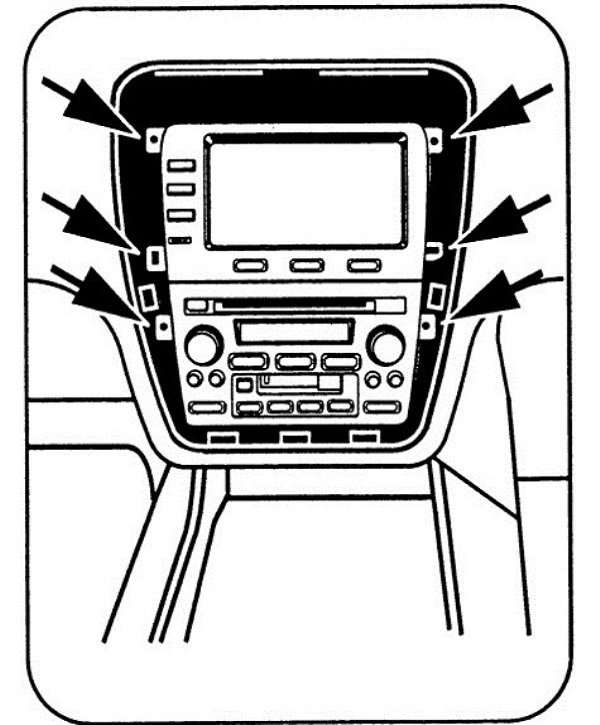
Figure 3. Remove the screws from the radio and display.
Step 2 – Assembly the bracket and installation kit
Align the brackets from the installation kit and screw them together. Install the housing for the radio to the brackets. Slide the new double DIN stereo into the bracket and secure it using the supplied screws.
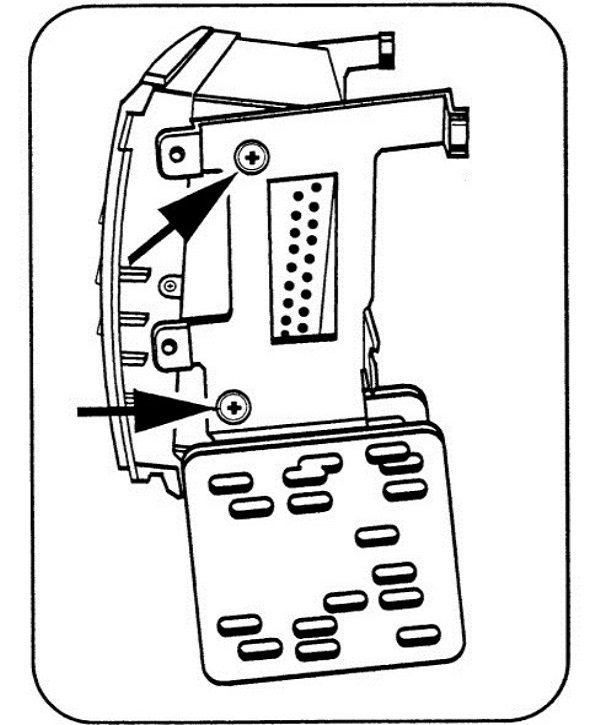
Figure 4. Assemble the brackets to the housing. 
Figure 5. Install the radio in the housing.
Step 3 – Install the radio in the dash
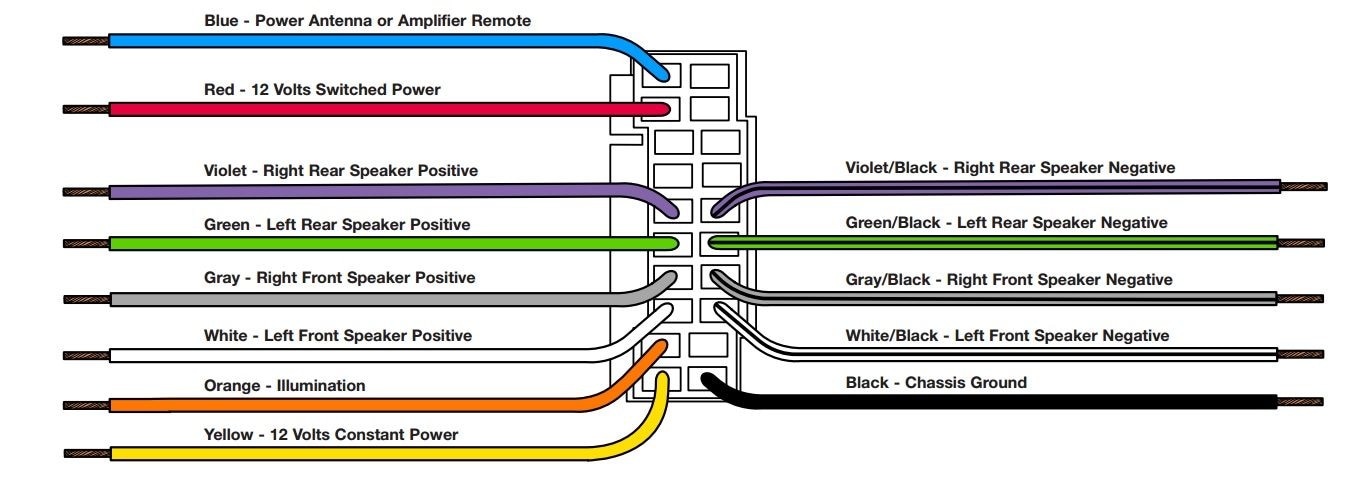
Splice the wires from the wiring harness kit into the new radio's harness using a wire crimp tool and crimps. Plug the harness into the factory harness and reinstall the antenna wire. Carefully slide the new assembly into the dash and reinstall the screws. Reinstall the trim and push it in gently to secure it back into the retaining clips.
Related Discussions and Sites
- 2nd Gen Final Double DIN Install - AcuraZine.com
- MDX Stereo Illumination Wire Double DIN Installation - AcuraZine.com
- Acura MDX Metra Double DIN Head Unit Installation Guide - Crutchfield.com
- Acura MDX Metra Wiring Harness Installation Guide - Crutchfield.com