LOG IN
REGISTER
Forums
AcuraZine
New Member Introductions
AcuraZine Member Help, Support & Suggestions Area
AcuraZine Articles
Black Market
Marketplace
Sponsored Sales & Group Buys
AcuraZine Model Community
1G ADX (2025-)
6G TLX (2021+)
5G TLX (2015-2020)
4G TL (2009-2014)
4G MDX (2022+)
3G TL (2004-2008)
3G RLX (2013+)
3G RDX (2019+)
3G MDX (2014-2020)
ILX
2G TSX (2009-2014)
2G TL (1999-2003)
2G RL (2005-2012)
2G RDX (2013-2018)
2G NSX (2017+)
1/2G MDX (2001-2013)
2G CL (2001-2003)
ZDX
1G TSX (2004-2008)
1G TL (1996-1998)
1G RL (1996-2004)
1G RDX (2007-2012)
1G NSX (1990-2005)
1G MDX (2001-2006)
1G CL (1997-1999)
Integra
Special Interest
Car Talk
Automotive News
Motorsports News
Audio, Video, Electronics & Navigation
Wash & Wax
AcuraZine's Hall of Fame
AcuraZine's Car of the Month Showcase
Regional Forums
Regions
Marketplace
Vendor Directory
Become a Vendor
New Posts
Tools
Car Payment Calculator
Tire Rim Calculator
Vin Decoder
Recalls
Technical Service Bulletins (TSBs)
Members List
Live Feed
How-Tos
Gallery
View Dark Mode
Please register or login to enable Dark Mode.
Log In
Register
Threads
Google
Threads
Posts
Advanced
Dark Mode
Please register or login to enable Dark Mode.
Log In
Forgot your Password?
By logging into your account, you agree to our
Terms of Use
and
Privacy Policy
, and to the use of cookies as described therein.
or
Login with Google
Login with Facebook
Recent
Commented
Albums
My Pictures
Acura TL Builder's Photos
View Profile
Sort:
Most Recent
Most Recent
Most Comments
Albums
Photos
0
2019/03/09 13:24:51
Acura TL B
Looks good
0
2019/03/09 13:24:43
Acura TL B
0
2019/03/09 13:24:36
Acura TL B
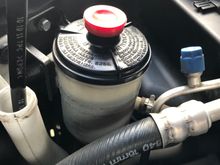
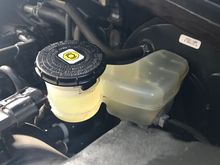
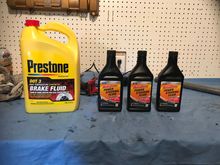
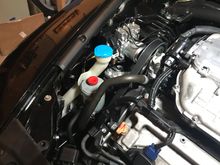
Bought brake fluid and power steering fluid to change in both TLs and the MDX.
0
2019/03/09 13:24:26
Acura TL B
Looks good there
0
2019/03/09 13:24:18
Acura TL B
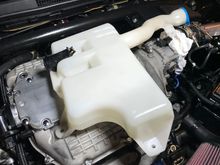
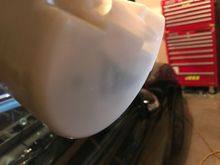
Reinstallarion of bladder successful
0
2019/03/09 13:24:09
Acura TL B
Cleaned up the windshield wiper bladder.
0
2019/03/09 13:24:00
Acura TL B
0
2019/03/09 13:21:52
Acura TL B
0
2019/03/09 13:21:43
Acura TL B
0
2019/03/09 13:21:35
Acura TL B
0
2019/03/09 13:21:27
Acura TL B
0
2019/03/09 13:21:18
Acura TL B
0
2019/03/09 13:21:10
Acura TL B
0
2019/03/09 13:21:00
Acura TL B
0
2019/03/09 13:20:51
Acura TL B
0
2019/03/09 13:20:41
Acura TL B
ya
0
2019/03/09 13:20:32
Acura TL B
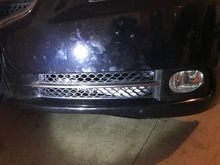
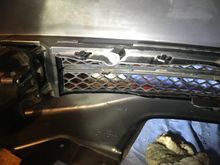
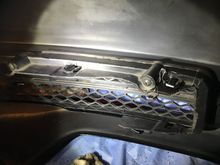
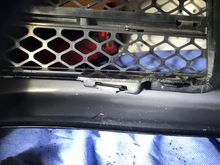
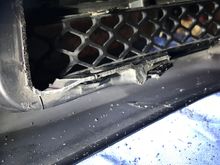
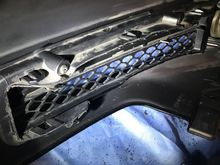
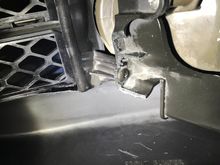
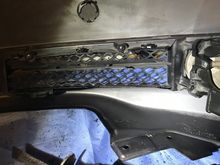
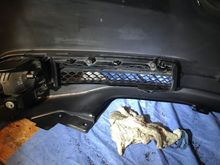
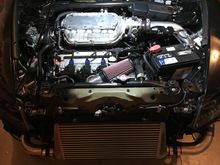
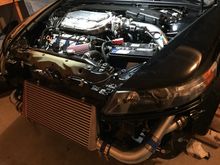
The interior of the front bumpers needed to be trimmed to make room for the new intercooler charge pipes.
0
2019/03/09 13:20:22
Acura TL B
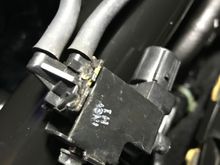
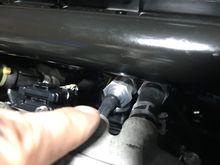
The Evap sensor was deleted due to it no longer being used.
0
2019/03/09 13:13:21
Acura TL B
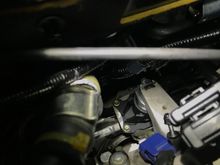
There is the Evap sensor which the front and rear engine mounts are connected to. I deleted the hydraulic vacuum lines.
0
2019/03/09 13:13:14
Acura TL B
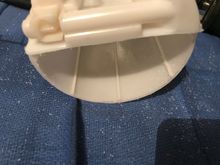
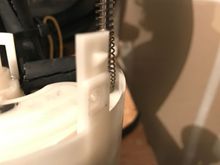
I ended up cutting the bottom of the fuel cage to seat the o-ring that delivers fuel.
0
2019/03/09 13:13:08
Acura TL B
0
2019/03/09 13:12:59
Acura TL B
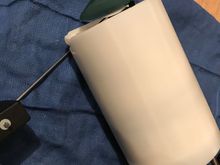
The fuel pump sock was bottoming out on the bottom of the fuel cage.
0
2019/03/09 13:12:51
Acura TL B
0
2019/03/09 13:12:43
Acura TL B
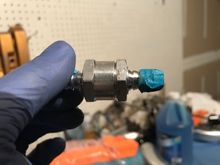
x2 One-way check valves are used to prevent boost from escaping from the intake manifold. When not in boost, the check valve allows vacuum to flow once again.
0
2019/03/09 13:08:13
Acura TL B
Nothing to it.
0
2019/03/09 13:08:05
Acura TL B
0
2019/03/09 13:07:55
Acura TL B
0
2019/03/09 13:07:45
Acura TL B
Everything reinstalled.
0
2019/03/09 13:07:36
Acura TL B
Test fitting the new longer serpentine belt around the Rotrex pulley.
0
2019/03/09 13:02:46
Acura TL B
Ins
0
2019/03/09 13:02:37
Acura TL B
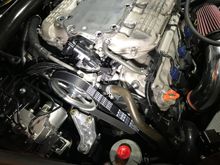
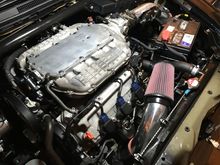
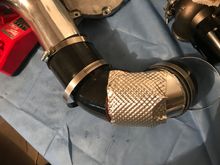
The 4” intake pipe which is connected to the Rotrex unit is in close proximity to the anterior RV6 v3 PCD exhaust pipe. Thoughtfully, Andy Gerzina over at Gerzy Bear Performance provided an 1800F heat shield to keep the intake temperatures down.
0
2019/03/09 13:02:29
Acura TL B
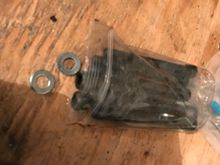
New P2P intake manifold hex studs.
0
2019/03/09 13:02:19
Acura TL B
0
2019/03/09 12:58:44
Acura TL B
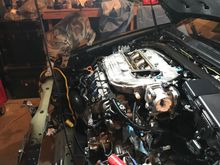
Cat approved of Intake manifold fitment.
0
2019/03/09 12:58:36
Acura TL B
Use bolts clear the gap. Should hold?
0
2019/03/09 12:58:27
Acura TL B
Rear engine mount installed! Not easy to install,but I refrained from reinstalling anything back there to give me more room. It is still more difficult to get the oem one out.
0
2019/03/09 12:58:18
Acura TL B
Gap between the two parts of the mount.
0
2019/03/09 12:58:11
Acura TL B
Testing new serpentine belt
0
2019/03/09 12:49:27
Acura TL B
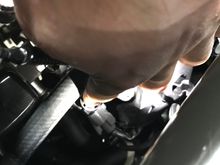
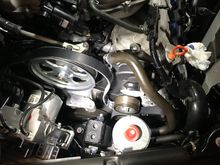
One-way check valves are to be installed to prevent boost from out of the intake manifold via pipes connected to it. Boost should only be going through the vacuum lines which feed to the Fuel regulator, Blow off valve, Wastegate.
0
2019/03/09 12:49:19
Acura TL B
First
Page
40 of 70
Last
Go To
Page
1
...
38
39
40
41
42
...
70
40 of 70
Go To
GO
Go to page
of 70
pages
1
...
38
39
40
41
42
...
70