AcuraZine - Acura Enthusiast Community
  • LOG IN
  • REGISTER
  • Forums
    • AcuraZine
      • New Member Introductions
      • AcuraZine Member Help, Support & Suggestions Area
      • AcuraZine Articles
    • Black Market
      • Marketplace
      • Sponsored Sales & Group Buys
    • AcuraZine Model Community
      • 1G ADX (2025-)
      • 6G TLX (2021+)
      • 5G TLX (2015-2020)
      • 4G TL (2009-2014)
      • 4G MDX (2022+)
      • 3G TL (2004-2008)
      • 3G RLX (2013+)
      • 3G RDX (2019+)
      • 3G MDX (2014-2020)
      • ILX
      • 2G TSX (2009-2014)
      • 2G TL (1999-2003)
      • 2G RL (2005-2012)
      • 2G RDX (2013-2018)
      • 2G NSX (2017+)
      • 1/2G MDX (2001-2013)
      • 2G CL (2001-2003)
      • ZDX
      • 1G TSX (2004-2008)
      • 1G TL (1996-1998)
      • 1G RL (1996-2004)
      • 1G RDX (2007-2012)
      • 1G NSX (1990-2005)
      • 1G MDX (2001-2006)
      • 1G CL (1997-1999)
      • Integra
    • Special Interest
      • Car Talk
      • Automotive News
      • Motorsports News
      • Audio, Video, Electronics & Navigation
      • Wash & Wax
      • AcuraZine's Hall of Fame
      • AcuraZine's Car of the Month Showcase
    • Regional Forums
      • Regions
  • Marketplace
    • Vendor Directory
    • Become a Vendor
  • New Posts
  • Tools
    • Car Payment Calculator
    • Tire Rim Calculator
    • Vin Decoder
    • Recalls
    • Technical Service Bulletins (TSBs)
    • Members List
    • Live Feed
  • How-Tos
  • Gallery
  • View Dark Mode
    • Please register or login to enable Dark Mode.
  • Log In
  • Register
AcuraZine - Acura Enthusiast Community
    • Threads
      • Advanced
Dark Mode

Please register or login to enable Dark Mode.

Log In

Forgot your Password?

By logging into your account, you agree to our Terms of Use and Privacy Policy, and to the use of cookies as described therein.
or
 
  • Recent
  • Commented
  • Albums
  • My Pictures

My Post Pictures

dmstom33
February 11, 2017
 63
 0
Sort:
Default
  • Default
  • Most Recent
0 2017/02/11 08:25:26 dmstom33
0 2017/02/11 08:34:29 dmstom33
0 2017/02/11 08:34:31 dmstom33
These clips (at the "=") hook under the quarter-panel trim.  Be careful when you take this cowl off.  You'll have to kinda' thumb it toward the panel and downward, then do a little half circle like " ) " to unhook it.
These clips (at the "=") hook under the quarter-panel trim. Be careful when you take this cowl off. You'll have to kinda' thumb it toward the panel and downward, then do a little half circle like " ) " to unhook it.
0 2017/02/11 08:34:35 dmstom33
0 2017/02/11 08:34:40 dmstom33
0 2017/02/11 08:34:44 dmstom33
0 2017/02/11 08:34:49 dmstom33
0 2017/02/11 08:34:53 dmstom33
0 2017/02/11 08:34:57 dmstom33
0 2017/02/11 08:35:02 dmstom33
the under-cowl has two pieces, you can see the joining/seam here.
0 2017/02/11 08:35:07 dmstom33
0 2017/02/11 08:35:12 dmstom33
be careful removing this bridging clip - it has a "pinch" on either side of the arm. I used a small flat-head to do this.
0 2017/02/11 08:35:17 dmstom33
don't forget to remove (or lose!) this tiny button/clip!
0 2017/02/11 08:35:24 dmstom33
0 2017/02/11 08:35:31 dmstom33
0 2017/02/11 08:35:36 dmstom33
0 2017/02/11 08:35:39 dmstom33
0 2017/02/11 08:35:42 dmstom33
this driver's side of the under cowl is a massive PITA to remove - I ended up lifting the loose end (center engine), putting my wrist underneath this end (at the quarter panel/driver's side) and bumping from underneath.  I'm still not sure how I got the sucker back in, but I did after several loooooooong minutes.
this driver's side of the under cowl is a massive PITA to remove - I ended up lifting the loose end (center engine), putting my wrist underneath this end (at the quarter panel/driver's side) and bumping from underneath. I'm still not sure how I got the sucker back in, but I did after several loooooooong minutes.
0 2017/02/11 08:35:49 dmstom33
NOTE:  default position when you install the new/replacement motor is "summer," so make sure the arms are all the way down, or you'll have to re-adjust later.
NOTE: default position when you install the new/replacement motor is "summer," so make sure the arms are all the way down, or you'll have to re-adjust later.
0 2017/02/11 08:35:52 dmstom33
0 2017/02/11 08:35:55 dmstom33
0 2017/02/11 08:35:59 dmstom33
0 2017/02/11 11:08:43 dmstom33
right at these lines " = " there's an additional lip on the "cosmetic" cowl, which is what holds it tight against/under the lip of the quarter panel.  Use your thumb to gently push toward/down from the quarter panel on each end. (I don't really want to know how much this cowl would cost - since it runs along the entire windshield as one piece, I'm assuming more than I want to pay. ;-)
right at these lines " = " there's an additional lip on the "cosmetic" cowl, which is what holds it tight against/under the lip of the quarter panel. Use your thumb to gently push toward/down from the quarter panel on each end. (I don't really want to know how much this cowl would cost - since it runs along the entire windshield as one piece, I'm assuming more than I want to pay. ;-)
0 2017/02/11 11:08:47 dmstom33
0 2017/02/11 11:08:51 dmstom33
passenger side after "cosmetic" cowl removed
0 2017/02/11 11:08:55 dmstom33
passenger side "cosmetic" cowl still in place.
0 2017/02/11 11:09:00 dmstom33
Here you can juuuuuust see the clip that attaches under the quarter panel right above my finger
0 2017/02/11 11:09:04 dmstom33
0 2017/02/11 11:09:12 dmstom33
this is simply meant to show the join/seam of the cowl directly over the wiper motor - so yes, two pieces here, and the passenger side comes off first.  The driver's side is a bear, so be patient.
this is simply meant to show the join/seam of the cowl directly over the wiper motor - so yes, two pieces here, and the passenger side comes off first. The driver's side is a bear, so be patient.
0 2017/02/11 11:09:18 dmstom33
0 2017/02/11 11:09:22 dmstom33
This bridge clip here over the passenger side wiper arm comes off fairly easily with a pinch mechanism. I used a super-slim flathead to push in & up to unseat it.
0 2017/02/11 11:09:27 dmstom33
driver's side piece of cowl --- don't forget this little clip (or lose it) must come off before you try to take the cowl off.
0 2017/02/11 11:09:34 dmstom33
Here's that little clip, removed.
0 2017/02/11 11:09:40 dmstom33
0 2017/02/11 11:09:45 dmstom33
0 2017/02/11 11:09:47 dmstom33
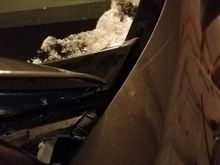
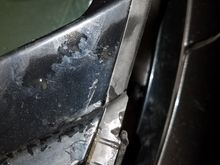
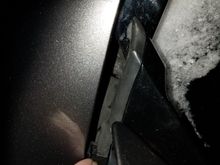
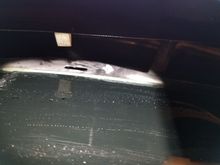
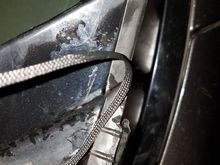
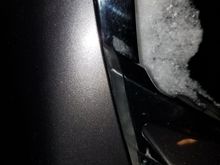
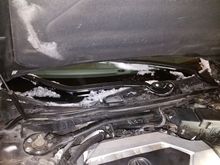
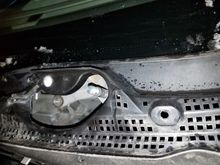
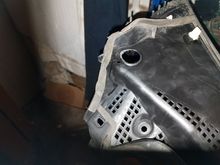
to remove this cowl piece (from the driver's side), I ended up lifting up from center-ish, getting my wrist underneath, and bumping it up several times. It'll eventually come out, just be patient and don't try to wrestle it out or you'll break the plastic.
0 2017/02/11 11:09:57 dmstom33
Here I just marked the alignment for the summer position after I re-attached the driver's side arm post-motor replace.
0 2017/02/11 11:10:00 dmstom33
0 2017/02/11 11:10:04 dmstom33
passenger side cowl piece - make sure everything's aligned perfectly before you start pushing the pieces back into place.  There's clips all along each piece that hold them in place.
passenger side cowl piece - make sure everything's aligned perfectly before you start pushing the pieces back into place. There's clips all along each piece that hold them in place.
0 2017/02/11 11:10:07 dmstom33
First
Page
1 of 2
Last
Go To
Page
  • 1
  • 2
1 of 2
Go To GO
Go to page of 2 pages
  • 1
  • 2

Top
AcuraZine - Acura Enthusiast Community
  • Contact Us
  • FAQ
  • Advertising
  • Cookie Policy
  • Privacy Statement
  • Terms of Service
  • Your Privacy Choices
  • Manage Preferences

© 2026 MH Sub I, LLC dba Internet Brands

Follow Us        


When you click on links to various merchants on this site and make a purchase, this can result in this site earning a commission. Affiliate programs and affiliations include, but are not limited to, the eBay Partner Network.