
DIY Slim fog light installation (pic heavy)
 01-02-2014, 12:17 PM
#1
Advanced
Thread Starter

DIY Slim fog light installation (pic heavy)
I know alot of people like to install the round fog lights but i feel the way the body is shaped and the style of the front grill on the TL looks much more sleek and uniform with a rectangular style fog light, and if you have the money to spend you can get a nice bright white LED light.
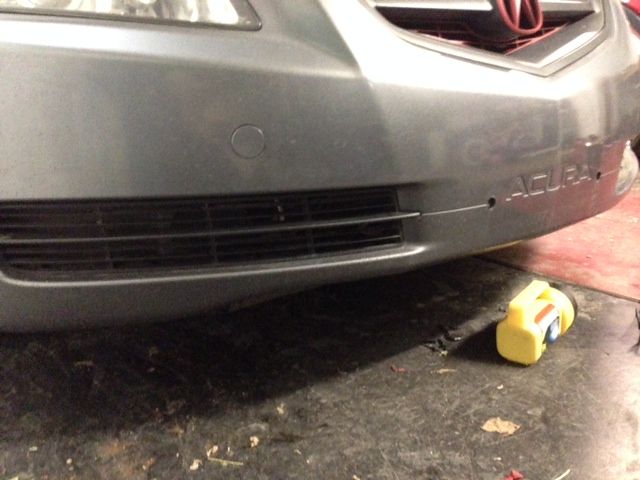
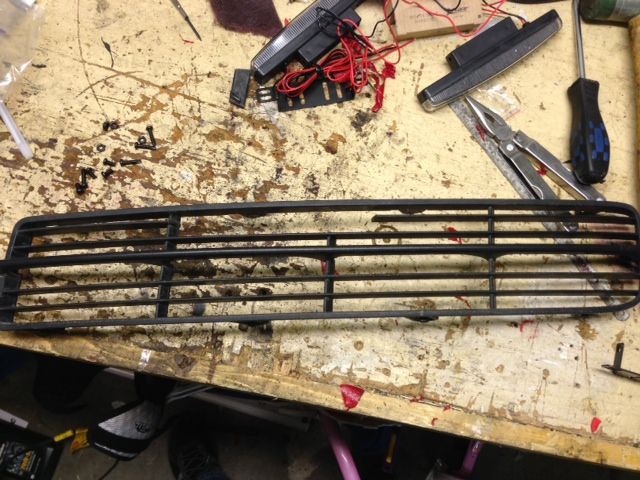
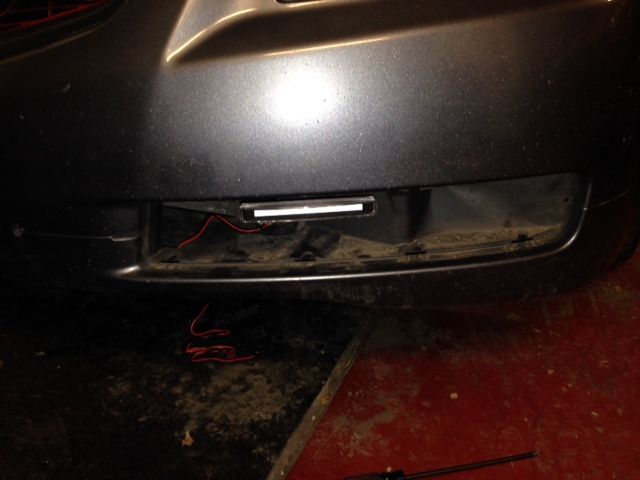
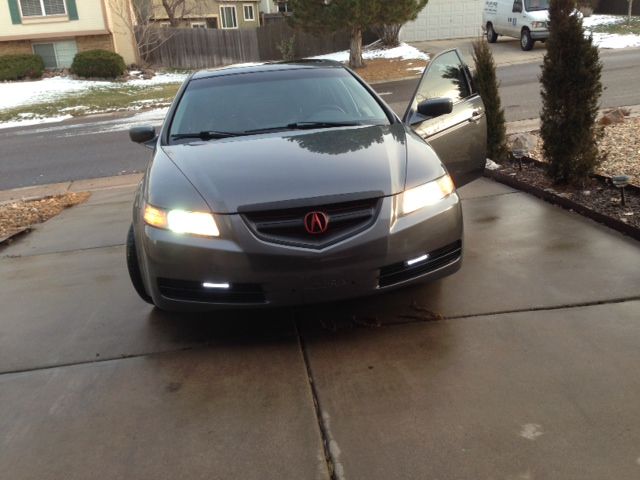
This first pic is what the grill looks like before doing anything, sorry it's kind of dark.
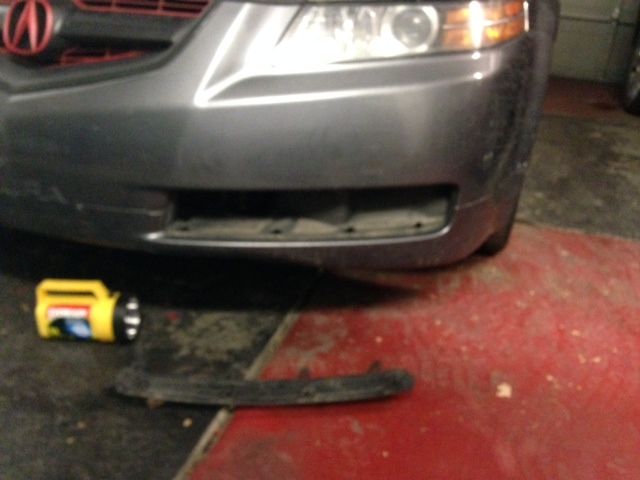
Removing the plastic grill piece is extremely easy there are 8 total push tabs 4 on top and 4 on bottom, start on one end, you will need to pull on the grill as you push these tabs in make sure you get both top and bottom tabs on one end then make your way over while keeping constant pulling force on the grill, it is plastic so don't pull too hard.
Tabs look like this:
Grill pulled off:
Next is decide where you want to install the Light, I chose the top so i have a nice sturdy mounting point for the lights, align the light to your grill and mark which bar you need to cut to make them fit.
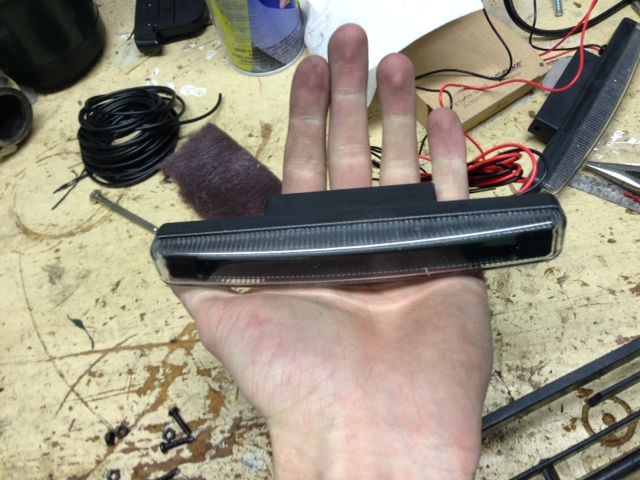
I positioned mine so that one side of the light is next to a support side of the bracket. Mark where you need to cut and cut away I just used a soft metal cutting blade with my hands this way its a nice clean cut and you have smooth surfaces when its cut to eliminate the need to file anything to a round edge.
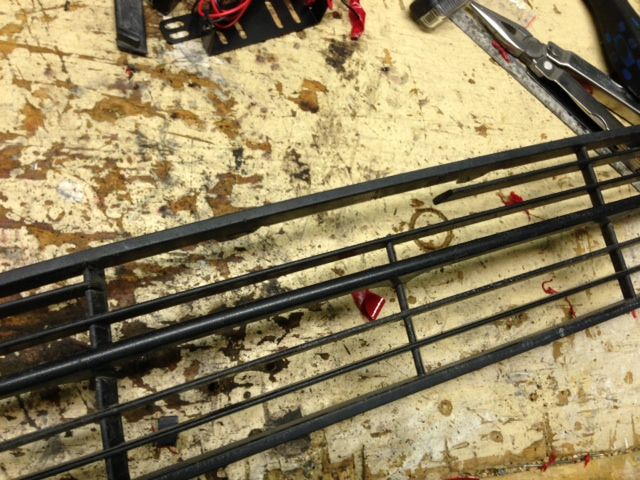
Fit the light in to make sure you are wide enough if you cut too short just use a fine grit file and file down enough to where it will fit. Always measure twice and cut once, if you cut too much you will have a big gap and will probobly have to buy a new grill.
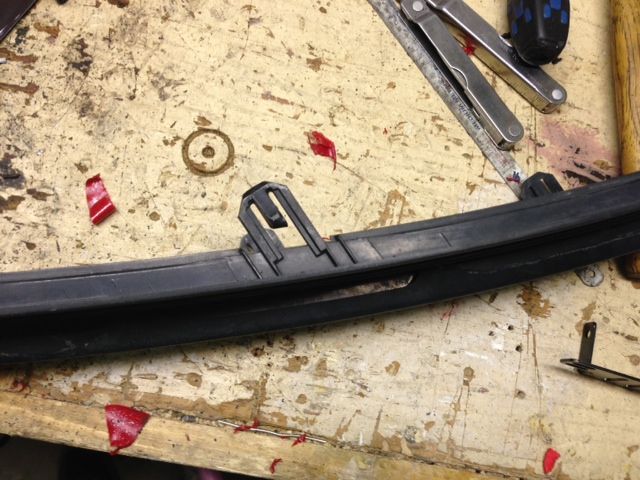
Next is the mounting bracket, they always make these brackets for the light to mount just off the mounting surface but because these are LED's that do not get hot and they are going in a bit of a tight space you will need to modify the mounting bracket by drilling new mounting holes for the light fixture.
Original mounting holes:
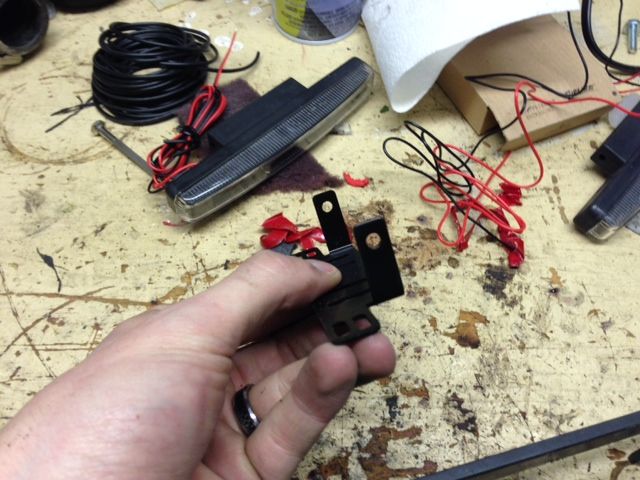
New holes drilled:
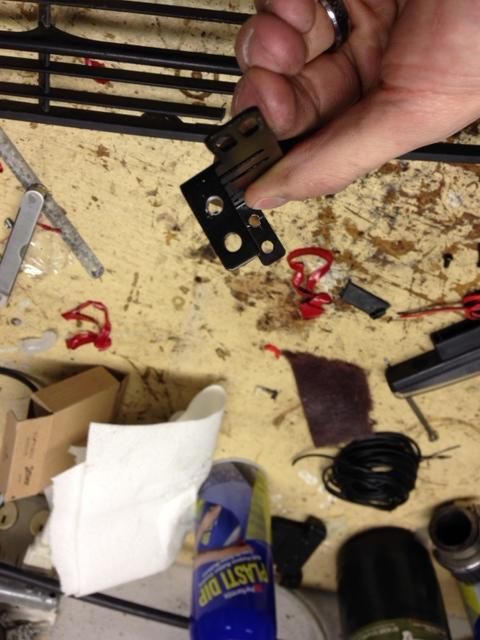
Be careful when drilling your holes, you want to measure so that the bracket sits flush with the light. I placed the bracket in my vice and used a pair of pliers to hold the bracket steady when drilling, its not thick steel and it will bend when pressing down to drill the holes.
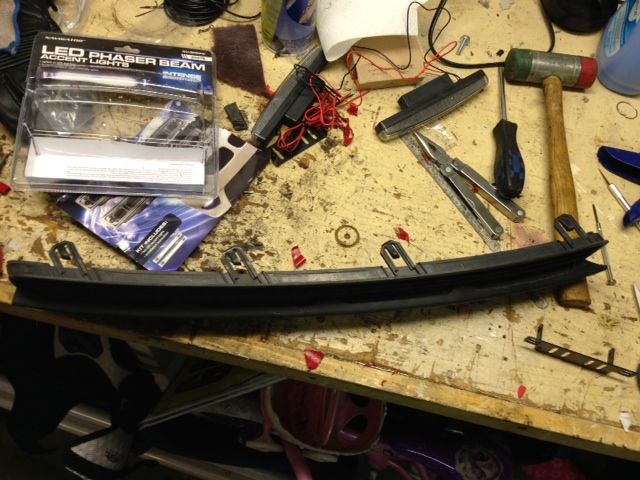
Mount the bracket on the light and make sure you are nice and flush.
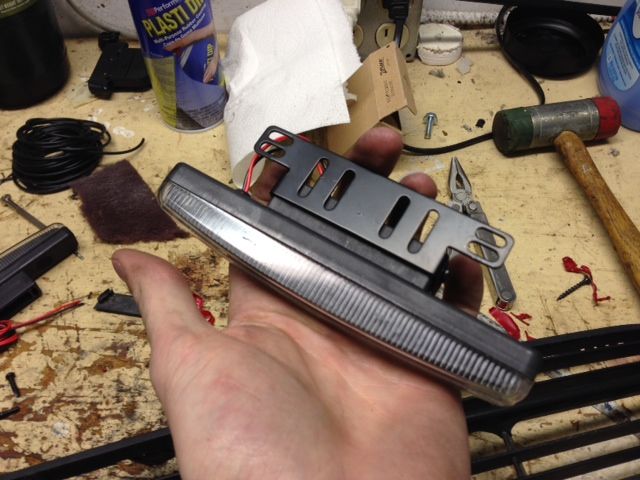
Now its time to mark where you will be mounting the lights on the car, this part is a bit tricky as you do not have a clear shot from the ground up, there are panels in the way and you have to work at an angle.
Put the light with the mounting bracket inside the grill piece, then place the grill piece back on the car.
You can use a marker or paint pen, shine a light through the grill and work from the back side of the bumper to see where the mounting points are and try to mark them, its a PIA and you will need to have patience and really focus so you hit the right points.
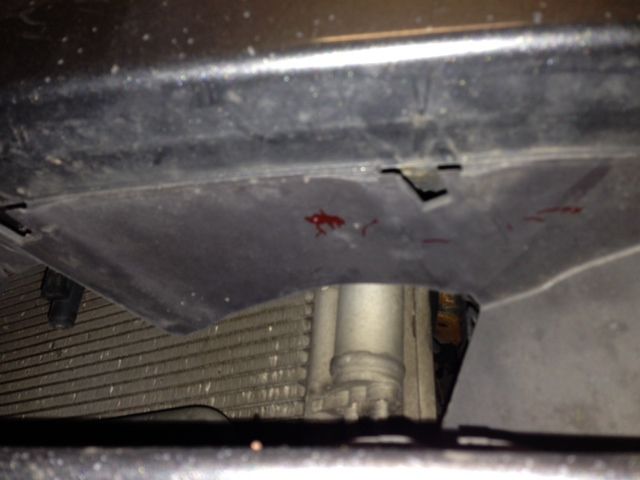
Once you have your insanely retarded all over the place mark its time to measure. Measure the total distance from the end of the grill to your first mounting point on the light go to the bumper and measure from the inside wall to your first mark, adjust your mark so you have the correct drilling point. Then measure the distance from the first mounting point to the next on the bracket and adjust your mark on the bumper.
Drill some pilot holes in the the bumper, the mounting screws provided are self tapping screws but they are flat tipped so pilot holes are necessary, make sure you do not drill holes too big. Next is tricky, you need either a stubby Phillips head or a 90 degree Phillips to get the screws in. once you get them started and have tapped the threads into the bumper pull them back out and install the light fixture.
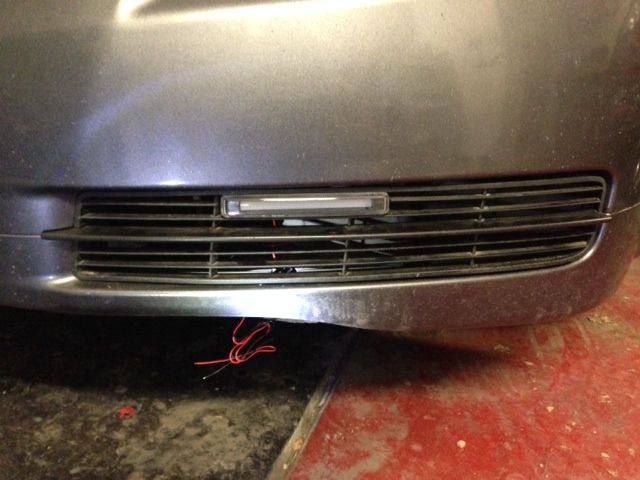
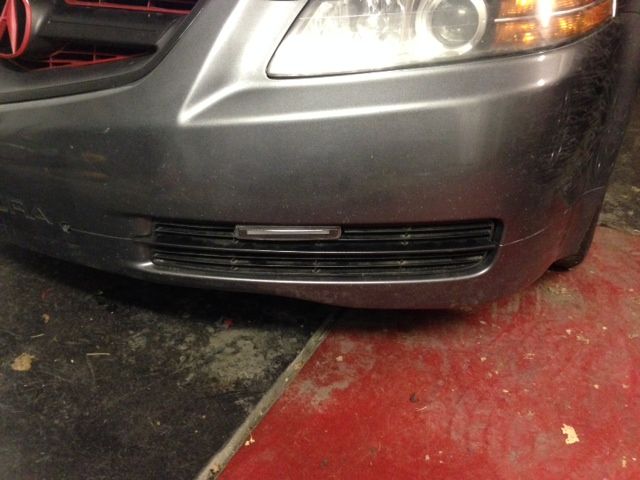
If you did your measurements correctly then the grill should slide right over the light and snap right into place.
For the wiring it is up to you, you can wire them on a switch you install, the daytime running lights, or the existing fog lights.
I tapped mine into the existing fog lights on the car since they are already on a switch.
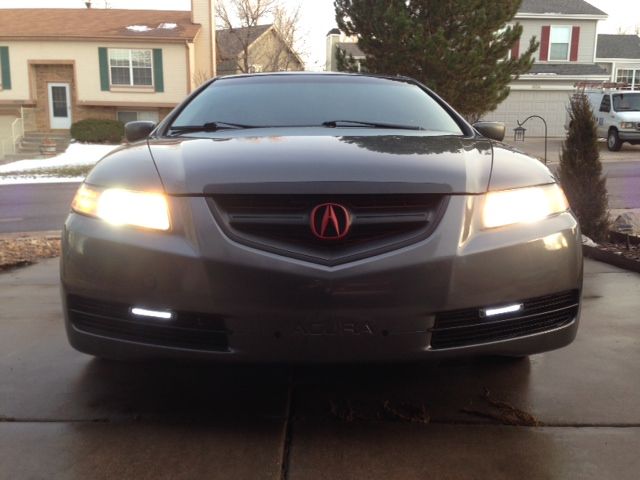
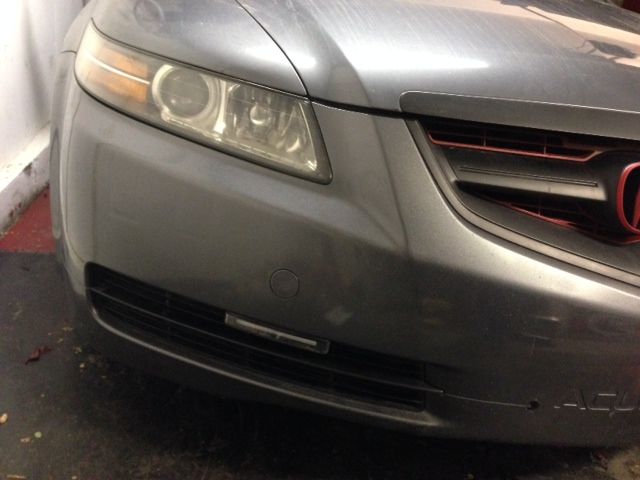
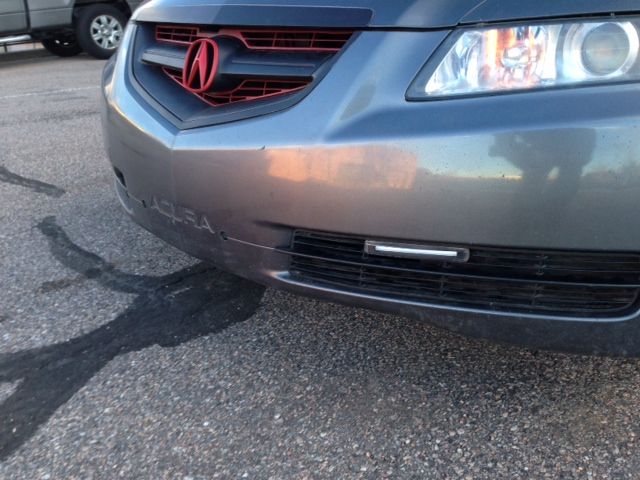
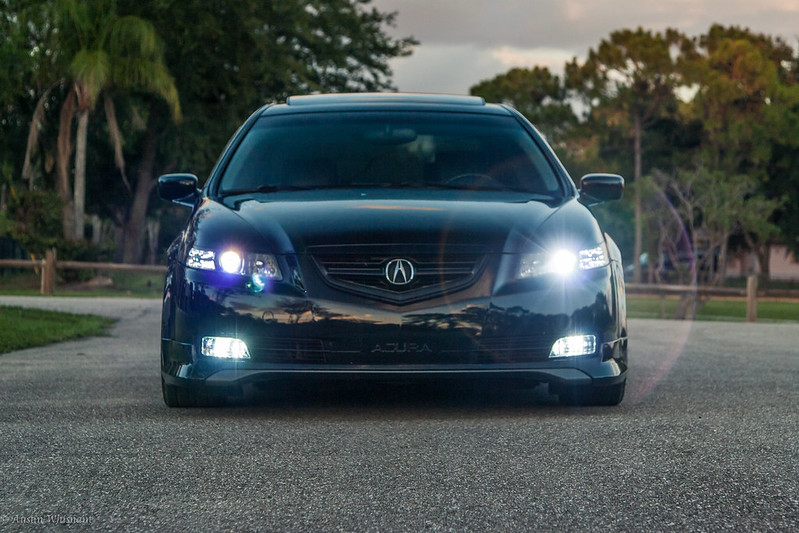
These are not exactly heavy duty super bright fog lights but they do help quite a bit, make the car look pretty aggressive at night and it was a clean install so it looks...well clean.
This project took me about 1.5 hours and cost me about $65 for the lights.
Hope this helps anyone interested in doing this mod
This first pic is what the grill looks like before doing anything, sorry it's kind of dark.

Removing the plastic grill piece is extremely easy there are 8 total push tabs 4 on top and 4 on bottom, start on one end, you will need to pull on the grill as you push these tabs in make sure you get both top and bottom tabs on one end then make your way over while keeping constant pulling force on the grill, it is plastic so don't pull too hard.
Tabs look like this:

Grill pulled off:


Next is decide where you want to install the Light, I chose the top so i have a nice sturdy mounting point for the lights, align the light to your grill and mark which bar you need to cut to make them fit.

I positioned mine so that one side of the light is next to a support side of the bracket. Mark where you need to cut and cut away I just used a soft metal cutting blade with my hands this way its a nice clean cut and you have smooth surfaces when its cut to eliminate the need to file anything to a round edge.


Fit the light in to make sure you are wide enough if you cut too short just use a fine grit file and file down enough to where it will fit. Always measure twice and cut once, if you cut too much you will have a big gap and will probobly have to buy a new grill.
Next is the mounting bracket, they always make these brackets for the light to mount just off the mounting surface but because these are LED's that do not get hot and they are going in a bit of a tight space you will need to modify the mounting bracket by drilling new mounting holes for the light fixture.
Original mounting holes:

New holes drilled:

Be careful when drilling your holes, you want to measure so that the bracket sits flush with the light. I placed the bracket in my vice and used a pair of pliers to hold the bracket steady when drilling, its not thick steel and it will bend when pressing down to drill the holes.
Mount the bracket on the light and make sure you are nice and flush.

Now its time to mark where you will be mounting the lights on the car, this part is a bit tricky as you do not have a clear shot from the ground up, there are panels in the way and you have to work at an angle.
Put the light with the mounting bracket inside the grill piece, then place the grill piece back on the car.

You can use a marker or paint pen, shine a light through the grill and work from the back side of the bumper to see where the mounting points are and try to mark them, its a PIA and you will need to have patience and really focus so you hit the right points.

Once you have your insanely retarded all over the place mark its time to measure. Measure the total distance from the end of the grill to your first mounting point on the light go to the bumper and measure from the inside wall to your first mark, adjust your mark so you have the correct drilling point. Then measure the distance from the first mounting point to the next on the bracket and adjust your mark on the bumper.
Drill some pilot holes in the the bumper, the mounting screws provided are self tapping screws but they are flat tipped so pilot holes are necessary, make sure you do not drill holes too big. Next is tricky, you need either a stubby Phillips head or a 90 degree Phillips to get the screws in. once you get them started and have tapped the threads into the bumper pull them back out and install the light fixture.

If you did your measurements correctly then the grill should slide right over the light and snap right into place.


For the wiring it is up to you, you can wire them on a switch you install, the daytime running lights, or the existing fog lights.
I tapped mine into the existing fog lights on the car since they are already on a switch.


These are not exactly heavy duty super bright fog lights but they do help quite a bit, make the car look pretty aggressive at night and it was a clean install so it looks...well clean.
This project took me about 1.5 hours and cost me about $65 for the lights.
Hope this helps anyone interested in doing this mod

The following users liked this post:
EvilVirus (04-21-2014)


The following users liked this post:
EvilVirus (01-02-2014)

Trending Topics
The following users liked this post:
Undying Dreams (04-22-2014)
04-22-2014, 11:47 AM
#9
Race Director
iTrader: (3)
Join Date: Feb 2012
Location: South Florida
Age: 30
Posts: 18,278
Received 3,824 Likes
on
2,847 Posts

The following 3 users liked this post by Undying Dreams:
 04-22-2014, 01:29 PM
#11
[x] FWCC [x]
 but i dont want to go through all the trouble in switching them out.
The following users liked this post:
Undying Dreams (04-22-2014)


Thread
Thread Starter
Forum
Replies
Last Post
prox
5G TLX Problems & Fixes
6
09-01-2015 02:03 AM