
DIY: The Big 3+1 (plus battery cable upgrade)

Thread Starter
Ah, hamburgers!
Joined: Jun 2012
Posts: 107
Likes: 35
From: Somerset, NJ
DIY: The Big 3+1 (plus battery cable upgrade)
The benefits of a Big 3 are all over the internet so if you have a demanding system, this is the next thing you should be looking into.
Here I did the traditional three point upgrade (alternator to battery, battery negative to chassis, and engine to chassis) plus upgrade the transmission case ground. In addition since I had some more extra wire left, I went ahead and upgraded the battery to fuse block cable.
Parts needed:
10 ft. 1/0 cable (high quality flexible type)
1/0 Terminals
1/0 Fuse holder with 150a fuse
Heat shrink
Techflex
Step 1: First and foremost, you want to go ahead and terminate all of your cable runs. The alternator to battery runs about 4-5 feet depending how you secure it (with the fuse holder included). The battery negative to chassis, engine to chassis, and transmission case to chassis are all about 1 foot long each. I used Techflex to cover the wire and copper lugs and heatshrink to finish up the runs.
Step 2: Take the rubber boot off the alternator cable and unbolt the 12mm nut. BE CAREFUL TO NOT TO TOUCH ANY PART OF THE RATCHET TO THE CHASSIS!!!
Step 3: Install the 1/0 cable first onto the threaded stud on the alternator then the stock cable on top of it. Then re-thread the 12mm nut from the previous step and tighten. Run the cable to the battery whichever you way like. I ran mine behind coolant reservoir. Here is the finished product.
Step 4: Next is the engine to chassis groudning. Here you want to go ahead and remove the two 10mm bolts that hold onto that flimsy little grounding cable on the passenger side engine mount to chassis.
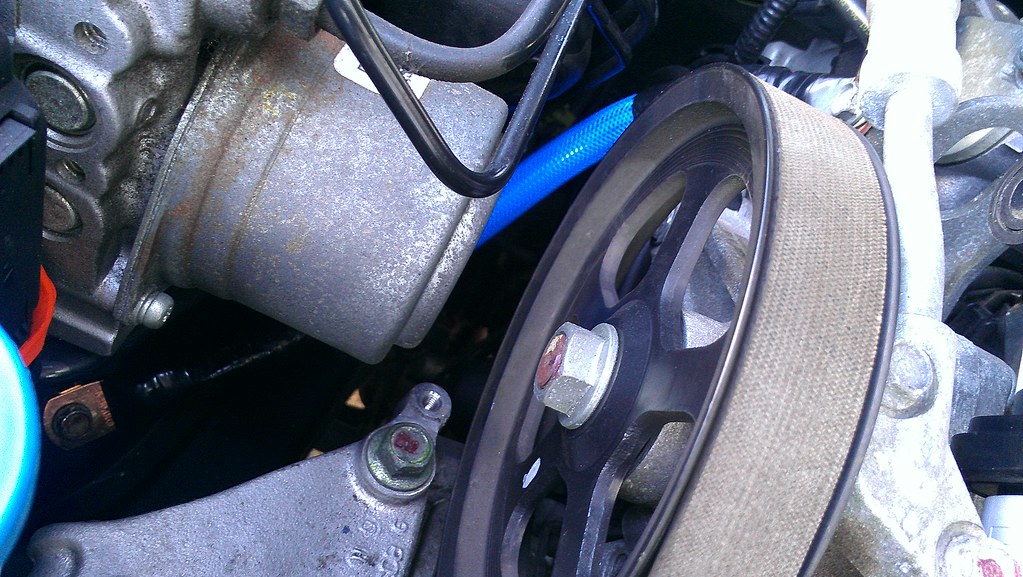
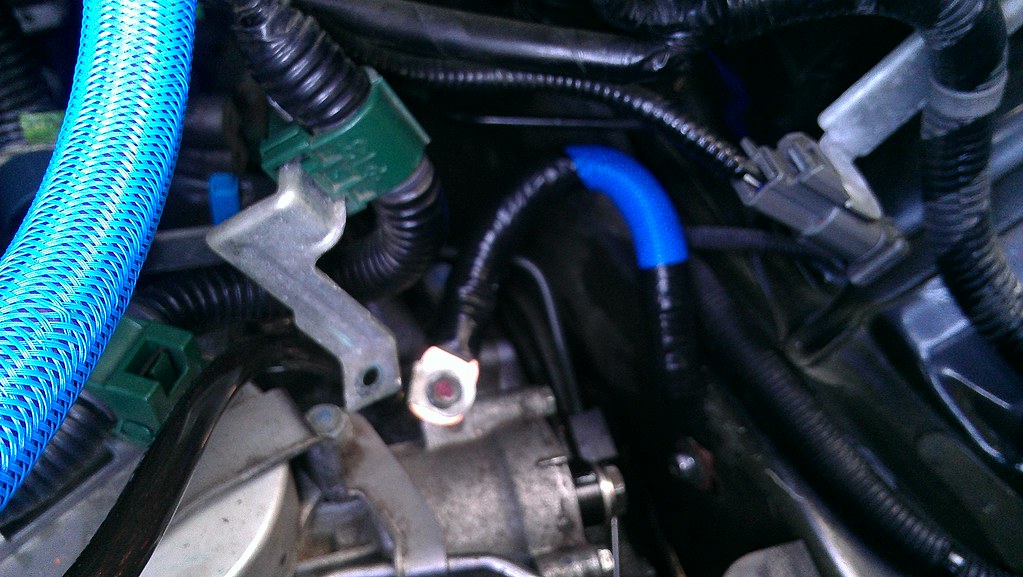
Step 5: To upgrade this point, I did not use the same two locations as stock. I measured the stock chassis ground point and other engine ground points with the minimal amount of resistance. The lowest resistance engine ground point I ended up using is right above/behind the PS pulley. There is a small ground cable already connected to it so it's not too hard to locate. Here it is:
Here is the final product:
Step 6: Next point is the battery negative to chassis. This is as simple as it gets. Just use the stock grounding point.
Step 7: Take off the intake. Like the battery negative, transmission case grounding is also very simple. We're just going to use the stock grounding point.
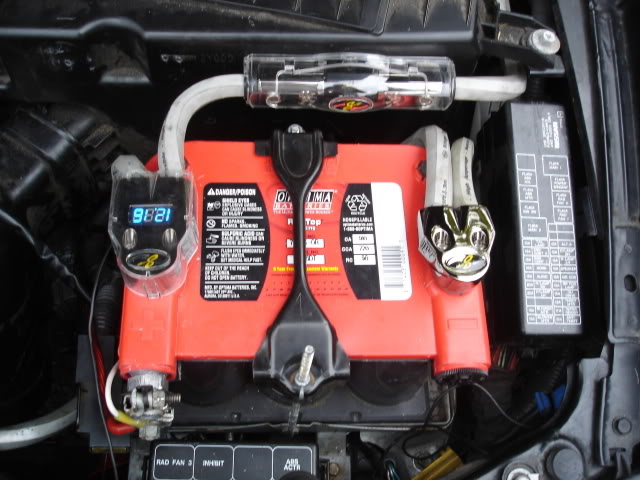
I also went ahead and replaced the stock battery positive to fuse block wiring. The stock cable is barely a 8 ga. wire. Since I had extra wire left, I just used the stock fuse block terminal (90 degree) and soldered on the 1/0 wire. The other end is terminated into a aftermarket battery terminal.
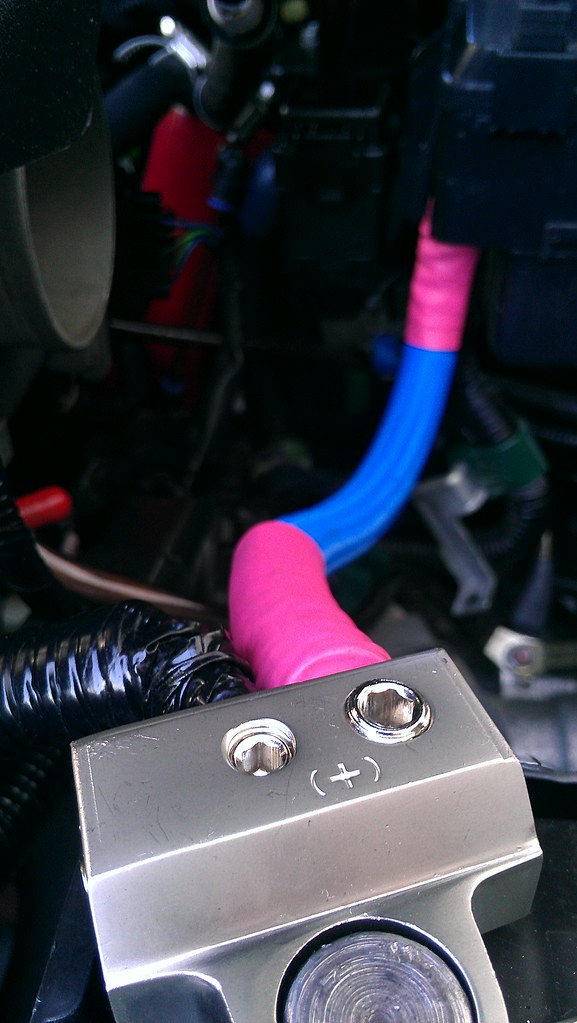
Here is the finished product.

Here I did the traditional three point upgrade (alternator to battery, battery negative to chassis, and engine to chassis) plus upgrade the transmission case ground. In addition since I had some more extra wire left, I went ahead and upgraded the battery to fuse block cable.
Parts needed:
10 ft. 1/0 cable (high quality flexible type)
1/0 Terminals
1/0 Fuse holder with 150a fuse
Heat shrink
Techflex
Step 1: First and foremost, you want to go ahead and terminate all of your cable runs. The alternator to battery runs about 4-5 feet depending how you secure it (with the fuse holder included). The battery negative to chassis, engine to chassis, and transmission case to chassis are all about 1 foot long each. I used Techflex to cover the wire and copper lugs and heatshrink to finish up the runs.
Step 2: Take the rubber boot off the alternator cable and unbolt the 12mm nut. BE CAREFUL TO NOT TO TOUCH ANY PART OF THE RATCHET TO THE CHASSIS!!!
Step 3: Install the 1/0 cable first onto the threaded stud on the alternator then the stock cable on top of it. Then re-thread the 12mm nut from the previous step and tighten. Run the cable to the battery whichever you way like. I ran mine behind coolant reservoir. Here is the finished product.
Step 4: Next is the engine to chassis groudning. Here you want to go ahead and remove the two 10mm bolts that hold onto that flimsy little grounding cable on the passenger side engine mount to chassis.
Step 5: To upgrade this point, I did not use the same two locations as stock. I measured the stock chassis ground point and other engine ground points with the minimal amount of resistance. The lowest resistance engine ground point I ended up using is right above/behind the PS pulley. There is a small ground cable already connected to it so it's not too hard to locate. Here it is:
Here is the final product:
Step 6: Next point is the battery negative to chassis. This is as simple as it gets. Just use the stock grounding point.
Step 7: Take off the intake. Like the battery negative, transmission case grounding is also very simple. We're just going to use the stock grounding point.
I also went ahead and replaced the stock battery positive to fuse block wiring. The stock cable is barely a 8 ga. wire. Since I had extra wire left, I just used the stock fuse block terminal (90 degree) and soldered on the 1/0 wire. The other end is terminated into a aftermarket battery terminal.
Here is the finished product.
Last edited by jiggad369; Sep 2, 2012 at 09:18 PM.

Thread Starter
Ah, hamburgers!
Joined: Jun 2012
Posts: 107
Likes: 35
From: Somerset, NJ
It will not let the electrical system suffer from a voltage drop from high loads of electrical abuse. The fuse is there so just incase the alternator goes bad, the battery and the other side of the wire is always protected.

Three Wheelin'
Joined: Mar 2010
Posts: 1,785
Likes: 96
Fuse also helps for when you get in an accident and short out the battery. I've also done the big 3 but mine aren't fused. I didn't replace the cables though, just added to the stock cables.
Last edited by SpiderX1016; Sep 3, 2012 at 02:15 PM.
Thread Starter
Ah, hamburgers!
Joined: Jun 2012
Posts: 107
Likes: 35
From: Somerset, NJ
Trending Topics
Better grounding, less voltage drop, bulbs won't dim when the stereo hits, some cars you get better spark and the engine runs smoother, I did it to my last 2 vehicles and it does make a difference especially with if you have subs. I'd be interested in doing this if there was a kit made that ran along the stock cables, on my Impala I have a 1/0 kit that replaces the stock cables and honestly it's a PITA to work with cause it's so thick, I get annoyed when I have to disconnect the battery. On my last car, Trailblazer SS, I had a kit that was 4 gauge and left the stock stuff in place, it still did the trick, I had 2 amps and my bulbs didn't dim anymore. It would be neat to see if it made a difference if somebody ran extra grounds to the coils, I think I ran like 5 extra grounds on the TBSS.
Nice write-up!!!
For ease of installation, use Stinger Cable EXPERT series...this stuff is AMAZINGLY easy to deal with. Not trying to steal OPs thunder, but the bend radius speak for itself...from my old whip:
For ease of installation, use Stinger Cable EXPERT series...this stuff is AMAZINGLY easy to deal with. Not trying to steal OPs thunder, but the bend radius speak for itself...from my old whip:

Instructor
Joined: May 2012
Posts: 201
Likes: 30
From: Concord, NC
Getting ready to do the Big 3 install today . Question is , can I use 4 gauge wire or do I need to use 1/0 gauge ? I already have a bunch of extra 4 gauge , just need to get a few ring terminals.

Instructor
Joined: Mar 2011
Posts: 107
Likes: 4
From: SA, TX
Nice write up.
I thought the big 3 included grounding for the throttle body as well (TB, engine block, & transmission block)?
Also, it seem's like 1/0 is a little of an overkill? 6 or 8 ga seems like it should be more than enough for a ground as long as you use high quality copper wire.
I thought the big 3 included grounding for the throttle body as well (TB, engine block, & transmission block)?
Also, it seem's like 1/0 is a little of an overkill? 6 or 8 ga seems like it should be more than enough for a ground as long as you use high quality copper wire.
Last edited by 08WDPTL; Oct 4, 2012 at 08:14 AM.
Three Wheelin'
Joined: Mar 2010
Posts: 1,785
Likes: 96
Nice write up.
I thought the big 3 included grounding for the throttle body as well (TB, engine block, & transmission block)?
Also, it seem's like 1/0 is a little of an overkill? 6 or 8 ga seems like it should be more than enough for a ground as long as you use high quality copper wire.
I thought the big 3 included grounding for the throttle body as well (TB, engine block, & transmission block)?
Also, it seem's like 1/0 is a little of an overkill? 6 or 8 ga seems like it should be more than enough for a ground as long as you use high quality copper wire.
Instructor
Joined: Oct 2009
Posts: 224
Likes: 38
From: Memphis, TN
http://www.madelectrical.com/electri...witworks.shtml
Alot of reading, but is a great "how it works" for battery/alternator operation. Mostly little older cars but applies to newer cars also, aka undersized battery/ground wires etc......
OP, DeathMetal great jobs. This is overlooked for performance mod. Electrical in a car running optimal volts evrything benefits.
Last edited by hofiveo; Oct 5, 2012 at 06:42 AM.


So I did mine this weekend, but with a slightly different approach for the negative and grounding cables. I purchased those instead of fabricating them. They are 1 gauge cables manufactured by Grote and available through a number of retailers, including Amazon, Grainger, and Drillspot. The two ground cables are 10" long (p/n 84-9256) and the battery cable is 12" long (84-9241).


I hacked up a new battery/starter cable and ran the new starter cable to the new battery terminal. The original starter cable was corroding at the battery terminal and, recently, the car wasn't starting as easily.
Also, I didn't mention that I used 4 gauge wire between the alternator and battery and between the battery and fuse box (using the fuse box terminal from my new OEM battery cable). Since I only added onto the factory alternator cable (which is about 4 gauge), I now have two 4-gauge wires carrying current from the alternator to the battery: the OEM path and my newly added direct path. The cross sectional area of 4 gauge is about half of 1 gauge. So the two 4-gauge positive cables are pretty well balanced with the 1-gauge negative cable.
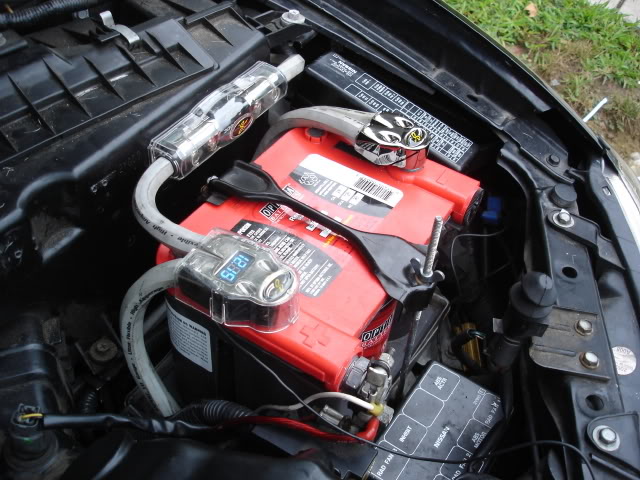
I also positioned the fuse between the alternator and battery much closer to the battery. You should minimize the length of unfused heavy gauge cable running from the battery. It poses a fire hazard in case of an accident. Here are a few more pics:
Last edited by AndrewA; Oct 24, 2012 at 10:33 AM.
Instructor
Joined: May 2012
Posts: 201
Likes: 30
From: Concord, NC
Looks good man ! I used 4 gauge for all my grounds . I had a bunch left over , so just used that . I had the same issue with my battery terminals corroding off . Looks like you went with the same kicker battery terminal as i did , it was a quick fix from bestbuy . I eventually changed both when i installed my system .


I responded to your PM, but for the benefit of others, I basically pried open the factory fuse box terminal (huge PITA requiring tools and patience) and soldered and heat shrink wrapped the new cable to the terminal.
If you're asking about the pre-fabbed ground and negative battery cables I got, it seems they are 3/8"
Another note, the factory ground bolts are probably a little short given that the pre-fabbed cable terminals are thicker (lead-plated copper). So I used slightly longer ground bolts with flat and lock washers.
Another note, the factory ground bolts are probably a little short given that the pre-fabbed cable terminals are thicker (lead-plated copper). So I used slightly longer ground bolts with flat and lock washers.


Thanks for posting those prefabbed ones Andrew. At the very least I'm gonna do the battery negative, should only take a minute to swap out and that wire does look very thin stock. I went from a cheap battery to a Diehard Platinum and I swear my car idles smoother and starts quicker, better cables only help that. I also recently added an 800 watt sub amp, I don't see any noticeable flickers but the stock charging system does seem to keep up with it fine. But like I said earlier from previous experience these mods are worth while.
Edit:
I googled the part number for the battery ground, it was only $13 shipped from Drillspot, screw it I ordered one.
http://www.drillspot.com/Shopping/Cart
Edit:
I googled the part number for the battery ground, it was only $13 shipped from Drillspot, screw it I ordered one.
http://www.drillspot.com/Shopping/Cart
Last edited by 350; Mar 1, 2013 at 12:13 PM.

Three Wheelin'
Joined: Feb 2006
Posts: 1,470
Likes: 230
I can't tell from deathmetal's picture, but I don't like the ground setup in andrewa's picture. There should be a main ground cable from the battery, directly to the engine block, as close to the starter as is practical. I like to use a starter mounting bolt when possible. The starter is the biggest current draw most cars see, hence the biggest cable. Next best would be to use large cable from his body grounding point to the starter mounting bolt. Some people mentioned using 4 ga wire. I don't think 4ga is much of an upgrade from stock for the 2 main cables. Honda uses cable with a lot of really fine wires. A lot of the aftermarket stuff uses fewer, larger strands which is stiffer, and doesn't carry as much current. Additionally the insulation can make a cable look a lot larger than it is. I used 4ga from the battery to the fuse block. Check out welding cable for fine wire strands and flexible insulation. Grainger, or Mcmaster-Carr has the cable and lugs. High end stereo supplies usually have the best battery cable ends.
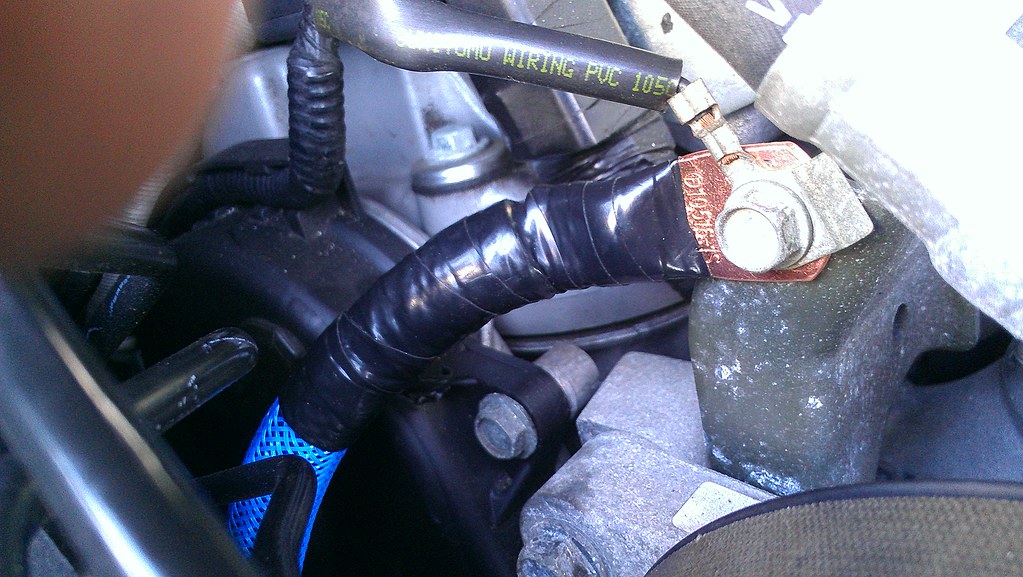
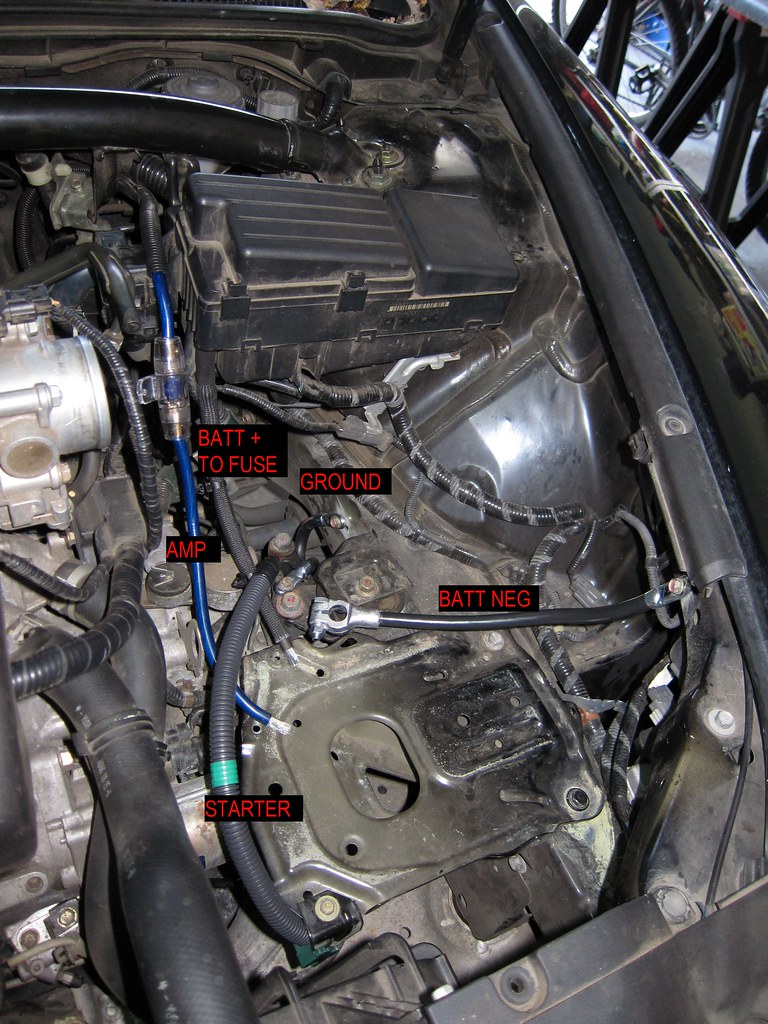
Just installed the negative battery cable and an extra ground from the fender/batt neg bolt to the starter, the one AndrewA posted makes this super simple, takes longer to reset the nav then the install did. I had a piece of 4 gauge with 2 ring terminals already on it that I used a while back to connect a capacator to ground so I reused that, it was maybe 16" long and I used the smaller bolt on the front of the starter right to the fender. That way the battery is daisy chained to the engine and the engine is grounded to the fender again. I plan on installing an extra 4 gauge from the battery positive to the alternator over the weekend, I just had these ready to go and a few free minutes. I have the stock neg cable sitting on top of the battery just for a comparison. For $13 why wouldn't you upgrade?

Second picture kinda sucks but you get the idea, I'm not going out to take another right now.
Second picture kinda sucks but you get the idea, I'm not going out to take another right now.
Suzuka Master
Joined: Sep 2006
Posts: 5,071
Likes: 596
From: San Diego, CA
https://acurazine.com/forums/3g-tl-photograph-gallery-96/hyper-voltage-grounding-kit-install-606115/
did someone say daisy chain and grounding?
This was originally done as a performance mod not an audio mod
here is a link to old article. http://www.hondatuningmagazine.com/t.../photo_03.html
did someone say daisy chain and grounding?
This was originally done as a performance mod not an audio mod
here is a link to old article. http://www.hondatuningmagazine.com/t.../photo_03.html
Last edited by pohljm; Mar 7, 2013 at 06:34 PM.
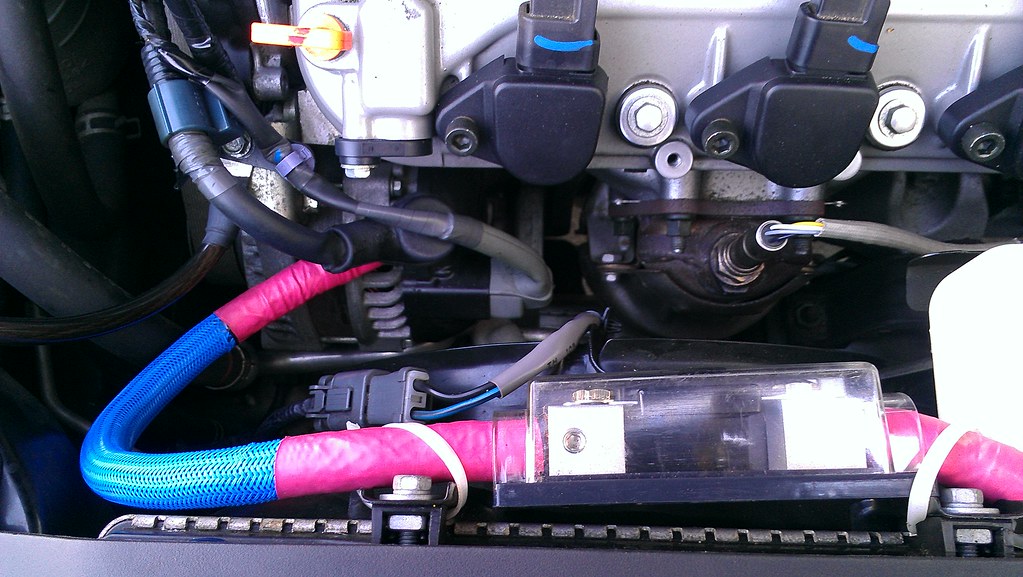
So I added a few more grounds today and the positive to alternator.
I did a grounding star as show in an older thread on here around the top of the engine and from the little bracket next to the alternator to the fender on the passenger side. Now I have extra grounds to both fenders, I still have a few feet of cable left so I'll probably add an extra positive from battery to fuse box and extra ground from throttle body to the driver side fender so that the star on top of the engine is grounded to both fenders. Everything is 4 gauge except the 1 gauge battery neg to fender. I covered all of the 4 gauge grounds cause I only had red wire, I know it doesn't make a difference but if someone else ever had to work on the car I wouldn't want them thinking positive wires are everywhere. Results stereowise are killer, my sub amp feels like it's hitting a few decibels louder with me adjusting nothing. I can't comment on anything like throttle response which some people have reported as it's DBW, theoretically grounding could help that but I haven't driven it yet.
Yes my engine bay is dirty but it's my daily so I don't care.


Yeah I need a cleaner looking positive battery cable, but stock works for now and have the cable to the alt and sub amp both on it getting plenty of juice. I bought a compact JL terminal which I'll probably use later but I'll need more rings, it has a bolt on the side so you can add as many rings as you want.
I did a grounding star as show in an older thread on here around the top of the engine and from the little bracket next to the alternator to the fender on the passenger side. Now I have extra grounds to both fenders, I still have a few feet of cable left so I'll probably add an extra positive from battery to fuse box and extra ground from throttle body to the driver side fender so that the star on top of the engine is grounded to both fenders. Everything is 4 gauge except the 1 gauge battery neg to fender. I covered all of the 4 gauge grounds cause I only had red wire, I know it doesn't make a difference but if someone else ever had to work on the car I wouldn't want them thinking positive wires are everywhere. Results stereowise are killer, my sub amp feels like it's hitting a few decibels louder with me adjusting nothing. I can't comment on anything like throttle response which some people have reported as it's DBW, theoretically grounding could help that but I haven't driven it yet.
Yes my engine bay is dirty but it's my daily so I don't care.
Yeah I need a cleaner looking positive battery cable, but stock works for now and have the cable to the alt and sub amp both on it getting plenty of juice. I bought a compact JL terminal which I'll probably use later but I'll need more rings, it has a bolt on the side so you can add as many rings as you want.

Advanced
Joined: Jul 2014
Posts: 98
Likes: 11
From: Aurora, IL
The Big 3 is for what exactly? Seems like just huge after market amps/stereo systems are being discussed, with some anecdotal comments about easier starting / smoother idle / brighter HID's...
That about sum it up?
Rev
That about sum it up?
Rev
At a minimum, you're going to immediately realize the engine turning over faster and higher voltage stability...but take that with a grain of salt; I've not hooked a VM to the terminal for a before and after. Once your amp hits 500W and above, this is a really smart idea.
FWIW, most new BMWs feature all 1/0AWG grounds, and Audi at 4AWG...
FWIW, most new BMWs feature all 1/0AWG grounds, and Audi at 4AWG...
It's really just cheap insurance against grounding issues and voltage drop. Most mass produced cars will use the thinnest wire to get the job done which can hurt performance and lead to grounding issues. If you have a system it's a must, but it's still worth doing otherwise. The only time I wouldn't do it is if it were a track only car to save weight, but even then I wouldn't skimp on the grounds.

10th Gear
Joined: Sep 2019
Posts: 10
Likes: 1
Big 3 upgrade on 2011 MDX
Hello everyone,
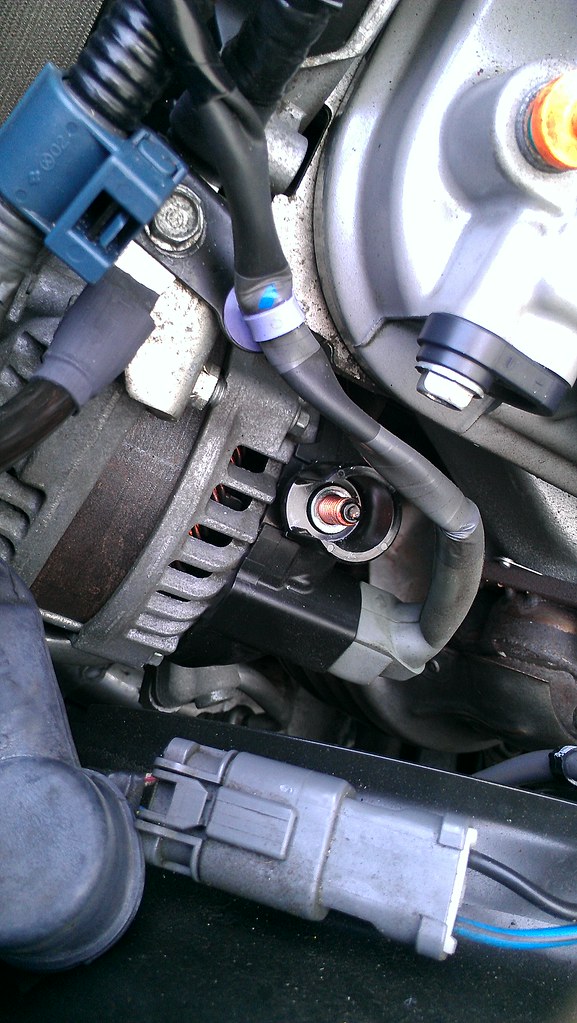
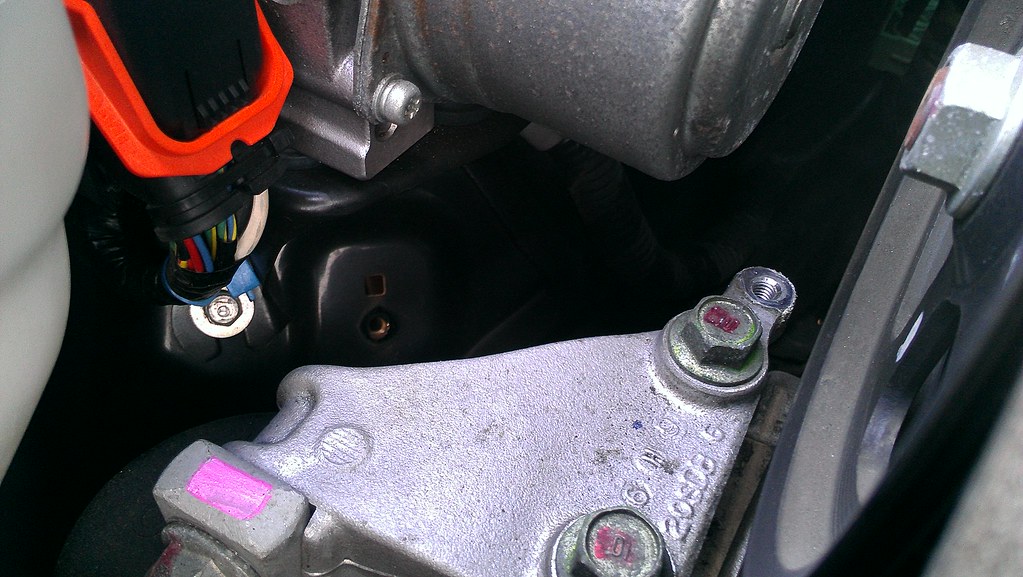
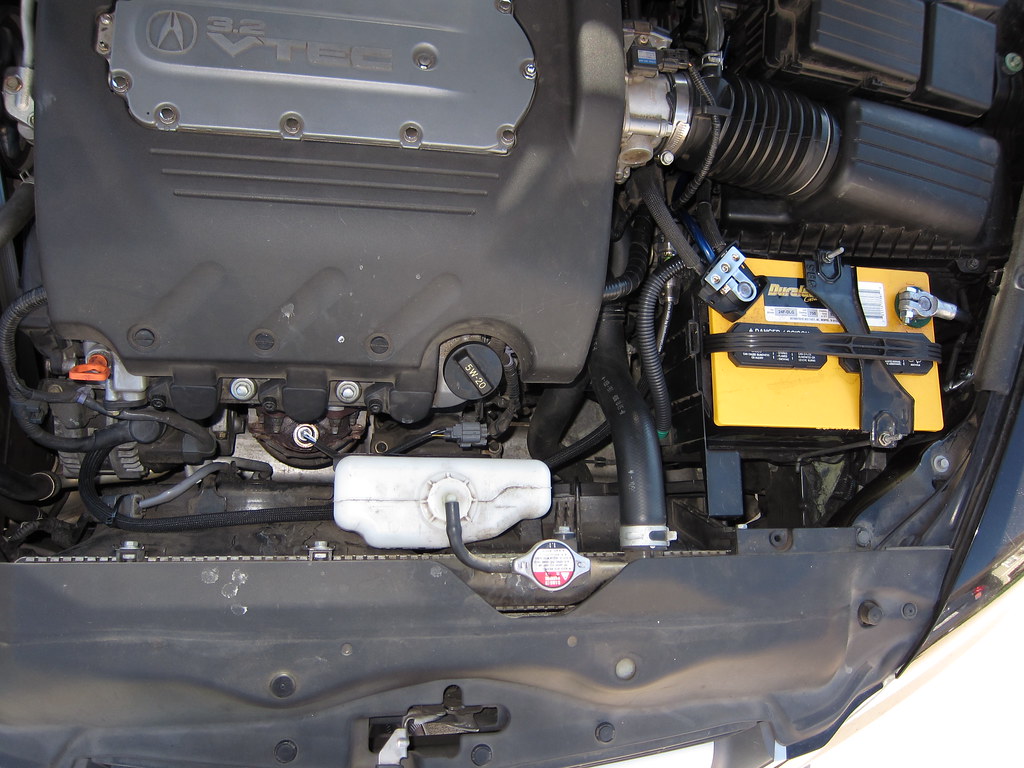
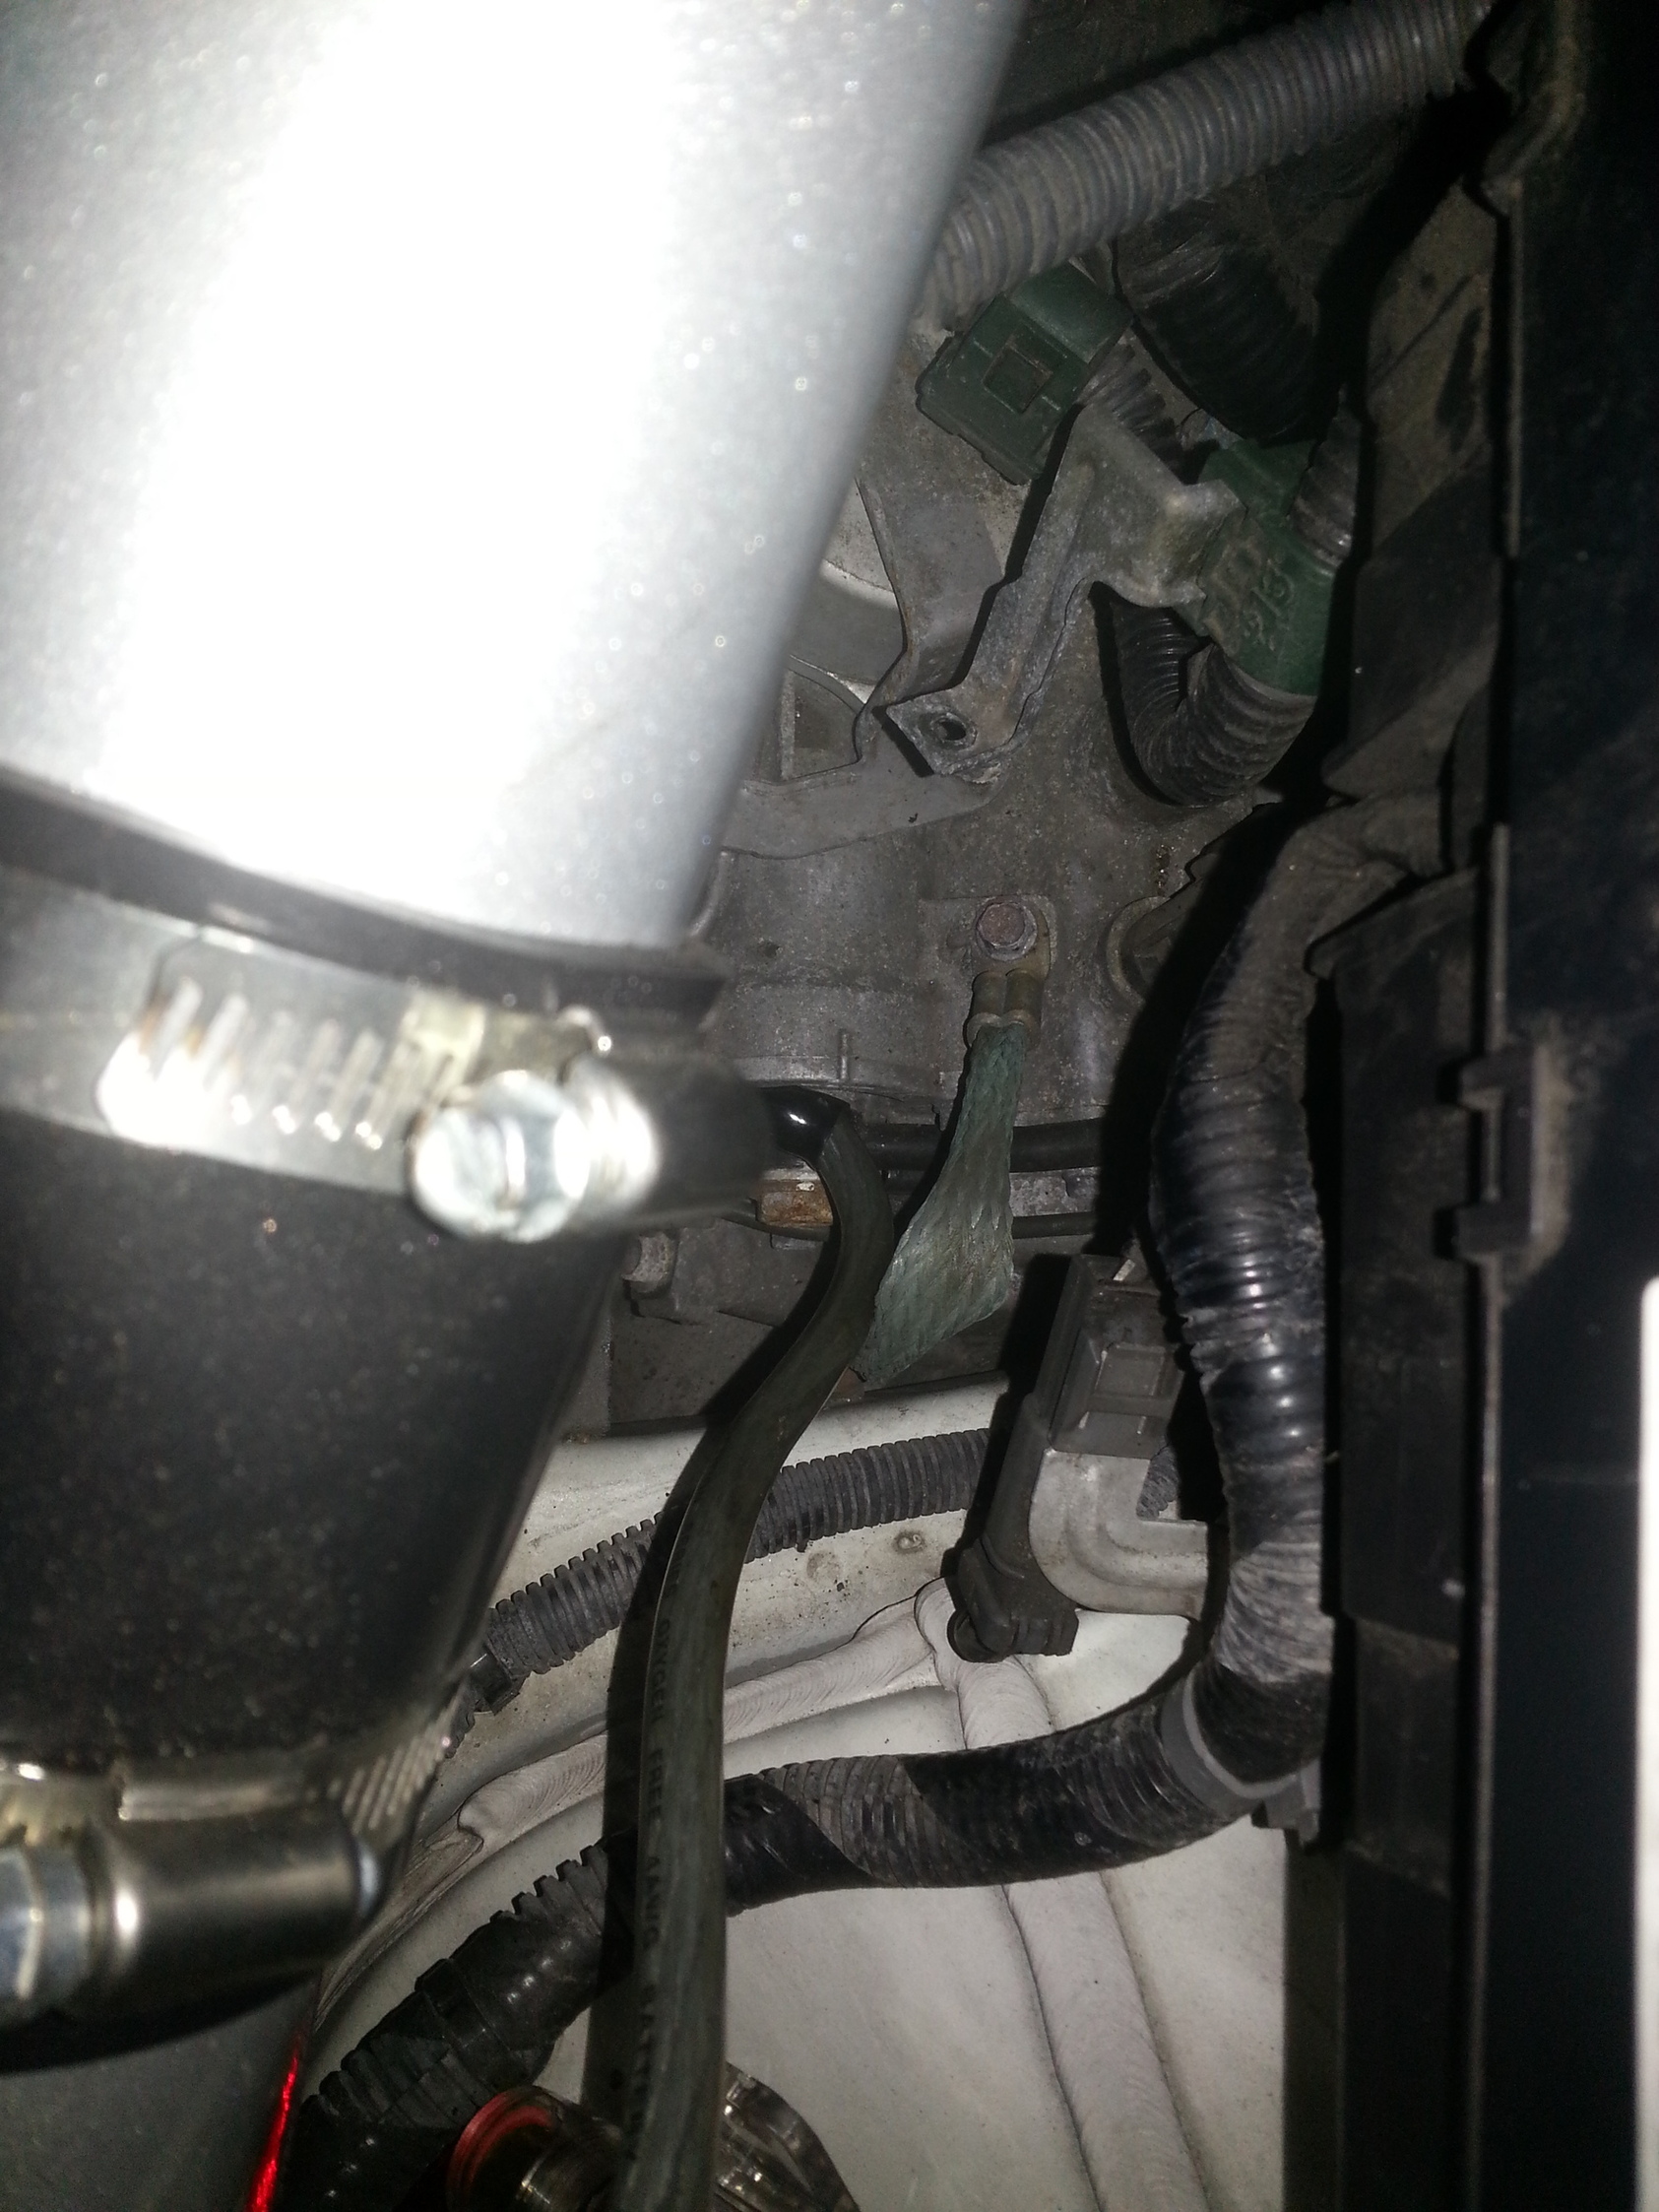
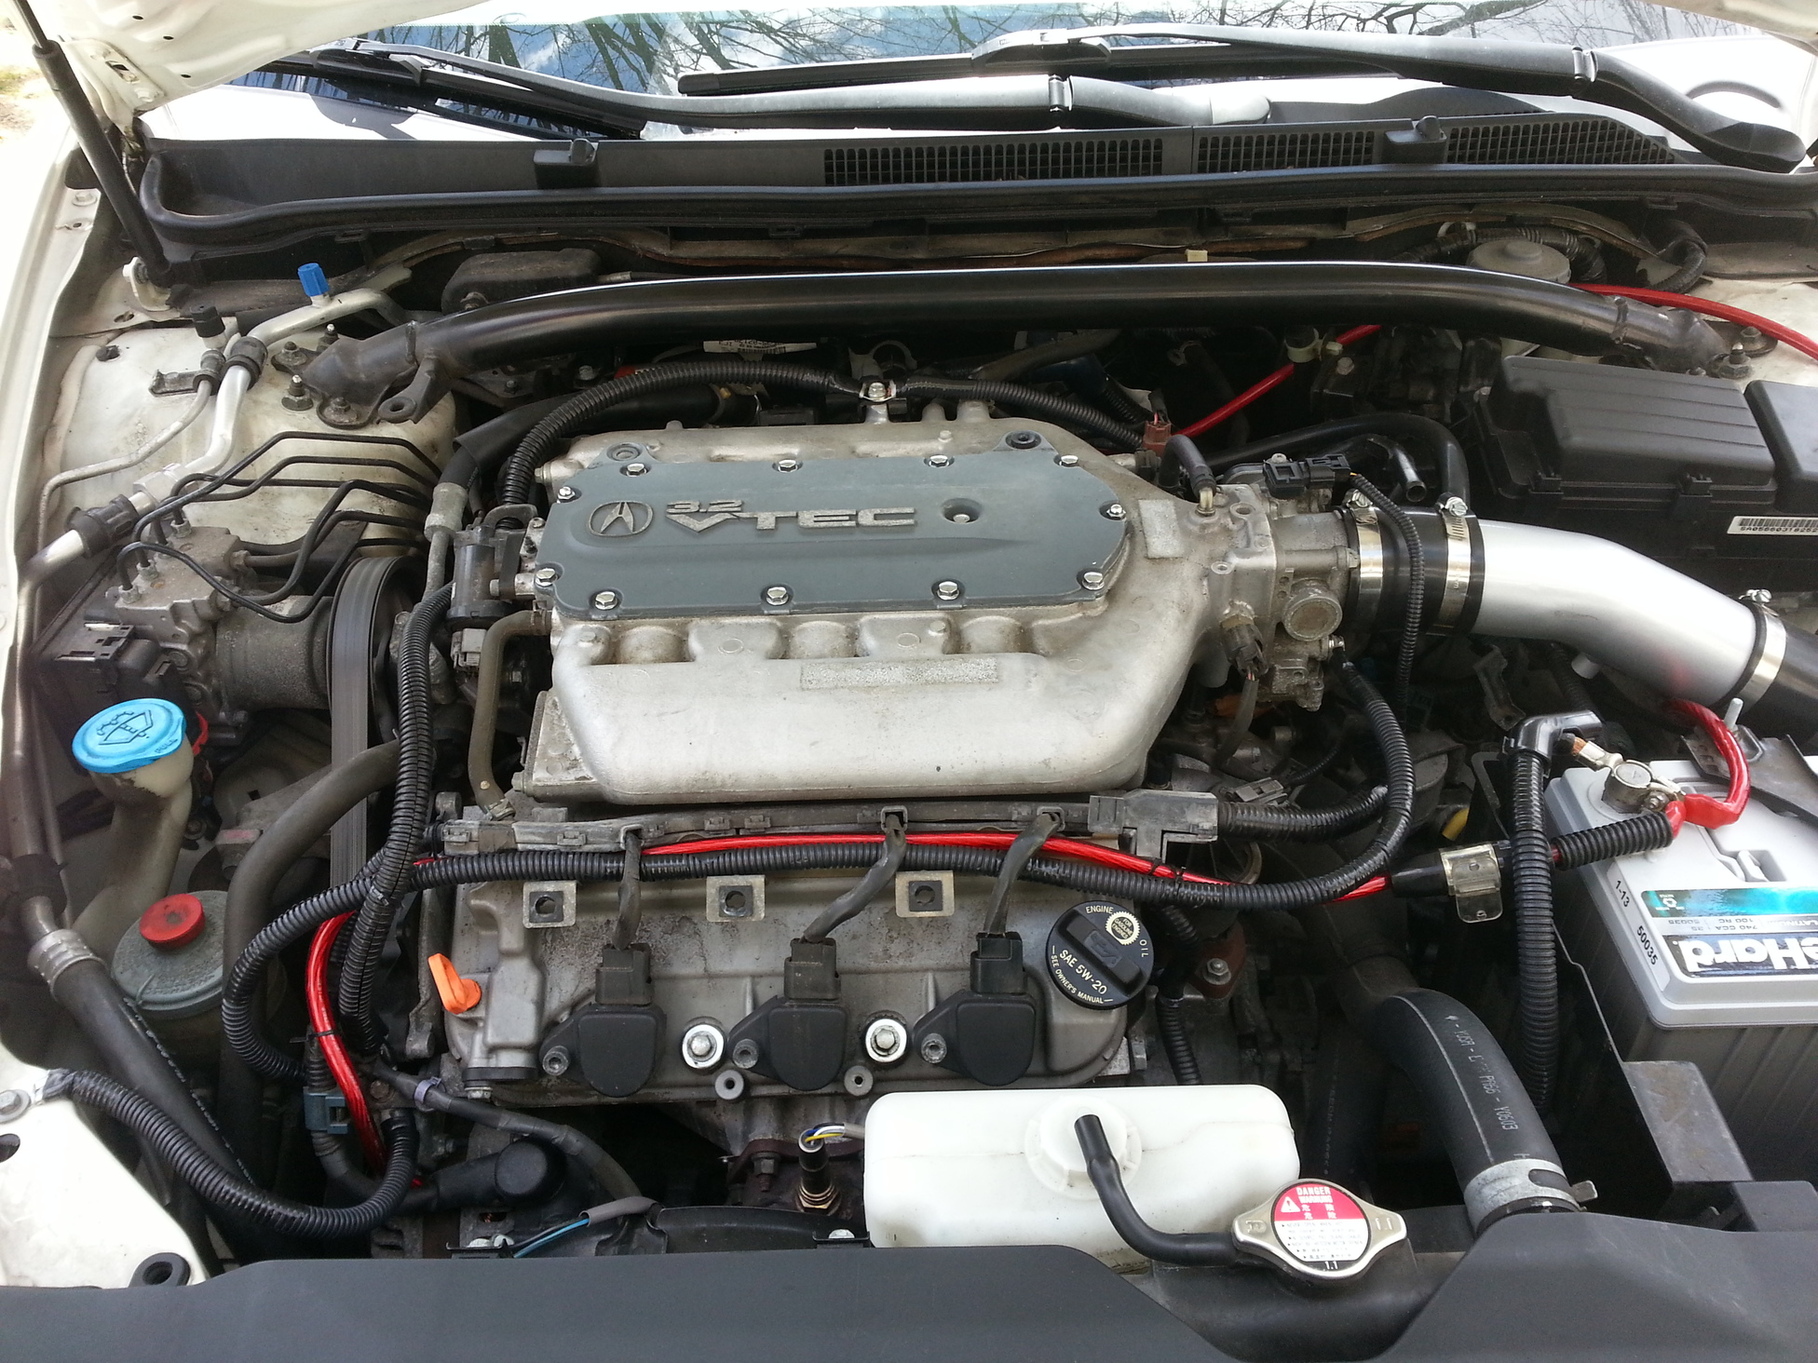
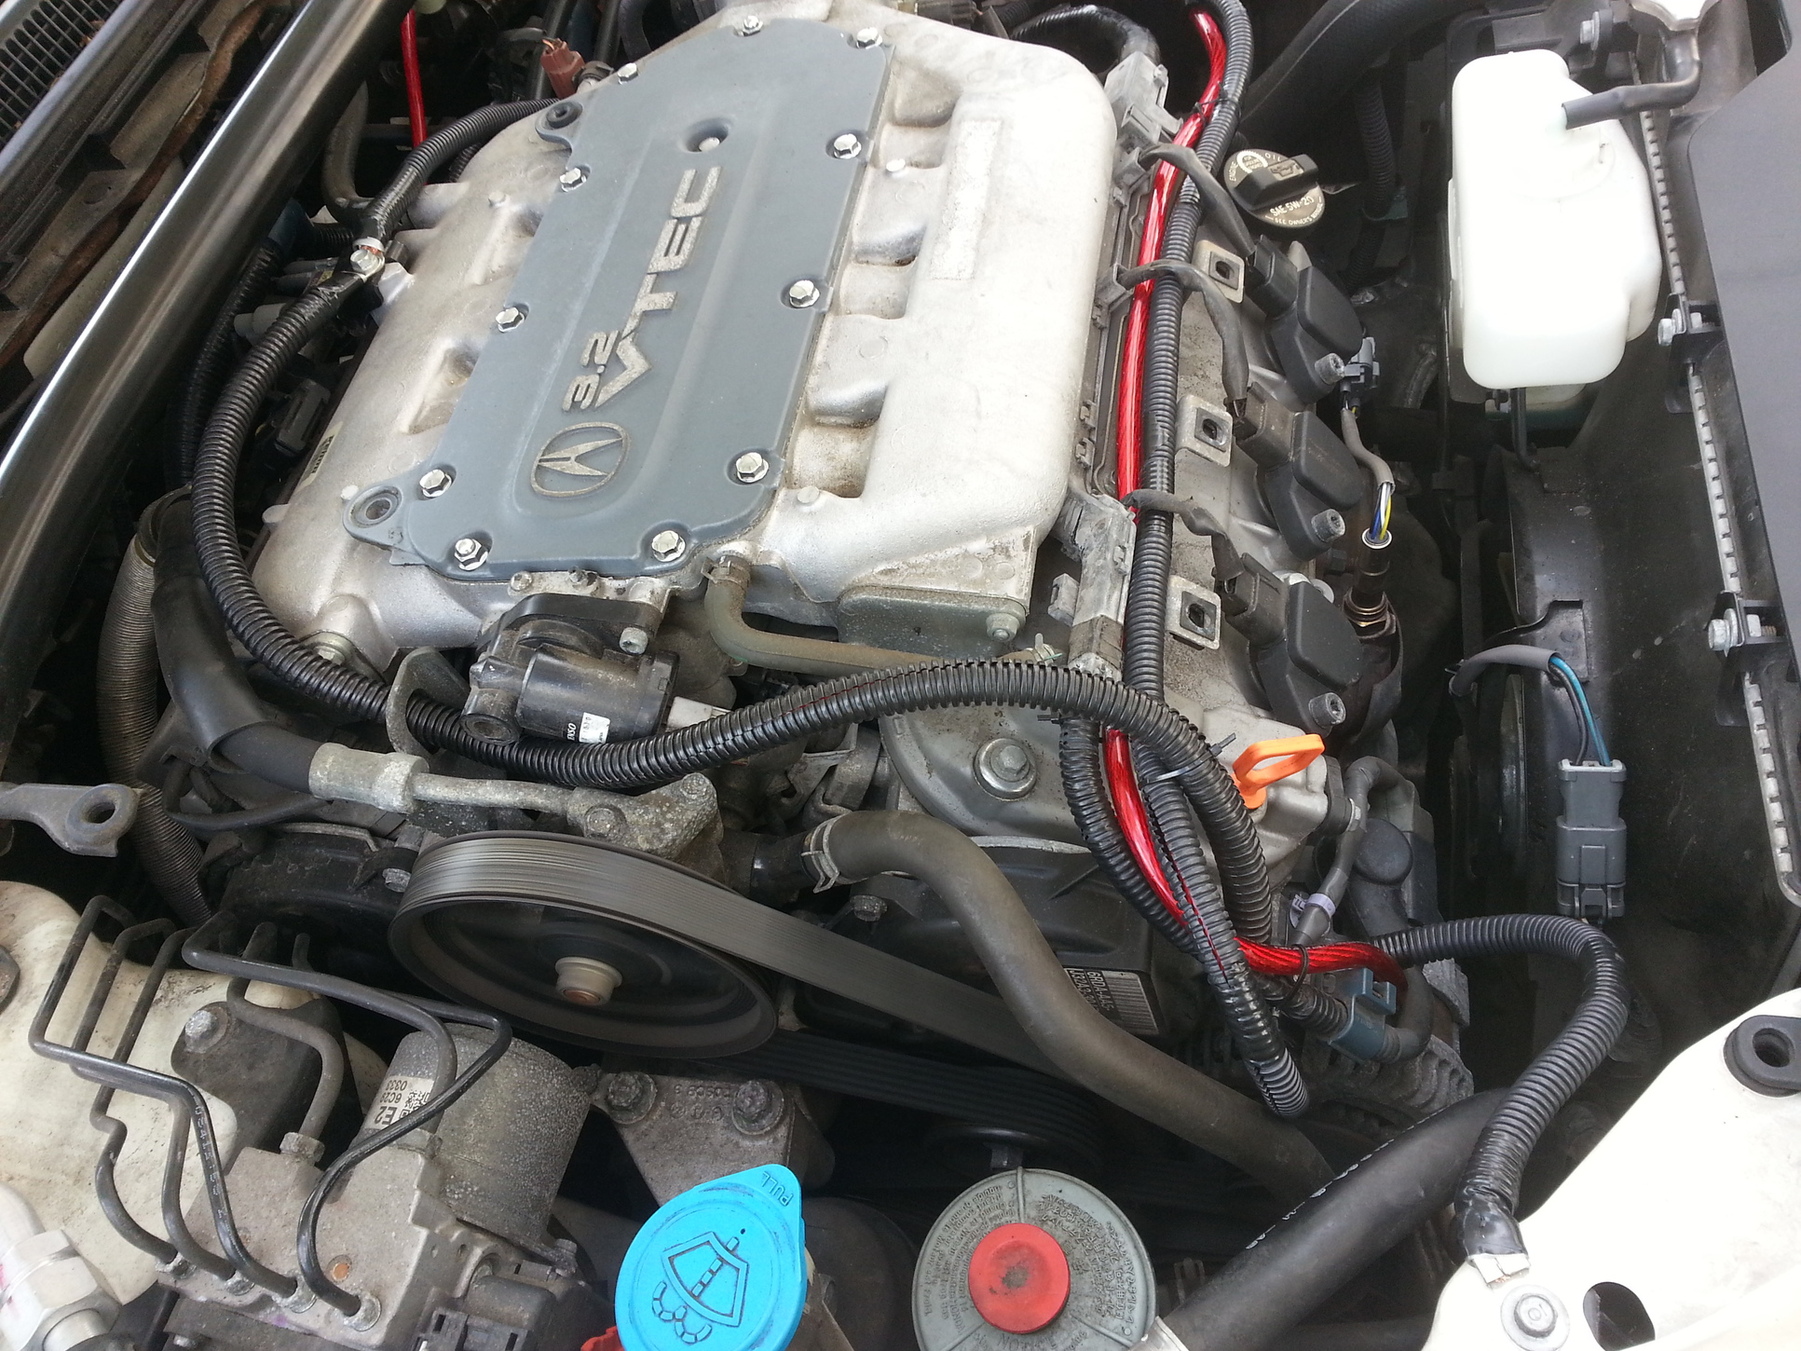
I plan on doing this battery cable upgrade due to check charging system light on. Light came on after I replaced alternator (on 2011 mdx). Alternator smoked /toast😁. I checked fuses and grounds (engine to chassis and battery negative to chassis), they looked fine. Volt meter plugged in cigarette lighter shows 14.2 to 14.5, so new alt working fine. Just can�t get rid of check charging light.
Before I tackle this upgrade, does the positive battery/alternator cable hook up to the fuse box simply with a ring/ nut/bolt or do I have to cut and hookup a bunch of small wires? I don�t want to start tearing it up and realize this task is beyond my capabilities. Also Is it necessary to move/raise the fuse box to acces the cable connector easier, and how can I do this? On the negative battery cable, there�s a smaller cable or what looks like a couple of wires that attach to a clip/connector on chassis. How do I connect this to the new negative battery cable? Finally, I don�t see a tranny ground, is this normal or should I look further. And just to confirm, tranny cable should hook up to chassis? Sorry for newbie questions. Please see attached pics (disregard grease around negative post, already cleaned up) and thanks in advance.
[img]blob:https://acurazine.com/f72fdaf1-9472-4414-844c-78fc8effc1b1[/img]
[img]blob:https://acurazine.com/5af5598b-c35a-442d-9e90-081e3f75b2c7[/img]
[img]blob:https://acurazine.com/3513c457-ee13-433a-8786-ba1194a3878e[/img]
10th Gear
Joined: Sep 2019
Posts: 10
Likes: 1
Intermediate
Joined: Jun 2021
Posts: 29
Likes: 1
From: Miami,Florida
What ring terminal I know thread is old sorry
I seen a few people ask this and didn�t see a for sure answer�.did everyone use the 5/16 ring terminal for the alternator on there TLs? Wanted to get it done this week but the pics don�t show which ring uses on the alternator

Cruisin'
Joined: May 2022
Posts: 15
Likes: 1
Nice write-up!!!
For ease of installation, use Stinger Cable EXPERT series...this stuff is AMAZINGLY easy to deal with. Not trying to steal OPs thunder, but the bend radius speak for itself...from my old whip:
Attachment 50272
Attachment 50273
For ease of installation, use Stinger Cable EXPERT series...this stuff is AMAZINGLY easy to deal with. Not trying to steal OPs thunder, but the bend radius speak for itself...from my old whip:
Attachment 50272
Attachment 50273

6th Gear
Joined: Jul 2017
Posts: 6
Likes: 0
From: Twin Cities, MN
Cold-weather benefits to �Big 3� or variation
Would a variation of this upgrade help for starting in cold-weather climates?
(I live in Minnesota.)
I have problems with a dead battery in the winter.
I’m considering an:
(I live in Minnesota.)
I have problems with a dead battery in the winter.
- I drive my car only 2 or 3 times/week.
- My trip to work is less than 5 minutes. (The battery doesn’t have a chance to get recharged)
- I live in an apartment without a garage, the car is outside in a parking lot.
I’m considering an:
- Aftermarket positive battery terminal for the following: (I have to use them often in the winter)
- Quick-connect for two accessories
- my Li-ion boost jump starter (NOCO Boost Plus GB40)
- battery charger (also a NOCO model)
- Quick-connect for two accessories
- Remote starter
Last edited by TeslaMax; Jan 19, 2024 at 05:08 AM.
6th Gear
Joined: Jul 2017
Posts: 6
Likes: 0
From: Twin Cities, MN
More �Cold Weather benefits?�
My Reddit post from last year might add a little context: https://www.reddit.com/r/AcuraTL/s/AzhzeqFnNA