
A-122: DIY - 105k Service: Timing Belt, Water Pump, Spark Plugs, Thermostat *PICS*
 04-25-2013, 10:39 PM
#521
Instructor
nah, he prob just wasnt cranking it long enough. It shouldnt have a problem starting up. As stated earlier, just manually turn the crank when you've got everything back together to make sure it lines up every time and there's no slack.
the first time I start mine to bleed air from the cooling system:
http://youtu.be/NxBNYxWEX5c
the first time I start mine to bleed air from the cooling system:
http://youtu.be/NxBNYxWEX5c
 04-26-2013, 01:20 AM
#523
Instructor
04-28-2013, 01:31 PM
#525

BEST WRITE UP EVERRRRRR!!!!!
Taking sway bar off is KEY!!!
Also, had a seized plug, blasted with PB, waited 10 minutes, tighten the plug a hair (to loosen up) and she's came out with NO issues...
Taking sway bar off is KEY!!!
Also, had a seized plug, blasted with PB, waited 10 minutes, tighten the plug a hair (to loosen up) and she's came out with NO issues...
04-29-2013, 01:45 AM
#526
Instructor
The following users liked this post:
ekxtreem (04-29-2013)
The following 3 users liked this post by ekxtreem:
05-02-2013, 07:33 AM
#529
Wow, you are the absolute MAN. Aside from Majofo's first post, this is the best post in this whole thread. Lining everything up and getting at everything is what has me intimidated. Although, the funny thing is that over time, I've removed and reinstalled almost everything you've posted so far.
The following users liked this post:
ekxtreem (05-02-2013)
05-02-2013, 11:18 AM
#530
Chapter Leader (Southern Region)
Thread Starter
J, you'd suck anyone's D. 
I like this pic EKZ.. proof that this is not a job for the limp wristed.. sorry J.
I like this pic EKZ.. proof that this is not a job for the limp wristed.. sorry J.
05-02-2013, 11:21 AM
#531
takin care of Business in
iTrader: (5)
Join Date: Jan 2008
Location: Kansas City, MO
Age: 40
Posts: 30,994
Received 4,732 Likes
on
4,064 Posts
 05-02-2013, 11:50 AM
#533
Instructor
Wow, you are the absolute MAN. Aside from Majofo's first post, this is the best post in this whole thread. Lining everything up and getting at everything is what has me intimidated. Although, the funny thing is that over time, I've removed and reinstalled almost everything you've posted so far.

 05-14-2013, 09:56 AM
#537
Instructor
05-14-2013, 03:48 PM
#538
Intermediate
I'm going to do the TB, water pump, tb tensioner, pulley and idler. Also since i'm there, i'll be rebuilding the power steering pump to fix a minor leak, replacing the AC belt, tensioner and thermostat.
Parts are a mixture of OEM and aftermarket. I have a AISIN TB kit, Gates AC tensioner, OEM AC belt, OEM thermostat and PS seals. The AISIN kit is less than half the cost of the OEM components and is of very comparable quality

OEM part numbers have been posted several times, i'd just do a search if you want to go that route.
05-14-2013, 05:04 PM
#539
I've been reading this thread over and over again to gain confidence and I feel like I can tackle this myself. My question is as 94eg suggested step one should be loosening the crankshaft pulley bolt, would it be okay to do so? Also I would have to align the marks on the rear and front cams looking through the hole before undoing the crankshaft bolt?
05-14-2013, 06:13 PM
#540
the overexplainer
I've been reading this thread over and over again to gain confidence and I feel like I can tackle this myself. My question is as 94eg suggested step one should be loosening the crankshaft pulley bolt, would it be okay to do so? Also I would have to align the marks on the rear and front cams looking through the hole before undoing the crankshaft bolt?
Just remember to line them back up before removing (vs. loosening) the bolt and pulley.
The following users liked this post:
abracing (05-14-2013)
05-15-2013, 11:18 AM
#541
Instructor
I've been reading this thread over and over again to gain confidence and I feel like I can tackle this myself. My question is as 94eg suggested step one should be loosening the crankshaft pulley bolt, would it be okay to do so? Also I would have to align the marks on the rear and front cams looking through the hole before undoing the crankshaft bolt?
05-15-2013, 11:25 AM
#542
Race Director
^^^^he means crank pulley.
And personally, knowing what I know now, I wouldn't even mess with that bolt. I'd gladly pay a shop $25 - $50 to pop it loose for me.
And personally, knowing what I know now, I wouldn't even mess with that bolt. I'd gladly pay a shop $25 - $50 to pop it loose for me.
05-15-2013, 11:47 AM
#543
Instructor
05-15-2013, 11:54 AM
#544
Instructor
I've been reading this thread over and over again to gain confidence and I feel like I can tackle this myself. My question is as 94eg suggested step one should be loosening the crankshaft pulley bolt, would it be okay to do so? Also I would have to align the marks on the rear and front cams looking through the hole before undoing the crankshaft bolt?
Last edited by ekxtreem; 05-15-2013 at 11:56 AM.
05-15-2013, 04:55 PM
#545
As stated before you don't need to have the marks lined up to loose the bolt but it is good to have it in the area, so i would say line it up then set your tools to take it off so when it is off you wan't have to do much turning to line the marks up again, also you don't necessarily need to turn the crank pully bolt to line the marks up, once that is off you can turn it from the from cam bolt using a wrench or bar/ratchet and socket. make sure it is lined up before removing the belt and once it is off try to put the new belt on right away without anything turning
05-15-2013, 05:48 PM
#547
the overexplainer
doesnt hurt to try but with 180 ft/lb (dont quote me on that) to torque it down and then go through several heatcycles and approx 105k miles it's pretty stuck. I bent a breaker bar + extensions 90 deg and it didnt budge. it seems though once its broken from the factory its easier.
05-16-2013, 12:46 AM
#549
Instructor
06-01-2013, 03:52 PM
#552
Instructor
Thanks for the write up and the tips guys, i just knocked this out today and it took me 7 hours all by myself.
It must be my lucky day because I got the CP bolt loose using the starter bump method, no bolts broke while removing them, and i got the timing belt on in one try, the camshaft pulleys didn't shift on me like some people reported.
Installing the thermostat was the worst part and yes smaller hands would have been nice cause mine now look like i got into a fight with an angry cat.
I still got the Honda Crank Pulley tool from Oreilly's and i used that for tightening the CP bolt back up and testing if everything lined up be rotating the engine.
I bought my kit from rockauto, Gates tckwp329
I reinstalled everything and it started right up and purred like a kitten.
This will be a service reminder i'll gladly reset! It popped up at 101462 miles when my oil was due.
Time to get my drink on
06-24-2013, 01:37 PM
#554
Advanced
This ended up taking me 12 hours this past weekend give or take a few breaks and typical ADD distractions. I happened to get very lucky with the fact that the CP bolt was already cracked lose from when Acura dealer had to go in and fix an oil pump leak earlier this year. What's scary is that I BARELY had to lean on the bolt for it to unscrew, must've been installed very loosely *face palm*
The hardest parts were ATTEMPTING to torque all of the bolts I removed during the job, and getting to the thermostat turned out to be a major PITA. Partly because I went about it without removing the intake or battery or wire harness...needless to say my hands are shredded to bits. I only got about .7 gallons of coolant out of the front bleeder valve, the other 1.3 gallons ended up pouring out all over the engine and thermostat area in the form of a 5"-wide waterfall of coolant...not too fun.
Crank seal replacement went smoothly but I ended up skipping on the cam seals, as I did not have the extra time this time around. Goodluck to anyone who tries this, involves a lot of common sense and very little mechanical-know how. Just think things through and you will be fine, white-out markings on the case, pulleys, belt all made the swap fairly risk free.
06-24-2013, 01:47 PM
#555
Chapter Leader (Southern Region)
Thread Starter

Don't say I didn't warn you..

 07-03-2013, 07:42 PM
#557

Here's another one on a MDX that has also given me great confidence to attempt this:
http://www.bobistheoilguy.com/forums...44#Post2985744
08-11-2013, 12:47 AM
#558
1st Gear

Join Date: Aug 2009
Posts: 1
Likes: 0
Received 0 Likes
on
0 Posts
Just wanted to pop in and say thanks to Majofo and to all the contributed. You guys saved me a ton of dough and gave me the piece of mind knowing it was done correctly.
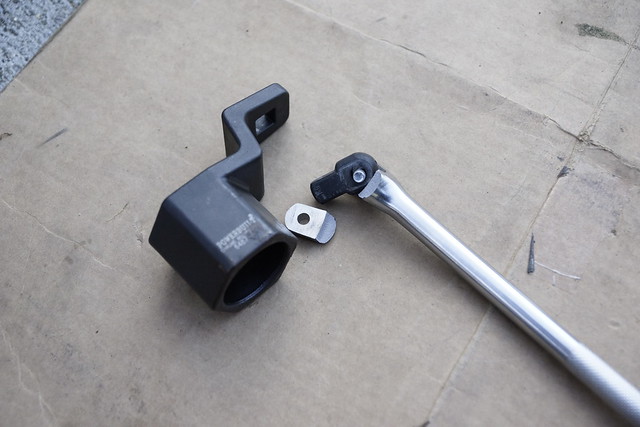
I just wanted to add a picture of the bump method. It was really nerve racking but it ended up being no big deal. After sweating for an hour with a 6ft pipe and breaker bar I was starting to get desperate. Just swing the bar into the A frame, zipped tie it to remove the slop, turn over and bam. Done


I just wanted to add a picture of the bump method. It was really nerve racking but it ended up being no big deal. After sweating for an hour with a 6ft pipe and breaker bar I was starting to get desperate. Just swing the bar into the A frame, zipped tie it to remove the slop, turn over and bam. Done
08-11-2013, 12:51 PM
#559
Chapter Leader (Southern Region)
Thread Starter

I'm surprised that zip tie survived.
09-02-2013, 05:44 PM
#560
Cruisin'
Join Date: Jan 2004
Location: Toronto, Ontario
Age: 61
Posts: 20
Received 0 Likes
on
0 Posts
First, just like so many of us, I like to thank Majofo for an excellent write up. Your write up makes it look easier than it really is. I had spent almost all of my labour day long weekend in the garage, with moments feelings with frustration, lost, worry, pressure, shame, relief, success and finally triumph. What a beg of emotions!!
I have a 2004 TL and am the first owner and had it since April 2004. It is now at 115k km (~approx. just less than 75k miles) and has been running just fine. I live in the great white north, with the extreme temperature, custom wisdom calls for changing the timing belt around this mileage. I never thought of doing this myself, but the dealer wanted $1380 + tax for this job, and that is just too much.
Bought an OEM parts from eBay and spent just $350 on it. In addition, I also bought a video from a person I followed on YouTube for $16 before proceeding. Majofo's write up however helps the most, once again thank you!
I snapped the CP bolt with the O'Reily Hex tool and breaker bar without any issue, it took me less than 20 minutes to crack it upon having extension hooked up. I said to myself, this is easy than many other have experienced, so it gave me confident to proceed, and that was Friday. I then proceed to disassemble the rest, and it took me a total of 7 hours on Friday alone to disassemble till I got all the covers off. The back cover is a bitch but that wasn't the worst.
On Saturday, I proceed to read through this forum again and take out the timing belt, and the water pump. It went very smoothly, and put in a new water pump without much issue. However, when the time to put the new belt on, it was like hell. For the longest time, I could not put the belt on tight enough from the front cam to the back cam which goes under the water pump pully. Many times the back cam either sprung forward or backward and took a lot for me to readjust. At the end of Saturday I had spent another 7 hours worrying how to put the belt on.
On Sunday, I had finally put the belt on by moving the back camp slightly forward by a tooth and then tighten the belt by pushing it toward the firewall. After that, the belt has enough slack to wrap around the adjuster. After double checked the timing mark, I proceed to pull the pin from the tensioner. Huge problem, the pin just got stuck and could only come out half way. I swear I must have taken it out and put it back on the vise at least 7 times before I figured out how I could fix this.... Oh yes the service manual calls for the battery tied down which then made sense. Now I tied it down and finally the pin came out in one piece. For the remaining of reassembling, it was a breeze comparatively speaking. I worked on it until 10:30pm last night until I filled up the radiator with fluids. I held my breath, said a prayer out loud twice before I started the car. IT WORKED! no code, sounded normal and in fact the engine sounds more quiet before I started the job. I thank God for it and slept well. Today as looked at my hands and arms, I really did had a fight with a nasty meow. Fingers were cut, arms with cut and bruises, but now I brag about it. Would I do it again if I knew this is what's going to happen.... the answer is NO, I would have gone to find a cheaper mechanic, but boy, what an adventure it was. Thanks Majofo! You just made it look too damn easy!