When you click on links to various merchants on this site and make a purchase, this can result in this site earning a commission. Affiliate programs and affiliations include, but are not limited to, the eBay Partner Network.
RL, Second Generation - Outside Mirror - Turn Signal Indicator Replacement - DIY Tip
I looked for specific information on how to remove the mirror from the housing. I did not find a complete answer. I was quoted a ridiculous price from the local Acura Dealer to install the part so I did it myself.
The crucial piece of information I couldn't find was exactly how to remove the mirror from the housing without breaking the mirror. I had lots of guys saying it's tricky and that if you do it wrong you will break the mirror etc. The single fact I found that helped was someone who said you have to remove the bottom clips first. That helped. As it turns out the only clips there are, are on the bottom. Anyways it becomes very evident and easy once you see what is behind the mirror.
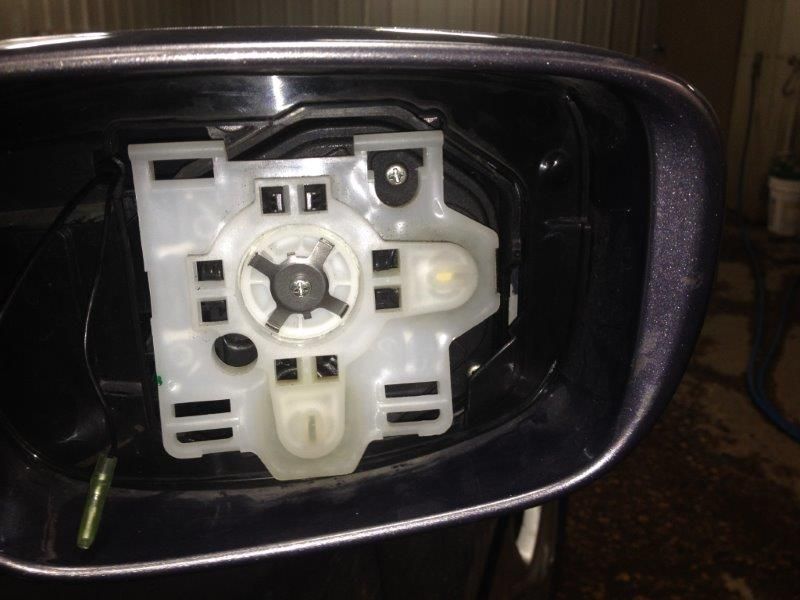
This is the mount that the mirror attaches to. The two openings at the top are the receivers for two "hooks" that slide in from the bottom (see picture below). The "clips" on the back of the mirror attach to the "tabs" you see on the bottom. The hooks act, for lack of a better term, as a hinge and the clips on the bottom snap in. Removal of the mirror must be done from the bottom side with a thin slotted screwdriver and each clip must be snapped away from the tabs and then the mirror slides out and down from the bottom. This is done by adjusting the mirror to provide an opening at the bottom and carefully inserting the screwdriver in between the mirror and the housing. Very simple and easy. Note that there are two electrical leads attached at the mirror for the heater element. Just slide these off immediately after you get the mirror unclipped.
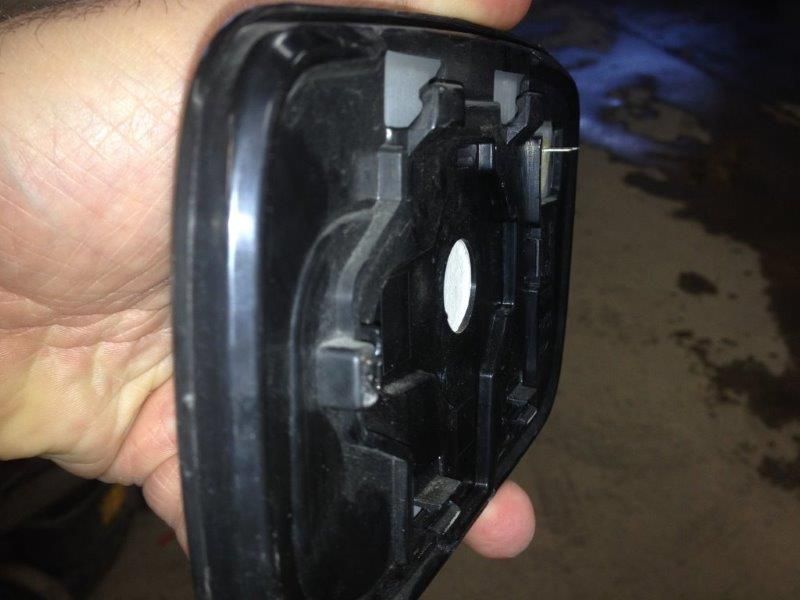
The back of the mirror: Note the hooks on top, clips on the bottom and connectors for mirror heater.
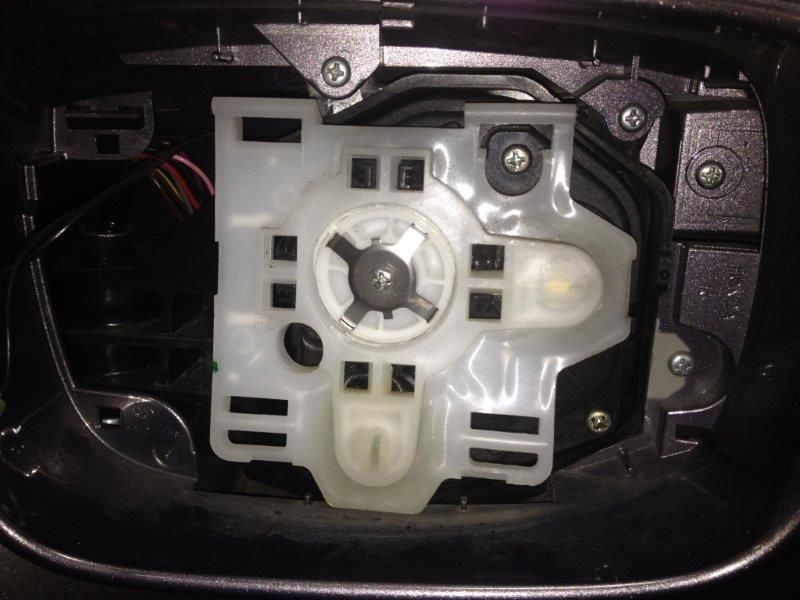
Once you get the mirror off there is a "ring of plastic" that goes all the way around the motor assembly that is just snapped into the housing to protect the guts of the mirror (I guess). You can see it in the first picture. Simply pull on it at the bottom at the six o'clock position and it pops out revealing the screw that holds the signal indicator/lens in. The screw is on the mid right side at about 230 (on a clock face). The signal indicator gets it's electrical connection from a "plug" on the left side (nearest the car). Once the screw is out you can just give the indicator a little push on the back side near the screw and you will feel it loosen. Push it forward and away from the car and the "plug" on the left side will pop out from its' socket and the piece comes free.
Here is a picture of the inside with the "piece of plastic" removed. Sorry about using "piece of plastic" as the ref. term. I don't know what else to call it.
Next slide the new part into place. Make sure the plug goes into the socket and put the screw back in. Turn on the lights and test the signal indicator and the movement of the mirror. Snap the plastic piece back into place. Make sure all the tabs are in and the piece is solid. Snap the mirror back into place. Test Again. DONE.
Hope this helps. This is my first post on anything ever.
Thanks to this post I was able to replace the side signal turn in less than 10 minutes.
I do would like to add some details:
1- To pop the glass mirror I used a butter knife covered with a soft cloth to avoid scratches:
There are plastic tools offered on eBay, this butter knife covered with the cloth did the job.
2- Since you only need to unscrew one philips screw, there's no need to disconnect the glass mirror from the electrical connectors, it was actually very hard to disconnect and you fear that it would broke from it, so I just left them hanging.
Once you take the screw, very carefully and starting from the side closer to the car, take out the older piece. You disconnect using a small screwdriver to pull the little hinge.
Once you take the screw, very carefully and starting from the side closer to the car, take out the older piece. You disconnect using a small screwdriver to pull the little hinge.
Thanks for the additional details and pictures. Just about to attempt the same fix myself. Btw, what does the replacement turn indicator cost?
This post is spot on... My side marker just started to take on water. I was about to replace it myself but checked to see if Acura service would cover it and they actually did since it was a defect. There was no damage to the lens so it never should have started to take on water especially.
Kinda an off topic question. Do you think there is enough room to take apart the actual housing and replace that too without taking off the door panel? Trying to skip the whole door panel removal part, as the door panel would never seem to hold as secure as it did before.
You can either use the correct tool and not damage the clips, or you could buy a bag of new clips for the ones you break. Either way, if you follow the removal instructions, your door liner will be as secure after removal as it was before.
 12-11-2013, 01:05 PM