
My parent's kitchen remodel (LOTS OF PICS)
 02-18-2011, 06:32 AM
#1
Suzuka Master
Thread Starter
My parent's kitchen remodel (LOTS OF PICS)
Well some of you read and added input in my thread about painting the doors and cabinets for my parents in their kitchen (https://acurazine.com/forums/home-garden-37/questions-about-painting-staining-cabinets-806691/). I figured I'd have a thread dedicated to the remodel. Aside from the Granite counter tops everything will be done by my brother and myself. I have never done this but have some basic skills. My brother, well let's just say I sometimes think he's "special" if you catch my drift.
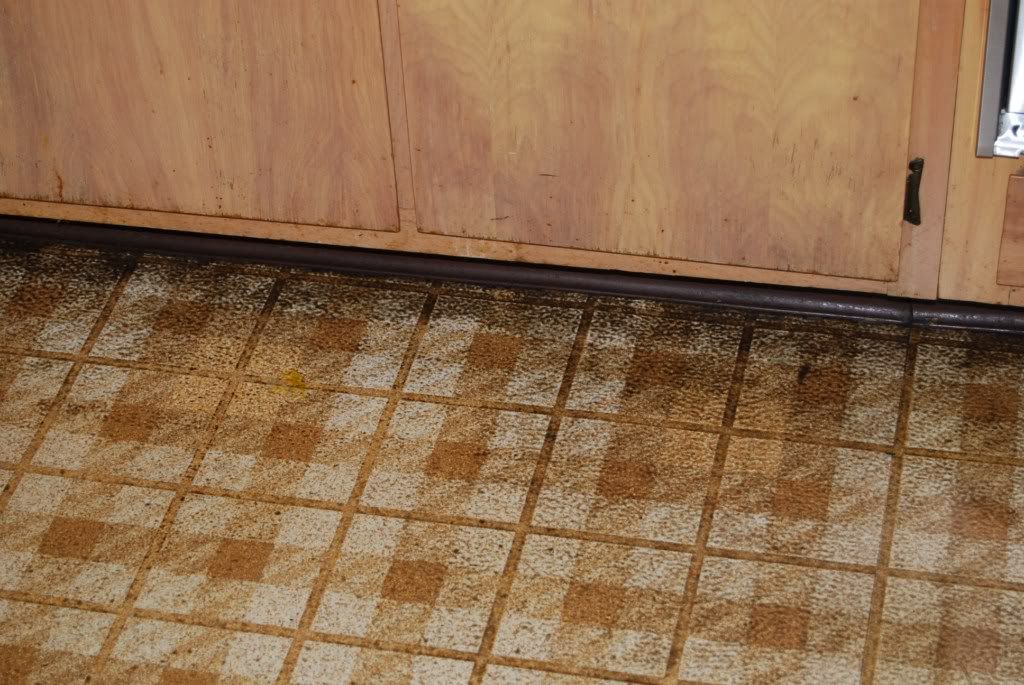
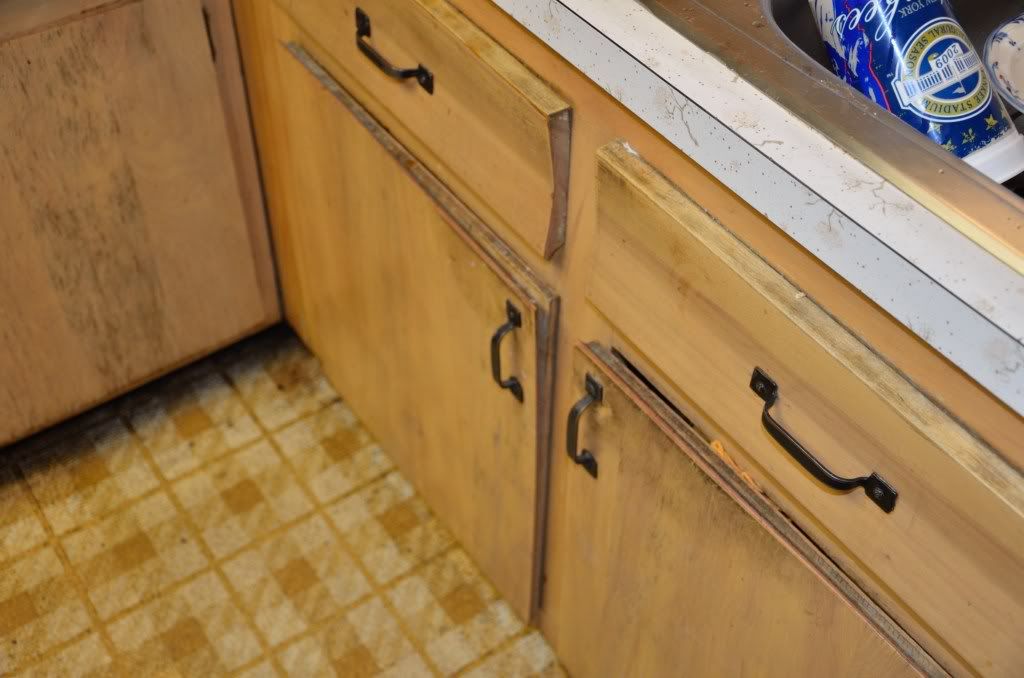
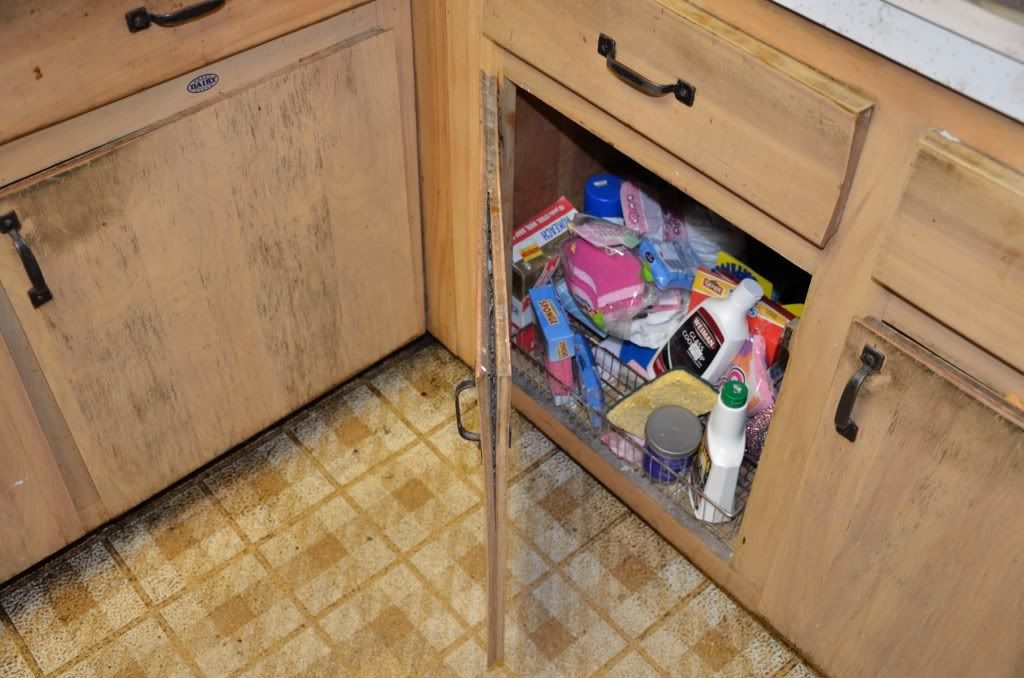
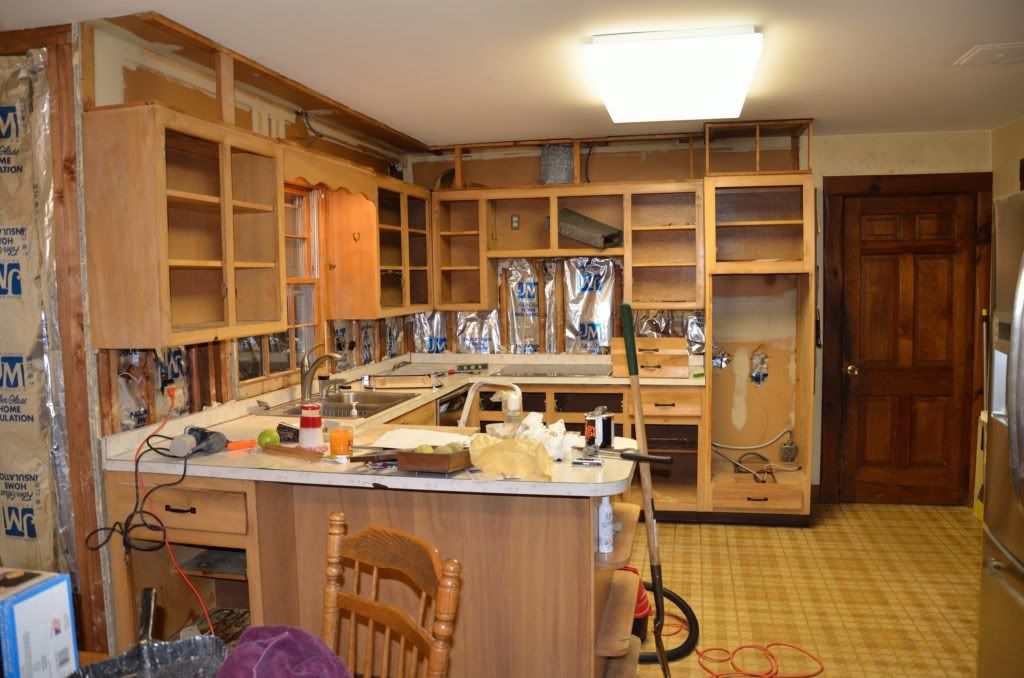
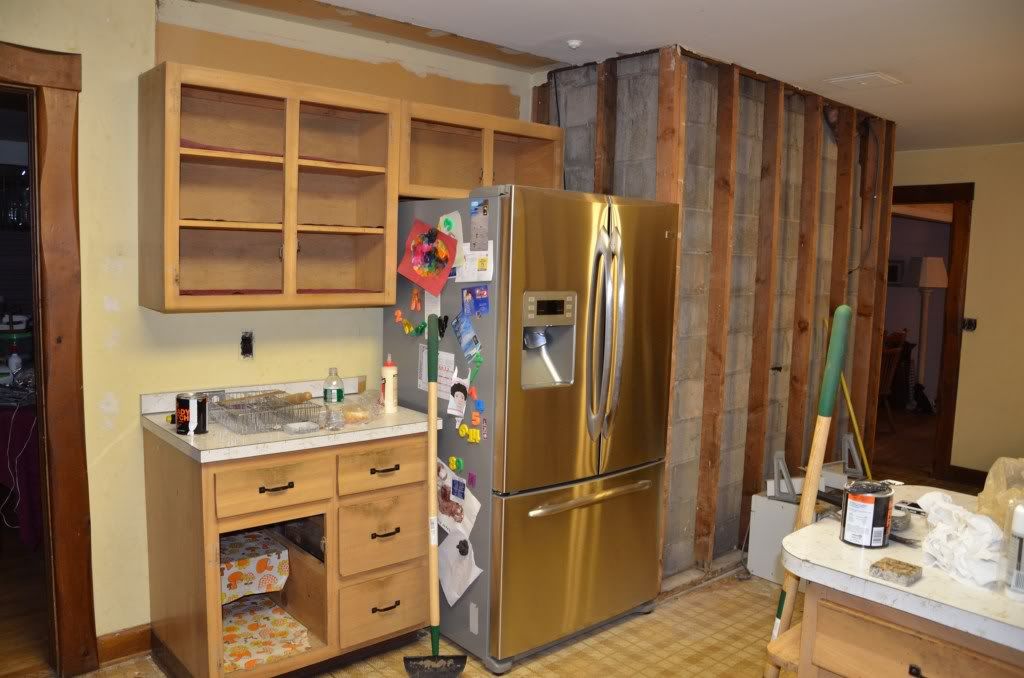
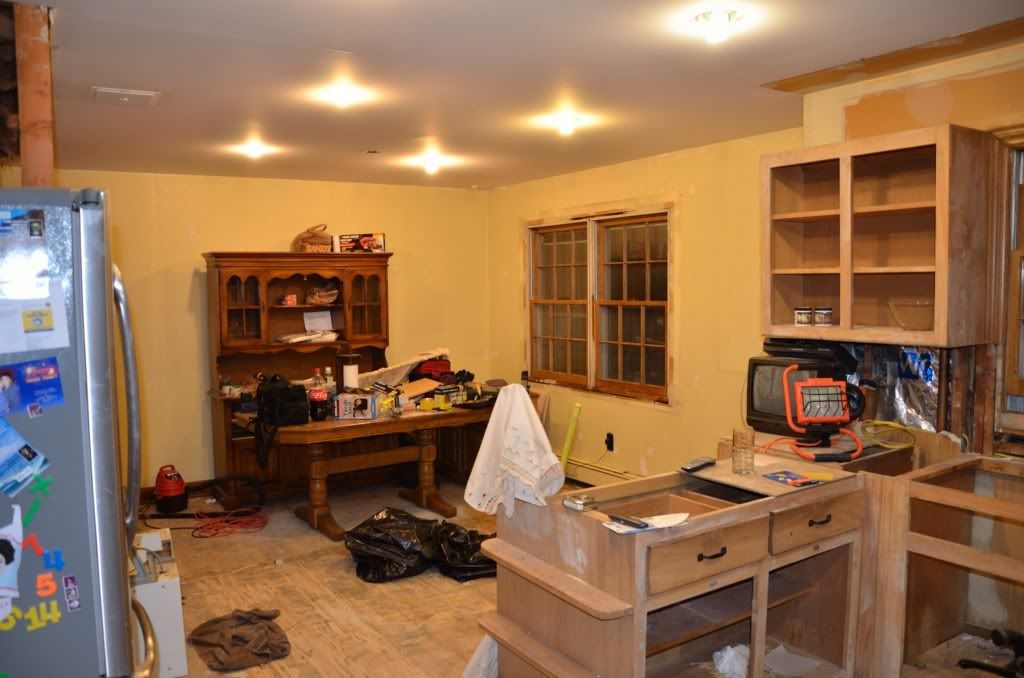
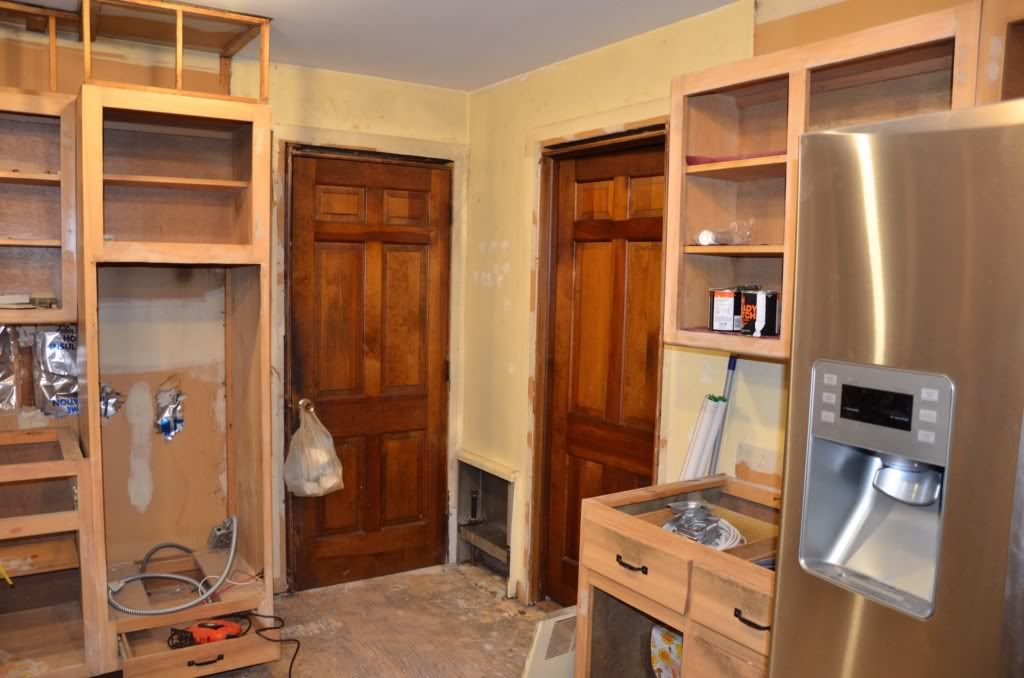
So we started demo a couple days ago. Luckily, my brother put in some extra time to do a few things after I left. He lives there. It's about a 30 mile drive for me. So between trying to run my business and getting down there and getting stuff done, it's gonna be a lot of work. I'll post some pics of the before. Warning, if you just ate, do not view these pictures. It is that bad and you might toss up whatever you ate.
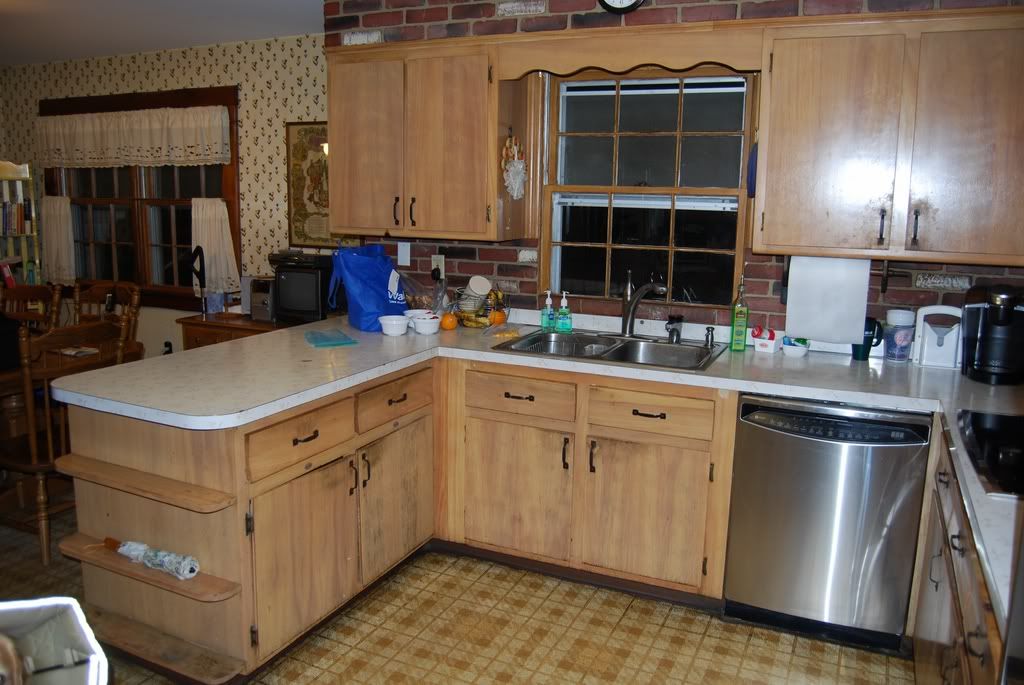
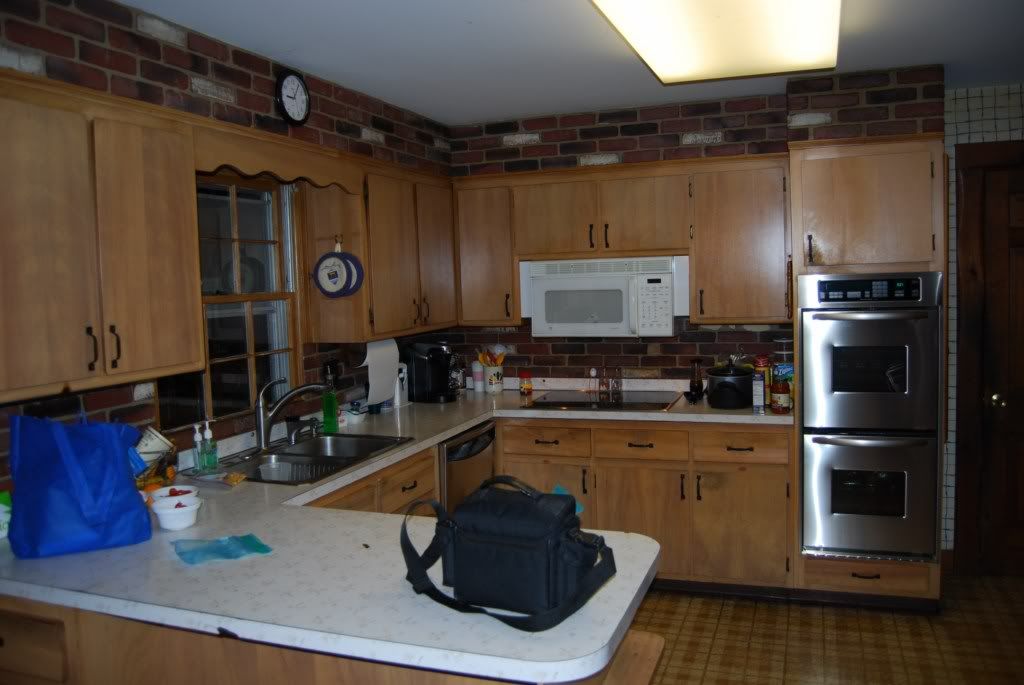
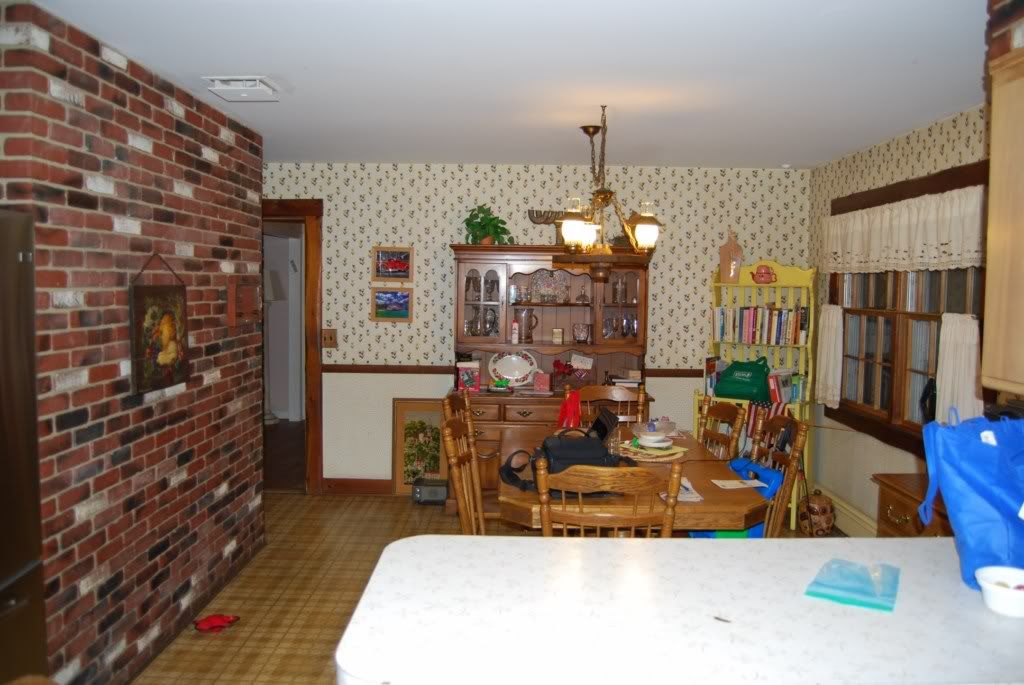
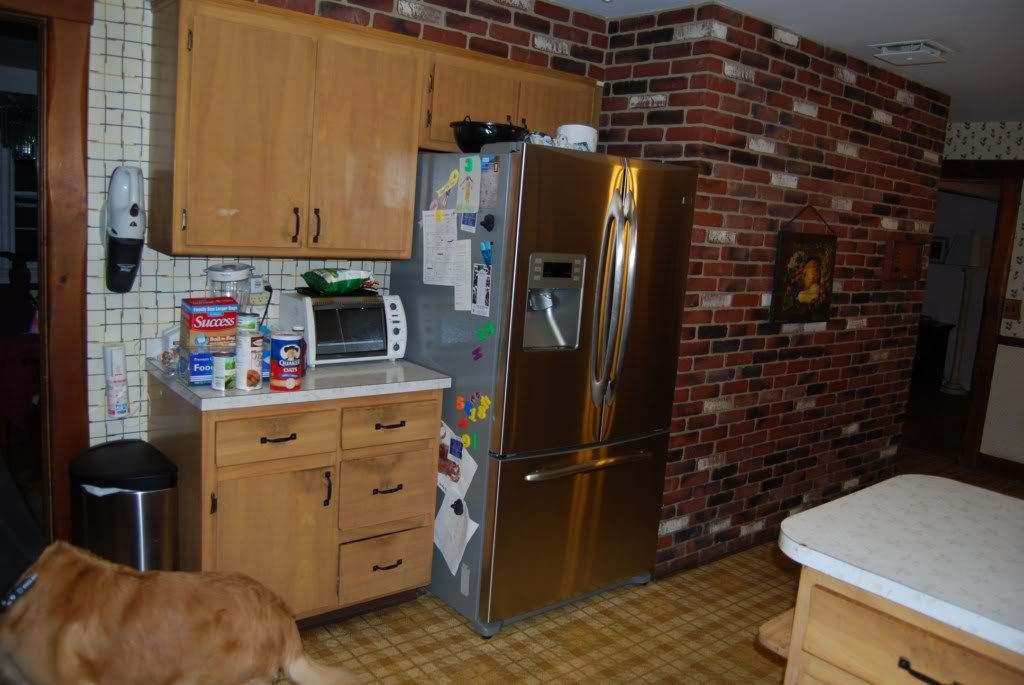
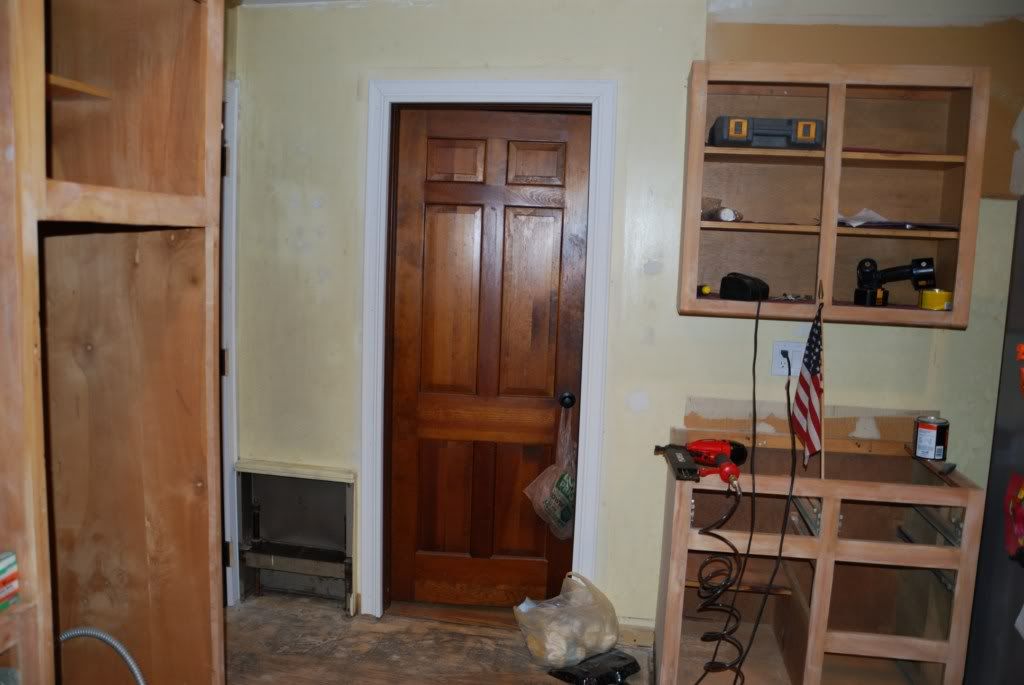
Before:

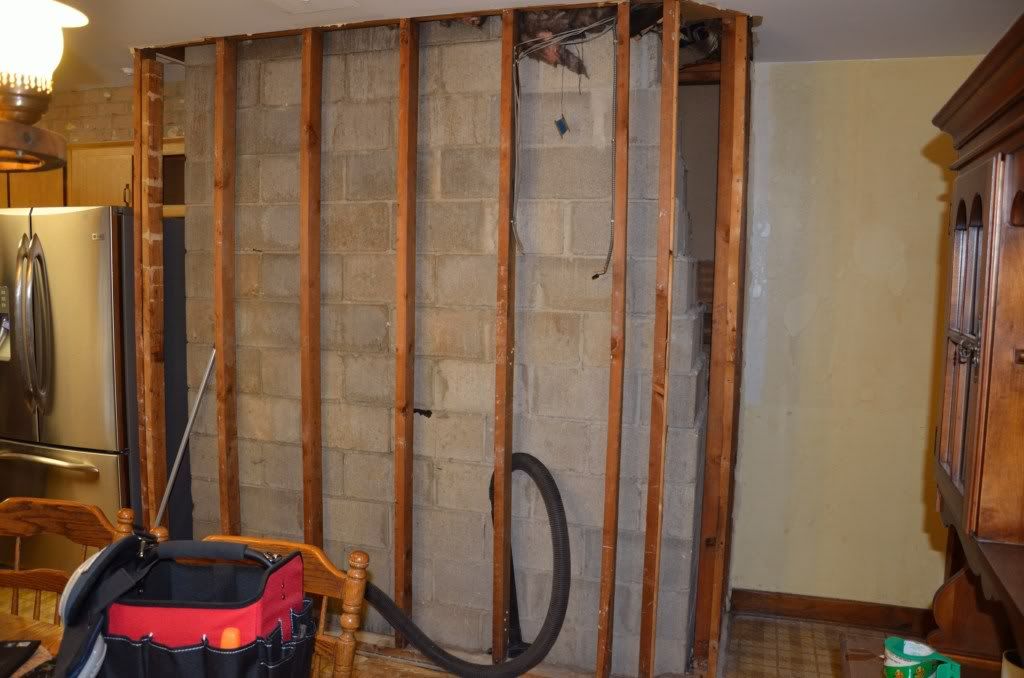
Demo:
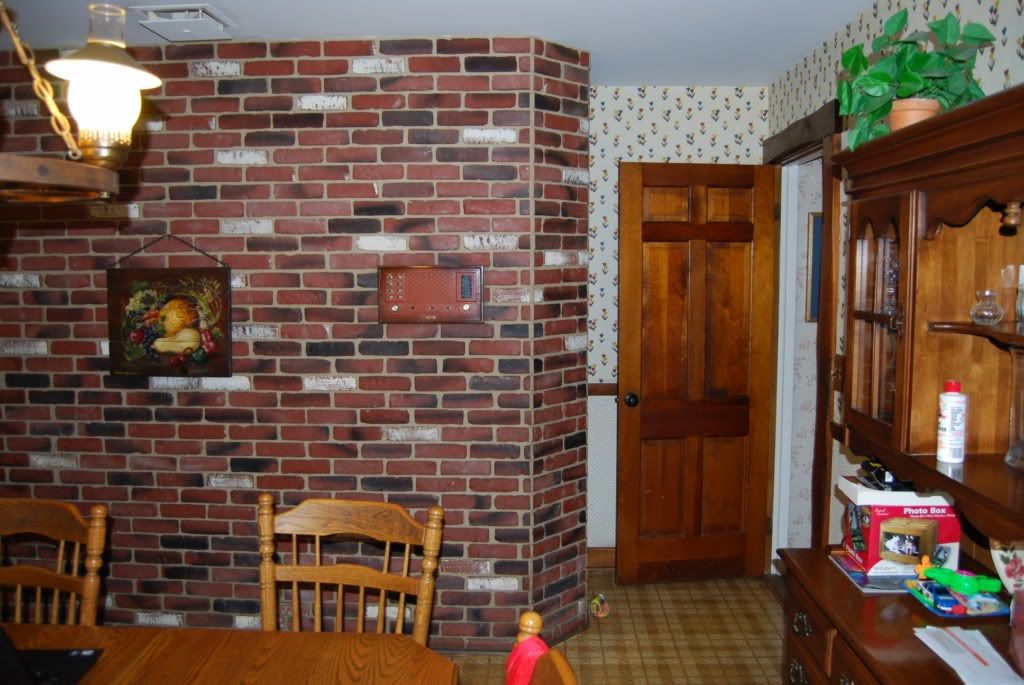
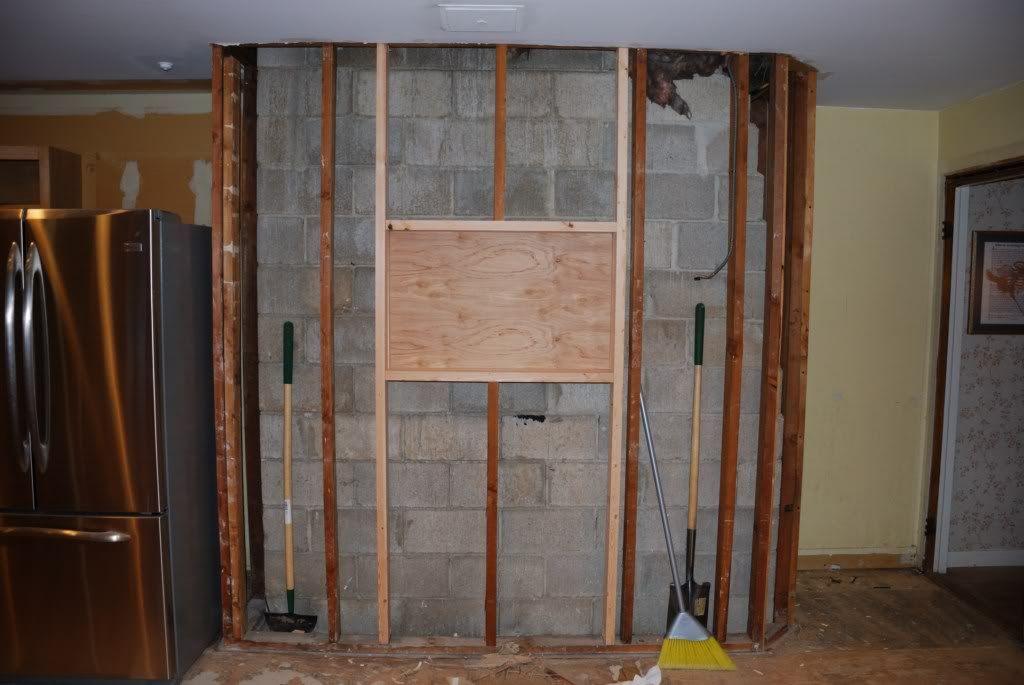
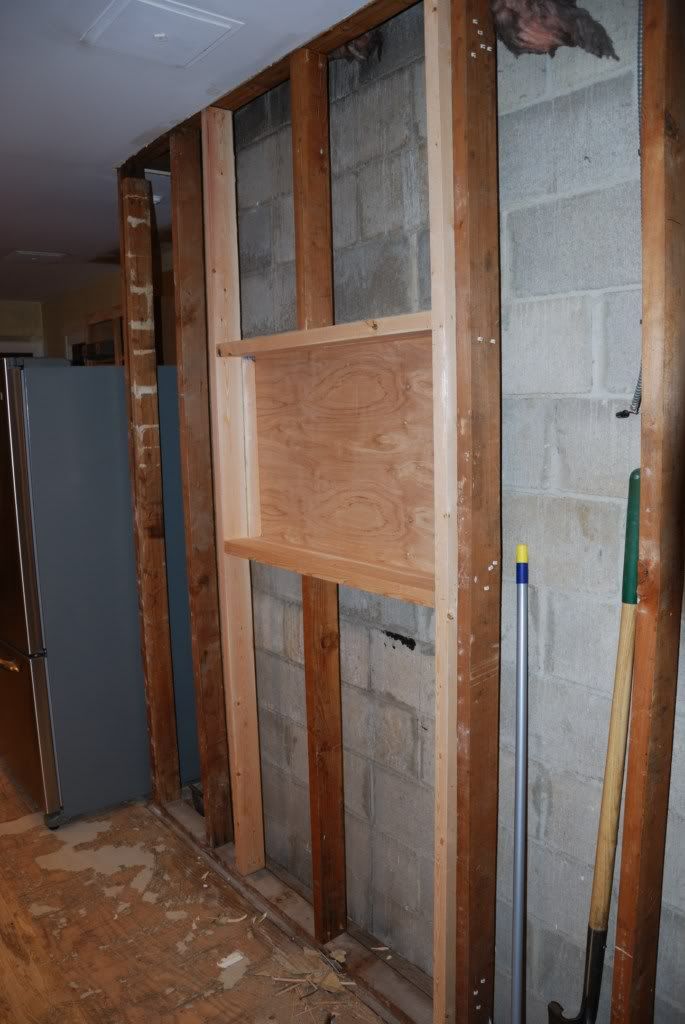
Removed the brick wall. Will sheetrock in its place.
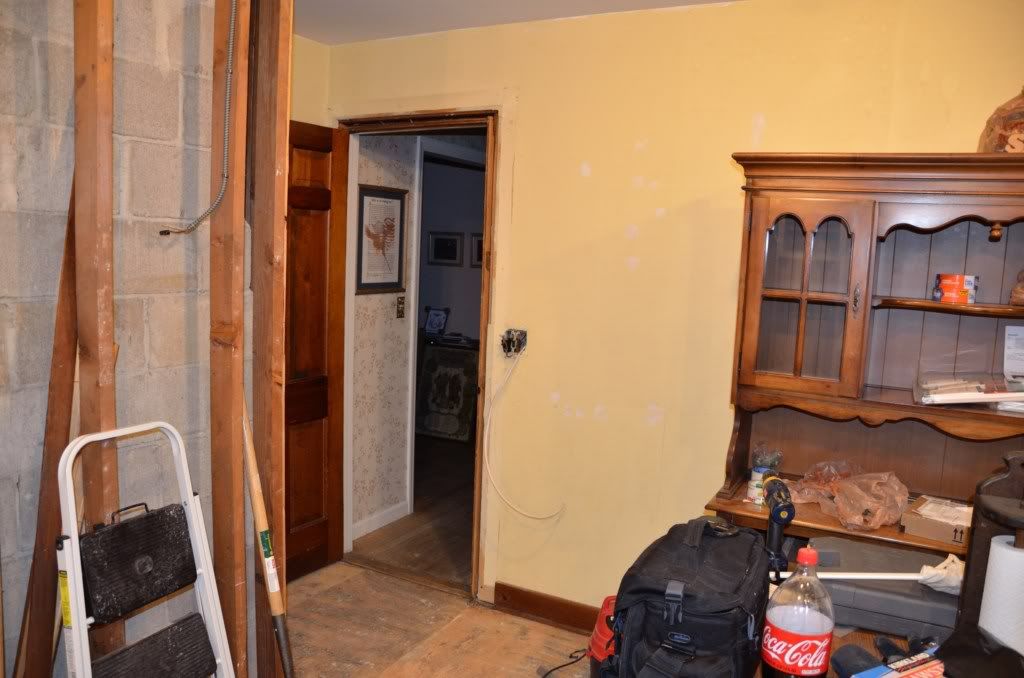
Wallpaper and chair rail removed. There were three different style wallpapers in the room. Will be painting the walls and possible installing a new chair rail:
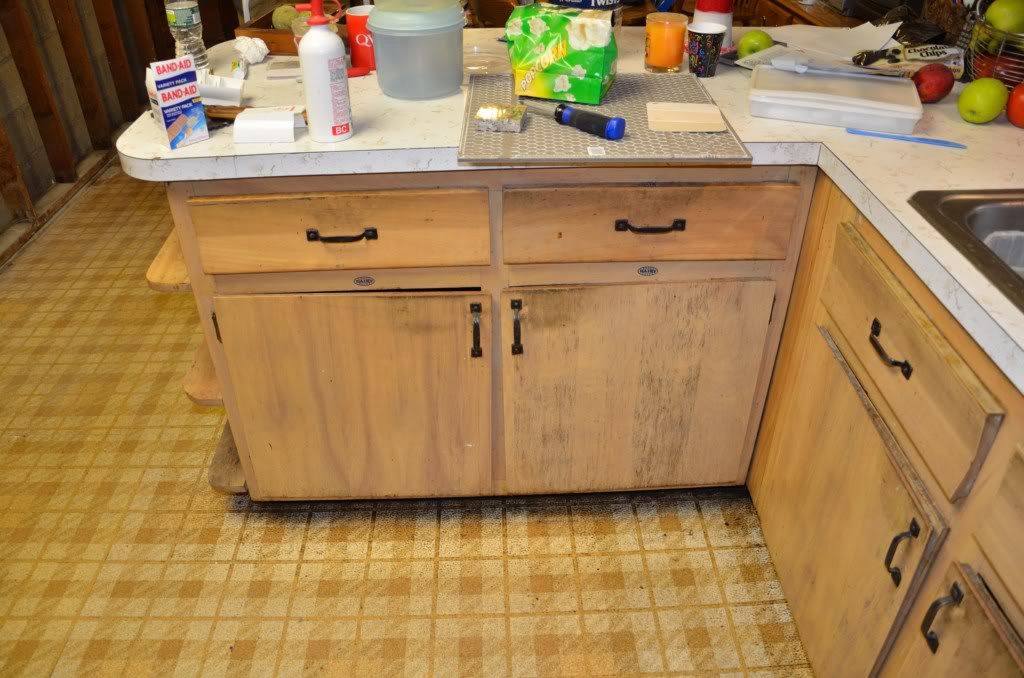
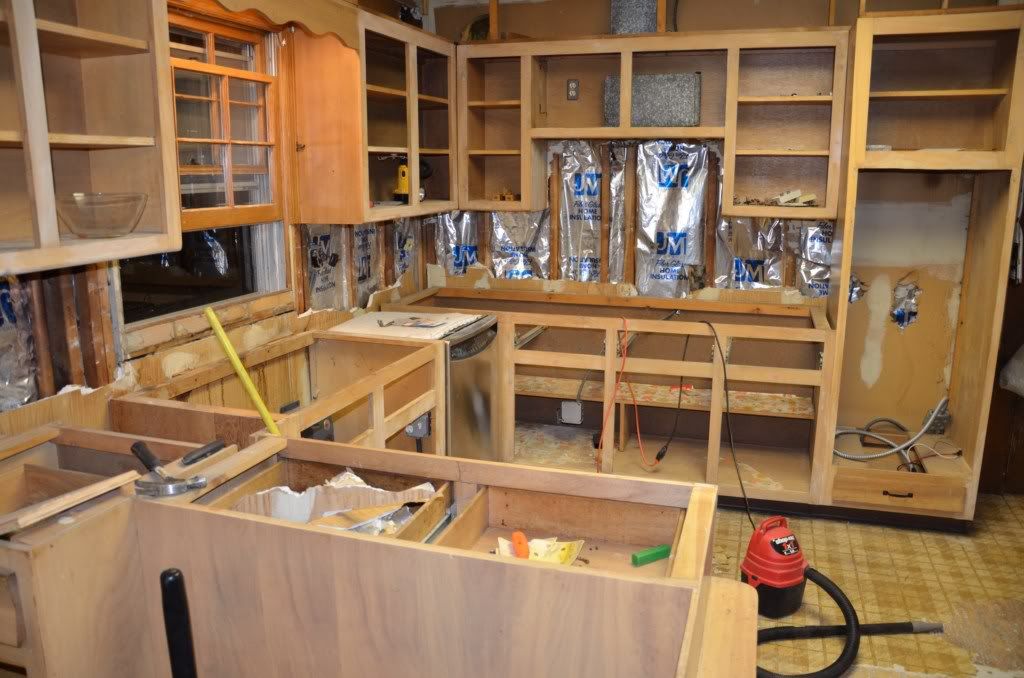
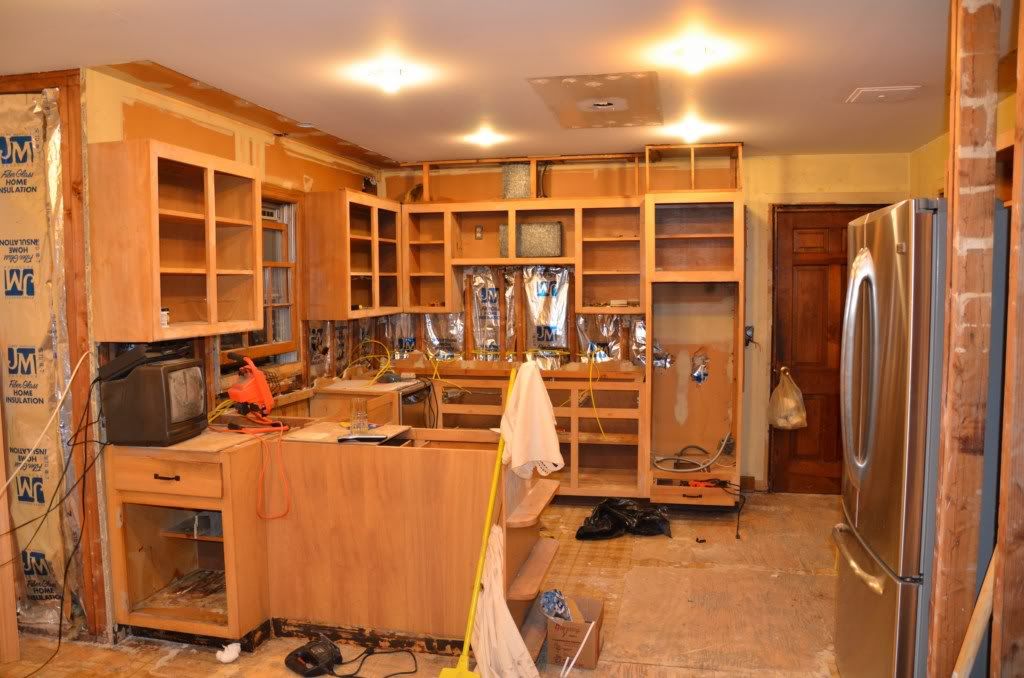
Removed all the cabinet doors, the oven, microwave and the brick above all the cabinets.
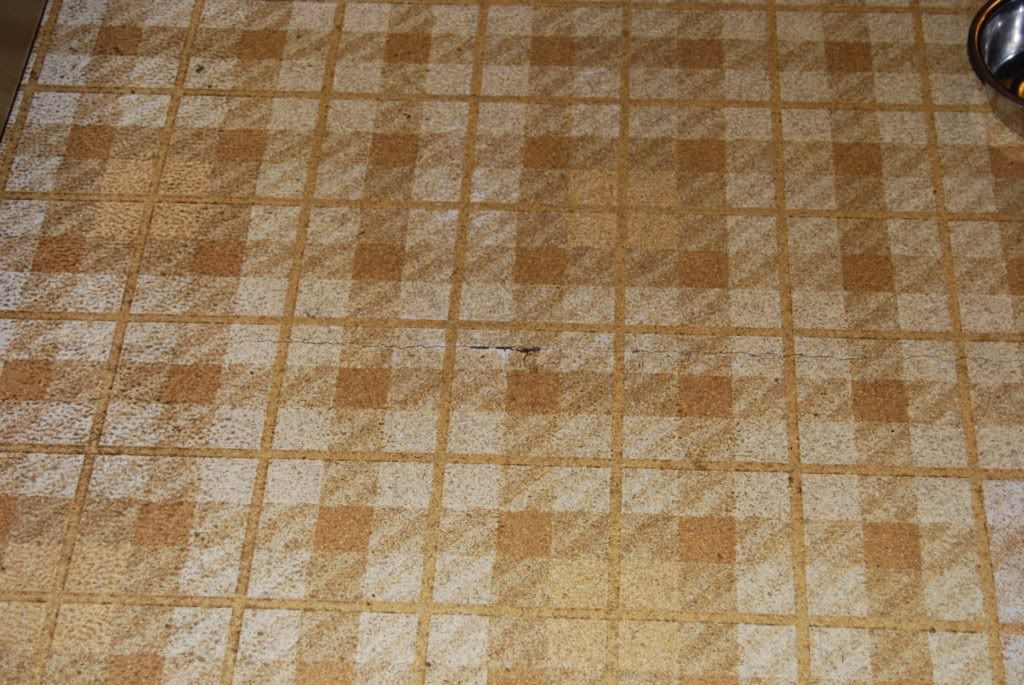
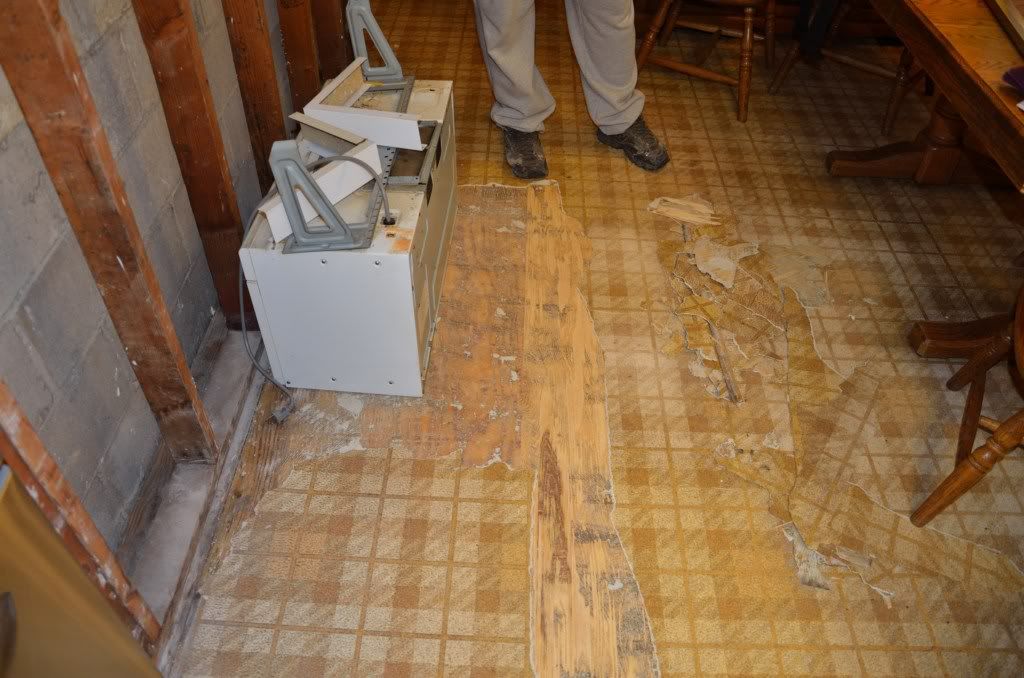
Started pulling up the linoleum to see how much work it will be. It's not the easiest thing in the world, mainly because it breaks apart. However it is coming up rather easily. It is just a big floor so will take some time. The good news, only one layer. Maybe I should thank my parents for never updating.
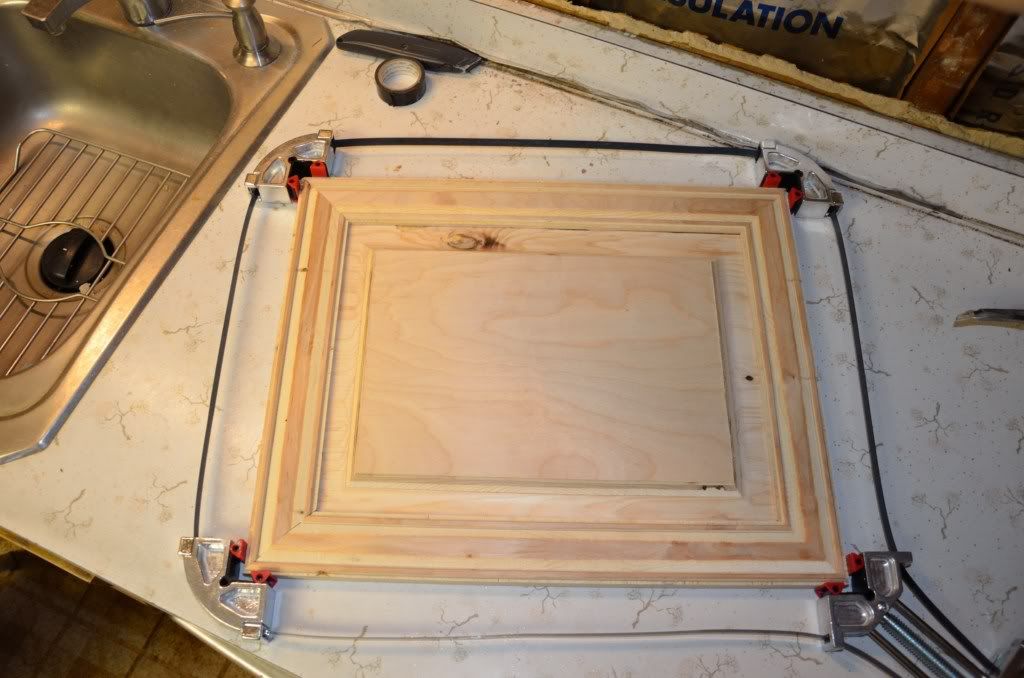
And lastly (for this post at list), this is the first door I made out of paintable Birch. I had some trouble at first as the router was chipping all the pieces. I realized I was just feeding it too fast. Slowed things down a bit and everything came out perfect. I haven't glued it yet. Waiting on the spaceballs (little rubber balls that keep the raised panel from moving). They should be here on Saturday so I can start assembling the doors.
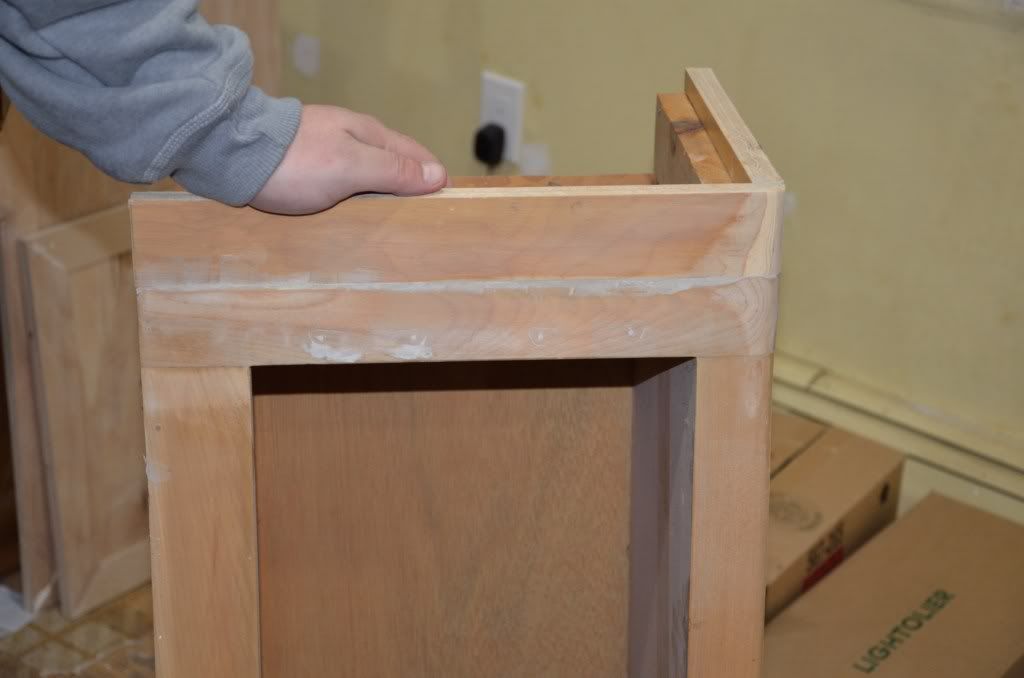
The cabinets aren't the greatest, but I think we can salvage them. There isn't really money in the budget for all new cabinets so they will be sanded down and painted. The new doors I am making will also obviously be painted. Really hoping to pull it off.
Well that's it for now. I know everyone loves these kind of threads so I figured I would detail everything as much as I can as I go for you guys to see.
So we started demo a couple days ago. Luckily, my brother put in some extra time to do a few things after I left. He lives there. It's about a 30 mile drive for me. So between trying to run my business and getting down there and getting stuff done, it's gonna be a lot of work. I'll post some pics of the before. Warning, if you just ate, do not view these pictures. It is that bad and you might toss up whatever you ate.
Before:
Demo:
Removed the brick wall. Will sheetrock in its place.
Wallpaper and chair rail removed. There were three different style wallpapers in the room. Will be painting the walls and possible installing a new chair rail:
Removed all the cabinet doors, the oven, microwave and the brick above all the cabinets.
Started pulling up the linoleum to see how much work it will be. It's not the easiest thing in the world, mainly because it breaks apart. However it is coming up rather easily. It is just a big floor so will take some time. The good news, only one layer. Maybe I should thank my parents for never updating.
And lastly (for this post at list), this is the first door I made out of paintable Birch. I had some trouble at first as the router was chipping all the pieces. I realized I was just feeding it too fast. Slowed things down a bit and everything came out perfect. I haven't glued it yet. Waiting on the spaceballs (little rubber balls that keep the raised panel from moving). They should be here on Saturday so I can start assembling the doors.
The cabinets aren't the greatest, but I think we can salvage them. There isn't really money in the budget for all new cabinets so they will be sanded down and painted. The new doors I am making will also obviously be painted. Really hoping to pull it off.
Well that's it for now. I know everyone loves these kind of threads so I figured I would detail everything as much as I can as I go for you guys to see.
 02-18-2011, 07:43 AM
#2
Team Owner
Spaceballs are the shiznit. Good move getting them.
My parent's kitchen is just as bad, but their house is in bad enough shape that when they sell it it will be as a teardown, so there's no point in renovating.
My parent's kitchen is just as bad, but their house is in bad enough shape that when they sell it it will be as a teardown, so there's no point in renovating.
02-18-2011, 07:51 AM
#3
Senior Moderator
 02-18-2011, 11:40 PM
#6
Senior Moderator
Awesome! That's a Lot work!! Any reason you choose birch? Now that the brick is gone, are you going to leave it open above the cabinets or frame it back in?
02-19-2011, 07:13 AM
#7
Suzuka Master
Thread Starter
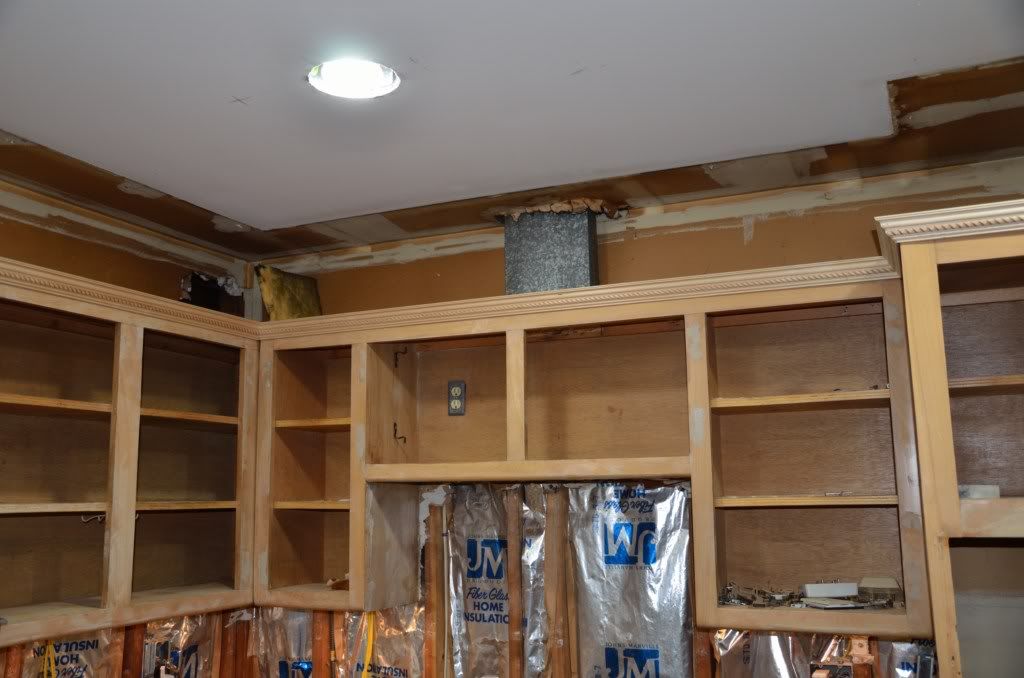
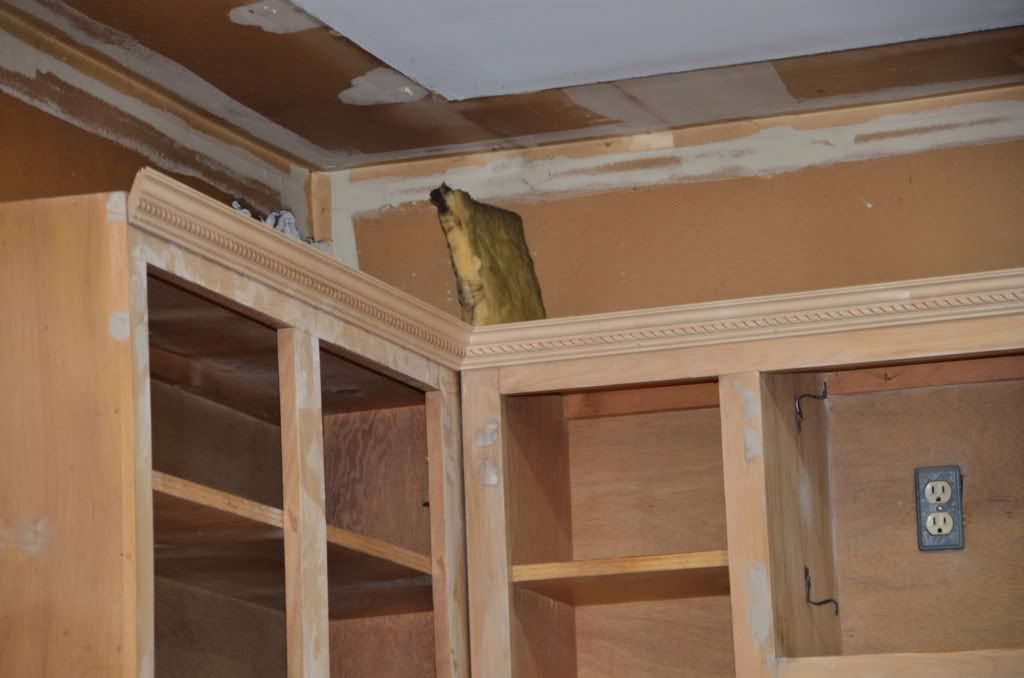
We have been discussing what to do over the cabinets. We could either leave it open and top it with a crown, or just box it back up with sheetrock. The only real issue is the ductwork for the microwave fan vent runs straight up. There are a couple of studs directly behind where the duct is, so I can just go straight back and into the wall to run it up. So I would have to box around the duct work and am afraid that will look awkward having the rest open with it boxed in that one spot.
Trending Topics

 02-19-2011, 10:43 AM
#9
One on the right for me
02-19-2011, 10:53 AM
#10
Senior Moderator
I am definitely new to this and do not really know my woods. I talked to the guys at the lumber yard after searching online. I couldn't really find much solid info online as to what is really the preferred wood, everyone seemed to have different answers. So the guys at the yard said the Birch will save money and give the same look because we are painting them. If we were staining, they said they would have gone a different route.
We have been discussing what to do over the cabinets. We could either leave it open and top it with a crown, or just box it back up with sheetrock. The only real issue is the ductwork for the microwave fan vent runs straight up. There are a couple of studs directly behind where the duct is, so I can just go straight back and into the wall to run it up. So I would have to box around the duct work and am afraid that will look awkward having the rest open with it boxed in that one spot.
We have been discussing what to do over the cabinets. We could either leave it open and top it with a crown, or just box it back up with sheetrock. The only real issue is the ductwork for the microwave fan vent runs straight up. There are a couple of studs directly behind where the duct is, so I can just go straight back and into the wall to run it up. So I would have to box around the duct work and am afraid that will look awkward having the rest open with it boxed in that one spot.

I think it looks pretty nice about the fridge and def worth considering leaving it open.
Looks awesome man!!
02-19-2011, 12:41 PM
#11
The Box
02-19-2011, 06:50 PM
#12
Suzuka Master
Thread Starter
No, you were spot on with the birch, it's just a little harder to work with, especially with the router, as you already mentioned it tends to chip. Now that you have one done and like it. I would set up some fences and stops and just cut everything at once so it's all the same. First one looks really good
I think it looks pretty nice about the fridge and def worth considering leaving it open.
Looks awesome man!!
I think it looks pretty nice about the fridge and def worth considering leaving it open.
Looks awesome man!!
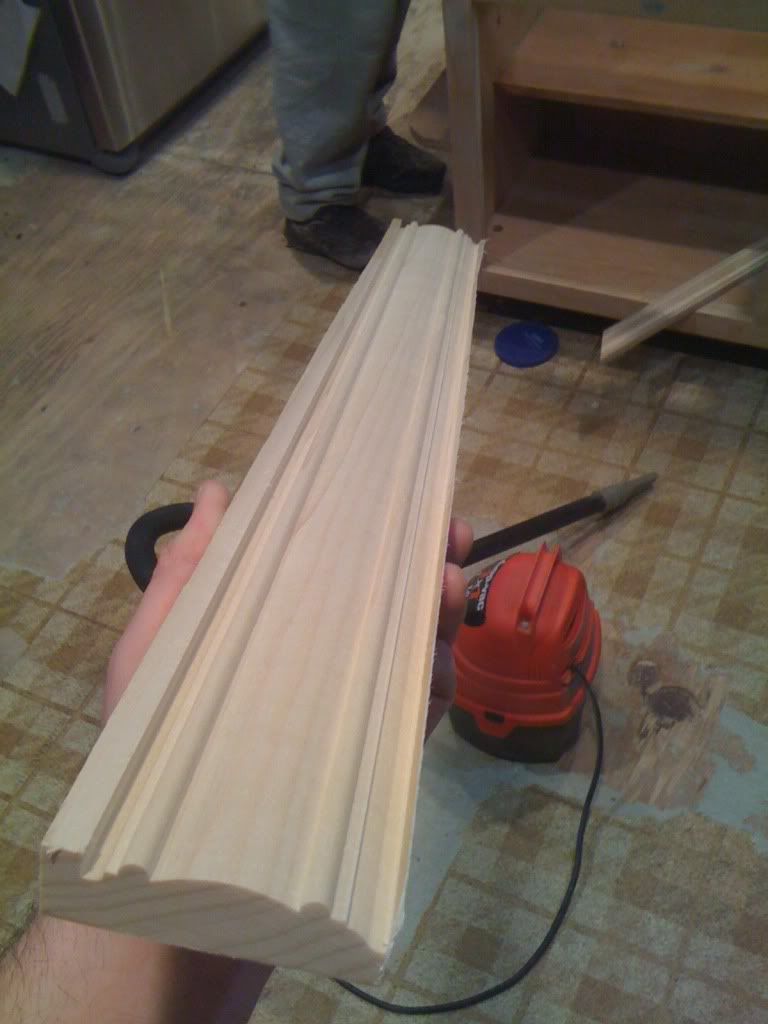
I think I will be leaving it open over the cabinets. I found a piece of moulding in the utility room that was laying around. I used it to show my parents the basic look if I put a crown on the top. Even with the moulding that was just laying around it looked really good. So I think we will go that route.
As for what has been done so far. My brother worked a bit more on the floor. He ended up pulling up some wood along with the linoleum, so I might have to replace some sub flooring too. The linoleum is really down pretty good in spots. It might just be worth cutting the floor and just pulling up what is there and replacing as much subfloor as possible. We are going to be screwing it down more either way (old or new).
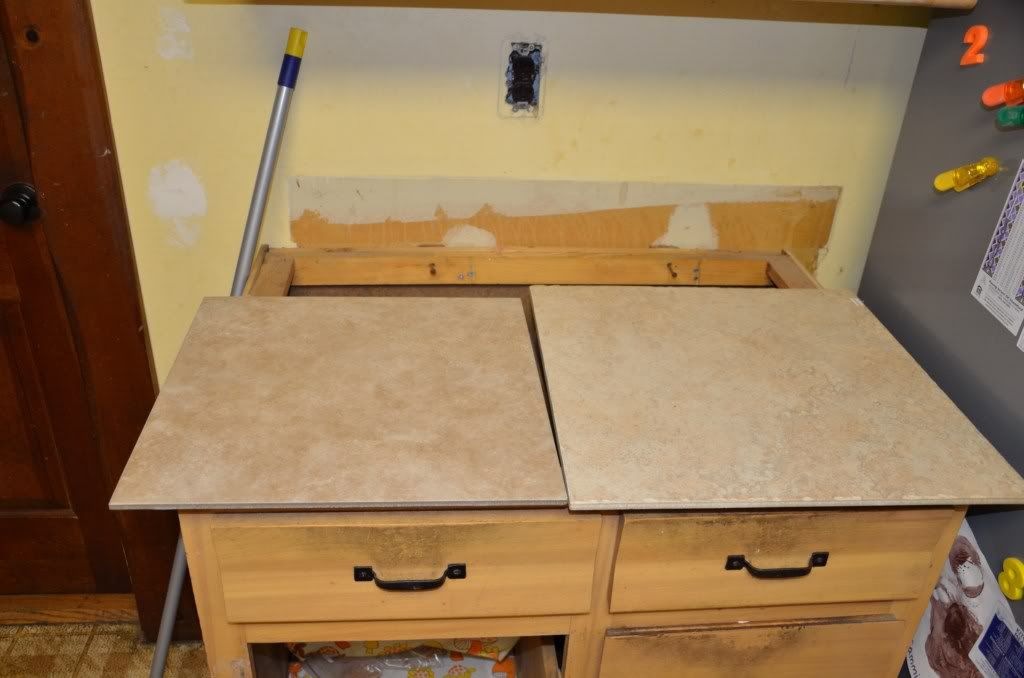
We also pulled the sink, stove top, and the counters. Had a granite guy come and do a template. He also brought some tile samples. He just sells them, so I will still be installing them. His are about 3 times the cost of the home depot tiles we picked out. It might be worth it cause I am worried about home depot's ability to match stock on ~30 boxes of tiles.
I had my electrician stop by today. I was considering just doing all the electrical myself, but since I have an electrician I work with (he works on my jobs, I work on his), so I figured I would just have him do it which is good so it will free me up to do more of the doors and other stuff. We are going to do recessed lighting and pull out the god awful wagon wheel light and industrial looking florescent light. We will have 4 cans, probably 6 inch over the cooking area, four over the eating area, with a small 4 inch most likely directly over the sink. We will be removing the valance thing between the cabinets over the sink. We are also going to put in under cabinet lighting under all the cabinets. Should help showcase the new granite nicely. We'll also change all the outlets and switches to new white decora style. I did that to every switch and outlet in my house and I think it really updates the look.
Here are a few more pics.
Range, sink, and counters removed:
Some of the tiles (the tile on the bottom left is the home depot tile):
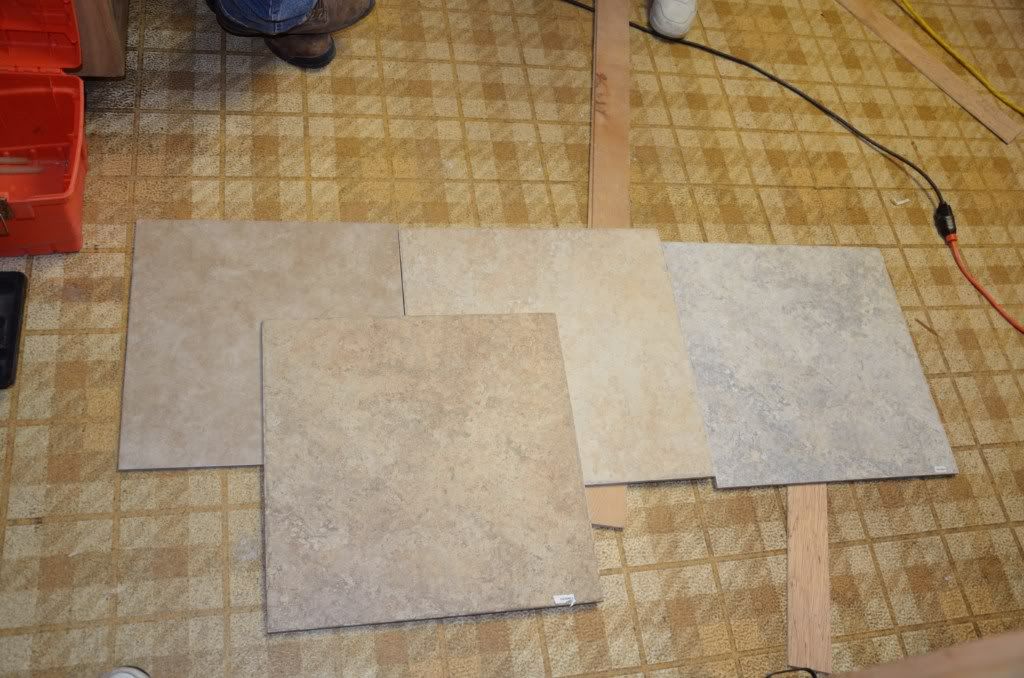
The two finalists, the home depot (18x18) on the left and the granite guys (20x20) on the right:
Some more linoleum pulled up:
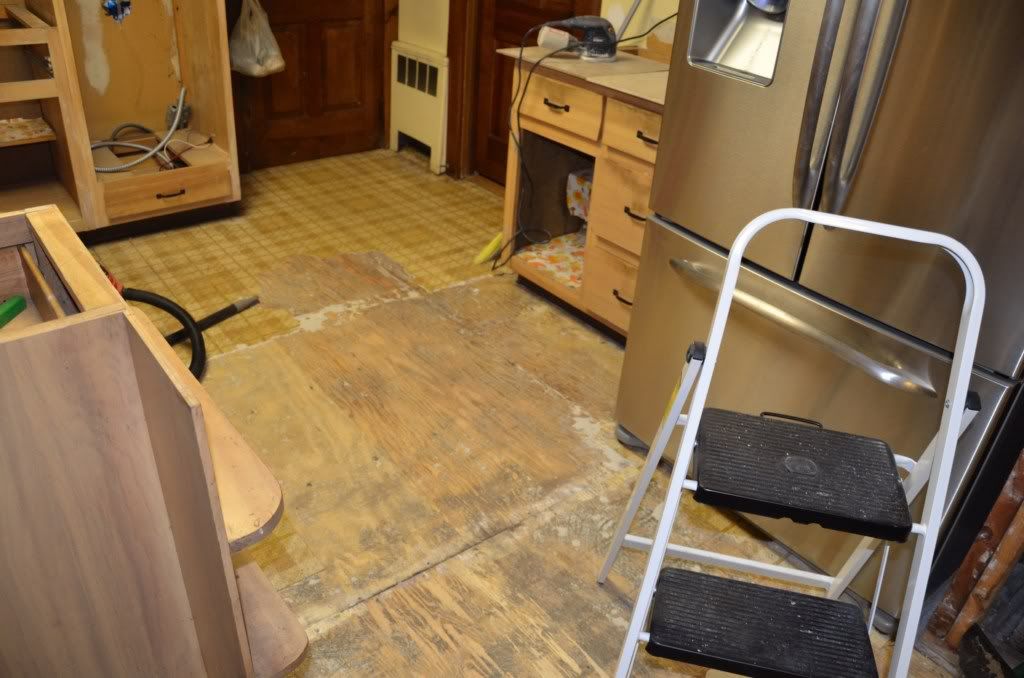
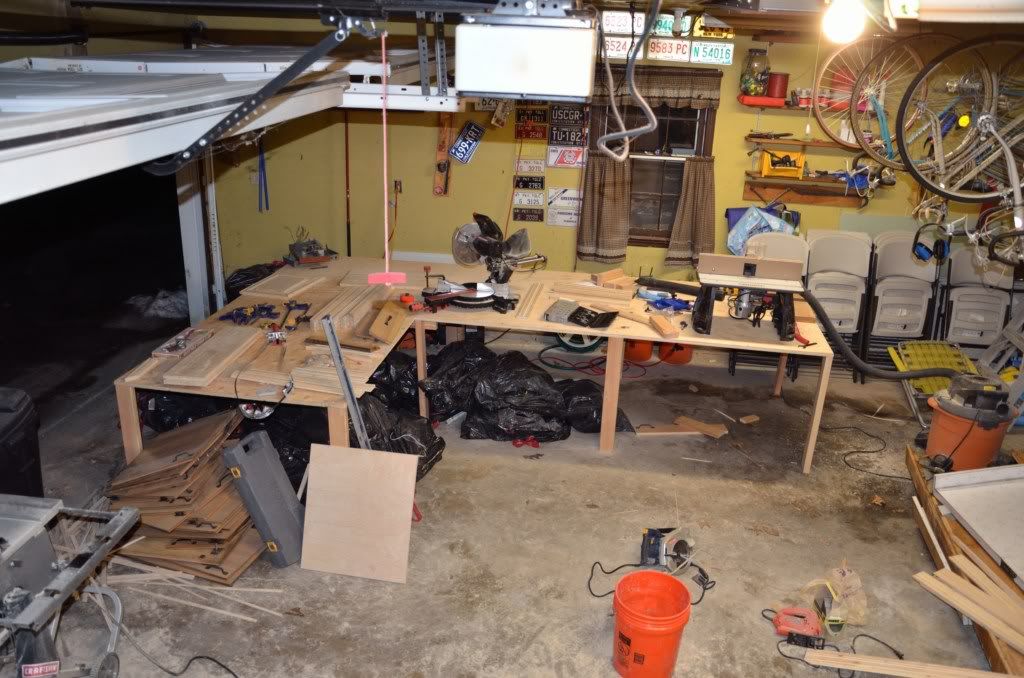
My dirty workspace. I have to say it is nice having the space to build the table and work. My garage is a small one car garage I built some shelving in so there is not a lot of space:
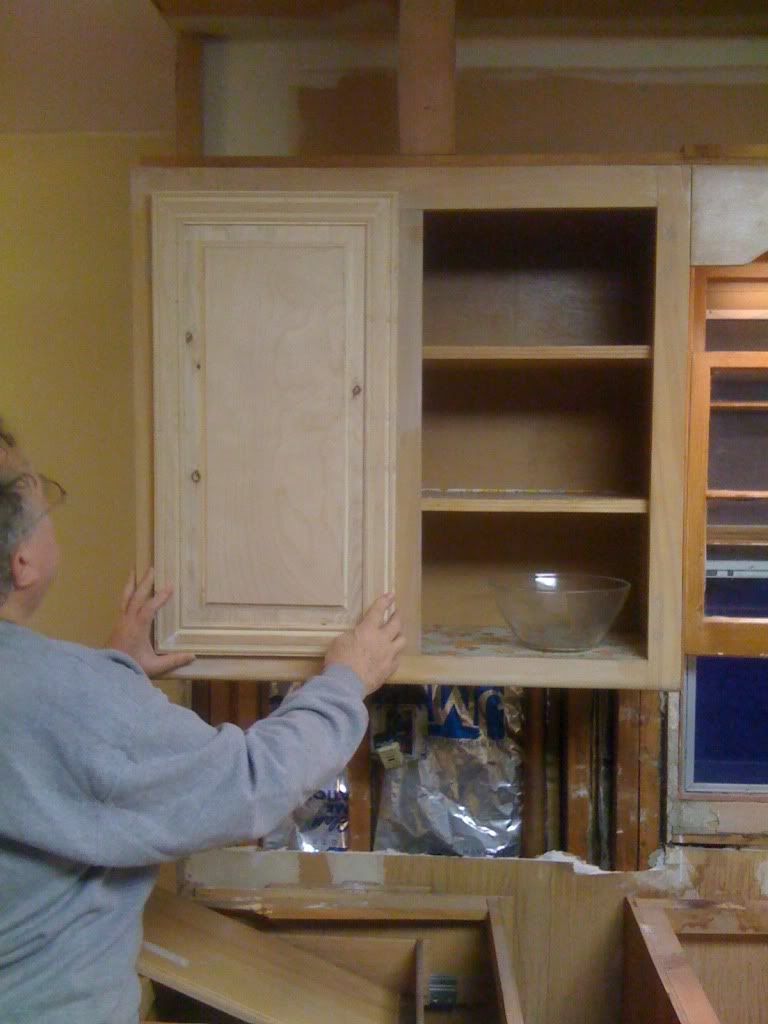
An iPhone pic of my father holding one of the doors I made up to the cabinet:
Well that's it for now. I'll keep updating as we go.
Last edited by 2001AudiS4; 02-19-2011 at 06:59 PM.
02-19-2011, 07:01 PM
#13
Three Wheelin'
Nice looking kitchen, cant wait for the finnished photos.
02-19-2011, 07:03 PM
#14
Suzuka Master
Thread Starter
02-19-2011, 07:05 PM
#15
Three Wheelin'
It looks better then mine, lol.
02-19-2011, 07:47 PM
#18
Senior Moderator
I like the tile on the left.
Would probably def be worth the time and effort to find someone with a planer to make all the doors if the wood varies that much. Or a harbor freight/craigslist planer. Might even be worth it to buy some doors. Not sure how much just doors go for these days.
Would probably def be worth the time and effort to find someone with a planer to make all the doors if the wood varies that much. Or a harbor freight/craigslist planer. Might even be worth it to buy some doors. Not sure how much just doors go for these days.
02-25-2011, 08:55 PM
#19
Suzuka Master
Thread Starter
Sorry for the lack of updates. Between running my business, working at my sister's and sister-in-laws, plus working on the kitchen, I have had so little time lately. We are slowly making progress. My brother has been working on getting the linoleum up still. It's a HUGE pain in the ass. I've been working on building some more doors, and also started installing a crown on the cabinets. We also extended the side of one of the cabinets. When they bought a new fridge, the cabinets were all moved a couple inches to the left to make room for the larger fridge. This resulted in a gap to the right of the cabinets. So we just filled the gap. We also got all the lighting finished, as well as upgraded to all new white decora style plugs and switches. We did recessed lighting with 8 5" cans and 1 4" can over the sink. We removed the ugly valance over the sink to open it up. It looks much better and allows for light from the 4" can. We also ran a 14/3 to install a 3 ways switch. Previously, there were two lights, one in the eating area and one in the cooking area. Only one of the lights was on a 3 way. Now both are, each on its own 3 way switch. Here are some pictures:
Some of the new lighting:
More of the new lighting. I forgot to mention that I removed all the door and window molding (except the window molding over the sink. That will come out too):
Door molding removed:
The extension we put on the cabinet over the fridge:
Routed the extension piece to match the curvature on the bottom of the cabinet:
New molding installed on cabinet. I definitely think they look better with a crown:
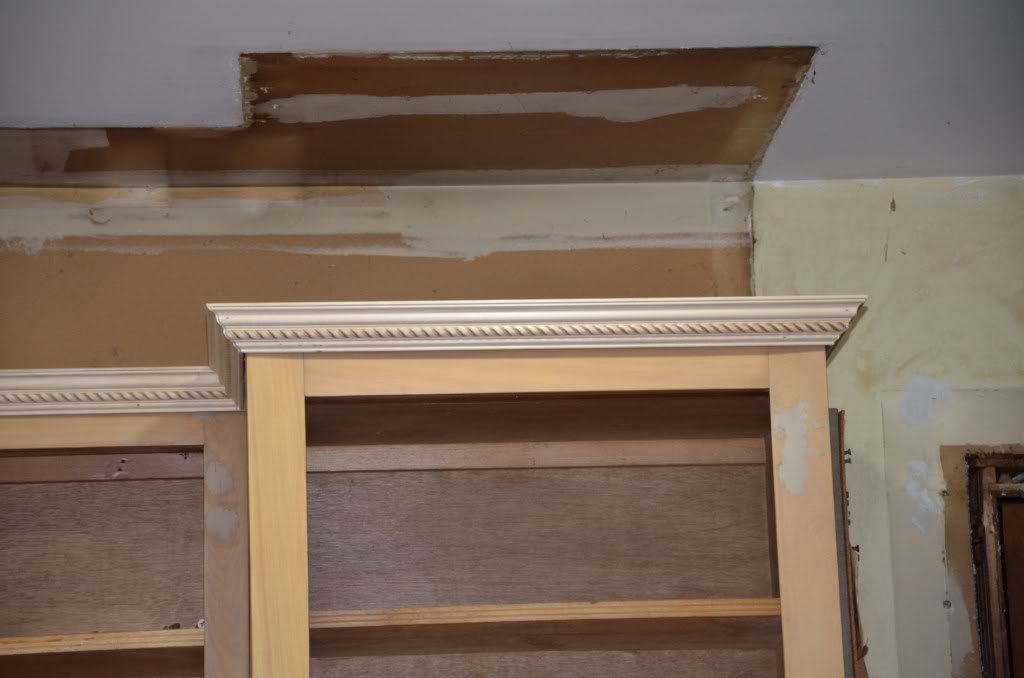
This is where I stopped with the molding. I wanted to finish it all today but realized I can't until I replace the window molding since this will butt up against it. I couldn't finish a couple other spots until after we sheetrock:
Well that's it for now. I have been working about 13 hours a day for a couple weeks now between this project and others along with work. I am going away for a few days for a job on Monday so I won't be able to do much more until the end of next week.
Some of the new lighting:
More of the new lighting. I forgot to mention that I removed all the door and window molding (except the window molding over the sink. That will come out too):
Door molding removed:
The extension we put on the cabinet over the fridge:
Routed the extension piece to match the curvature on the bottom of the cabinet:
New molding installed on cabinet. I definitely think they look better with a crown:
This is where I stopped with the molding. I wanted to finish it all today but realized I can't until I replace the window molding since this will butt up against it. I couldn't finish a couple other spots until after we sheetrock:
Well that's it for now. I have been working about 13 hours a day for a couple weeks now between this project and others along with work. I am going away for a few days for a job on Monday so I won't be able to do much more until the end of next week.
02-25-2011, 09:11 PM
#21
Suzuka Master
Thread Starter
02-28-2011, 12:46 PM
#24
Senior Moderator
Awesome!
02-28-2011, 07:23 PM
#25
Suzuka Master
Thread Starter
Thanks guys. I haven't been there since Friday. Worked Saturday all day, and took Sunday off to recover from a long stretch over the last couple of weeks. Up in Cape Cod for a job the next few days so I probably won't get back down there to work until the end of the week at best.
02-28-2011, 10:45 PM
#26
My Member is Registered
I love the documentation of your project! I used to be a cabinet and counter top maker and know exactly what you are going through. Smart move on the electrician. As far as the tile, I like the darker color, more of an earth tone to it. The lighting is very bright so you could easily go with a darker color on the flooring. Great job!
 03-01-2011, 06:20 PM
#28
Suzuka Master
Thread Starter
03-01-2011, 06:46 PM
#29
What he do, fart as he drug his ass across the floor?
03-01-2011, 08:43 PM
#30
Matt
Join Date: Apr 2006
Location: St. Louis, MO
Age: 43
Posts: 2,663
Likes: 0
Received 0 Likes
on
0 Posts
This is a great thread, I love this stuff. Thanks for taking the time to write it up and provide updates. Also, very impressive work so far; looking forward to the "After" pics.
 03-10-2011, 09:22 PM
#32
Suzuka Master
Thread Starter
Sorry, for the lack of updates. I haven't gotten too much done in the last couple of weeks due to work. I went today and took care of a few things. I got some door molding up, and built and installed the box for the recessed TV. Sorry for the crappy pics. You can barely see the molding in these pics. I will get some better ones on my next trip:
We are probably going to sand the doors down and paint them. The one door that goes to the garage has a crack in it, so hopefully the wood filler will be good enough.
I also decided the birch was just not working out for the doors. Too much pitting and chipping. I picked up some 3/4" poplar and it is SO much easier to work with. I ran a half dozen rails through the router and they are so much smoother then with the birch
This picture is before I ran it through the table saw to cut off the excess. That's about it for now. Hopefully we can get moving a bit more now that I got some of my jobs out of the way.
03-11-2011, 10:27 AM
#34
Senior Moderator
Regional Coordinator
(Mid-Atlantic)
Regional Coordinator
(Mid-Atlantic)
iTrader: (6)
Awesome work, definitely giving me inspiration for when I start my kitchen remodel, keep it up bro
03-11-2011, 10:36 AM
#35
Suzuka Master
Thread Starter
03-11-2011, 11:06 AM
#36
Senior Moderator
Join Date: May 2003
Location: Better Neighborhood, Arizona
Posts: 45,641
Received 2,329 Likes
on
1,309 Posts
Very nice. My wife and I are remodeling our kitchen this summer. Looking forward to seeing the end!
03-11-2011, 03:29 PM
#37
Moderator
Regional Coordinator (Southeast)
Regional Coordinator (Southeast)
Join Date: Dec 2003
Location: Mooresville, NC
Age: 38
Posts: 43,618
Received 3,833 Likes
on
2,571 Posts
great work can't wait to see the rest
03-12-2011, 08:53 PM
#38
Suzuka Master
Thread Starter
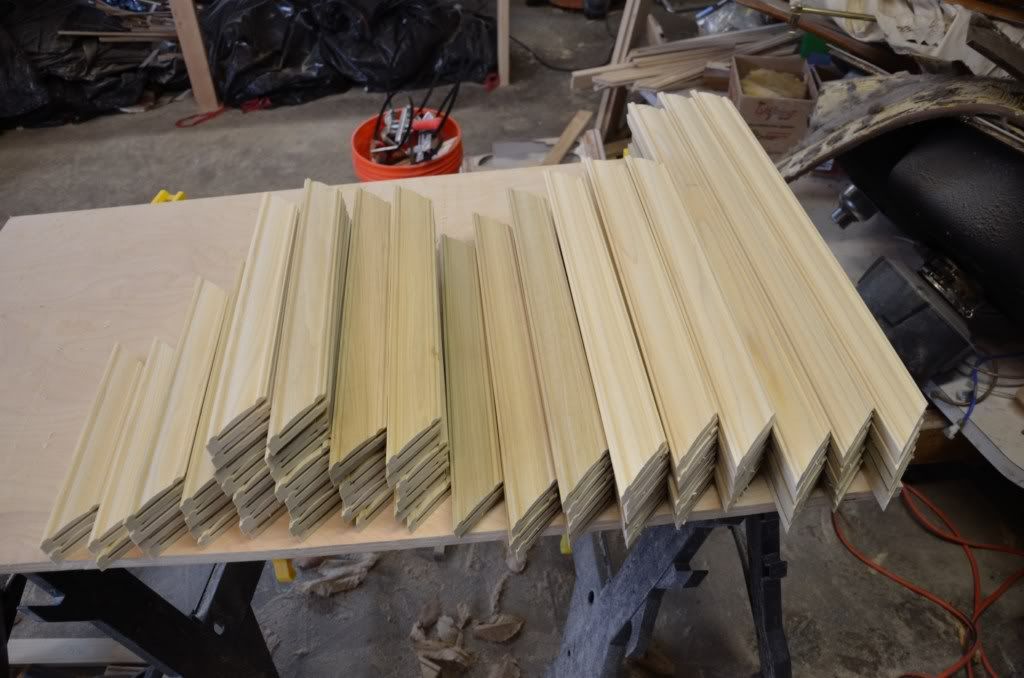
Well today I got all the rails and stiles made on the router for the cabinet doors. 94 in total.
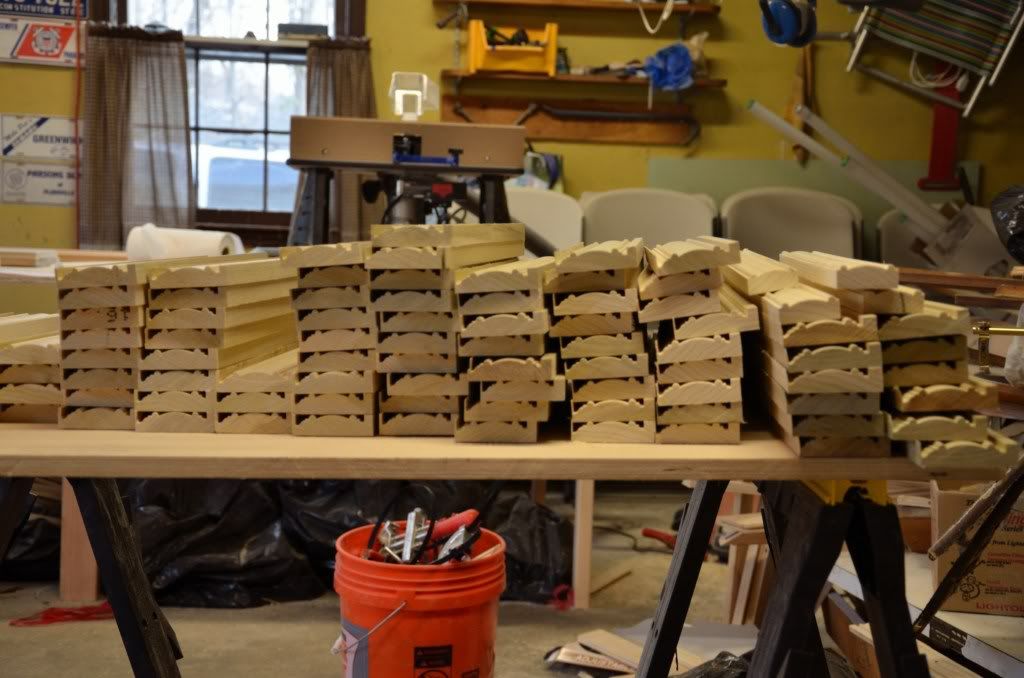
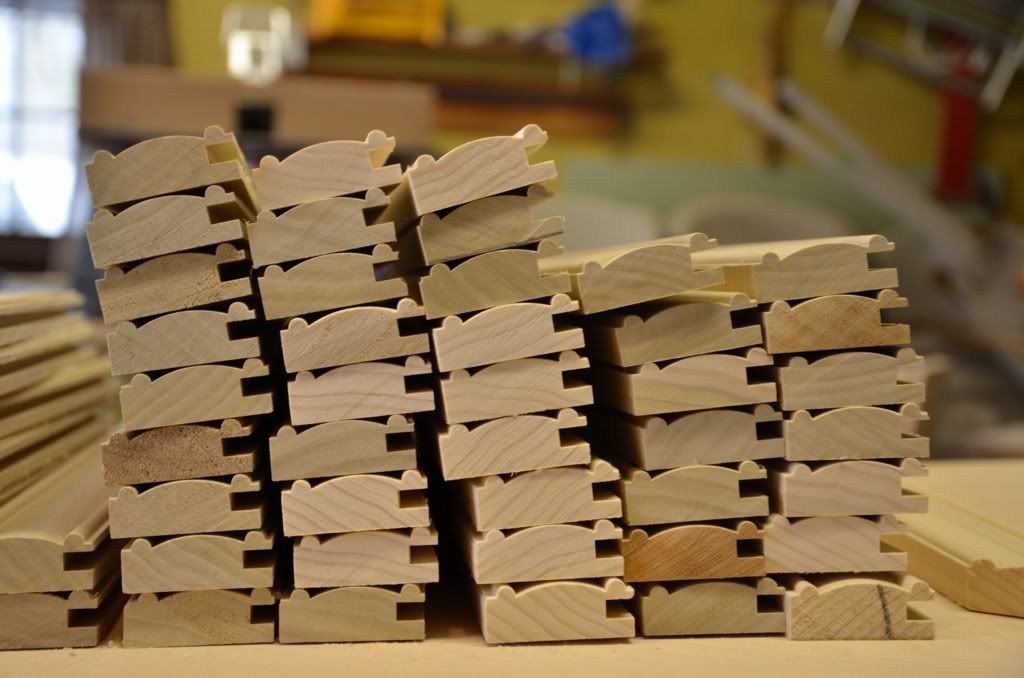
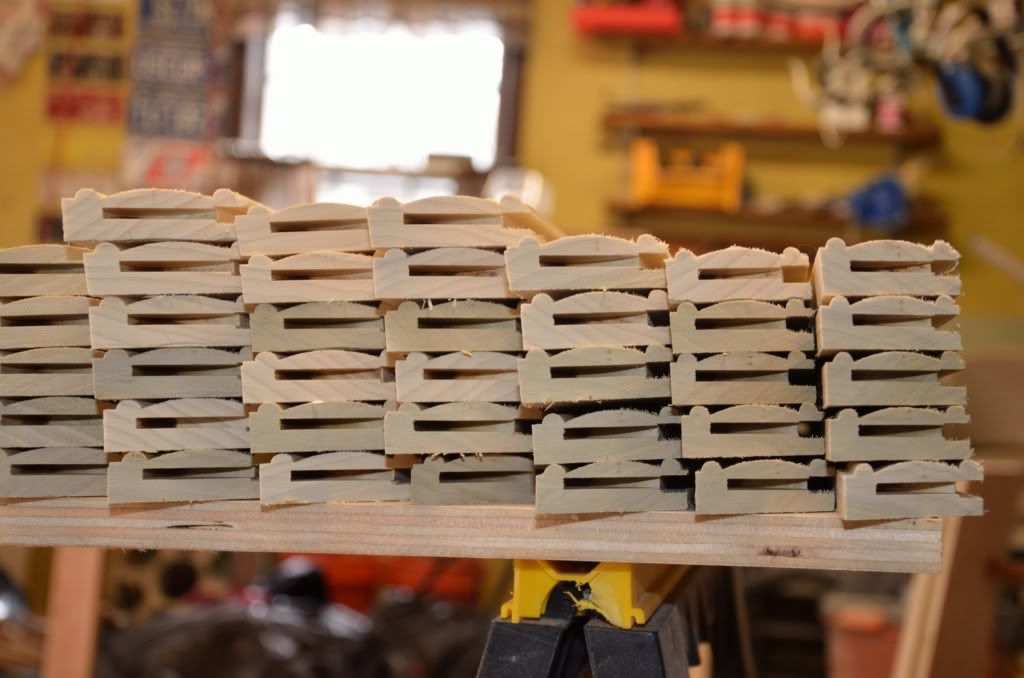
After I ran them through the table saw to cut off the excess:
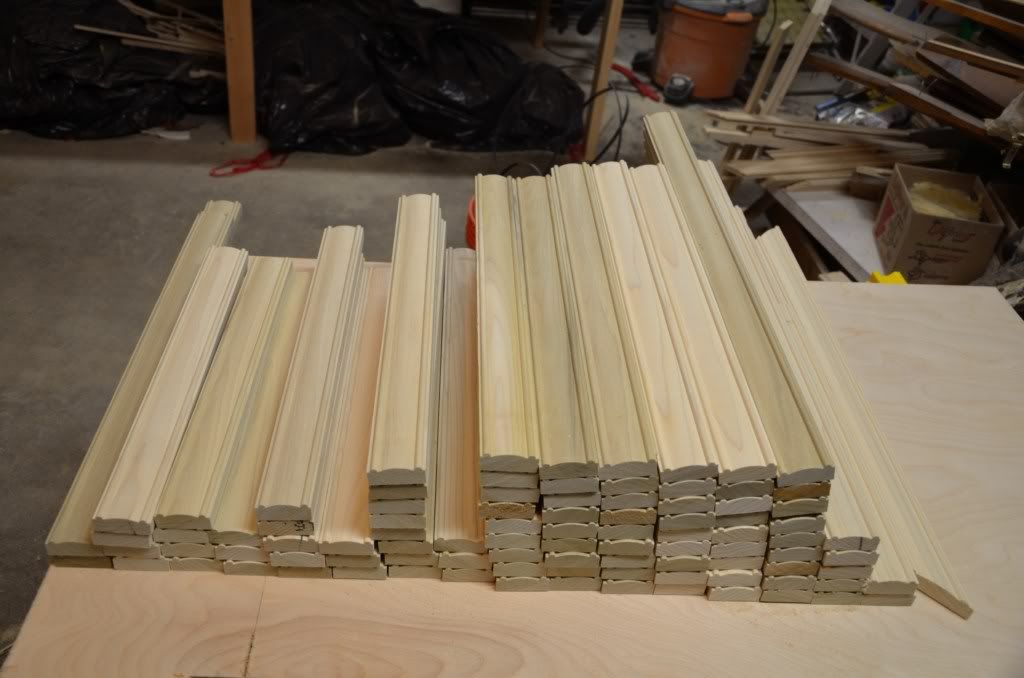

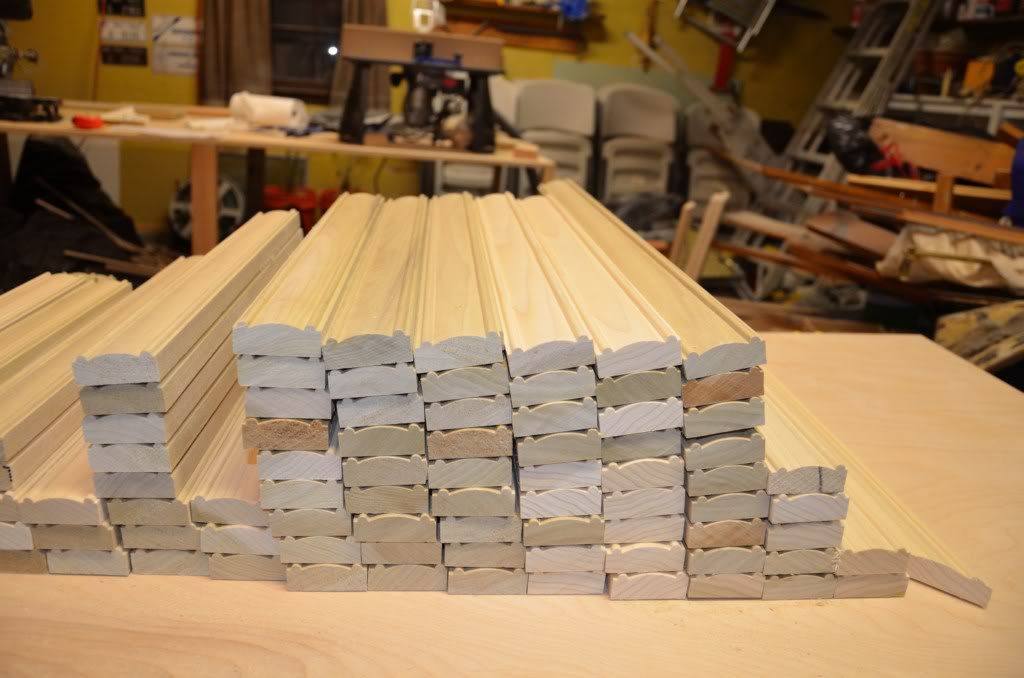
I know, not much of an update, but this took me all day. I am sure someone with more experience could do this in a couple hours. I took my time though to make sure I did it right. Now that these are done the rest of the process of making the doors should go much faster. They were the hardest part.
After I ran them through the table saw to cut off the excess:
I know, not much of an update, but this took me all day. I am sure someone with more experience could do this in a couple hours. I took my time though to make sure I did it right. Now that these are done the rest of the process of making the doors should go much faster. They were the hardest part.
03-12-2011, 10:44 PM
#39
Team Owner
There're some things you just can't hurry. Cutting profiles in wood is one of them if you want them to come out decent and blood-free.
Looking good!
Looking good!
03-18-2011, 09:47 PM
#40
Suzuka Master
Thread Starter
Okay, ready for another update. It's been a busy week, and luckily was able to get some stuff done on the kitchen.
I rip a channel in all the rails and stiles to encase the raised panels:
Then it was time to make all the miter cuts:
After the miter cuts, I had to route out a slot in the edges for the biscuits:
I then had to piece together the rails and stiles for all the different sized doors, to take the measurements for the raised panels:
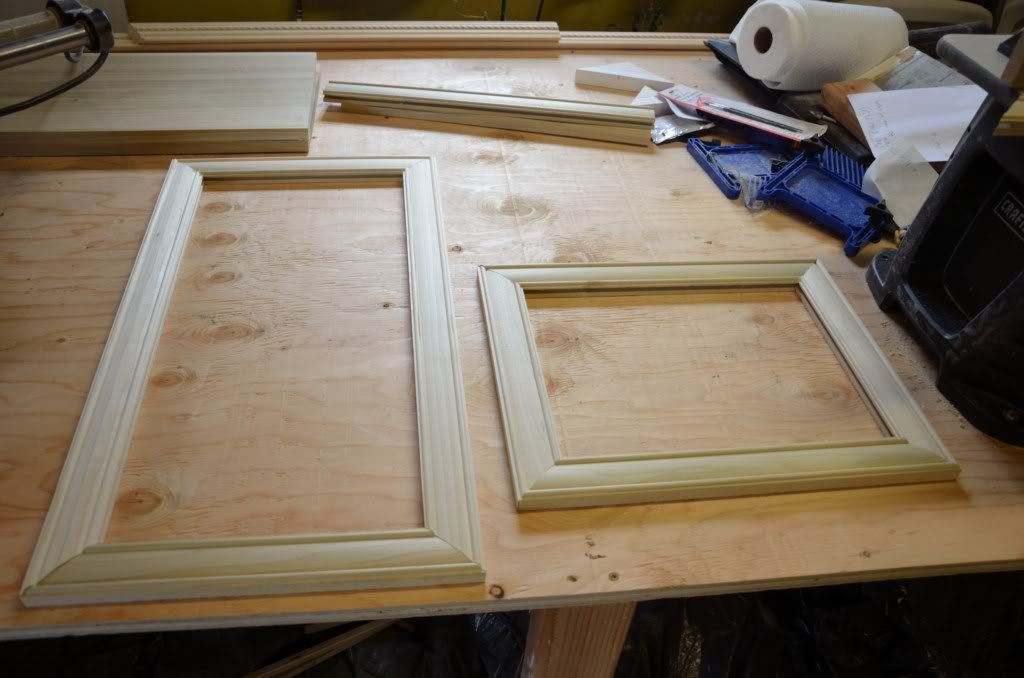
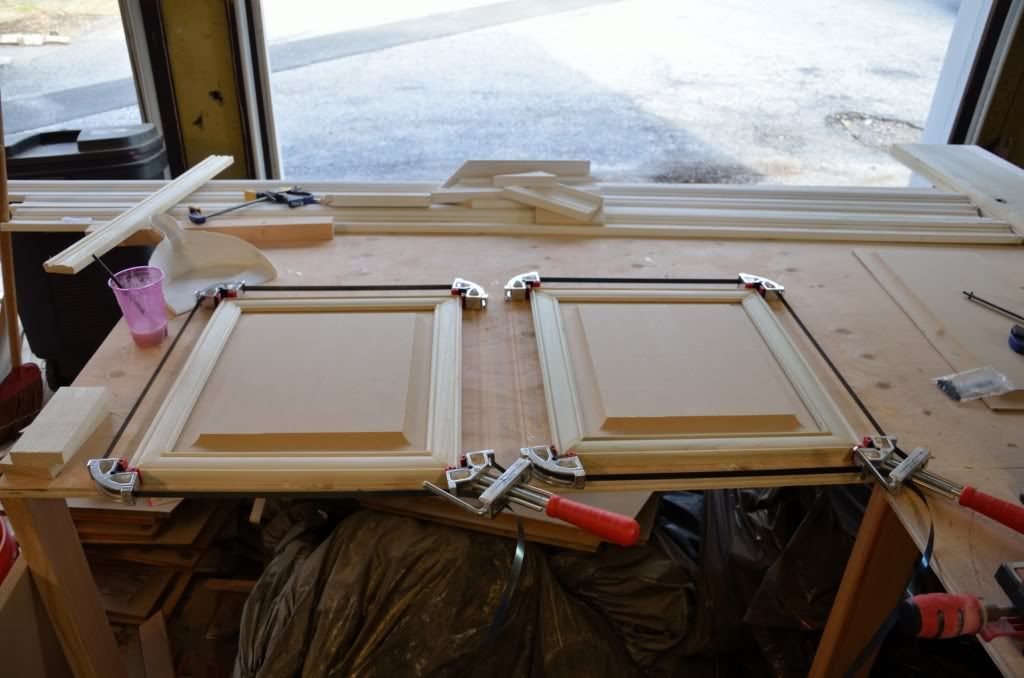
Then it was just time to cut out the panels and route them. This created a ton of dust. Then it was just time to glue the doors together and clamp them. Dry time was only 30 minutes:
I have made 16 of the 22 doors so far:
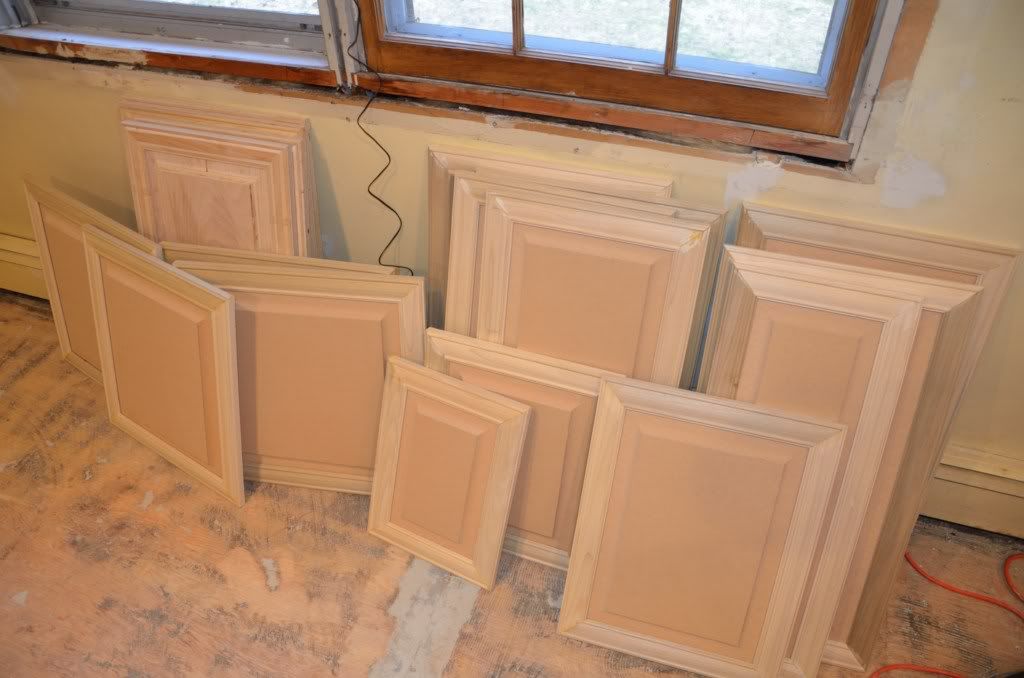
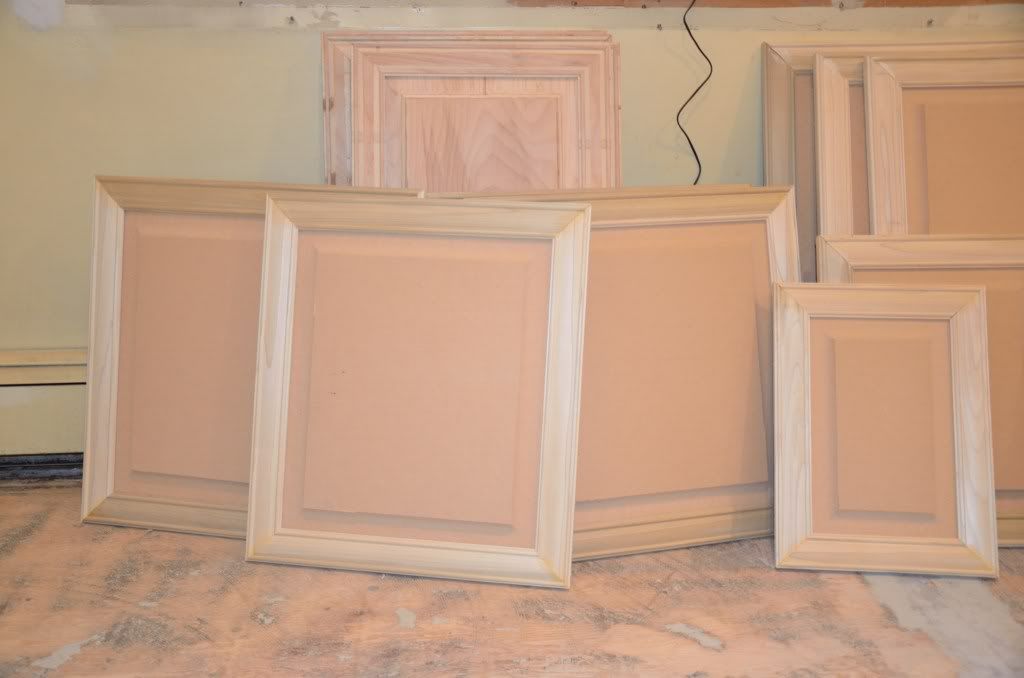
You can see a couple of the doors I made out of birch in the background. The poplar/mdf combo definitely makes a much smoother door.
My brother also got the rest of the linoleum up:
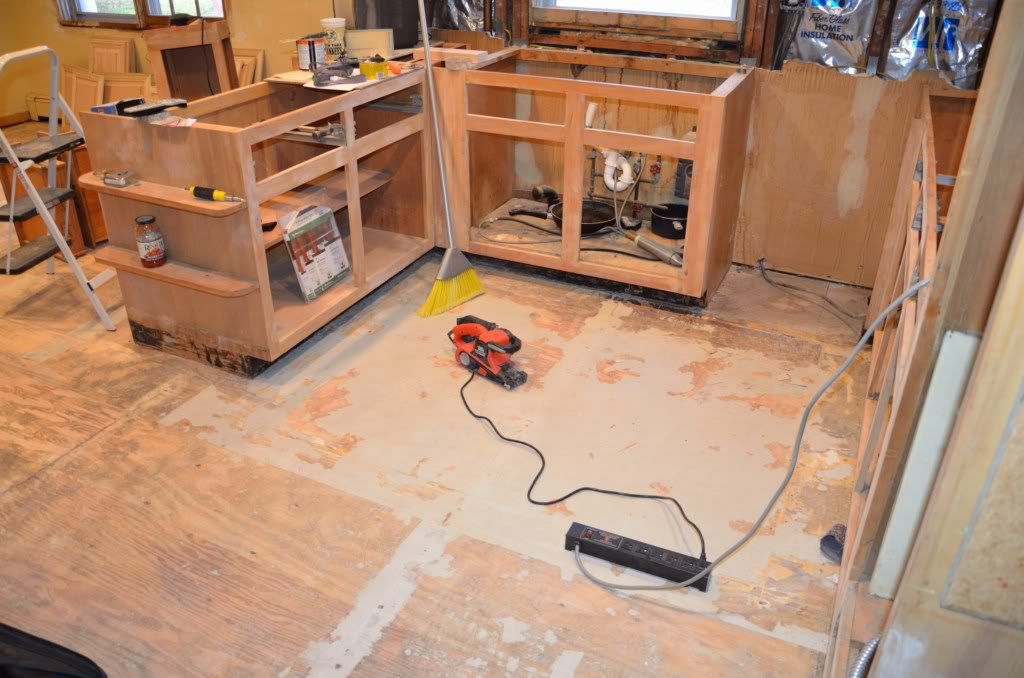
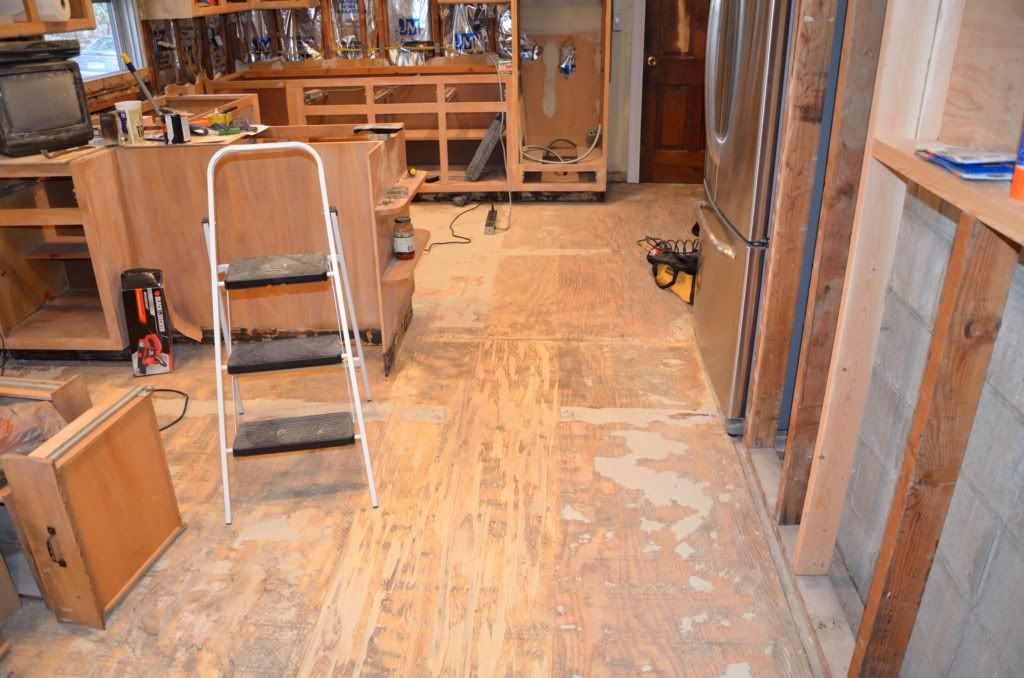

He has also been sanding the cabinets, and filling some holes and cracks with wood filler. We will probably pick up sheetrock this weekend. The only thing I have to do is run my wires for the TV and install the cooling conduit and then we can start sheetrocking. Thats about it for now.
I rip a channel in all the rails and stiles to encase the raised panels:
Then it was time to make all the miter cuts:
After the miter cuts, I had to route out a slot in the edges for the biscuits:
I then had to piece together the rails and stiles for all the different sized doors, to take the measurements for the raised panels:
Then it was just time to cut out the panels and route them. This created a ton of dust. Then it was just time to glue the doors together and clamp them. Dry time was only 30 minutes:
I have made 16 of the 22 doors so far:
You can see a couple of the doors I made out of birch in the background. The poplar/mdf combo definitely makes a much smoother door.
My brother also got the rest of the linoleum up:
He has also been sanding the cabinets, and filling some holes and cracks with wood filler. We will probably pick up sheetrock this weekend. The only thing I have to do is run my wires for the TV and install the cooling conduit and then we can start sheetrocking. Thats about it for now.