Magnetic Knife Block
 08-25-2012, 08:31 PM
#1
Racer
Thread Starter

Magnetic Knife Block
I was tired of dedicating a drawer to the knives, and I wanted to get them in a more easily accessible place. Thought about doing a magnetic strip on the wall, but I only have 14 inches from the bottom of the cupboards to the counter, which it makes it difficult to see them without bending over.
So...I made this.
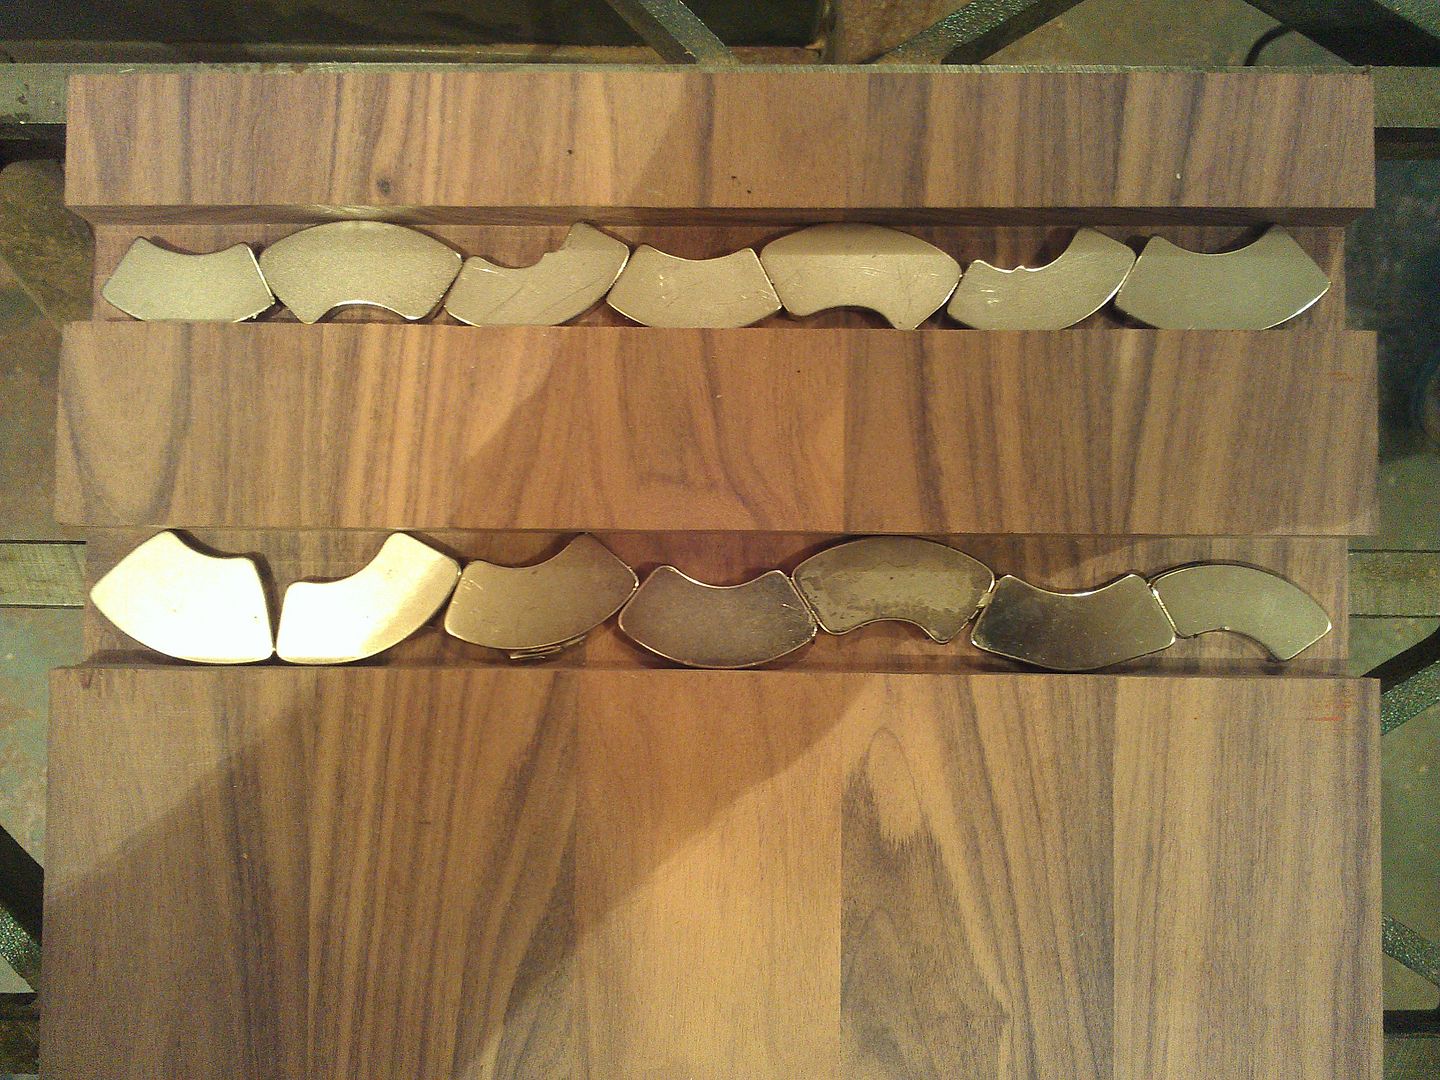
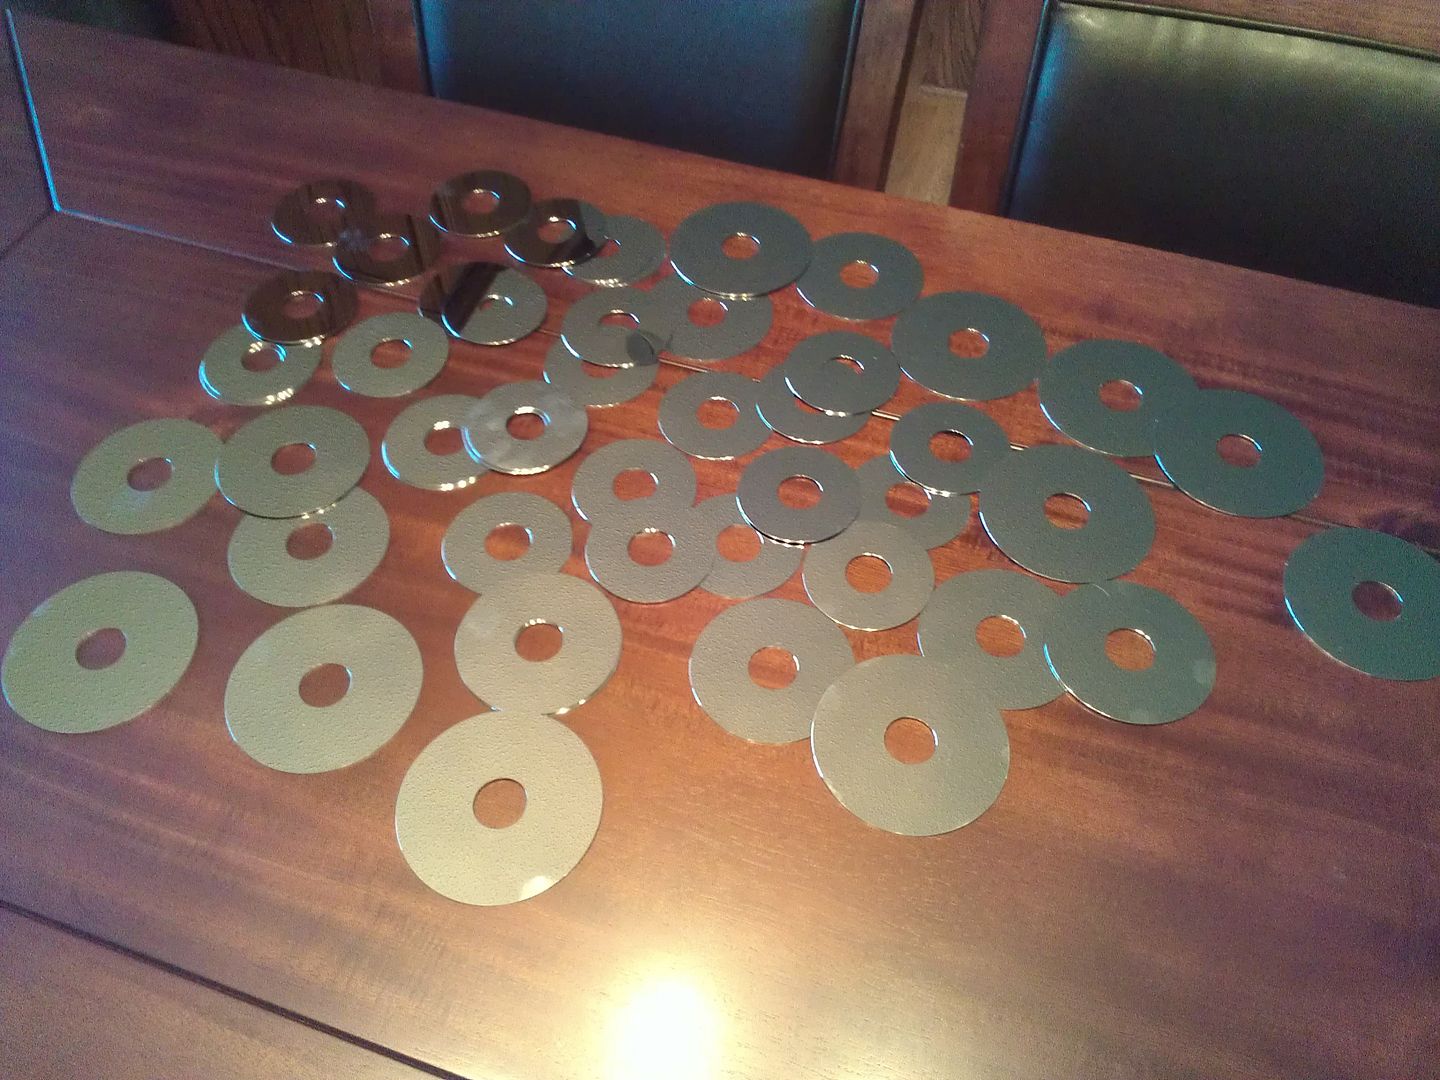
Started with about 18 bad hard drives.
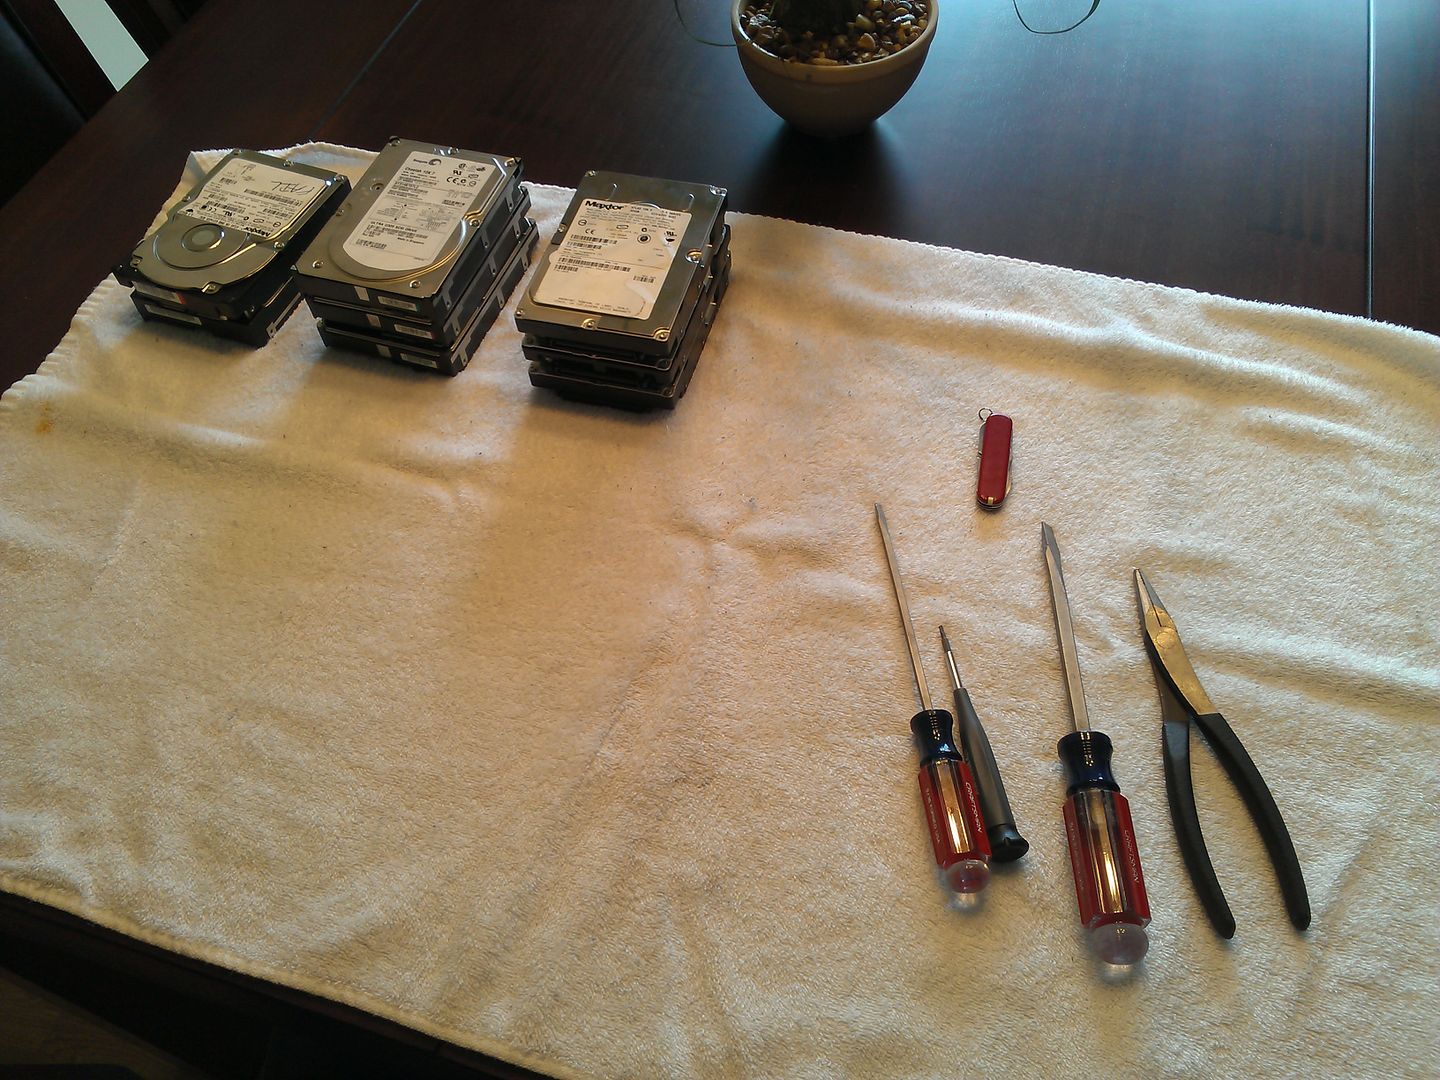
Opened them all up to retrieve the magnets.
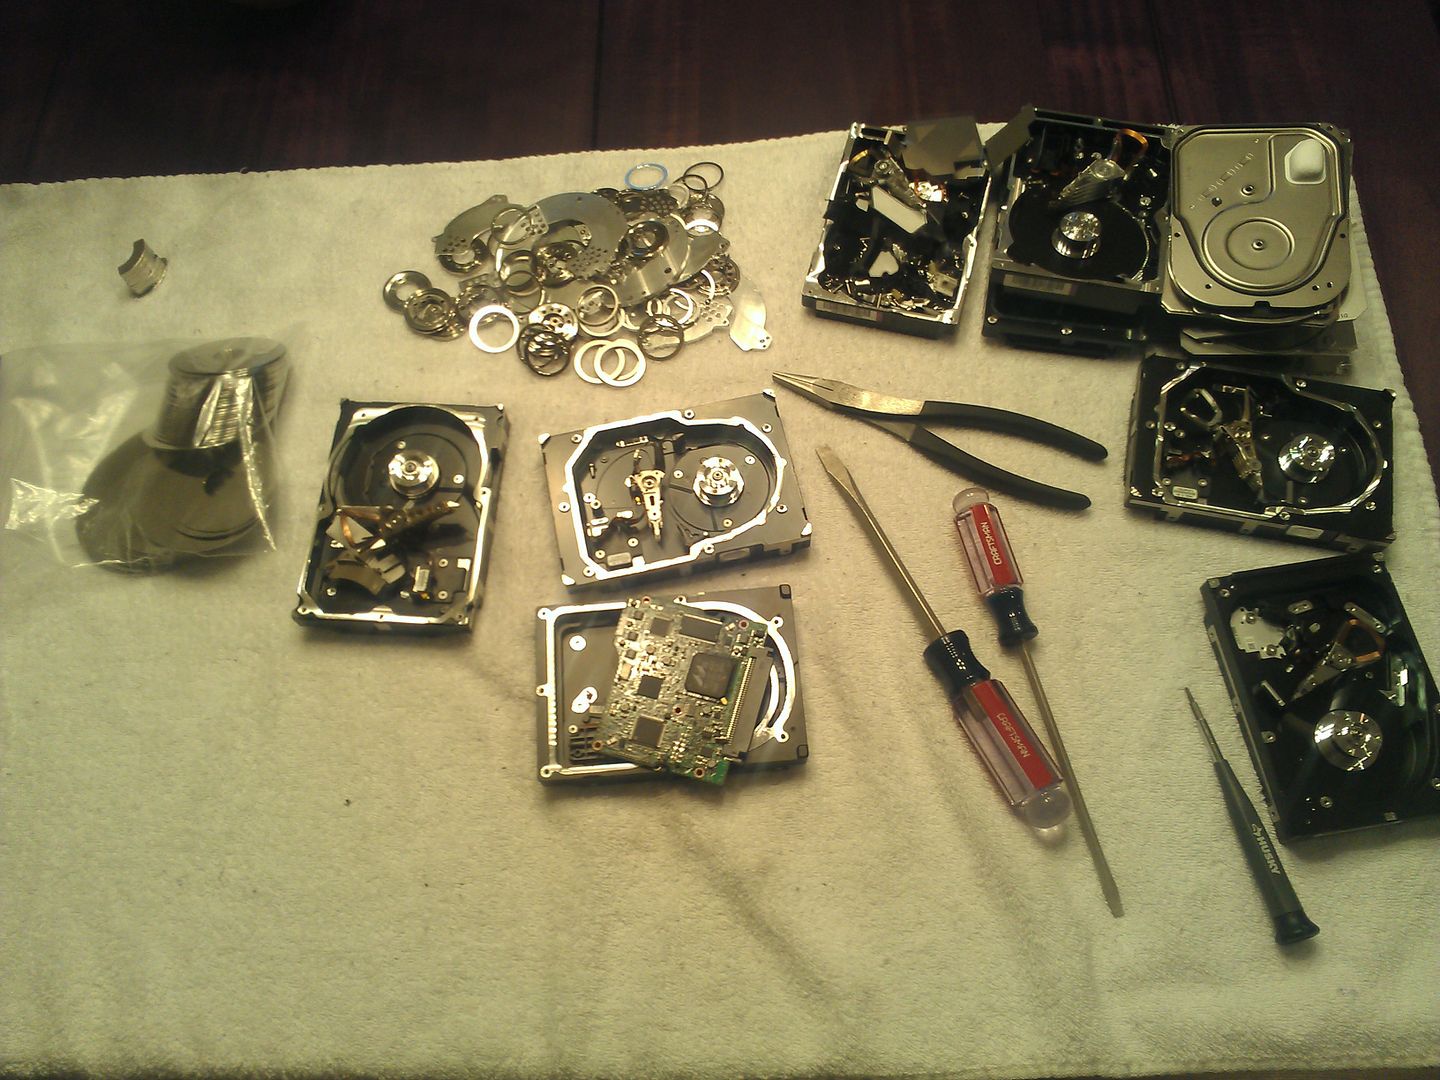
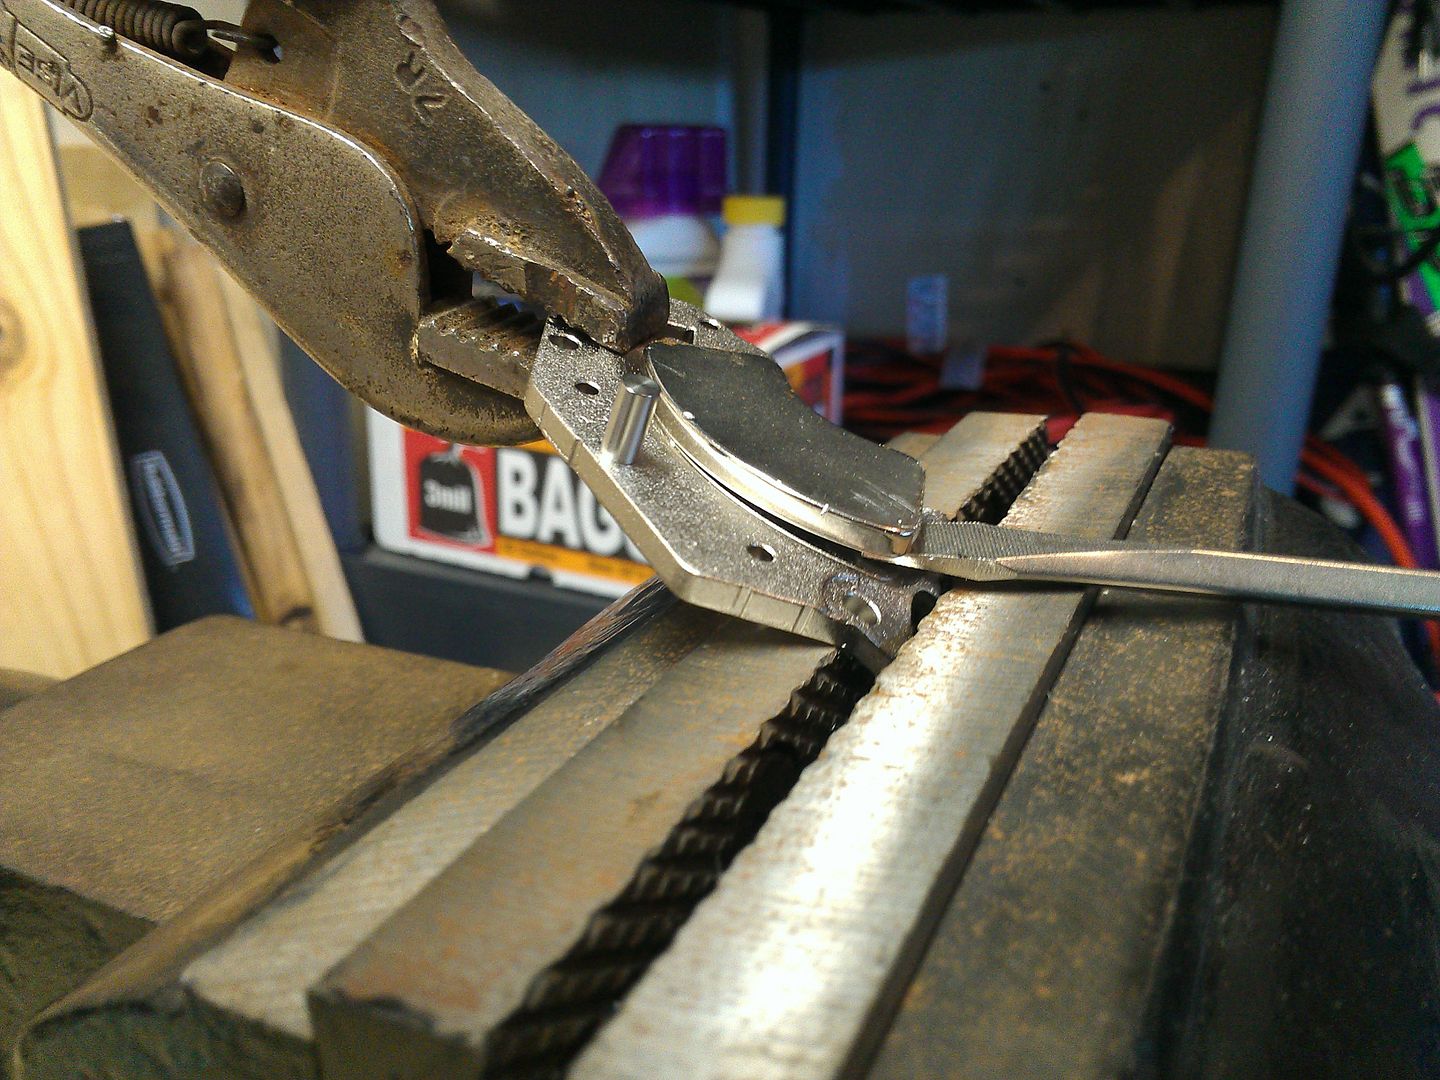
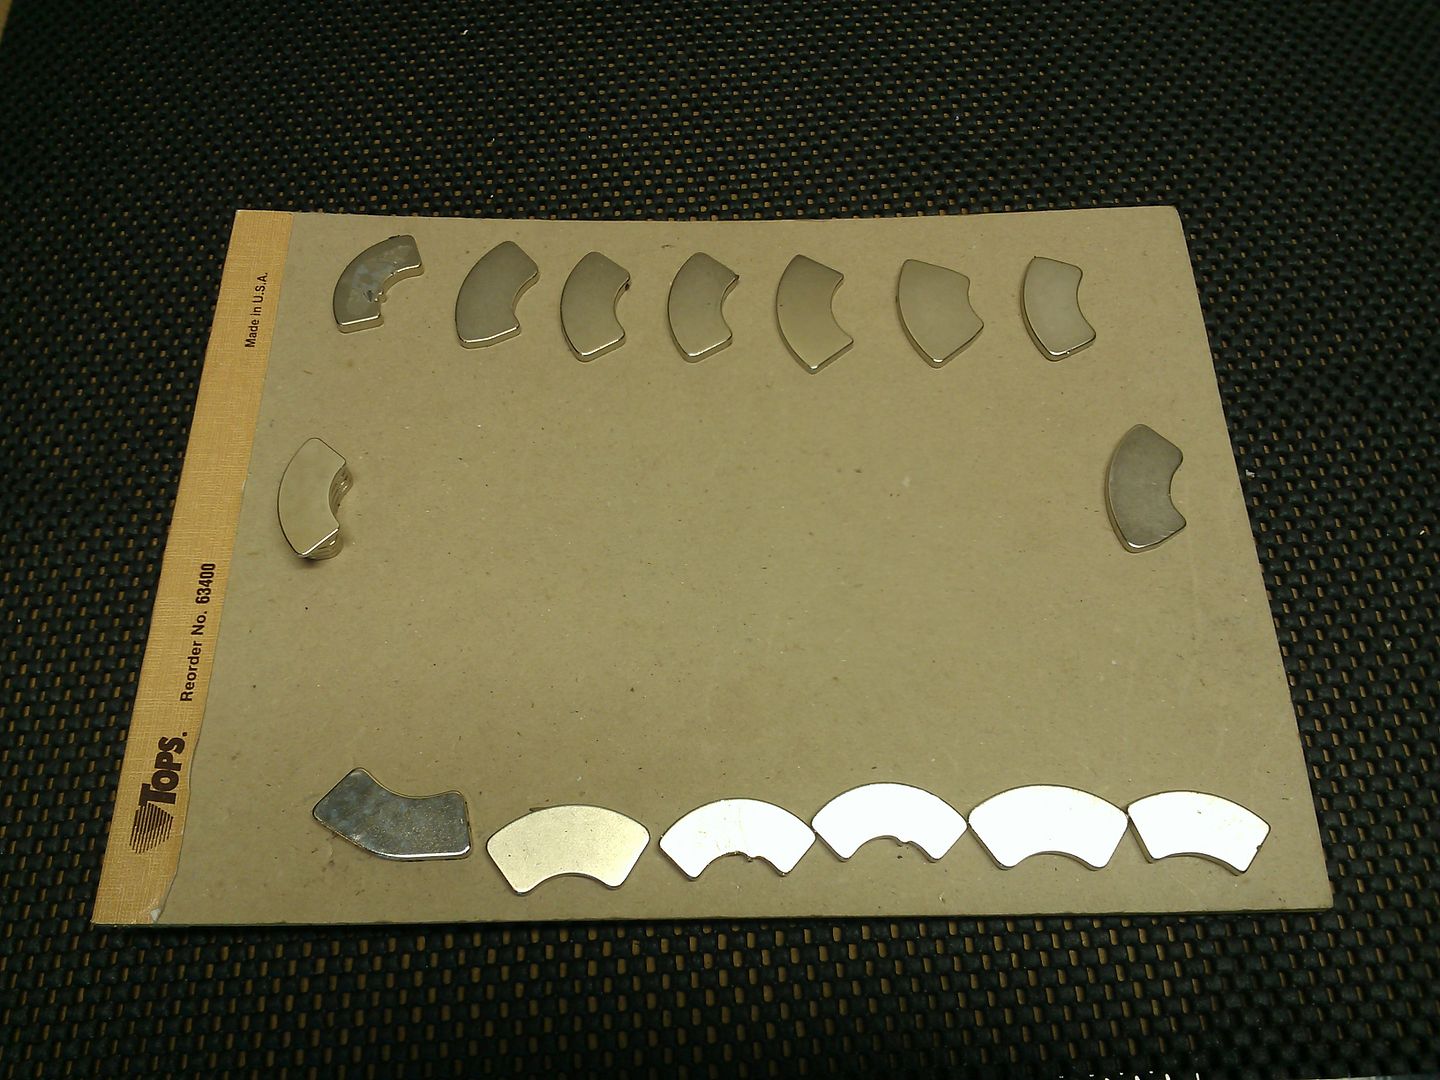
The magnets are glued to a metal plate, so I had to put them in a vice and bend the metal to get the magnets off the plate.

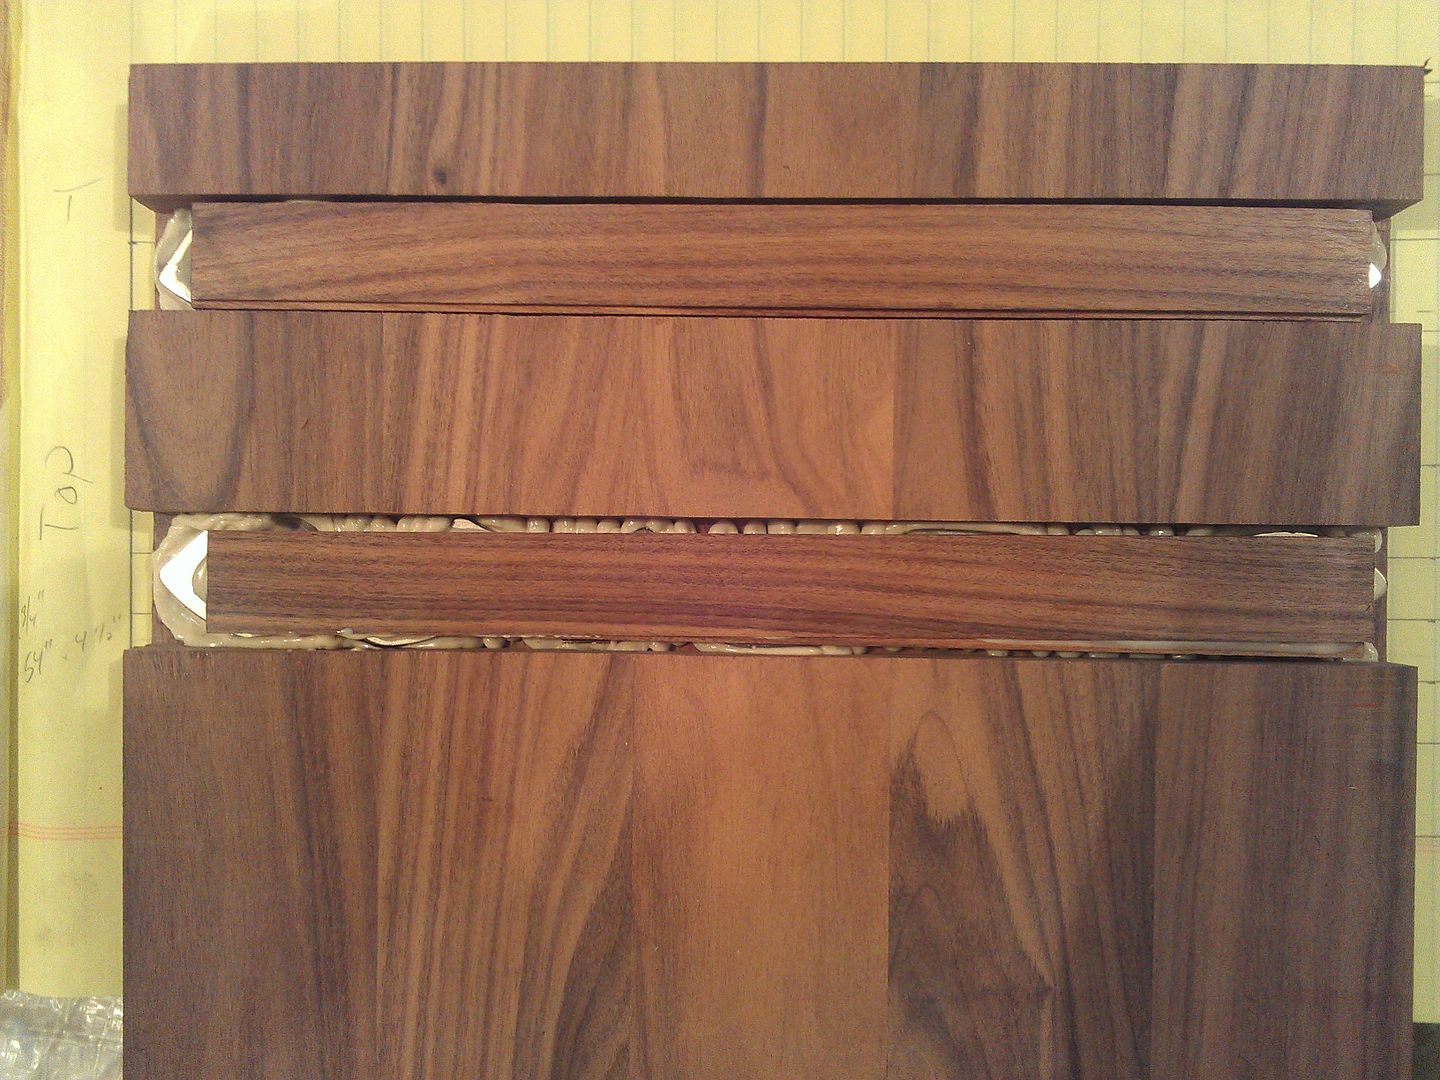
Decided on two kinds of wood, Brazilian Rosewood and Hard Rock Maple.
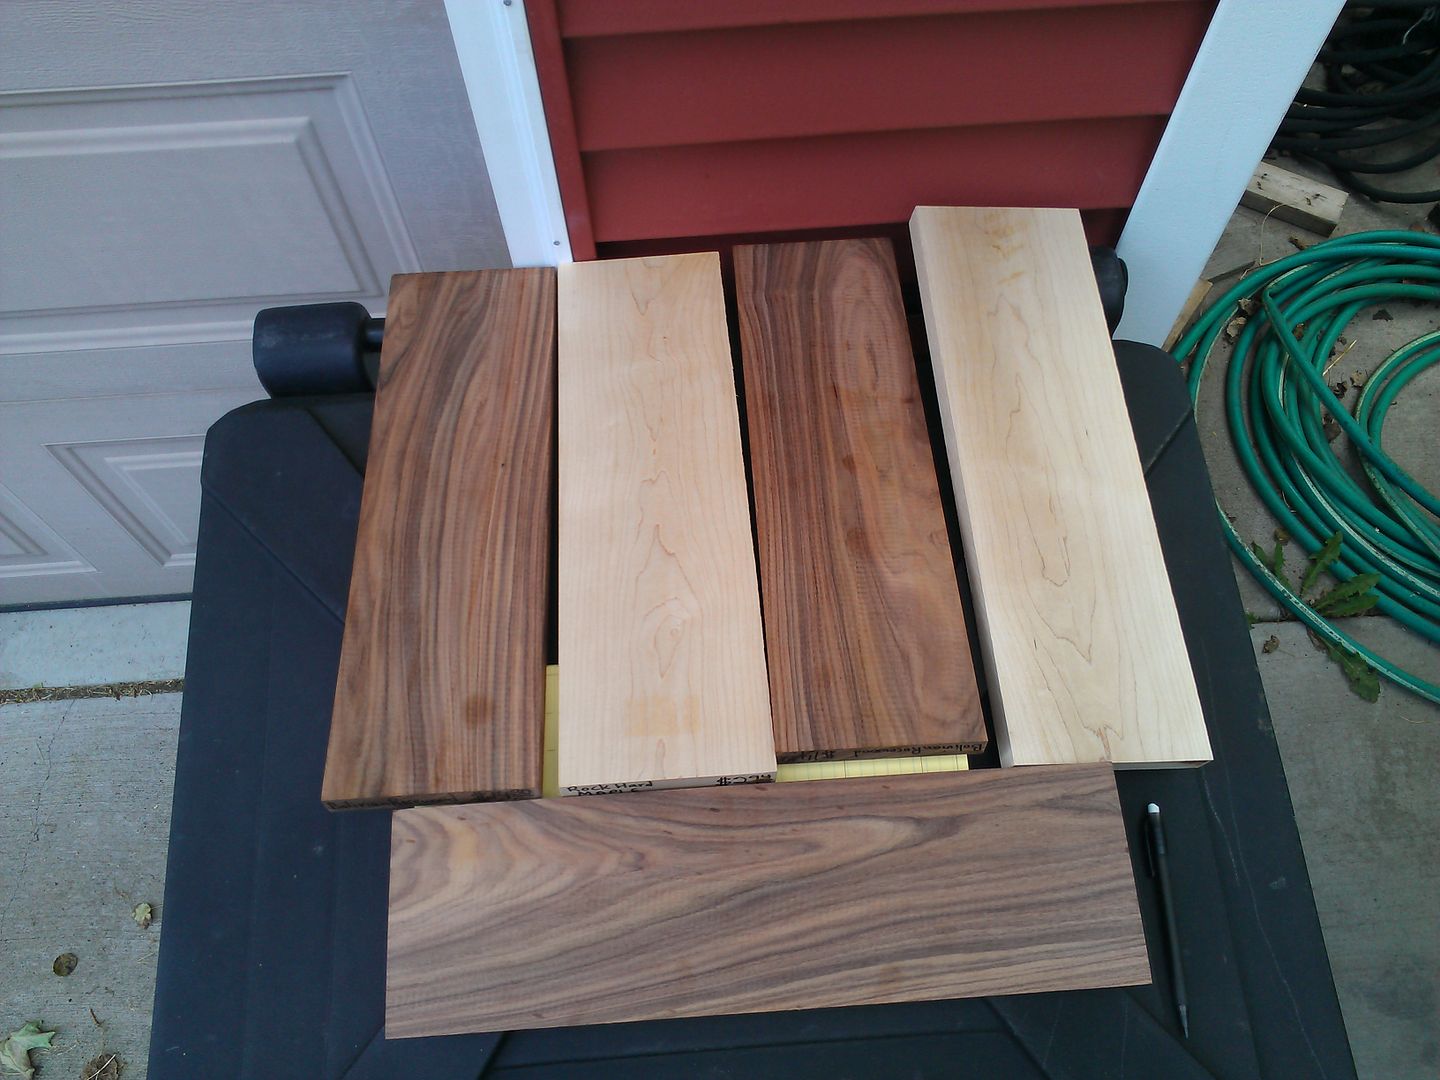
Ripped them to slightly wider than 2".
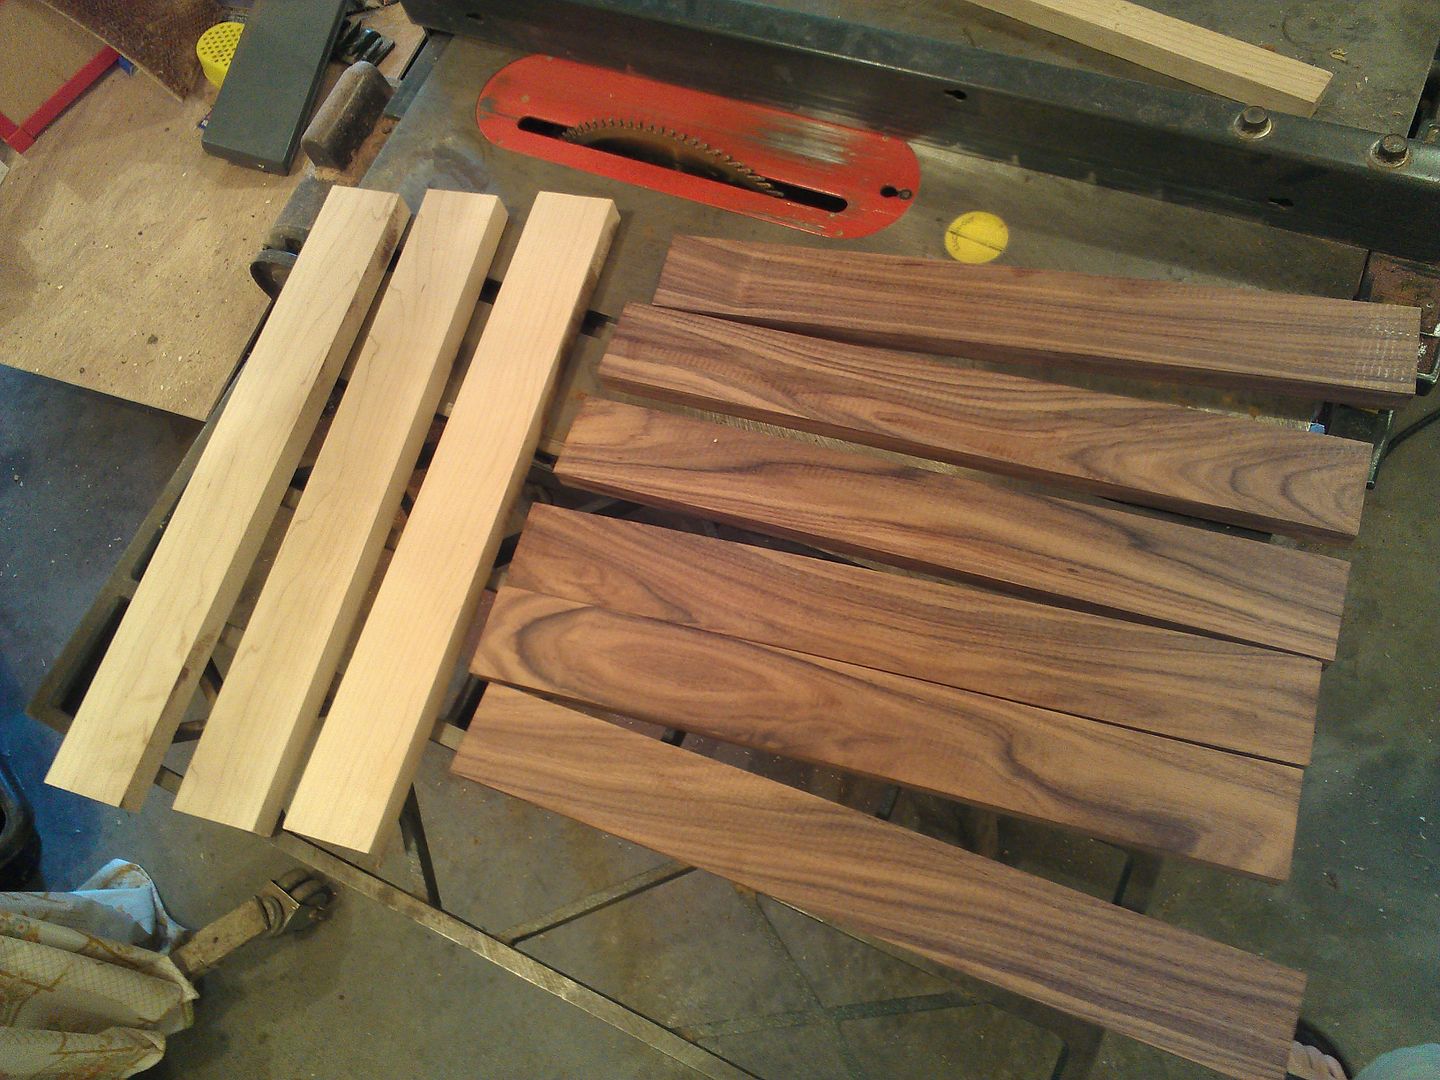
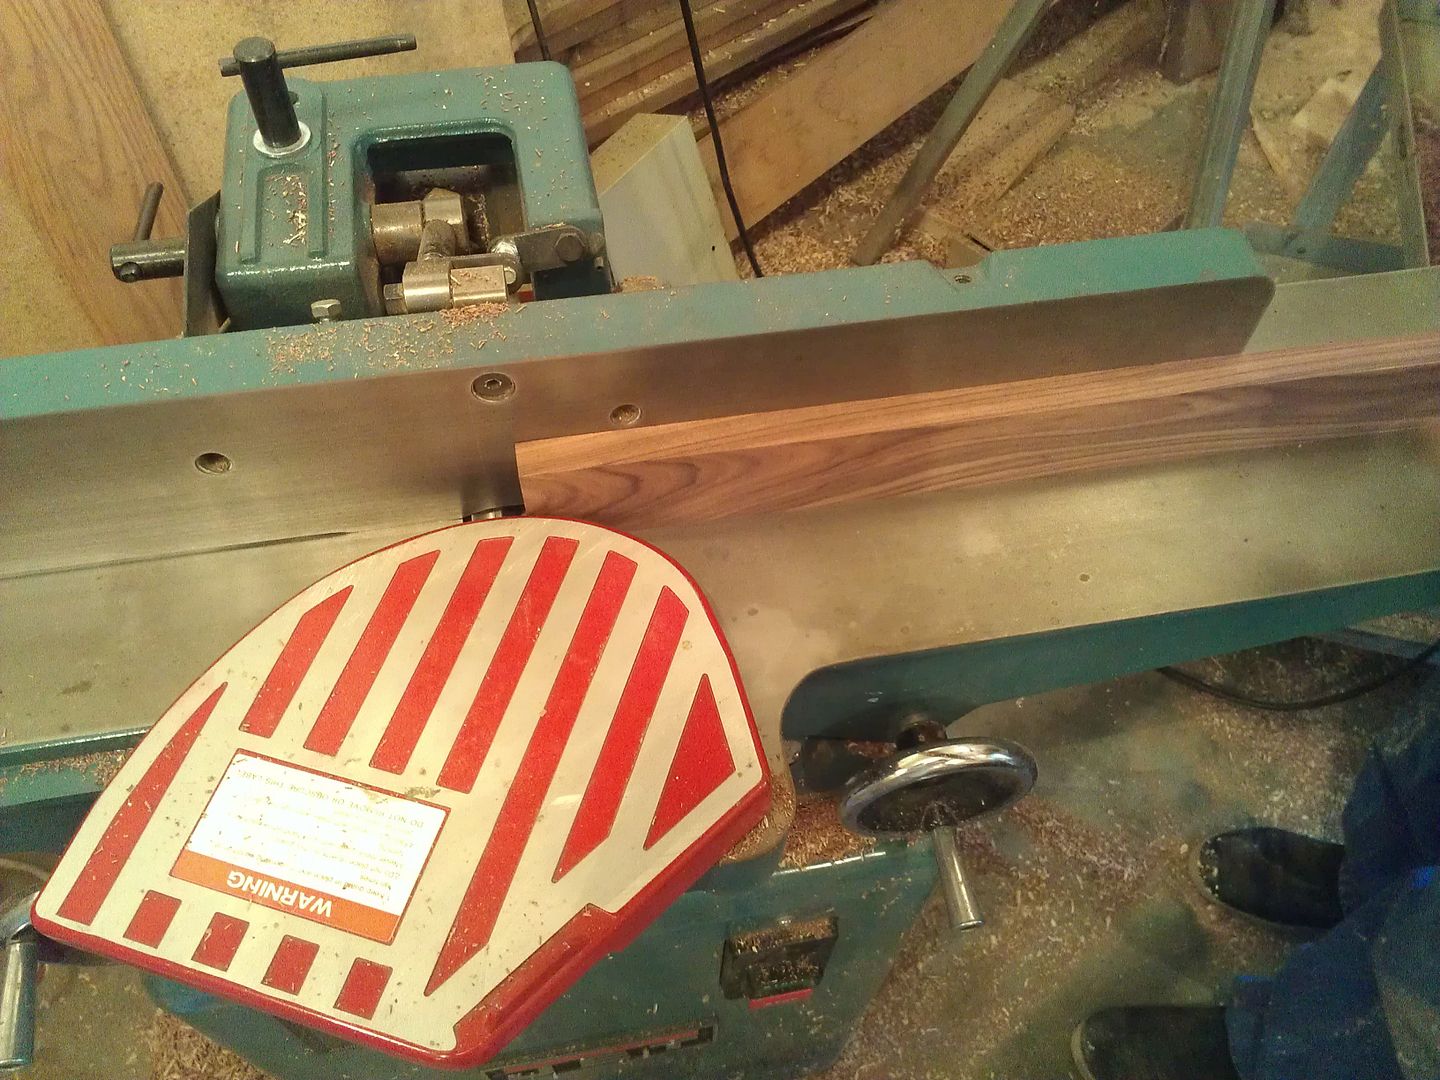
Jointed the pieces to get a square edge.
Glued them together to get a board with a nice grain pattern.

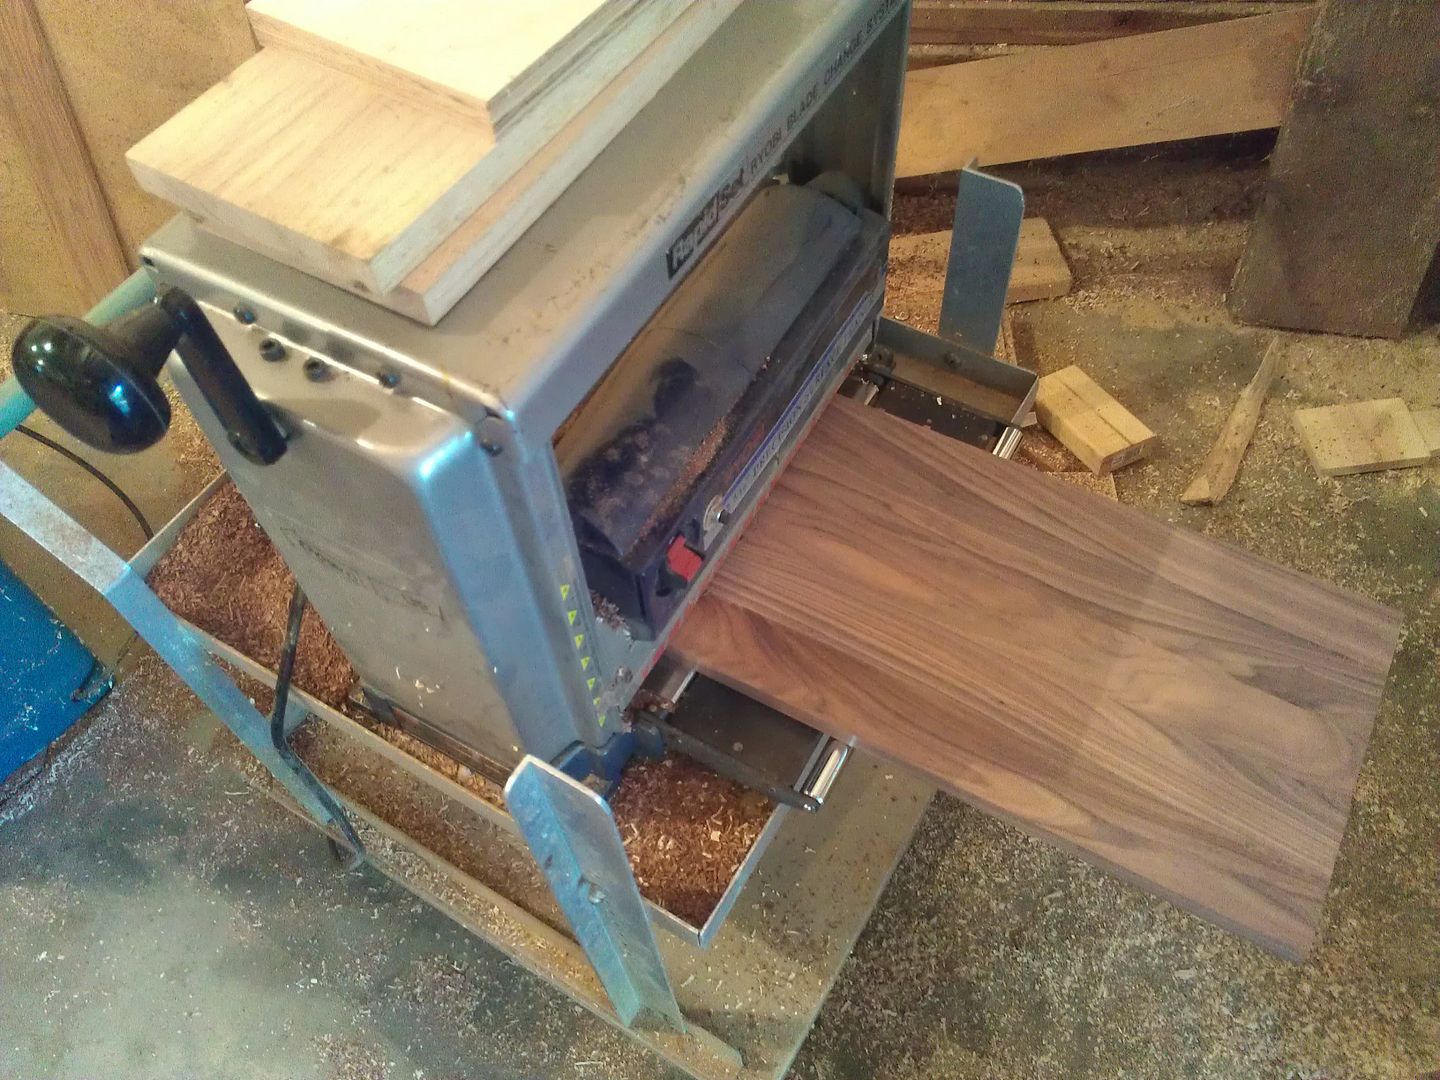
Planed both boards to equal thicknesses.
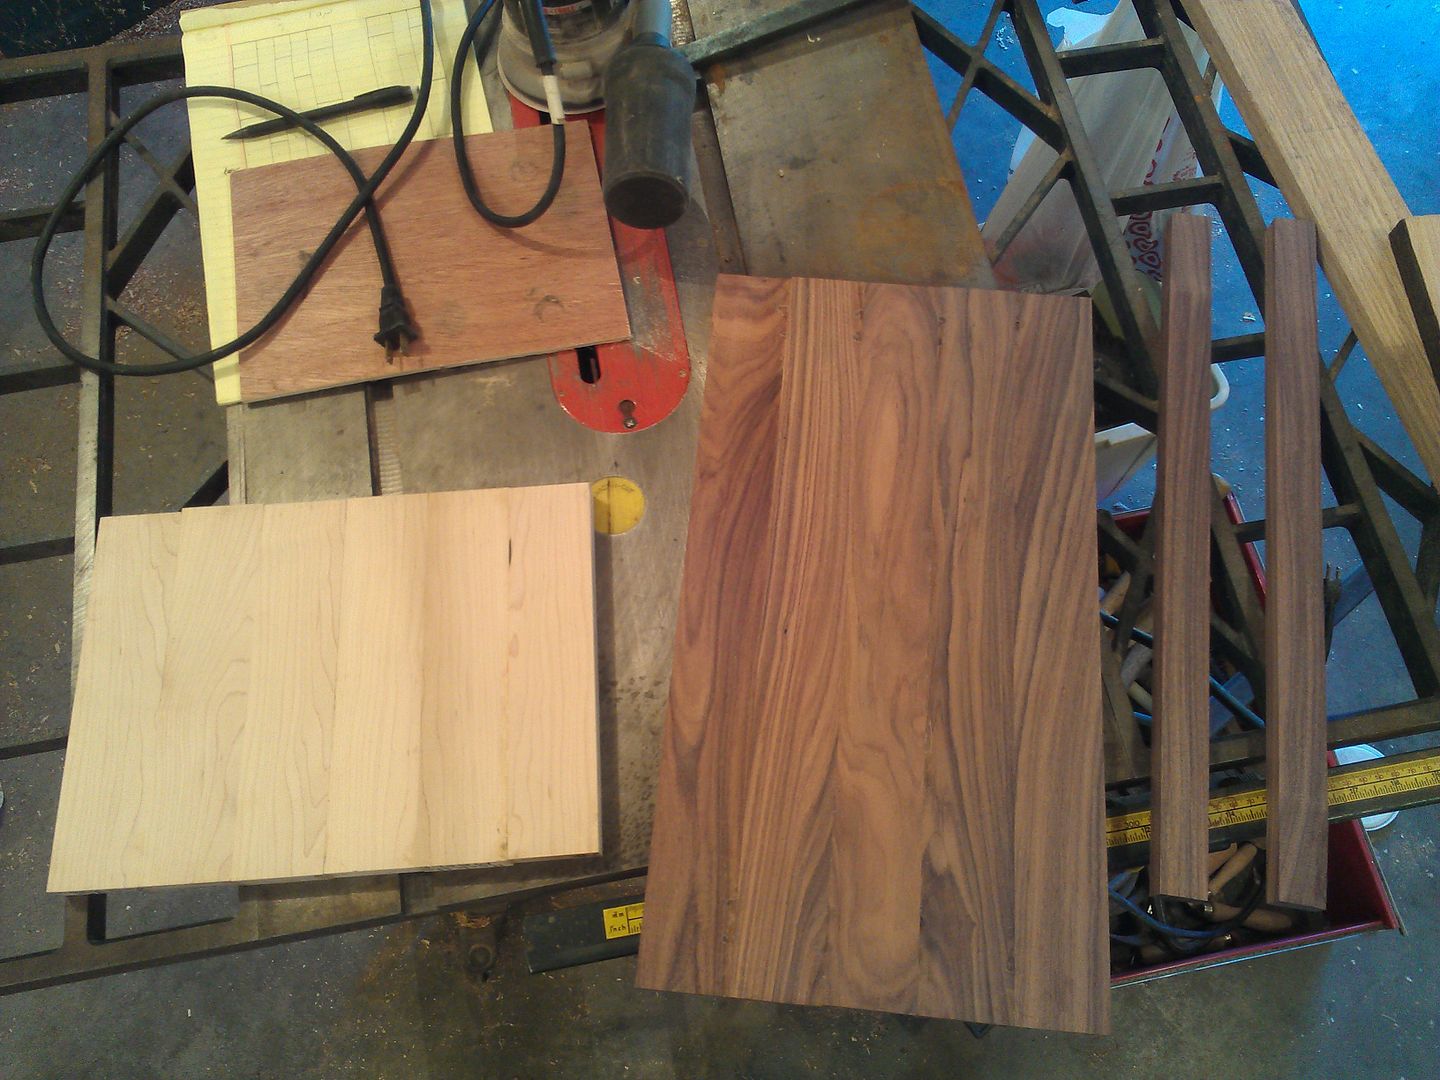
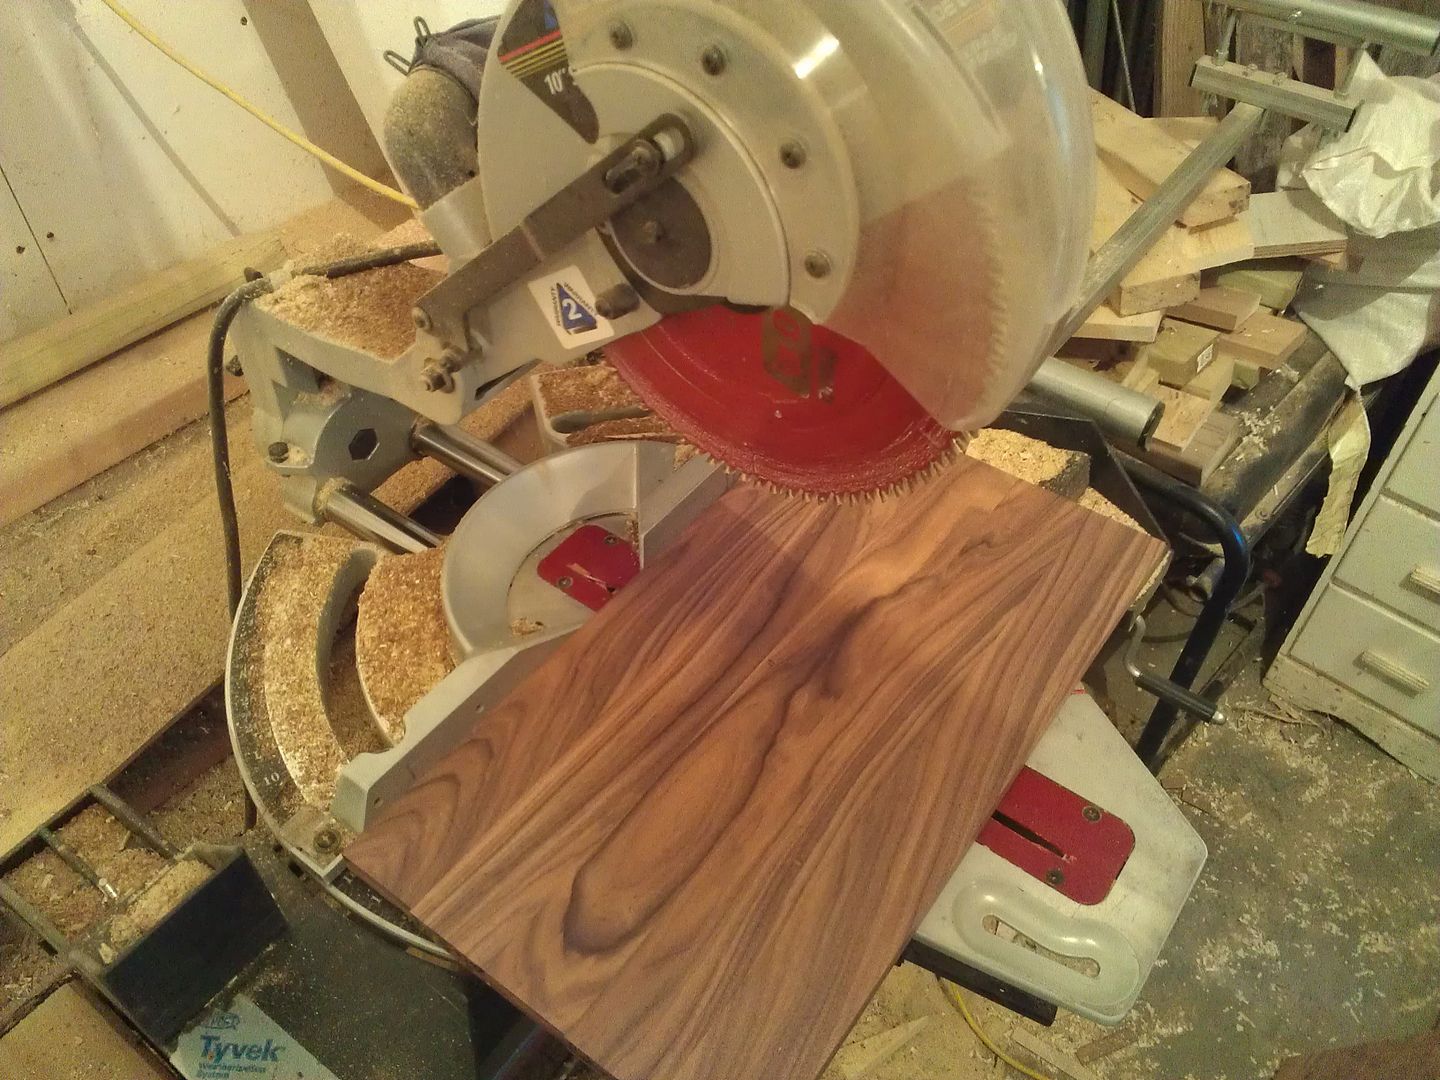
Cut the rosewood in half to match the size of the maple.
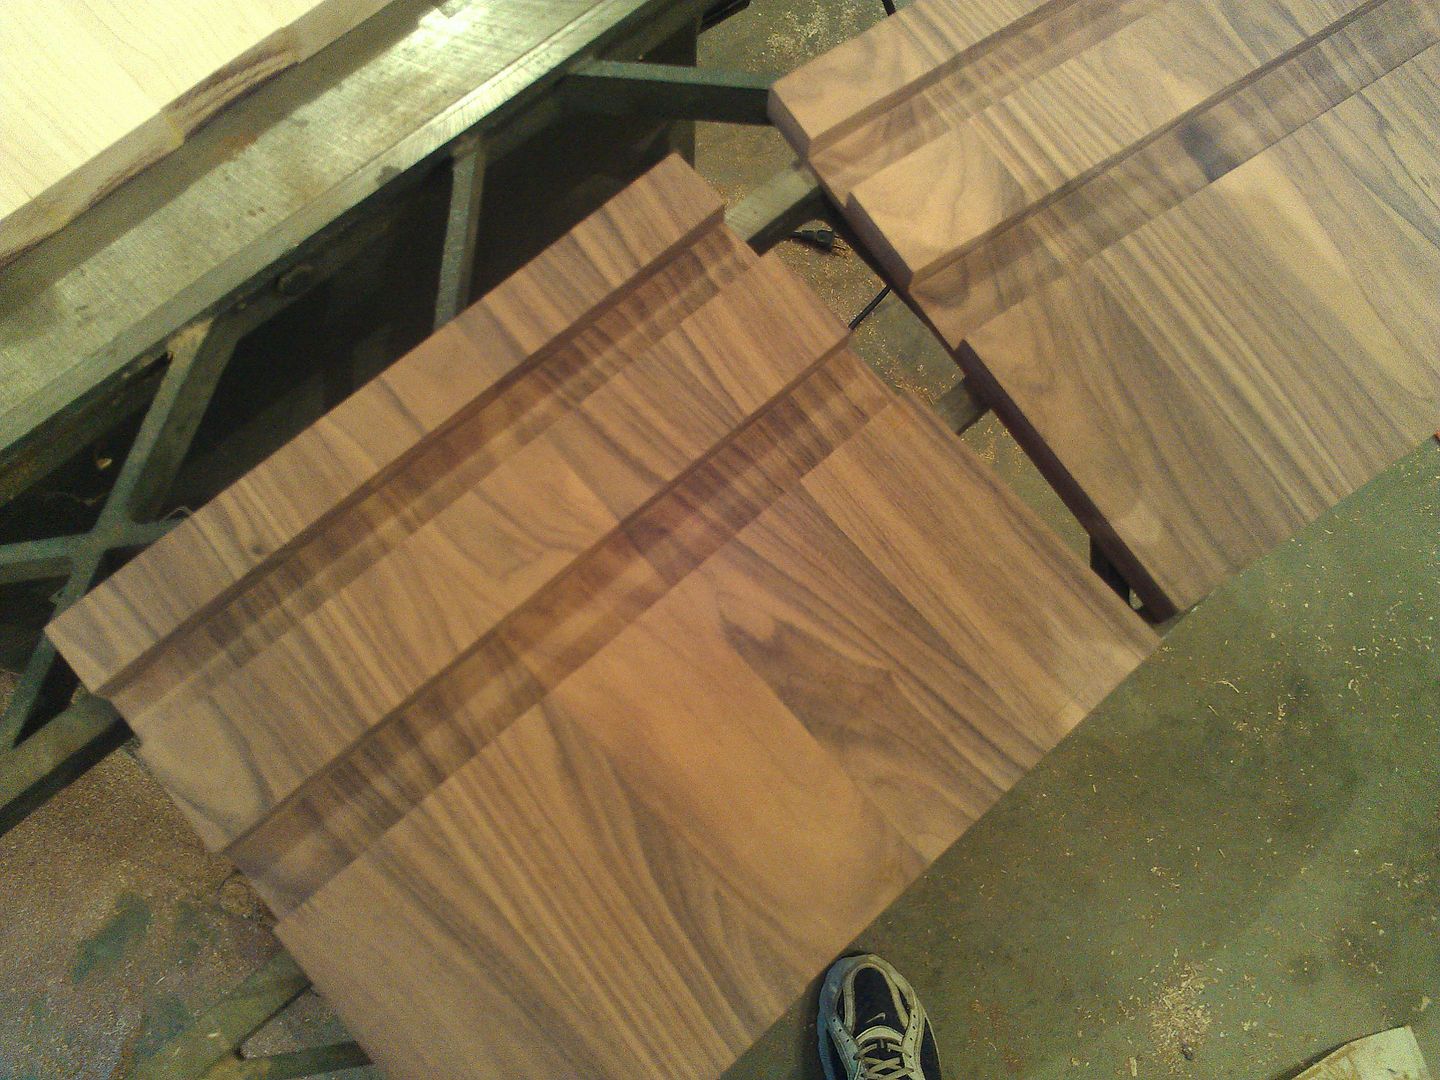
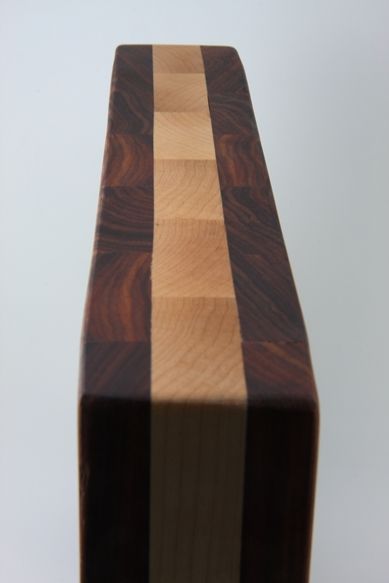
Cut 2 dadoes in each piece of rosewood.
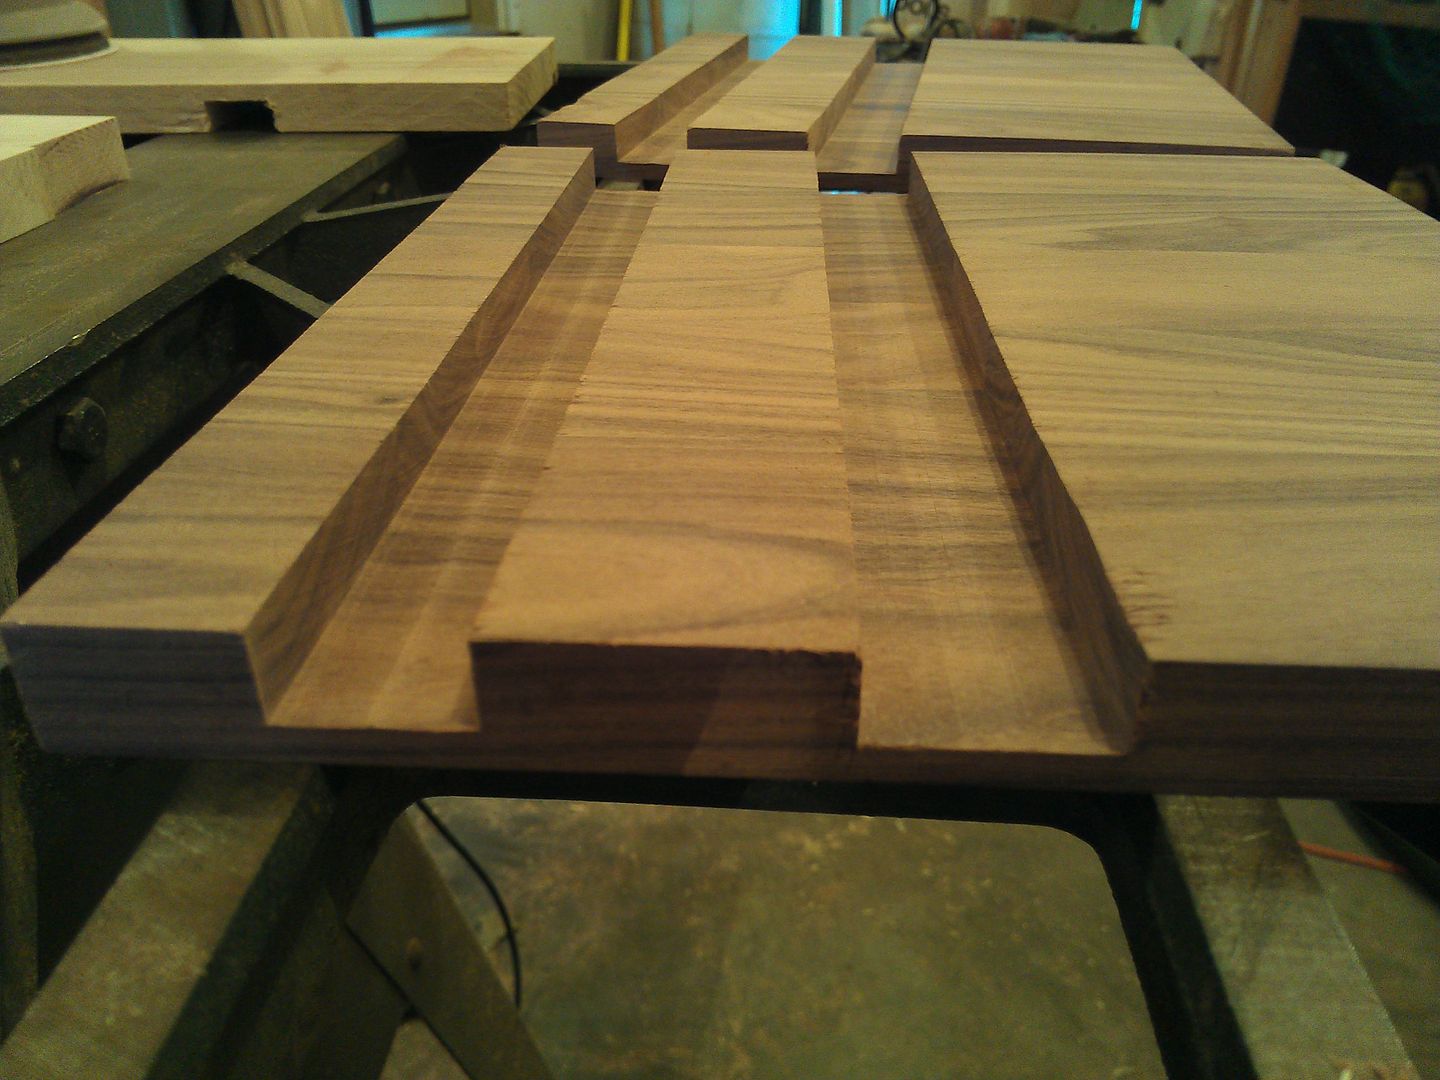
Dry fit the magnets in the each dado and them glued them in place.
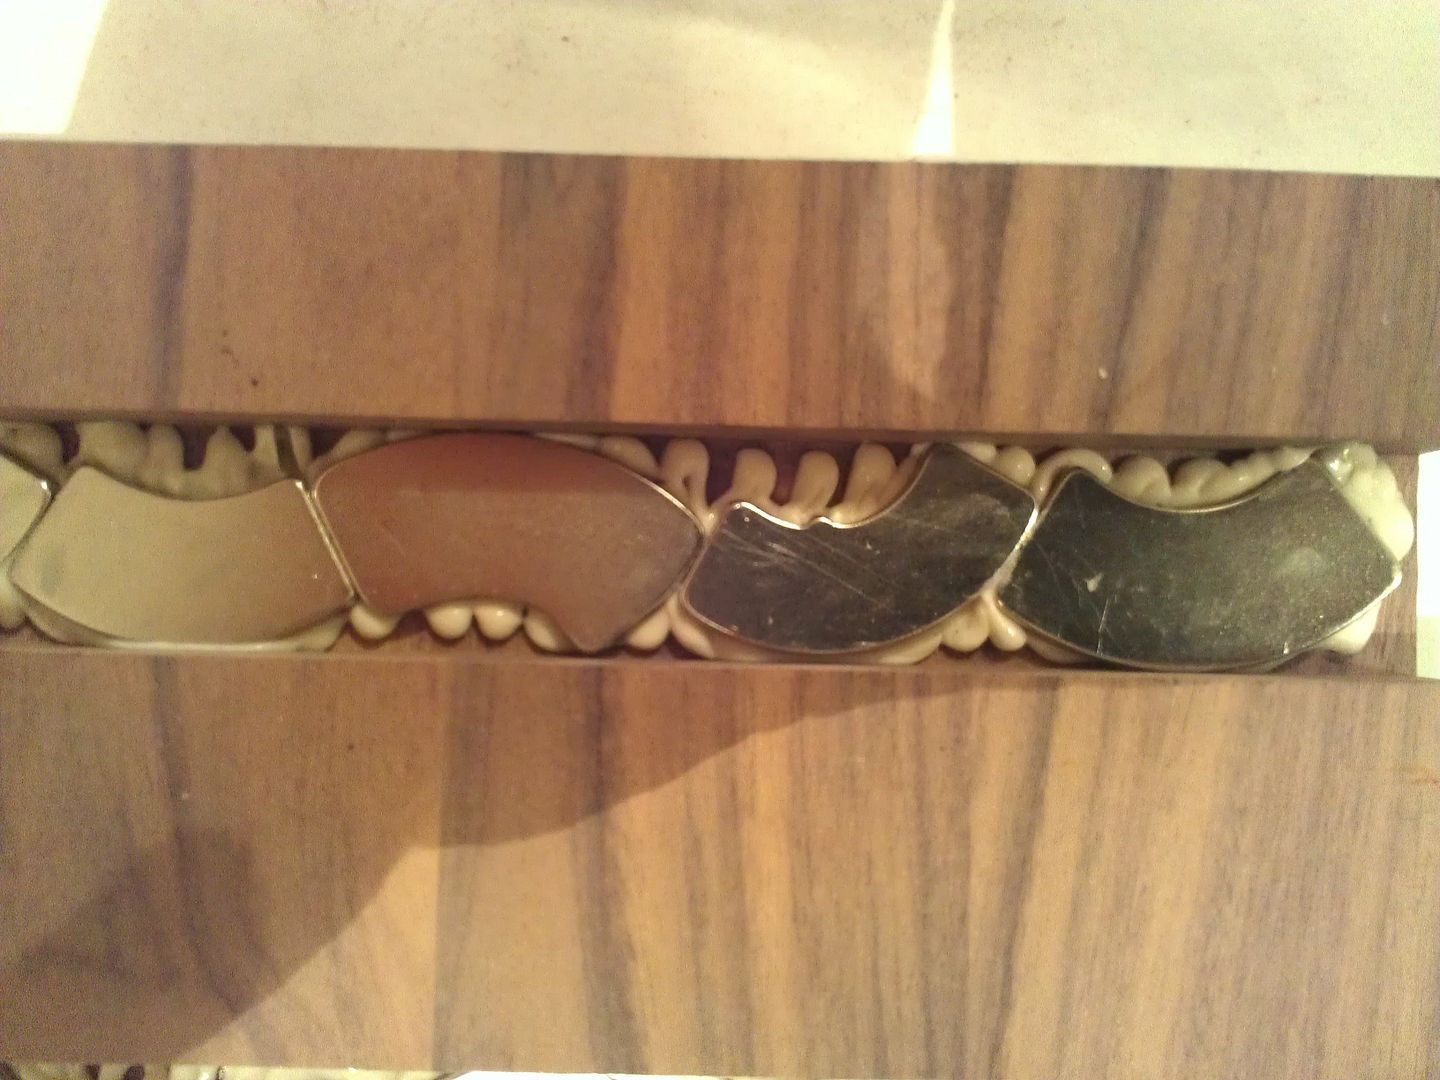
Used some scrap to fill in the gap should the magnets become unglued. This should hopefully keep them in place.
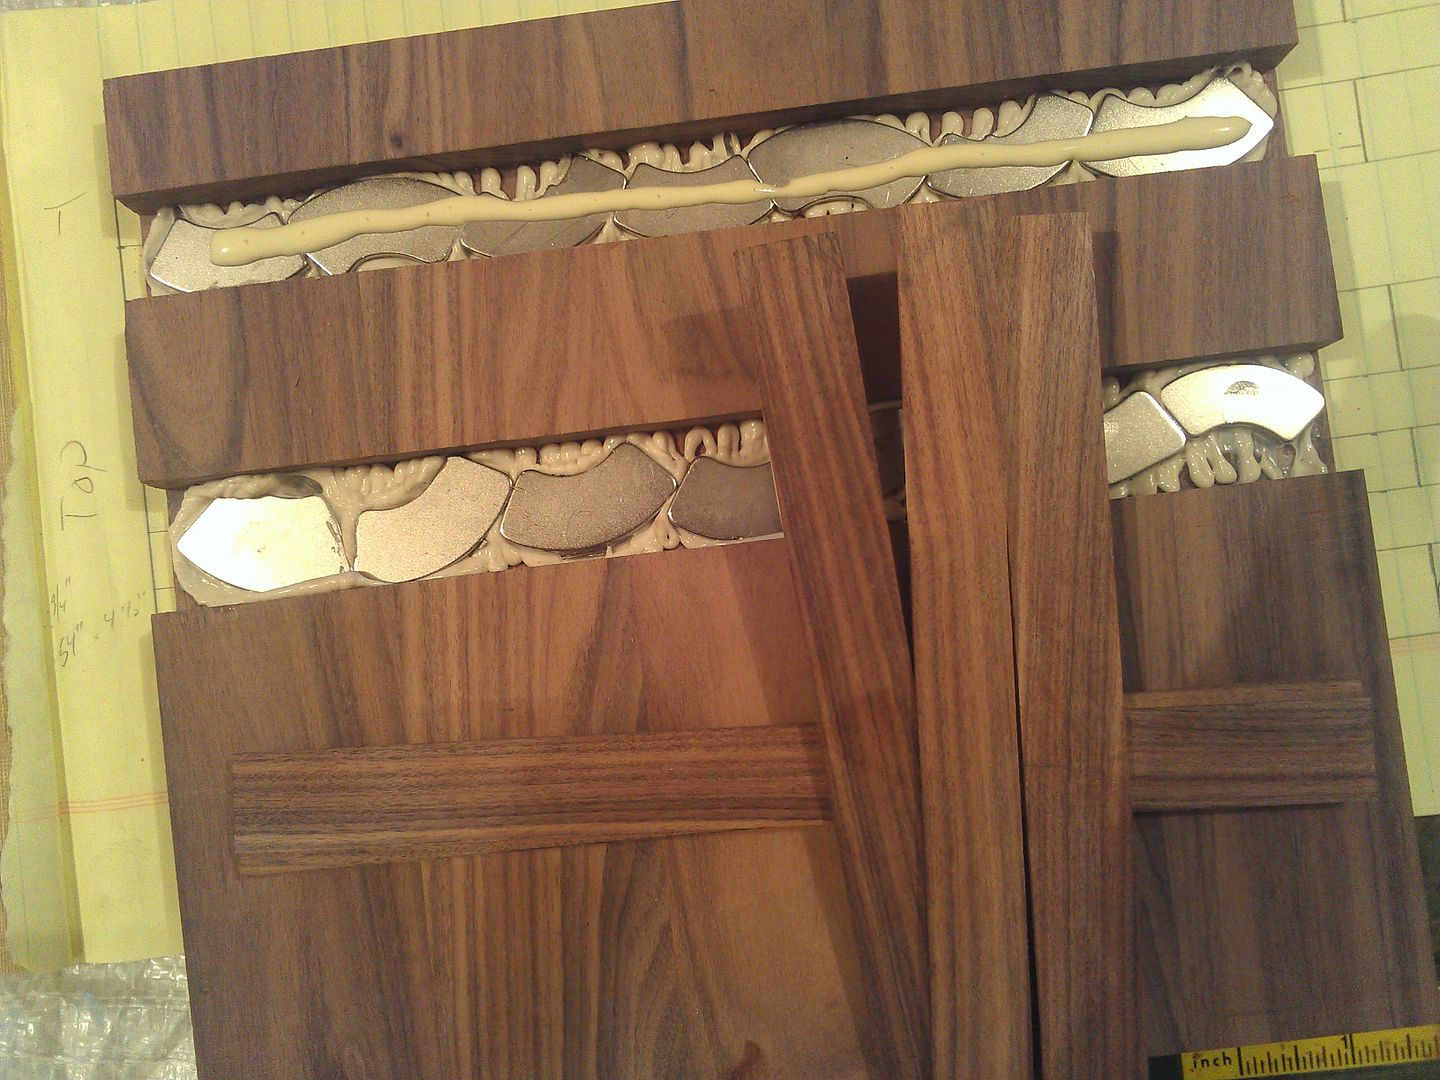
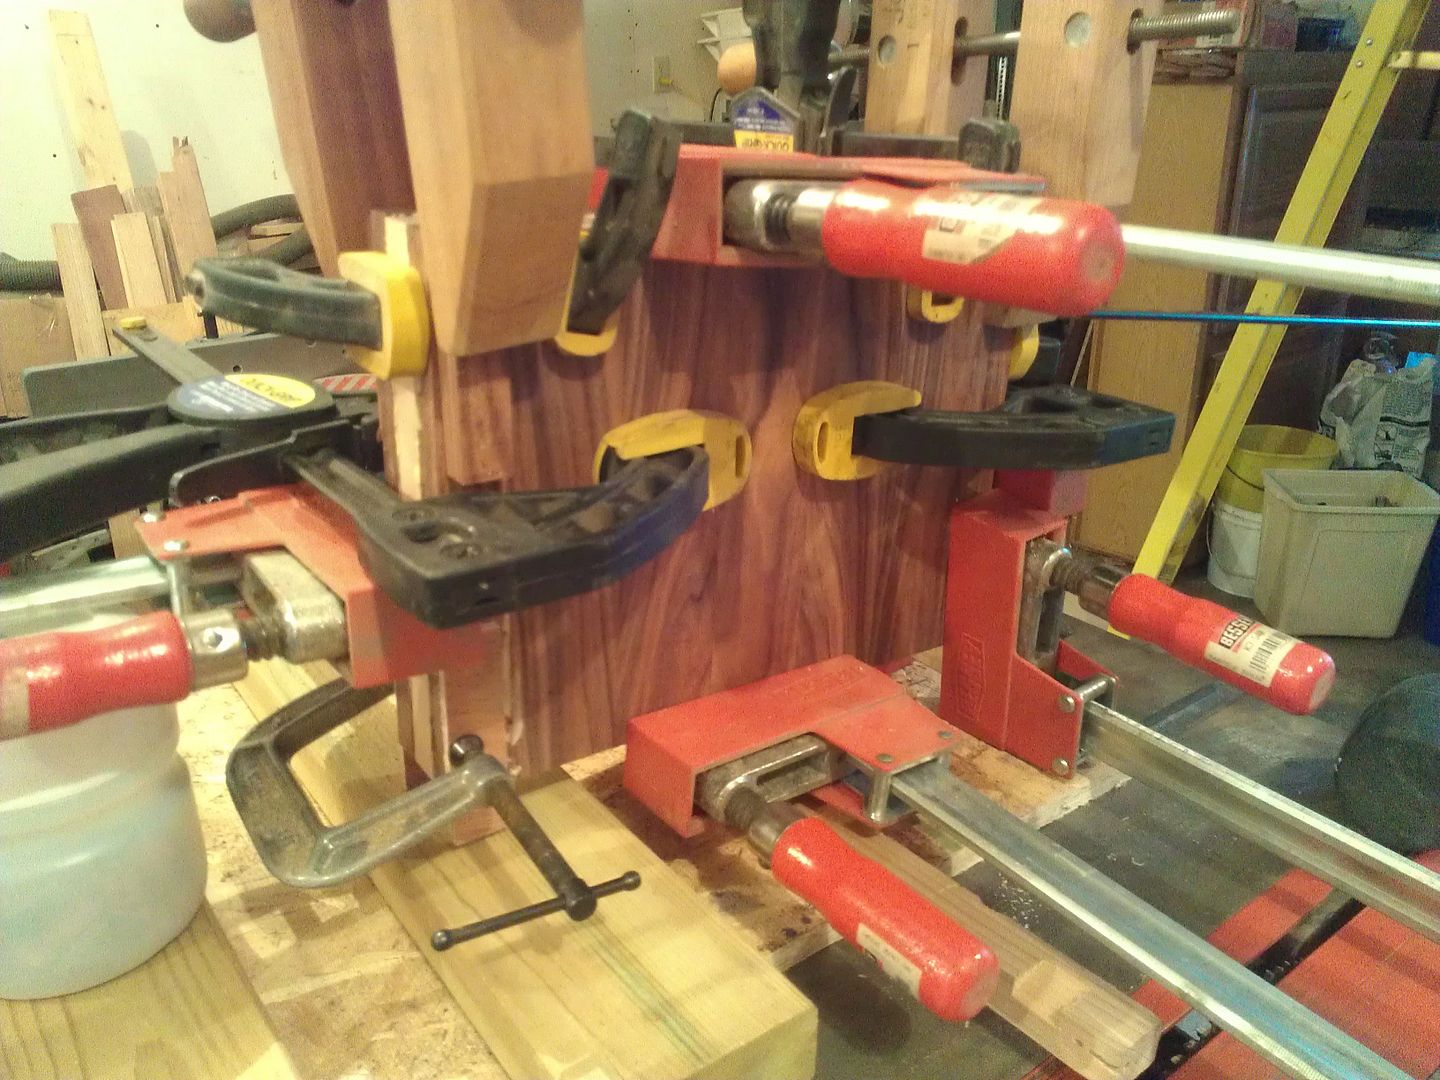
Sandwiched the maple with each piece of rosewood and glued them all together. You can never have enough clamps!

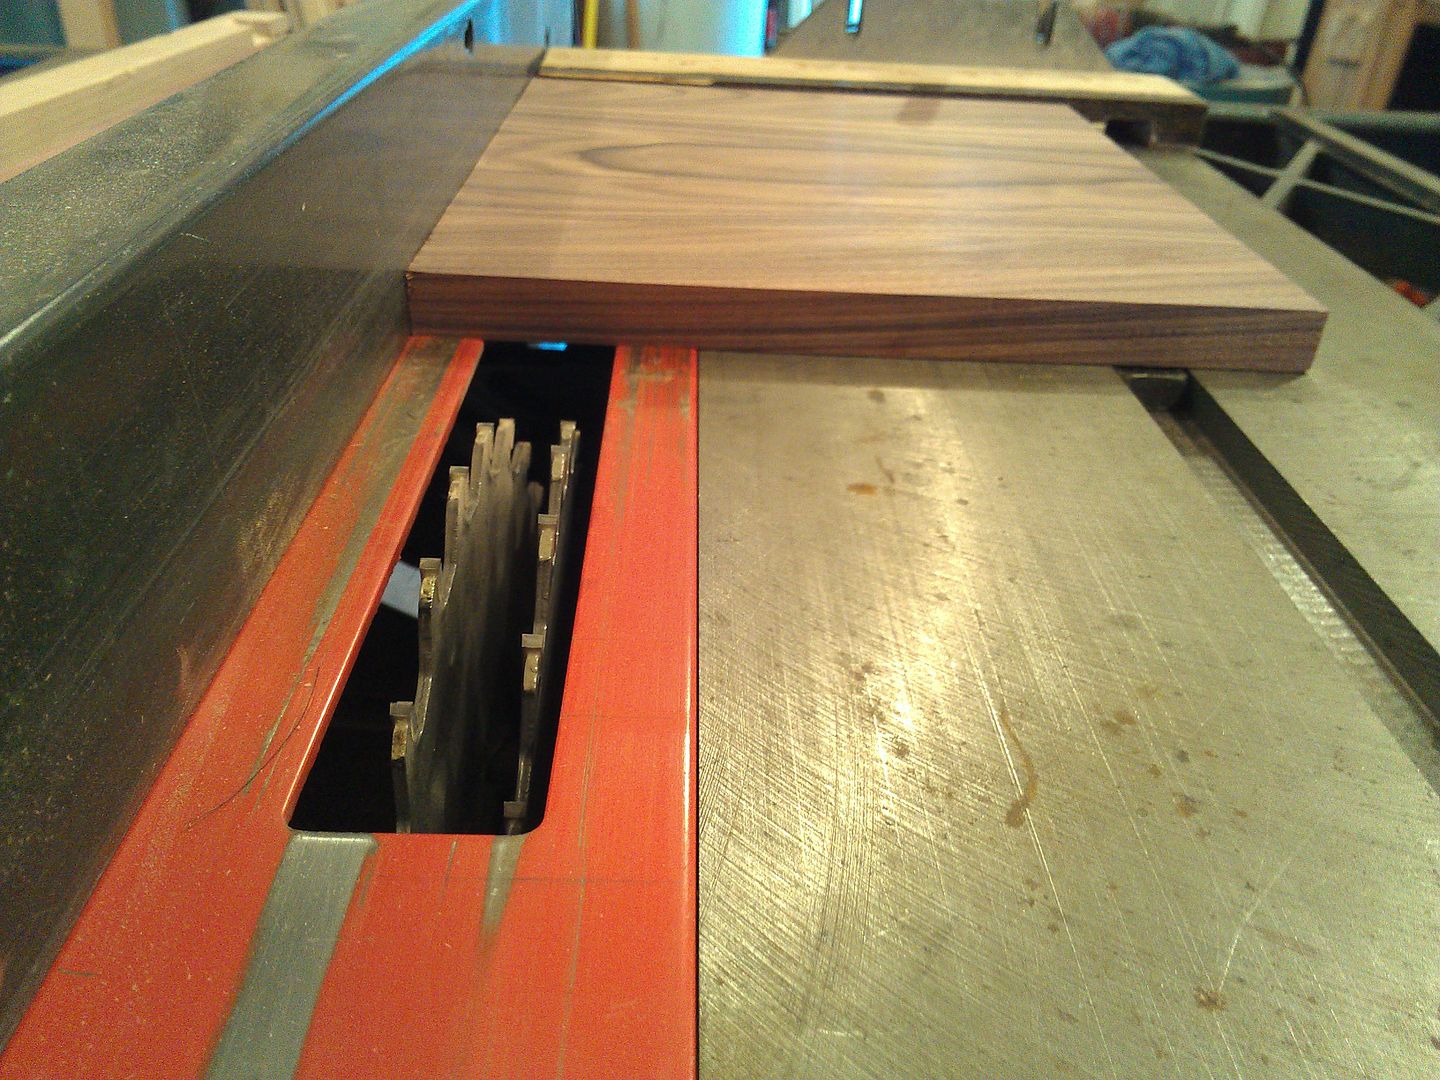
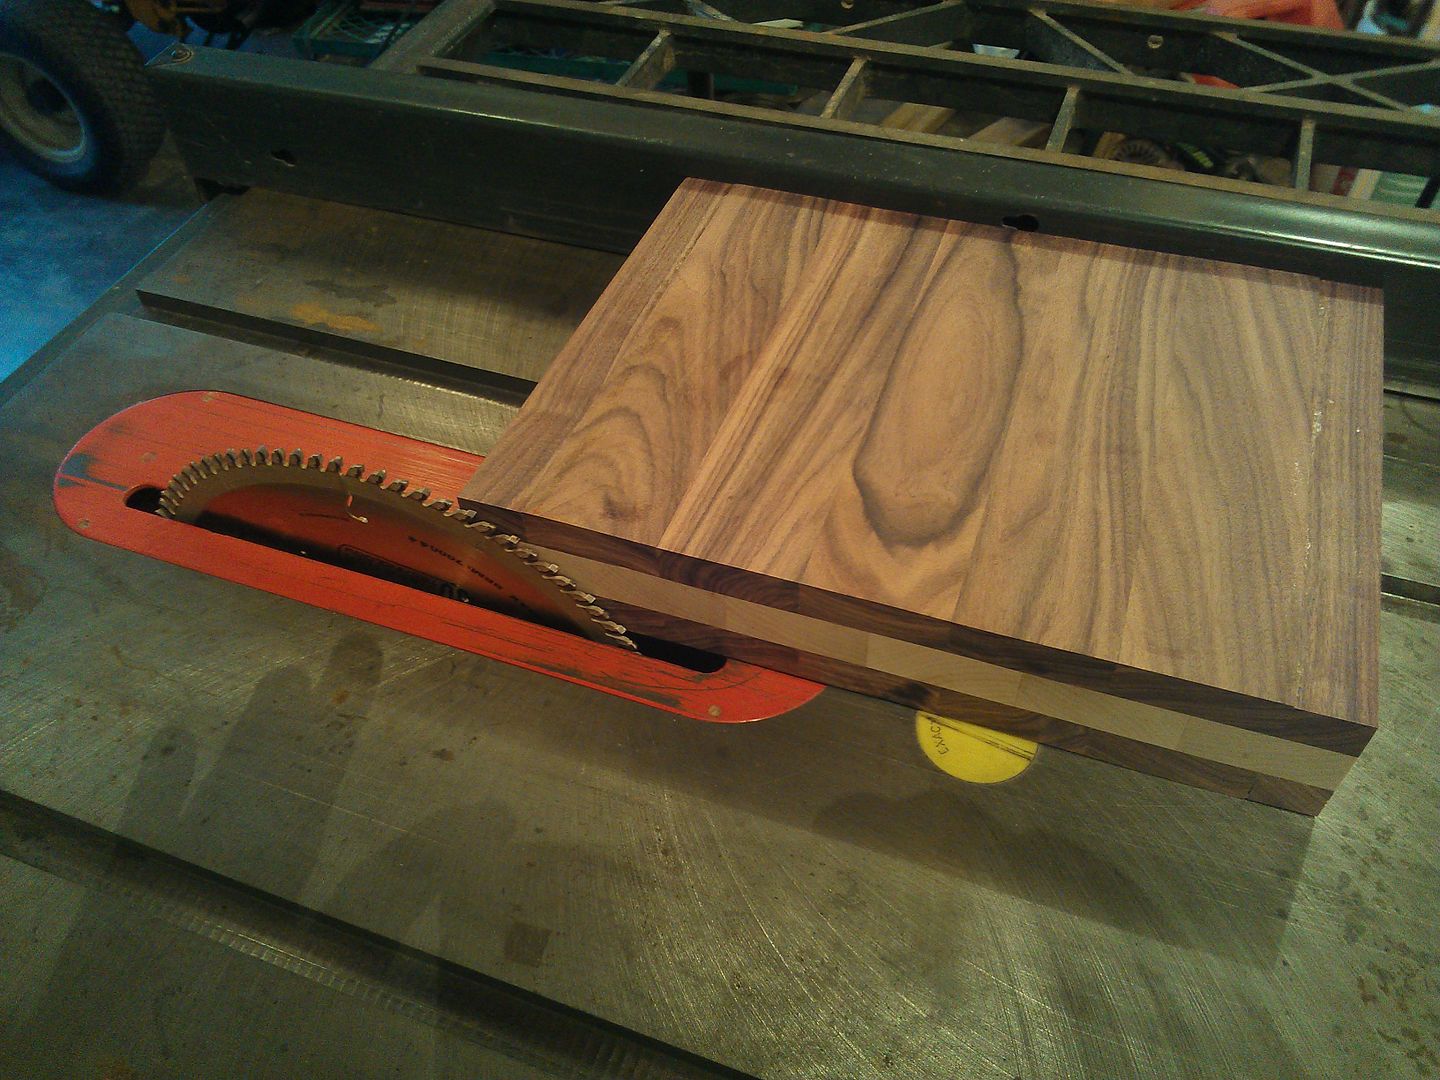
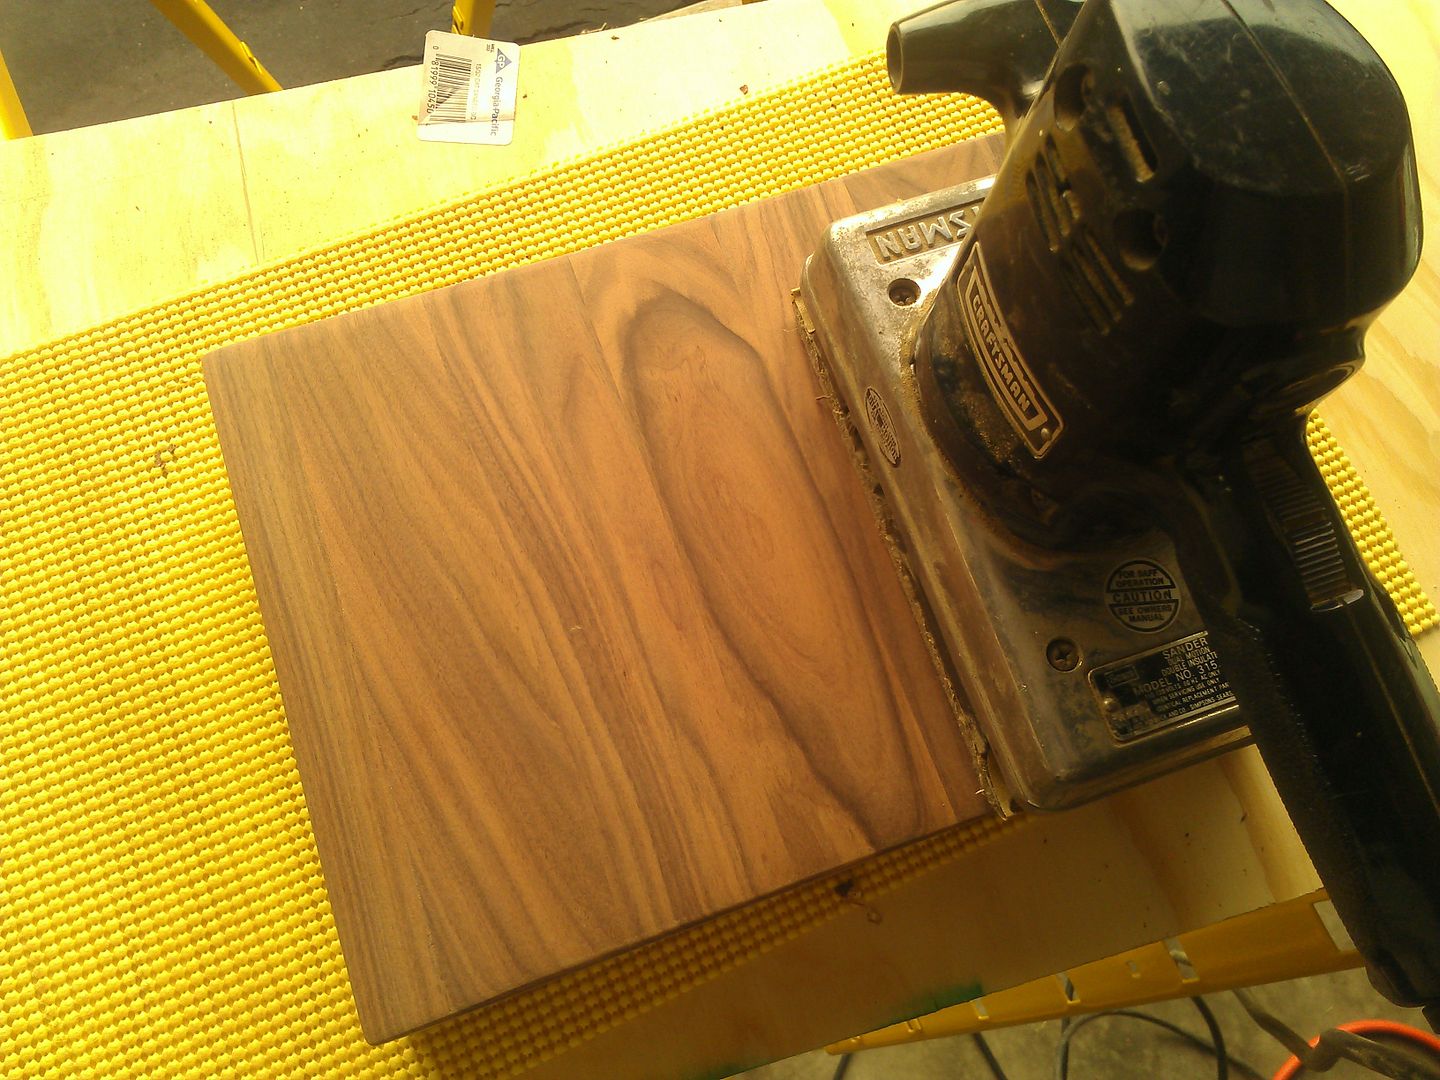
Cut all four sides down with a planer blade.
Used a hand planer to round off the edges.

Sanded with 80 and then 120 grit.
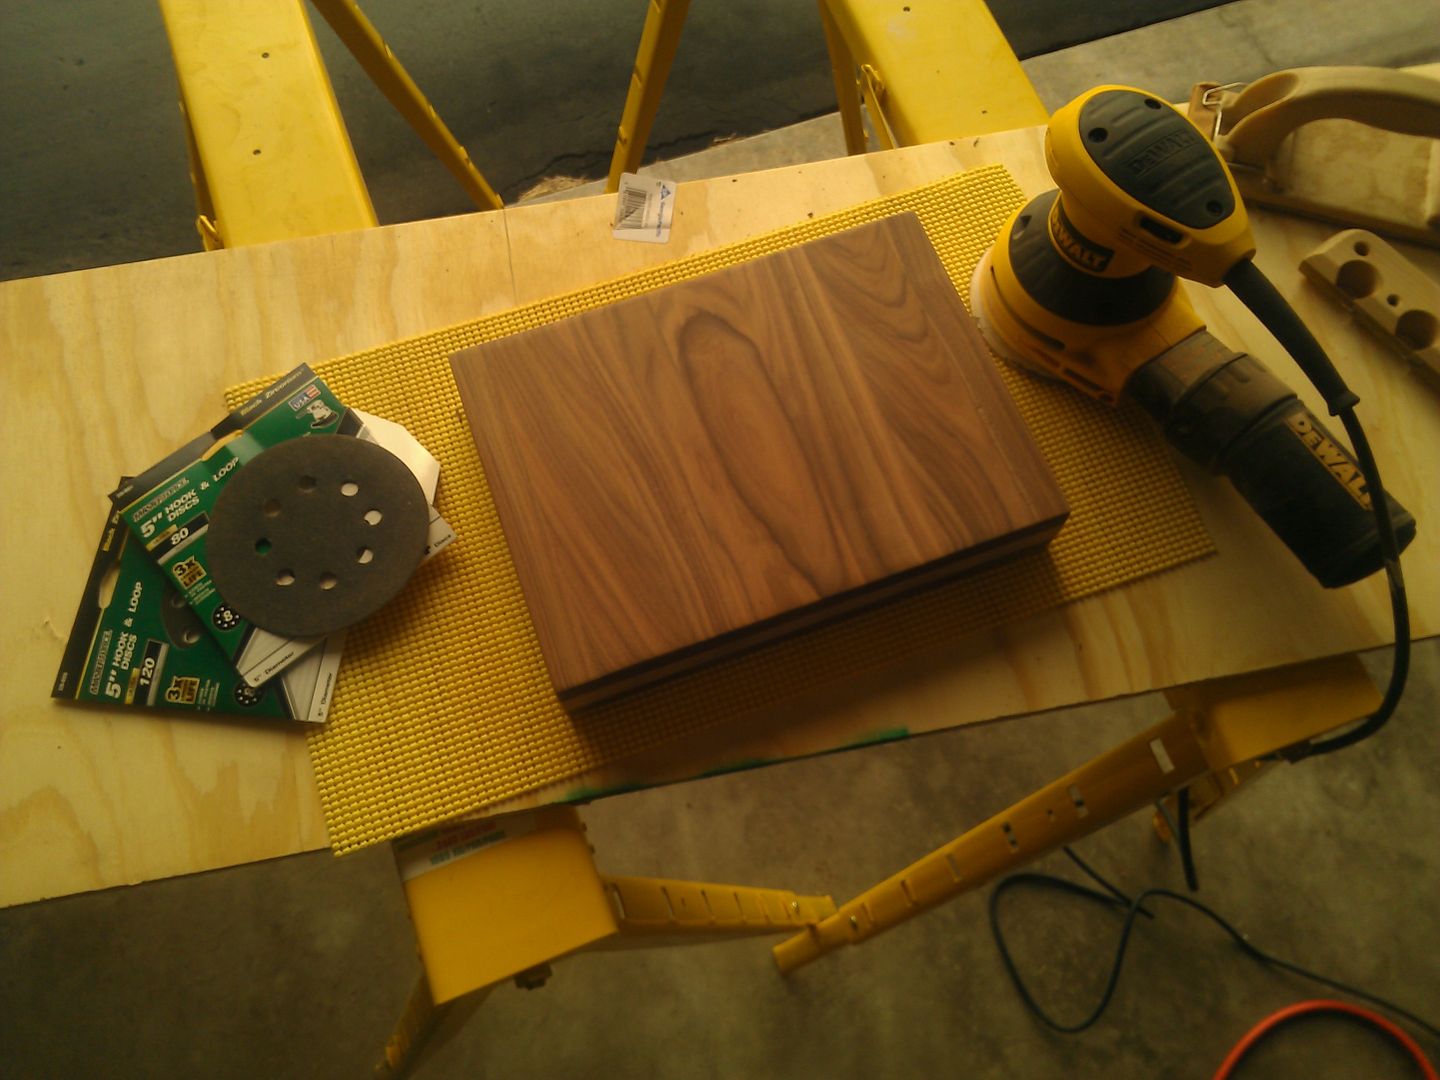
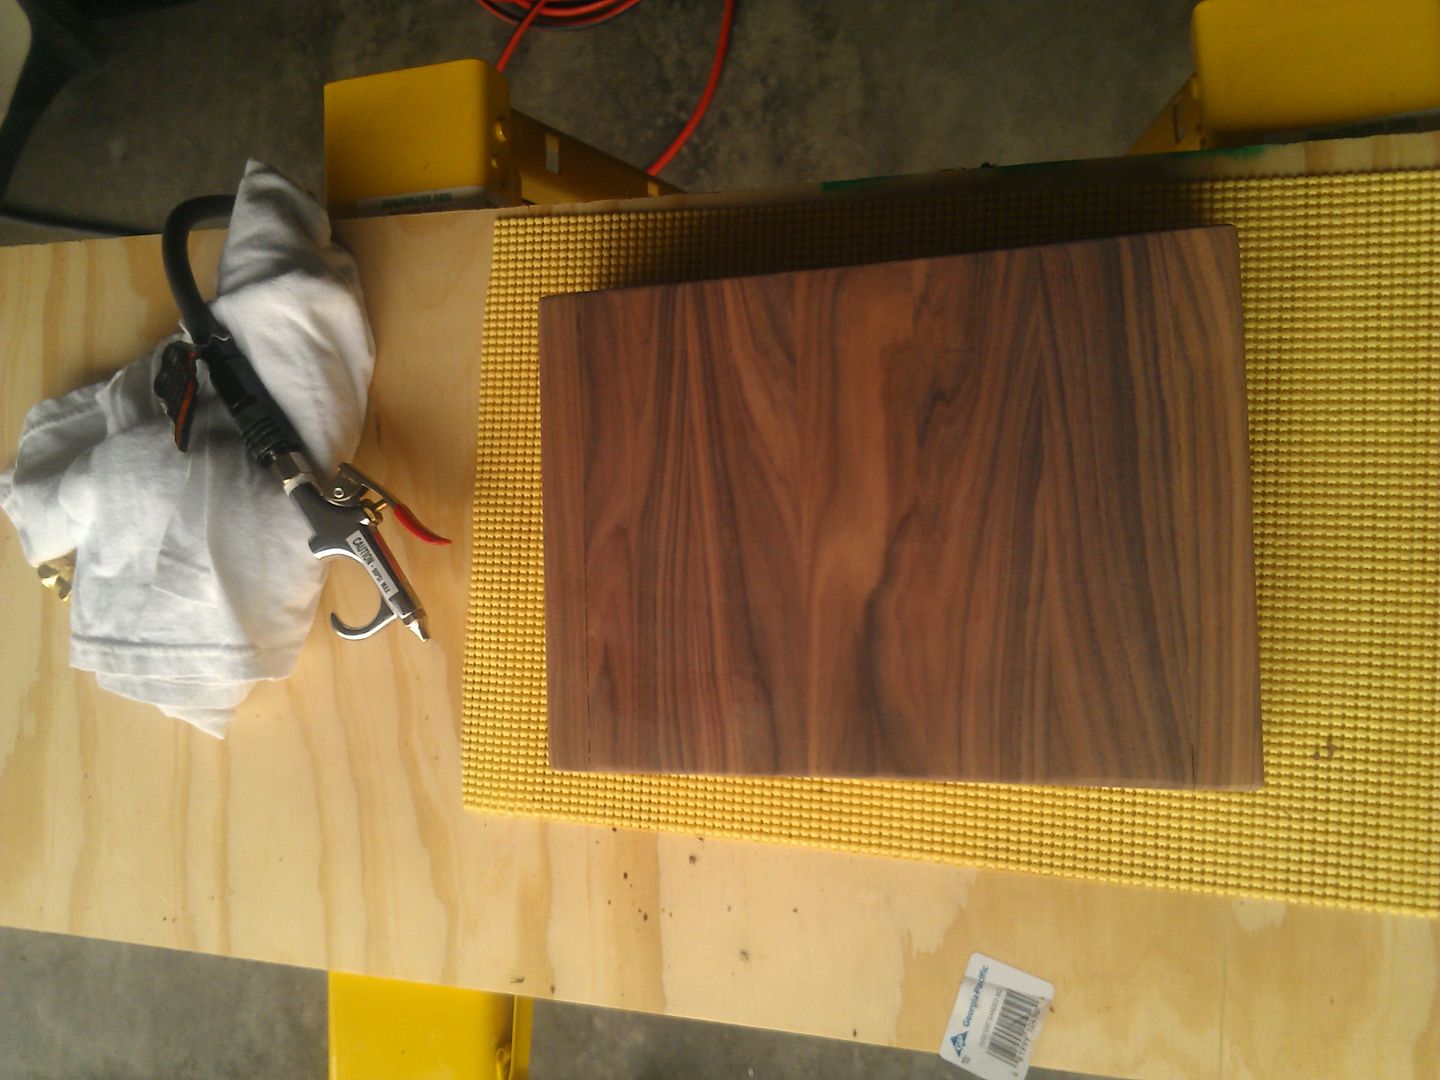
Final sanding with 220 grit.
Blew off the dust and wiped it clean.
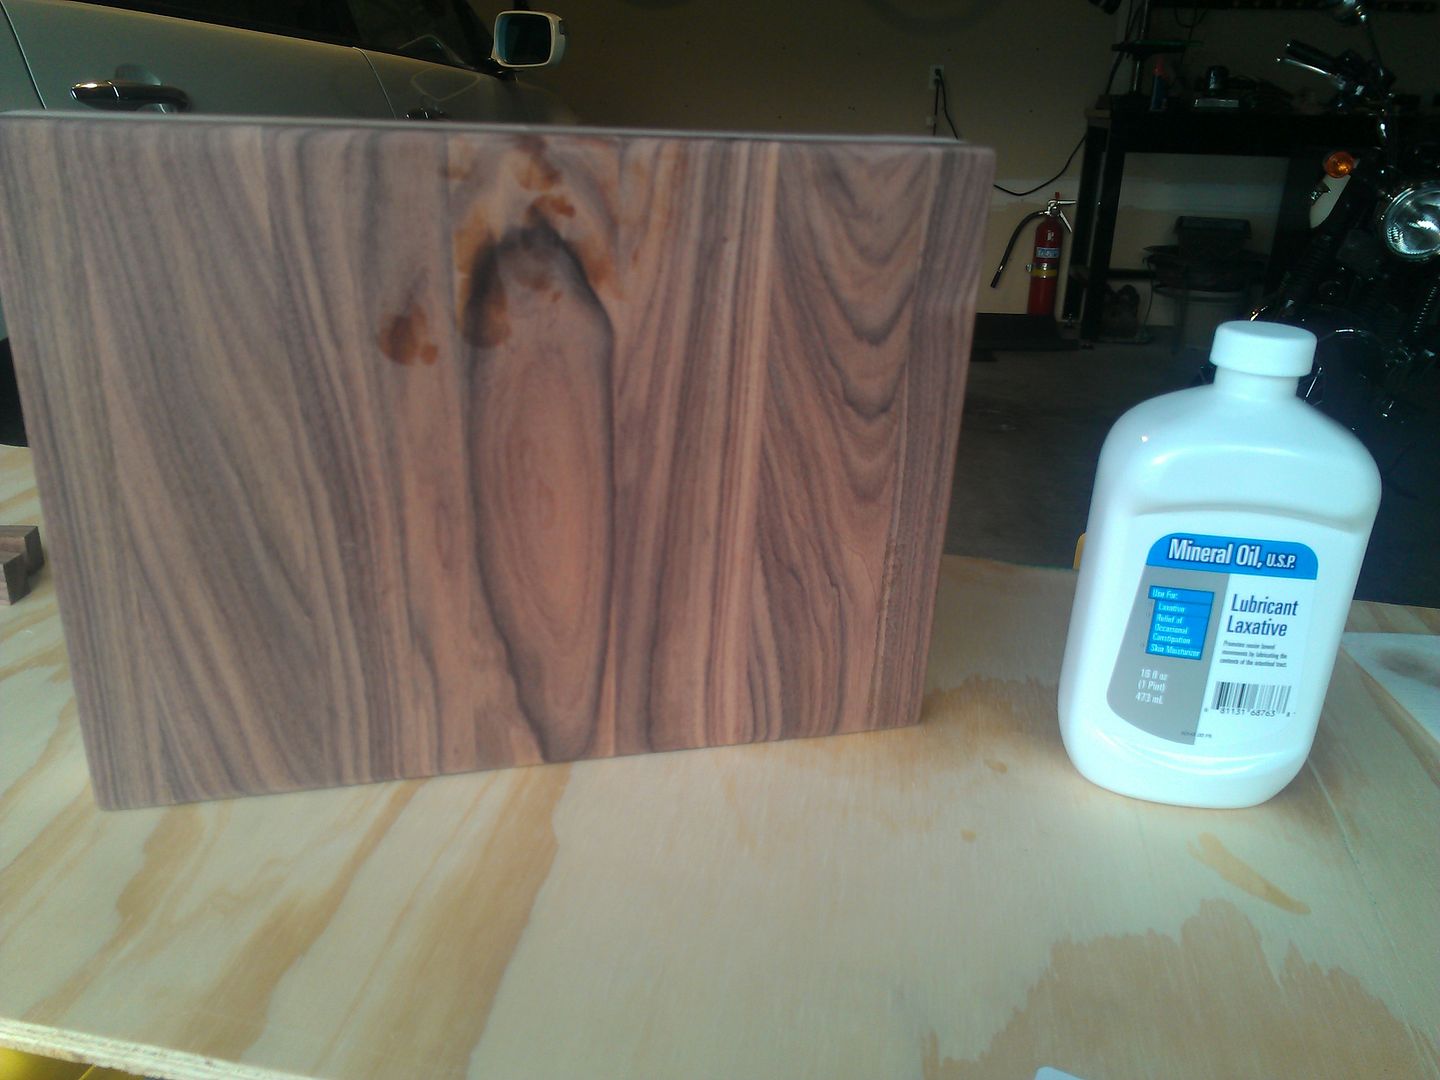
Rubbed some laxatives on it.
And the end result.
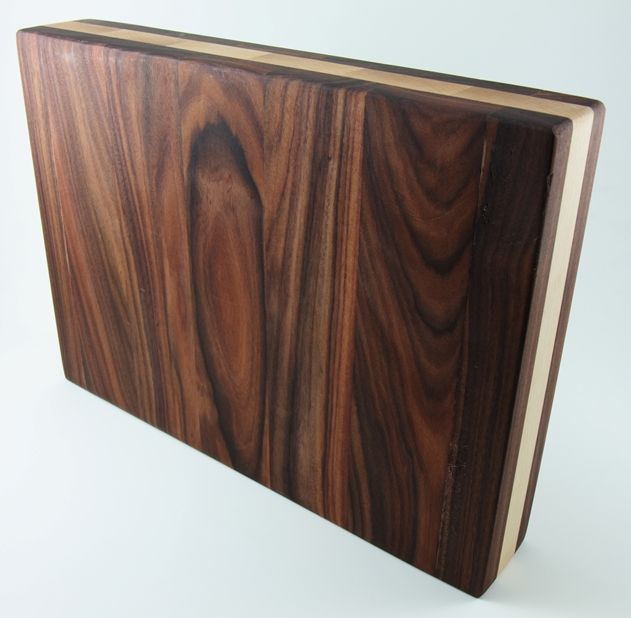
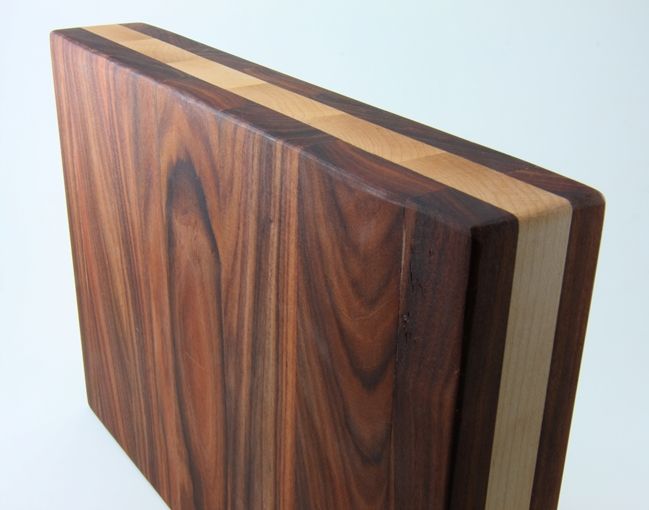
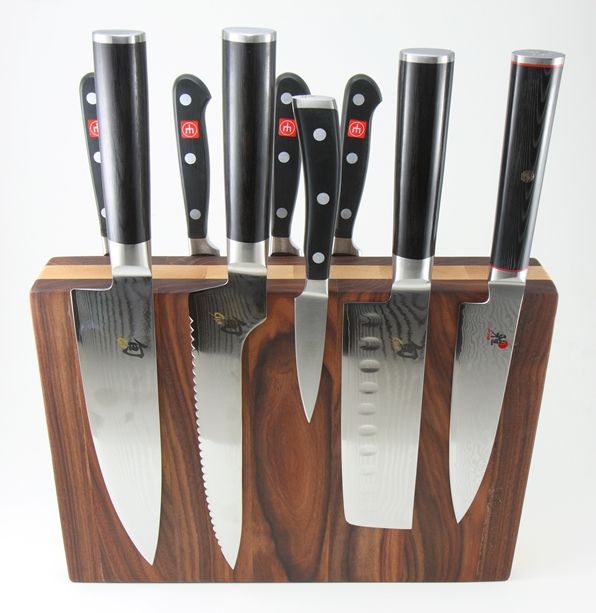
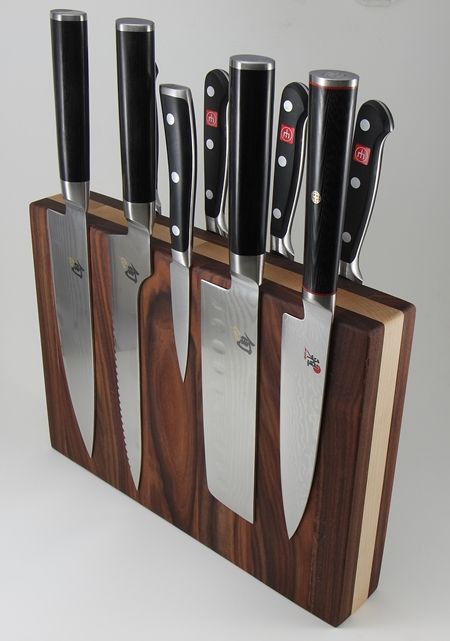
There are a few blemishes. Some gaps during the glue job and some chipping from the planer, but all in all, I'm happy with how it turned out.
So...I made this.
Started with about 18 bad hard drives.
Opened them all up to retrieve the magnets.
The magnets are glued to a metal plate, so I had to put them in a vice and bend the metal to get the magnets off the plate.
Decided on two kinds of wood, Brazilian Rosewood and Hard Rock Maple.
Ripped them to slightly wider than 2".
Jointed the pieces to get a square edge.
Glued them together to get a board with a nice grain pattern.
Planed both boards to equal thicknesses.
Cut the rosewood in half to match the size of the maple.
Cut 2 dadoes in each piece of rosewood.
Dry fit the magnets in the each dado and them glued them in place.
Used some scrap to fill in the gap should the magnets become unglued. This should hopefully keep them in place.
Sandwiched the maple with each piece of rosewood and glued them all together. You can never have enough clamps!
Cut all four sides down with a planer blade.
Used a hand planer to round off the edges.
Sanded with 80 and then 120 grit.
Final sanding with 220 grit.
Blew off the dust and wiped it clean.
Rubbed some laxatives on it.
And the end result.
There are a few blemishes. Some gaps during the glue job and some chipping from the planer, but all in all, I'm happy with how it turned out.

 08-27-2012, 10:57 AM
#7
Earth-bound misfit
That is beautiful and creative. Fantastic result. Thanks for sharing!!
Trending Topics
 08-27-2012, 01:19 PM
#9
The sizzle in the Steak
Nice!
Very creative.
Seems it might be a bit too narrow. A wider base would be nice so you don't have to use your other hand to hold the block when removing the knives.
Very creative.
Seems it might be a bit too narrow. A wider base would be nice so you don't have to use your other hand to hold the block when removing the knives.
08-27-2012, 02:03 PM
#12
Senior Moderator
Regional Coordinator
(Mid-Atlantic)
Regional Coordinator
(Mid-Atlantic)
iTrader: (6)
Love it, props for the originality. I'm also very jealous of your wood shop
08-27-2012, 07:31 PM
#13
Racer
Thread Starter
Thanks, everyone! It was a fun little project.
I was going to spend about $30 on neodymium magnets, but caught wind of a large number of drives at work headed to the recycler. Cut the project cost in half.
Yeah, unfortunately it is a little too thin. My original plan was for two 3/4" outer layers and three 1/2" inner layers, so I could stagger the joints the way I wanted. A 3" width would probably have been just about right. This ended up being slightly over 2". Fully loaded, the thing weighs just under 11 pounds, so the weight gives it some stability. The Nakiri knife is the only one that really needs a second hand, the chef's knife is close. I've learned to sort of twist those two off. I might make some sort of base for it if it becomes a problem, but I like the clean look of it now.
 08-28-2012, 11:18 AM
#16
Three Wheelin'
When I saw that I looked up at the huge metal filing cabinet here we have at work. Everytime we have bad hard drives we always open them up for fun and take out the magnets then stick to the metal filing cabinet.
GJ OP! final product looks awesome!
08-28-2012, 03:12 PM
#18
Honda+Blue=My garage


Thread
Thread Starter
Forum
Replies
Last Post
SidhuSaaB
3G TL Problems & Fixes
18
05-30-2020 12:40 AM