
Mobius Action Camera - Dashboard Camera

Thread Starter
Intermediate
Joined: Mar 2014
Posts: 49
Likes: 5
Mobius Action Camera - Dashboard Camera
Hey all, so my Mobius ActionCam came in yesterday. So far I haven't done much with it but I'm hoping to rough it in this weekend.
I'm still waiting for the fuse tap and to come in.
I've also attached the system config (SYSCFG.TXT) file with setting that I think should work for a car camera "dashcam" set-up.
Anyone else used this camera?
dq
I'm still waiting for the fuse tap and to come in.
I've also attached the system config (SYSCFG.TXT) file with setting that I think should work for a car camera "dashcam" set-up.
Anyone else used this camera?
dq
Last edited by donq; Apr 24, 2014 at 09:55 AM.

Thats a really good cam. Looks like I'm gonna pick that up soon! Thanks for posting about it. I was looking for something with good visual quality
Last edited by d1sturb3d119; May 13, 2014 at 11:18 PM.
Thread Starter
Intermediate
Joined: Mar 2014
Posts: 49
Likes: 5
I'm still experimenting with it. Especially different mounts and locations. Right now I have it placed beside the rearview mirror (on the passenger side). It isn't too noticeable and it doesn't interfere with the movement of the mirror itself.
I've also found that you can point it about 20 deg towards the sky and still see the car in the bottom of picture. If you point it dead-on you get too much dash and hood which isn't useful information...
dq
I've also found that you can point it about 20 deg towards the sky and still see the car in the bottom of picture. If you point it dead-on you get too much dash and hood which isn't useful information...
dq
Trending Topics
rock the block
Joined: Dec 2013
Posts: 730
Likes: 143
From: Waterloo, Ontario
I'm still experimenting with it. Especially different mounts and locations. Right now I have it placed beside the rearview mirror (on the passenger side). It isn't too noticeable and it doesn't interfere with the movement of the mirror itself.
I've also found that you can point it about 20 deg towards the sky and still see the car in the bottom of picture. If you point it dead-on you get too much dash and hood which isn't useful information...
dq
I've also found that you can point it about 20 deg towards the sky and still see the car in the bottom of picture. If you point it dead-on you get too much dash and hood which isn't useful information...
dq
Thread Starter
Intermediate
Joined: Mar 2014
Posts: 49
Likes: 5
Thread Starter
Intermediate
Joined: Mar 2014
Posts: 49
Likes: 5
Ok folks, I finally got some time to hardwire this camera. Here are some photos and instructions:
Tools you'll need:
- fuse puller
- needle nose pliers
- light source
- multimeter or at least a light-bulb tester
- zip ties
- 10mm crescent wrench
- Wire strippers
I used the following fuse-tap (add-a-circuit) and this USB voltage regulator:
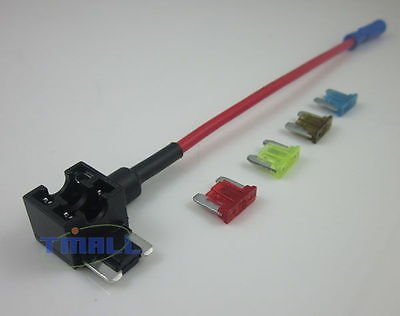
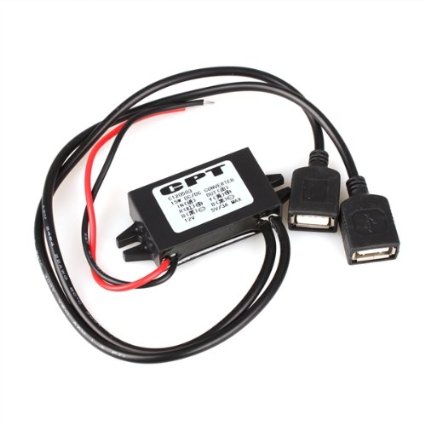
Links to e-bay and Amazon are in the top posting.
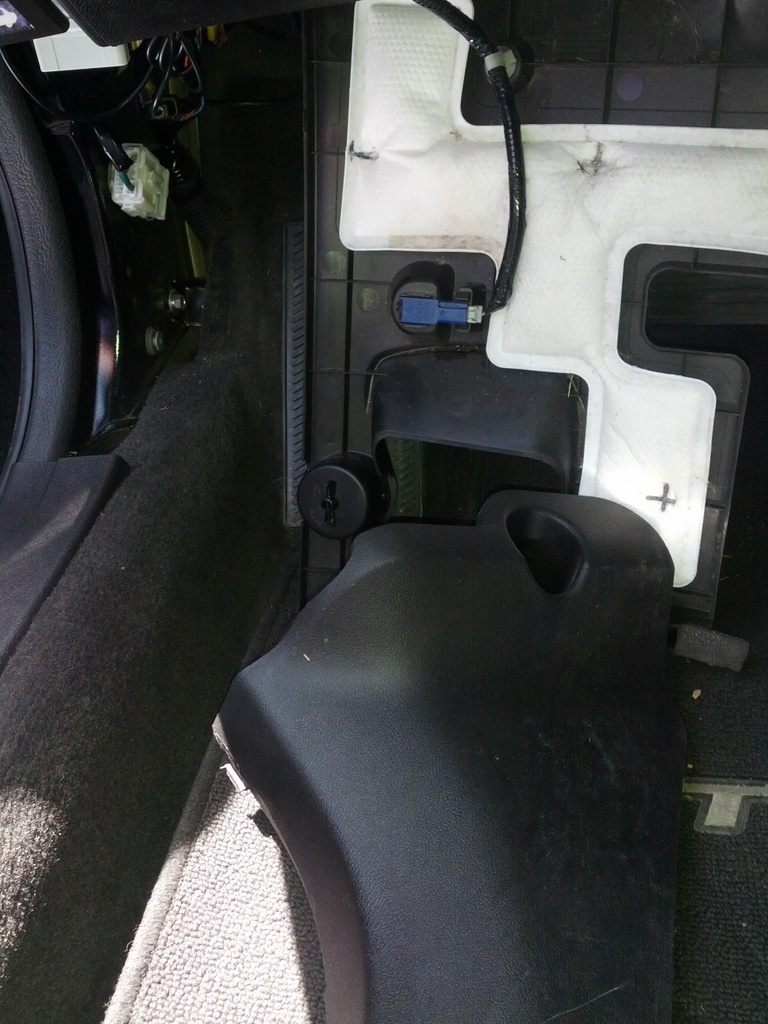
I removed the cover for the driver's side fusebox as well as the lefthand side cover. Be careful when removing this latter cover. I cracked it a bit trying to remove it. I think if you peel back the weatherstipping first it should come out easier:
You then need to attach the ground (black wire) of the voltage regulator to a group point on the car. This was the hardest part since I used a socket wrench instead and there wasn't much space for it. There is a common ground point to the left of the fuse box and it looks like this:
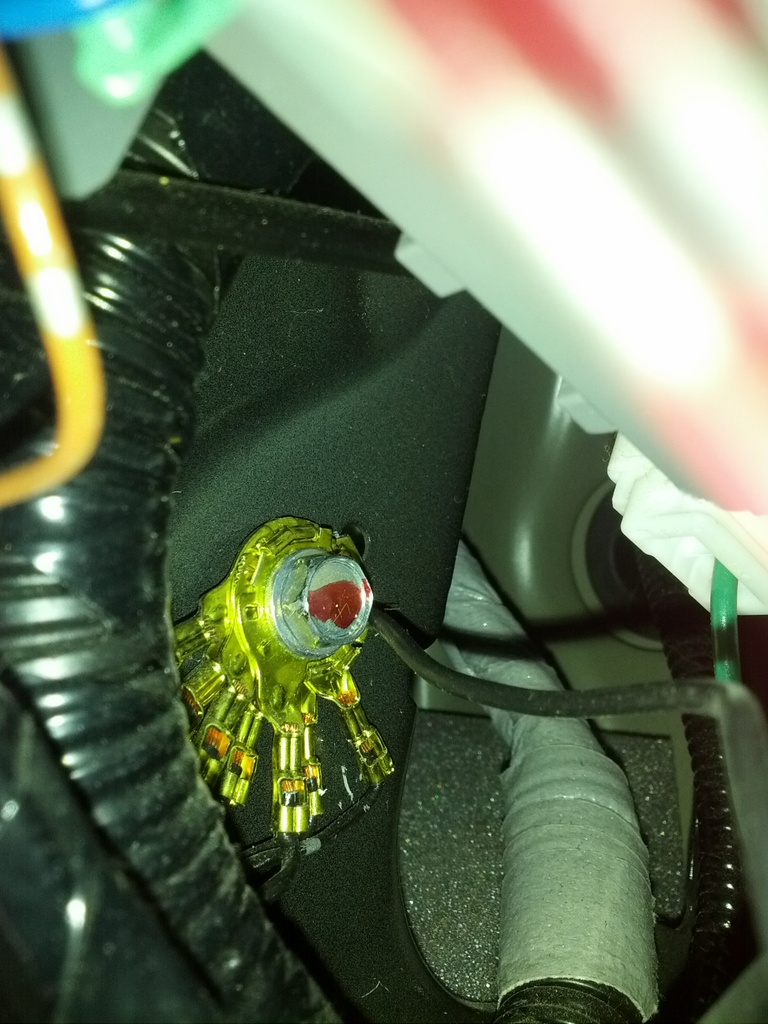
Loosen off the bolt but don't completely undo it. If you buy the linked regulator you will need to strip some more of the casing off. Underneath is twisted copper so be careful. Wrap the bare wire around the bolt and tighten the bolt. Check to see if the black wire is secure.
Next you need to hook the fuse tap. First I tried using #23 which is connected to the front lighter adapter but that didn't work (long story) so I then hooked it up to #18. Pull out the #18 7.5A fuse and put it into the fuse tap. Also put another 7.5A fuse into the fuse tap and then plug the fuse tap into #18:
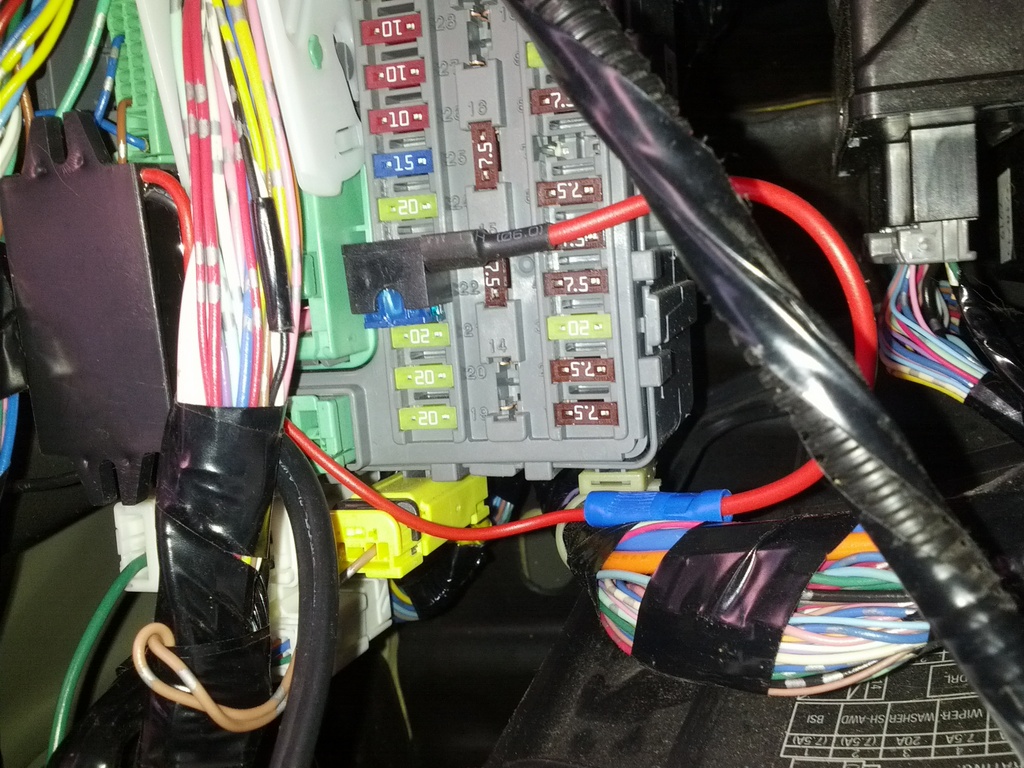
(This one is still in #23 but don't put it there)
Once the tap is in place test the voltage across the ground and the tap to check if there is anything. Do it with the car off and with the car on (or at least ACC-on). There should only be voltage when the car is on (engine running or ACC-on).
Next you can hook the red wire on the voltage regulator to the fuse tap. You will need to strip some more wire on the regulator and then but it in the blue coupler and squeeze it shut using pliers (you can see it connected in the above picture).
Now you can test the connection by plugging in a USB device into the regulator. It should only work when the car is on.
More to follow...
dq
First of all I ordered the adhesive backing instead of the suction cup because it stays on better:
Tools you'll need:
- fuse puller
- needle nose pliers
- light source
- multimeter or at least a light-bulb tester
- zip ties
- 10mm crescent wrench
- Wire strippers
I used the following fuse-tap (add-a-circuit) and this USB voltage regulator:
Links to e-bay and Amazon are in the top posting.
I removed the cover for the driver's side fusebox as well as the lefthand side cover. Be careful when removing this latter cover. I cracked it a bit trying to remove it. I think if you peel back the weatherstipping first it should come out easier:
You then need to attach the ground (black wire) of the voltage regulator to a group point on the car. This was the hardest part since I used a socket wrench instead and there wasn't much space for it. There is a common ground point to the left of the fuse box and it looks like this:
Loosen off the bolt but don't completely undo it. If you buy the linked regulator you will need to strip some more of the casing off. Underneath is twisted copper so be careful. Wrap the bare wire around the bolt and tighten the bolt. Check to see if the black wire is secure.
Next you need to hook the fuse tap. First I tried using #23 which is connected to the front lighter adapter but that didn't work (long story) so I then hooked it up to #18. Pull out the #18 7.5A fuse and put it into the fuse tap. Also put another 7.5A fuse into the fuse tap and then plug the fuse tap into #18:
(This one is still in #23 but don't put it there)
Once the tap is in place test the voltage across the ground and the tap to check if there is anything. Do it with the car off and with the car on (or at least ACC-on). There should only be voltage when the car is on (engine running or ACC-on).
Next you can hook the red wire on the voltage regulator to the fuse tap. You will need to strip some more wire on the regulator and then but it in the blue coupler and squeeze it shut using pliers (you can see it connected in the above picture).
Now you can test the connection by plugging in a USB device into the regulator. It should only work when the car is on.
More to follow...
dq
First of all I ordered the adhesive backing instead of the suction cup because it stays on better:
Thread Starter
Intermediate
Joined: Mar 2014
Posts: 49
Likes: 5
... continued:
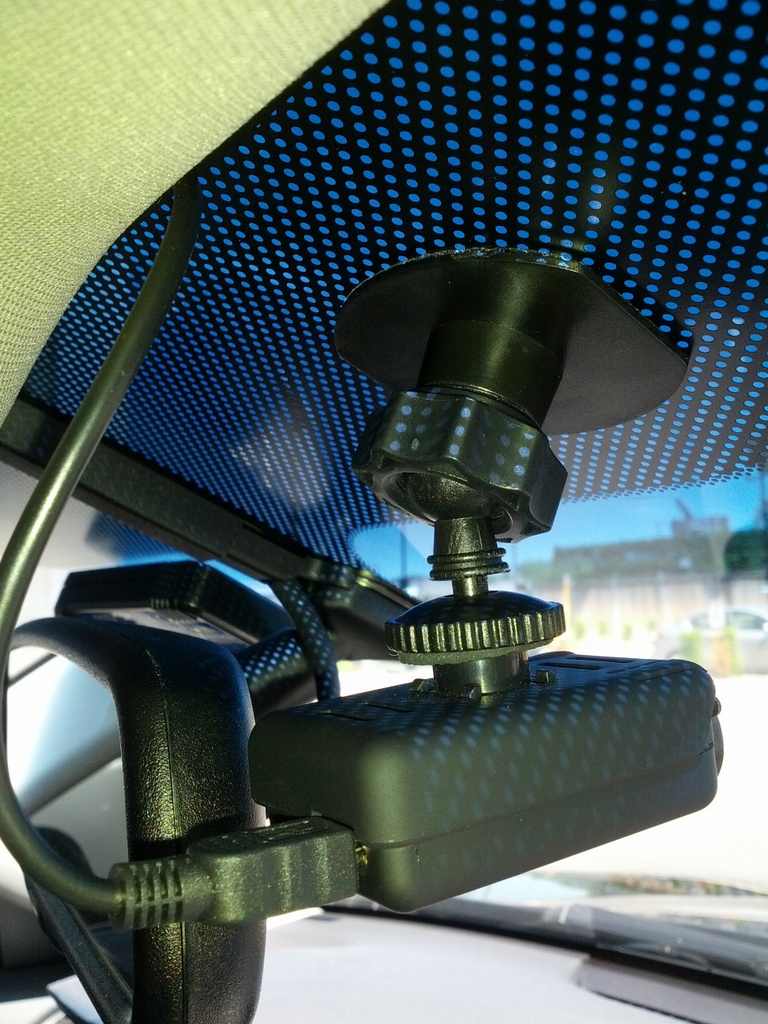
Now it's time to mount the camera and route the wire. This was much easier than I expected.
First of all I ordered the adhesive backing instead of the suction cup because it stays on better:
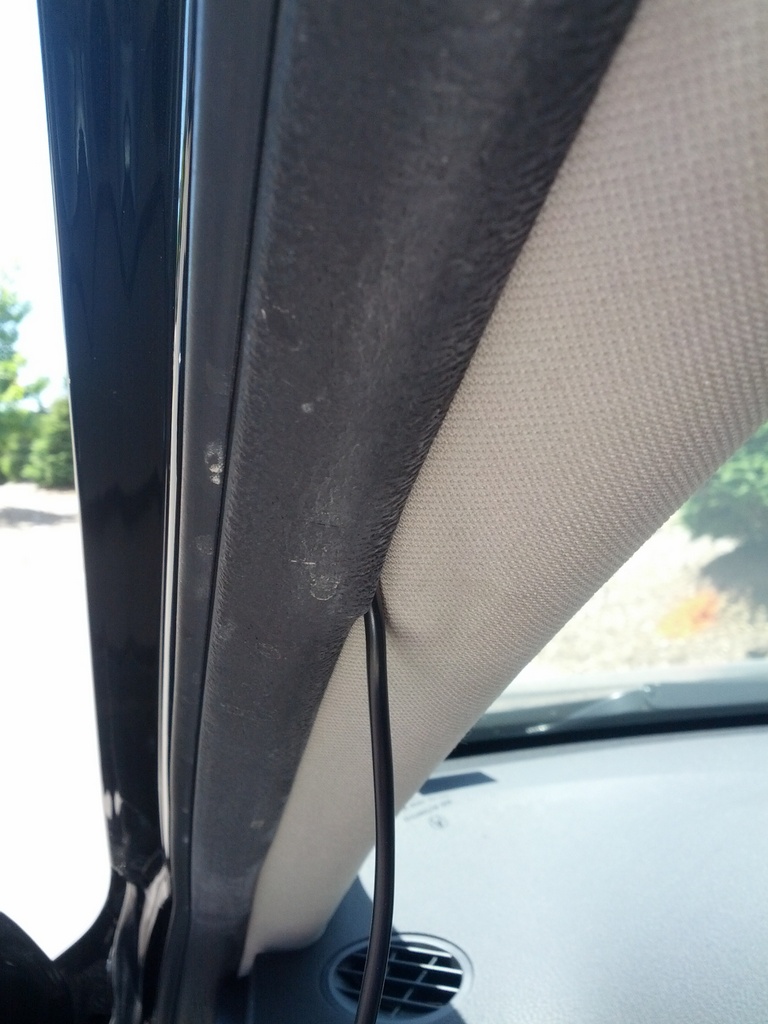
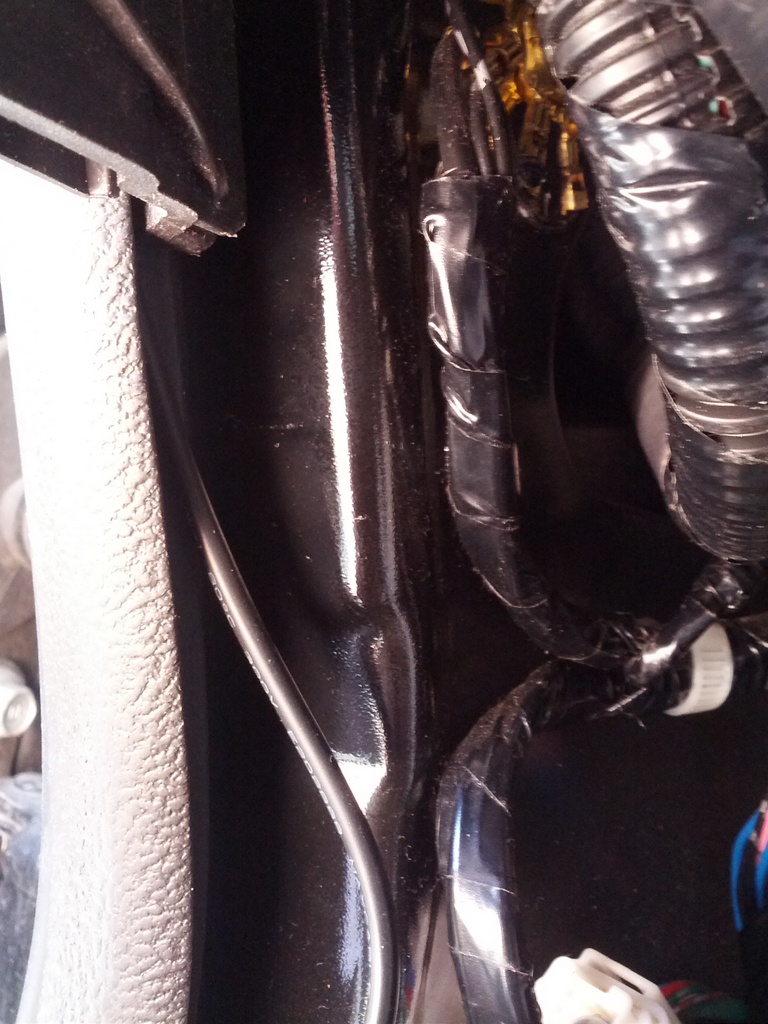
Then I shoved the wire along the top of the window and down the a-pillar:
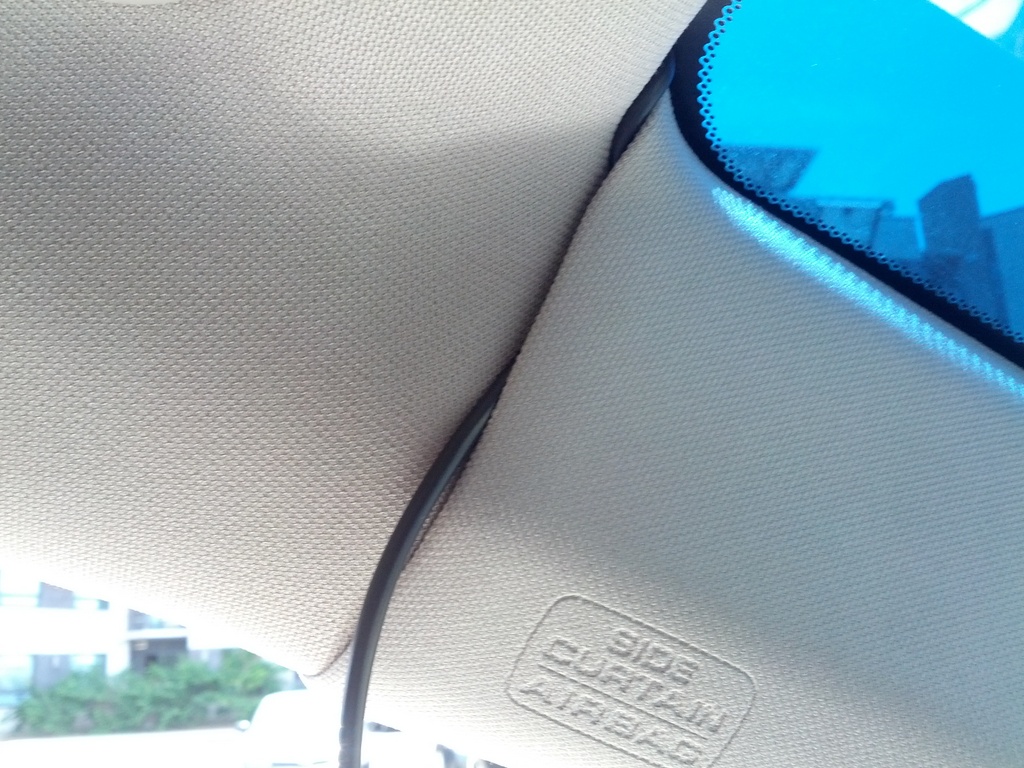
I suggest routing it underneath the weather stripping:
This is near the fuse box:
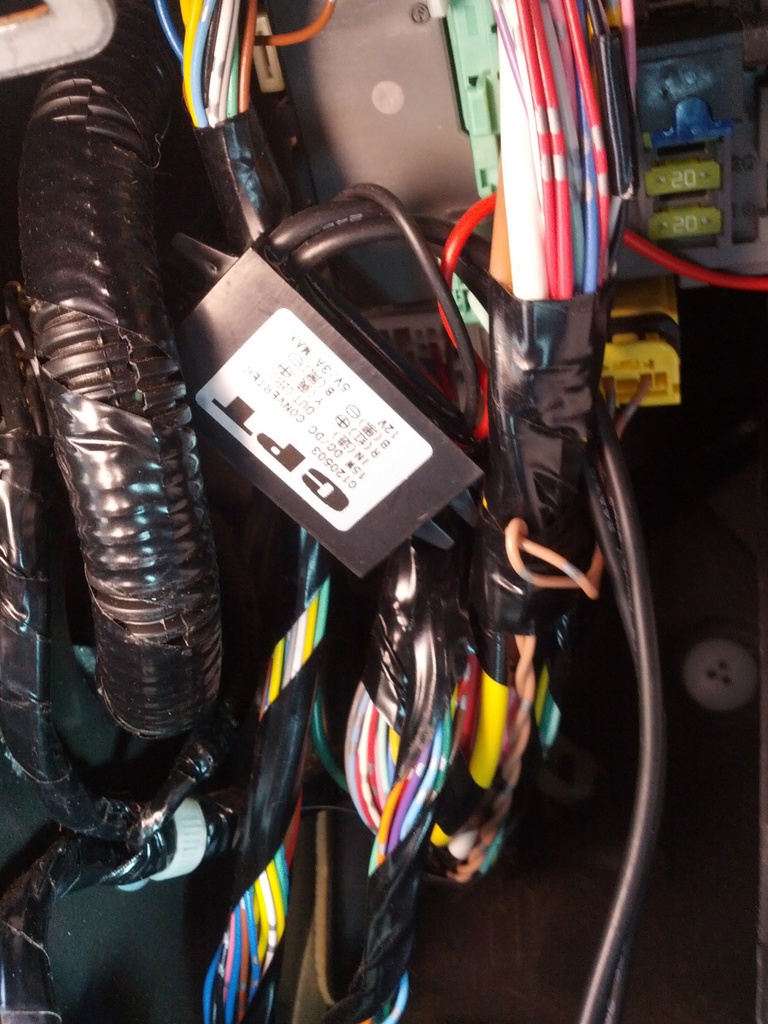
Here is a shot of the voltage regulator once it is connected:
Then I hooked up the camera and zip-tied it to a large cable bundle near the fusebox:
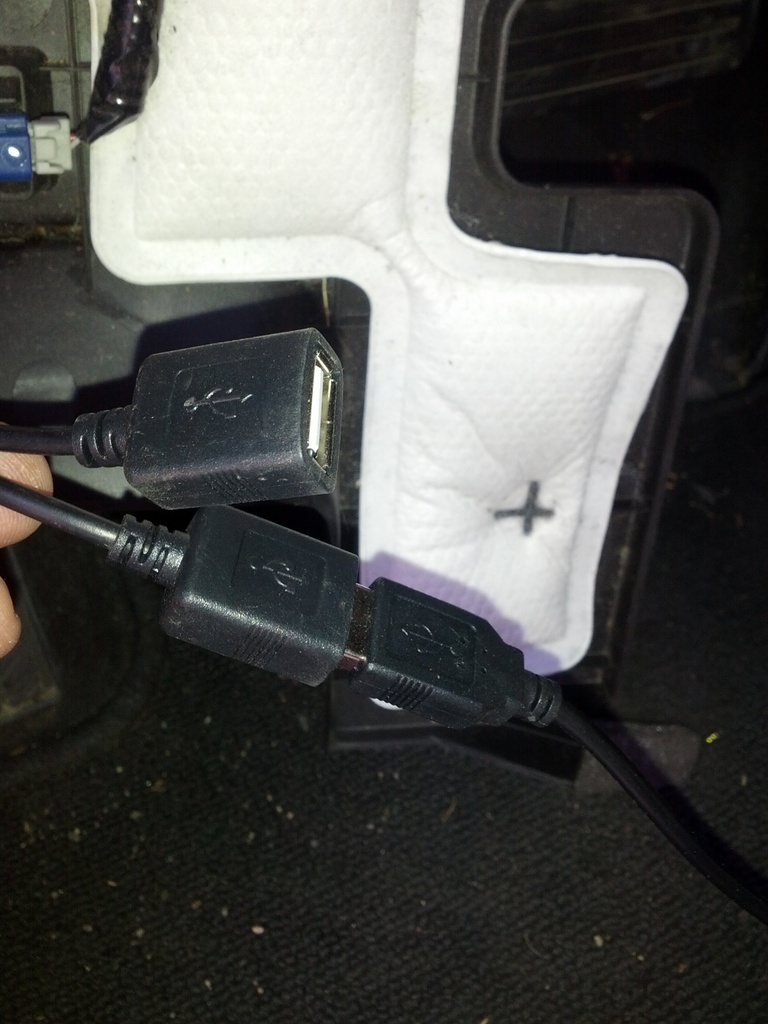
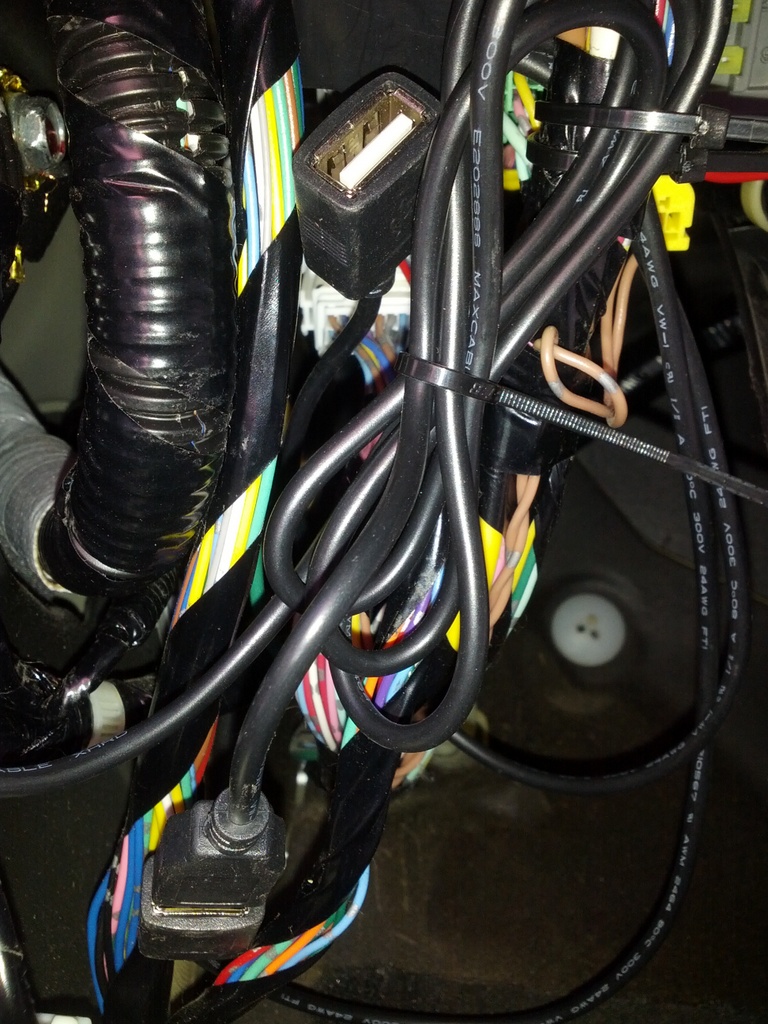
Note that there is a free USB socket for future use (rear dash camera?).
After that I put everything back together and it worked! I did run into one snag but to fix it I just pushed the fuses in the fuse tap a bit harder and it worked so keep a heads-up for that. Also, in case you are wondering, removing the #18 fuse will not cause the need to input the security code into the stereo before it can work.
If you have any questions, feel free to ask me. Good luck!
dq
Now it's time to mount the camera and route the wire. This was much easier than I expected.
First of all I ordered the adhesive backing instead of the suction cup because it stays on better:
Then I shoved the wire along the top of the window and down the a-pillar:
I suggest routing it underneath the weather stripping:
This is near the fuse box:
Here is a shot of the voltage regulator once it is connected:
Then I hooked up the camera and zip-tied it to a large cable bundle near the fusebox:
Note that there is a free USB socket for future use (rear dash camera?).
After that I put everything back together and it worked! I did run into one snag but to fix it I just pushed the fuses in the fuse tap a bit harder and it worked so keep a heads-up for that. Also, in case you are wondering, removing the #18 fuse will not cause the need to input the security code into the stereo before it can work.
If you have any questions, feel free to ask me. Good luck!
dq
rock the block
Joined: Dec 2013
Posts: 730
Likes: 143
From: Waterloo, Ontario
what a nice guide dq! thanks for taking so much time to put it together for us. I'm currently waiting for my BlackVue DR500GW and have been hunting around for some photos of an install
also glad to hear the sun isn't too imposing on the camera's quality.
someone get this guy a beer
also glad to hear the sun isn't too imposing on the camera's quality.
someone get this guy a beer

Advanced
Joined: Jun 2013
Posts: 69
Likes: 19
From: Toronto
I heard good things about the Mobius but ended up buying the Mini 0801 because I wanted an LCD screen and an adhesive mount instead of a suction cup. It sits behind the rearview mirror and is small enough that nobody who comes in my car even notices it unless I point it out, and it's pretty much invisible from outside. I didn't tap into the fuse box thought, I just ran the wire along the roof to the A pillar, down the A pillar and under the passenger floor mat, then beside the seat and into the center console and plugged it into the cigarette power socket in the center console.Now I'm thinking of getting a second, rearward facing camera and am considering the mobius for that, but need to plan how to install it.
Burning Brakes


Joined: Dec 2011
Posts: 836
Likes: 133
From: Alberta, CANADA
Thanks for the write-up. My fuse tap and step-down converter just arrived, but I also just had knee surgery, so installation of my A119 will have to wait a week or so. Mind if I ask how long a USB cable you needed?
Burning Brakes
Joined: Dec 2011
Posts: 836
Likes: 133
From: Alberta, CANADA
Thanks again. Install went smoothly, in large part thanks to your guide. I chose to ground through the dead pedal instead of the common ground; I can't see how you possibly could have accessed that ground. The dead pedal bolt seems to have worked just fine.


Burning Brakes
Joined: Dec 2011
Posts: 836
Likes: 133
From: Alberta, CANADA
Start at post 10, and work your way down. It's hard to tell from the image, but it looks almost like you're step-down converter has a micro or mini USB end, so you'll be running the wire all the way from the unit to the power source, but that's not an issue (so long as you have enough length). But again, that's based on what little I can see from the picture.

Thread
Thread Starter
Forum
Replies
Last Post
rp_guy
Member Cars for Sale
9
Jul 16, 2017 07:33 AM
navtool.com
5G TLX Audio, Bluetooth, Electronics & Navigation
31
Nov 16, 2015 08:30 PM