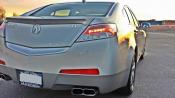
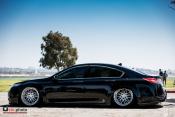
Dual Intensity LED Reflector mod.

Thread Tools
 
Search this Thread
 
Old Mar 5, 2015 | 08:51 PM
  #1  
korrupt3dazn's Avatar
Thread Starter
Intermediate
 
Joined: Mar 2009
Posts: 39
Likes: 10
Dual Intensity LED Reflector mod.

The LED are wired to the running lights and the brake lights.
When the running lights turn on the leds turn on but are pretty dim. When the brakes are applied the LED turn brighter. I didn't take enough picture to full show you the process of how to do it. So I pieced together what I could to make this DIY.


Video of Lights in Action.

Parts List:

1X -Red LED Strip: $7.99
Amazon.com: XKTTSUEERCRR Waterproof Red LED 3528 SMD 300LED 5M Flexible Light Strip 12V 2A 24W 60LED/M: Home Improvement Amazon.com: XKTTSUEERCRR Waterproof Red LED 3528 SMD 300LED 5M Flexible Light Strip 12V 2A 24W 60LED/M: Home Improvement


2X - 1N4001 MICRO 1A DIODES
1N4001 Micro 1A Diodes : Diodes | RadioShack.com


1X - 470 OHM 1/2W 5% CARBON FILM RESISTOR PK/5
470 ohm 1/2W 5% Carbon Film Resistor pk/5 : Resistors | RadioShack.com


First we need to remove the bumper:


Then remove the reflector:


After you remove the reflector use a dremel with a cutting wheel to cut the reflector in half like this.


Lay out your led strips how you like it. Keep in mind that you can only cut the strip every 3 leds. Also drill a hole so that you can pass the wire through


Place the reflector cover over the leds and hook it up to a 12v source to test it out and to to see if you like how the leds are laid out.


Add some silicone chalking around the edges. Then clamp the cover onto the back piece. Also chalk around the hole where the wires were passed through.


Next we will have to remove the tail lights


Next we will have to build the the LED controller. Solder it like this


Wire this led controller like this:


The 3 wire harness mention in step above is located on back of tail light


Last edited by korrupt3dazn; Mar 5, 2015 at 08:53 PM.
Reply
Old Mar 5, 2015 | 09:30 PM
  #2  
guitarplayer16's Avatar
Race Director
15 Year Member
Liked
Loved
Community Favorite
iTrader: (8)
 
Joined: Mar 2010
Posts: 10,766
Likes: 2,317
From: ON, Canada
pretty neat, nice job
Reply
Old Mar 5, 2015 | 09:56 PM
  #3  
Mr Magoo's Avatar
Intermediate
 
Joined: Dec 2014
Posts: 36
Likes: 4
From: Ontario, Canada
very cool, nice job
Reply
Old Mar 6, 2015 | 12:13 AM
  #4  
JTL12's Avatar
Instructor
 
Joined: May 2014
Posts: 200
Likes: 26
thats cool although not sure it would look right on a 12 and up.
Reply
Old Mar 6, 2015 | 06:55 AM
  #5  
korrupt3dazn's Avatar
Thread Starter
Intermediate
 
Joined: Mar 2009
Posts: 39
Likes: 10
Originally Posted by JTL12
thats cool although not sure it would look right on a 12 and up.
It doesn't look to bad. Here is a photo shopped imaged one with the mod.

Reply
Old Mar 6, 2015 | 10:43 AM
  #6  
Kumar-TL's Avatar
Advanced
 
Joined: Sep 2014
Posts: 87
Likes: 14
Im deff doing this mod. I had this on my IS350 and got alot of complements on it. However I had mine wired up to my driving lights and turn signals. Would this be possible?
Reply
Old Mar 6, 2015 | 11:09 AM
  #7  
wreak's Avatar
Three Wheelin'
 
Joined: Oct 2008
Posts: 1,490
Likes: 325
Really a different mod you did there. My issue with small LED lights is I find they look cheap, but I can't say that for sure unless I saw your car on the road. Regardless this is a cool post so thanks for sharing.
Reply
Old Mar 6, 2015 | 11:13 AM
  #8  
korrupt3dazn's Avatar
Thread Starter
Intermediate
 
Joined: Mar 2009
Posts: 39
Likes: 10
Originally Posted by Kumar-TL
Im deff doing this mod. I had this on my IS350 and got alot of complements on it. However I had mine wired up to my driving lights and turn signals. Would this be possible?
Yea, Just wire the line into your turn signals instead of brake but make sure you keep the driving lights on the side with the resistor.

Originally Posted by wreak
Really a different mod you did there. My issue with small LED lights is I find they look cheap, but I can't say that for sure unless I saw your car on the road. Regardless this is a cool post so thanks for sharing.
Yea I was a little on the fence about it and thought about using the COB led strip but ended up with the these led strips. They don't looks to bad.
Reply
Old Mar 6, 2015 | 12:47 PM
  #9  
Kumar-TL's Avatar
Advanced
 
Joined: Sep 2014
Posts: 87
Likes: 14
Are you able to wrap the resistor in heat shrink to protect it? I dont like how its all exposed after soldering.
Reply
Old Mar 6, 2015 | 02:24 PM
  #10  
korrupt3dazn's Avatar
Thread Starter
Intermediate
 
Joined: Mar 2009
Posts: 39
Likes: 10
Oh yea. I didnt show it but I used Marine Shrink tubing. Marine shrink tubes has a sealant inside to make the seal water tight.

Link to the one I used: 42 Piece Marine Heat Shrink Tubing
Reply
Old Mar 6, 2015 | 09:25 PM
  #11  
KarKraze's Avatar
Drifting
10 Year Member
Liked
Loved
Community Favorite
 
Joined: Feb 2011
Posts: 2,448
Likes: 673
From: Ontario Canada
Nice write up.
Reply
Old Mar 10, 2015 | 08:46 AM
  #12  
Kumar-TL's Avatar
Advanced
 
Joined: Sep 2014
Posts: 87
Likes: 14
Originally Posted by korrupt3dazn
Oh yea. I didnt show it but I used Marine Shrink tubing. Marine shrink tubes has a sealant inside to make the seal water tight.

Link to the one I used: 42 Piece Marine Heat Shrink Tubing

Perfect thank you I plan on doing this mod in the very near future on my 2012. I will post pics for those of you wondering how they would look on a 2012. Im going to try and fit 2 strips of leds in both as I noticed the '12 reflector are smaller in width than the previous years.
Reply
Old Mar 10, 2015 | 09:31 AM
  #13  
korrupt3dazn's Avatar
Thread Starter
Intermediate
 
Joined: Mar 2009
Posts: 39
Likes: 10
Originally Posted by Kumar-TL
Perfect thank you I plan on doing this mod in the very near future on my 2012. I will post pics for those of you wondering how they would look on a 2012. Im going to try and fit 2 strips of leds in both as I noticed the '12 reflector are smaller in width than the previous years.
Nice. Lmk if you get stuck or something along the way. Maybe you can document your process as well.
Reply
Old Mar 11, 2015 | 03:26 PM
  #14  
Kumar-TL's Avatar
Advanced
 
Joined: Sep 2014
Posts: 87
Likes: 14
Originally Posted by korrupt3dazn
Nice. Lmk if you get stuck or something along the way. Maybe you can document your process as well.
Will do!!!
Reply
Old Apr 22, 2015 | 11:23 AM
  #15  
korrupt3dazn's Avatar
Thread Starter
Intermediate
 
Joined: Mar 2009
Posts: 39
Likes: 10
Originally Posted by Kumar-TL
Will do!!!
Ever get around to doing this? I'm Curious how it looks on a 2012.

Reply
Old Apr 22, 2015 | 02:08 PM
  #16  
potmilkz's Avatar
Moderator
 
Joined: May 2010
Posts: 7,101
Likes: 1,022
From: Southern Cali 626 area
personally i dont like the reflector.. its too big already.. and to add lights to it to make it even more noticeable, well its not my cup of tea.

but otherwise a very clean job.
Reply
Old Apr 22, 2015 | 02:16 PM
  #17  
thoiboi's Avatar
Senior Moderator
15 Year Member
Community Builder
Loved
Community Favorite
 
Joined: Apr 2010
Posts: 48,314
Likes: 9,177
From: SoCal, CA
very neat OP,
Reply
Old Apr 22, 2015 | 02:52 PM
  #18  
Booya4139's Avatar
Burning Brakes
 
Joined: May 2012
Posts: 847
Likes: 123
nicely done
Reply
Old Apr 23, 2015 | 12:17 AM
  #19  
SlyAccord's Avatar
Instructor
 
Joined: Mar 2005
Posts: 233
Likes: 11
Yea nicely done, but not my style. Reminds me of trucks you see in the south with just brake lights all around it


Reply
Related Topics
Thread
Thread Starter
Forum
Replies
Last Post
CL-S progression 01
Car Parts for Sale
65
Jan 26, 2016 04:15 PM
DerrickW
3G TL Performance Parts & Modifications
9
Nov 15, 2015 05:52 PM
InFaMouSLink
Car Parts for Sale
3
Oct 30, 2015 09:43 AM
AcuraKidd
Non-Automotive & Motorcycle Sales
0
Sep 25, 2015 11:18 PM
eastcoastguy
3G TL (2004-2008)
1
Sep 23, 2015 06:29 AM


All times are GMT -5. The time now is 01:08 AM.