
DIY: Flaccid Armrest Cushion Replacement

Glad someone bumped this back up. I forgot to post. I did this a couple weeks ago.
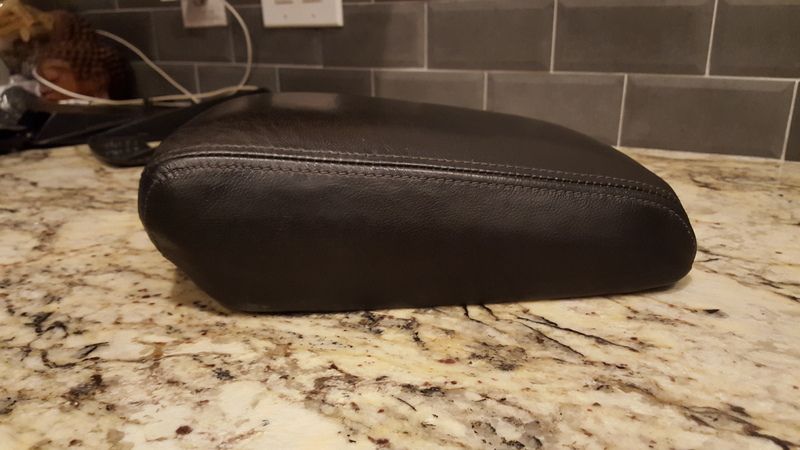
Old padding worn in the shape of a fore arm.
[IMG]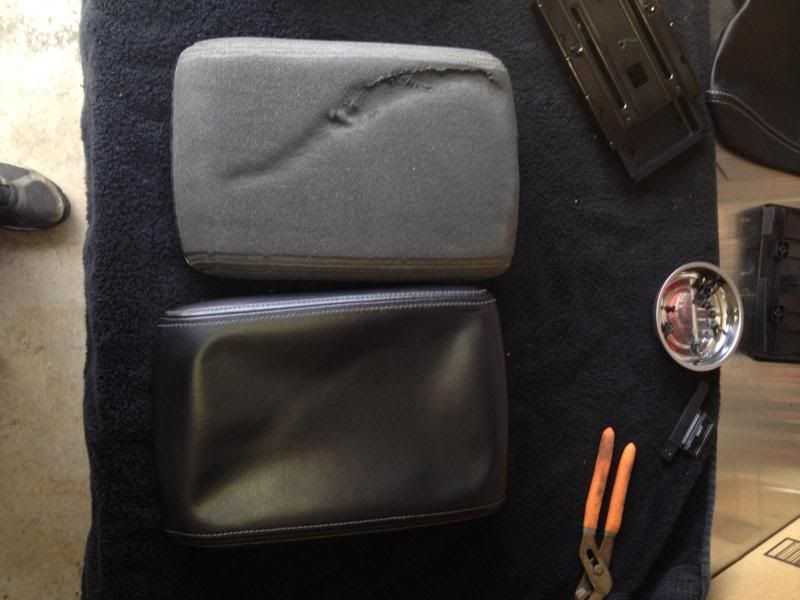 [/IMG]
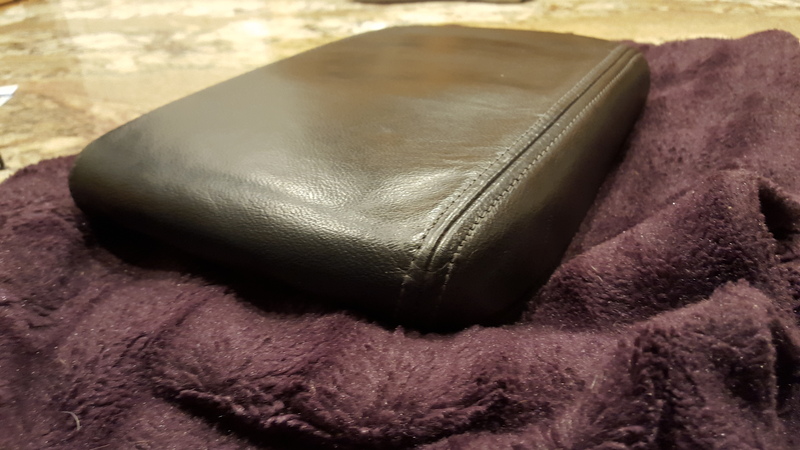
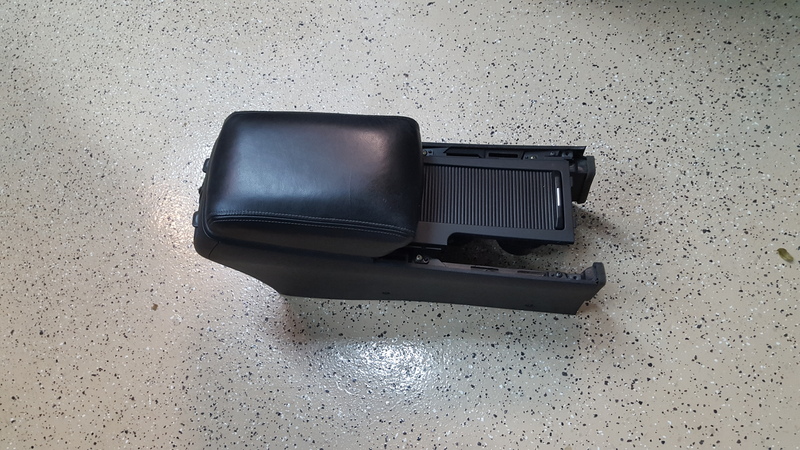
From left to right: Old padding removed, OEM arm rest, new padding, new leather cover.
[IMG]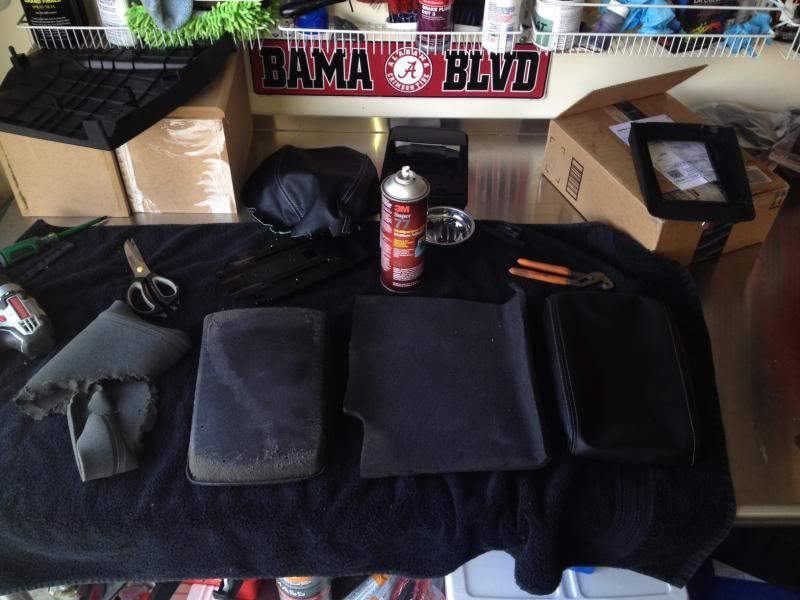 [/IMG]
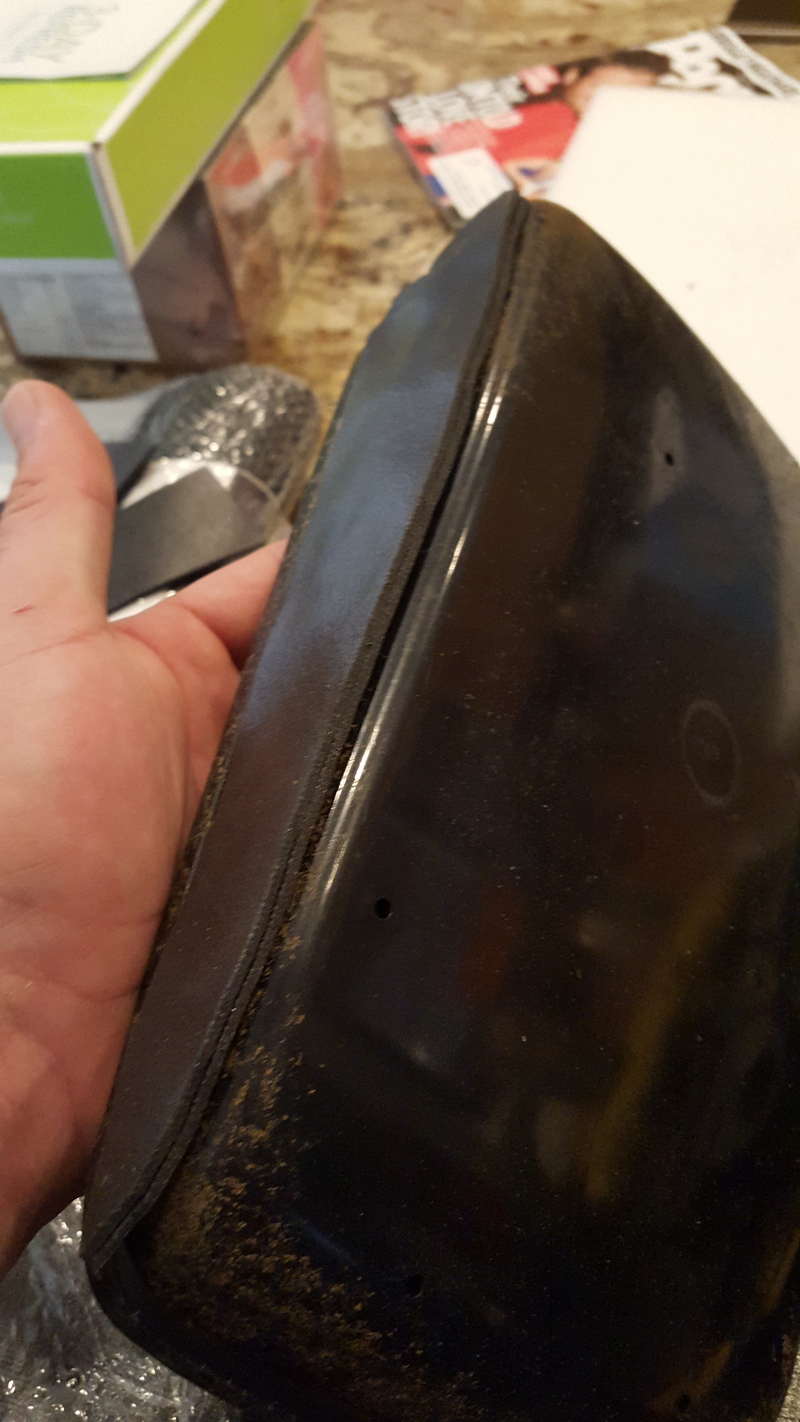
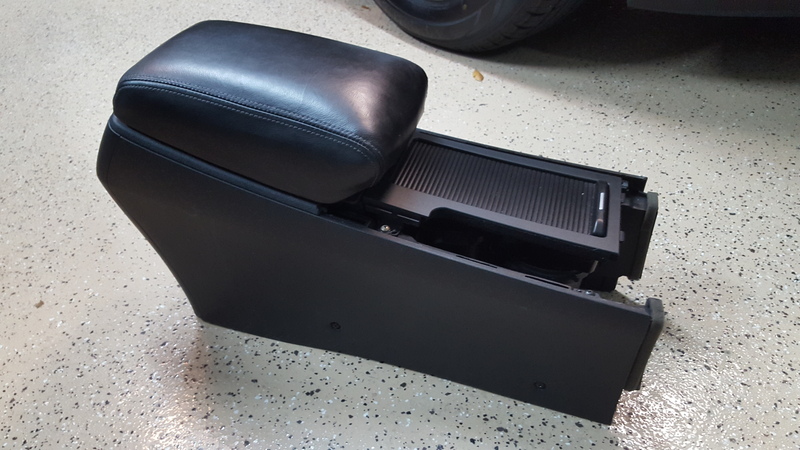
Old pad, OEM cover with new padding, new pad.
[IMG]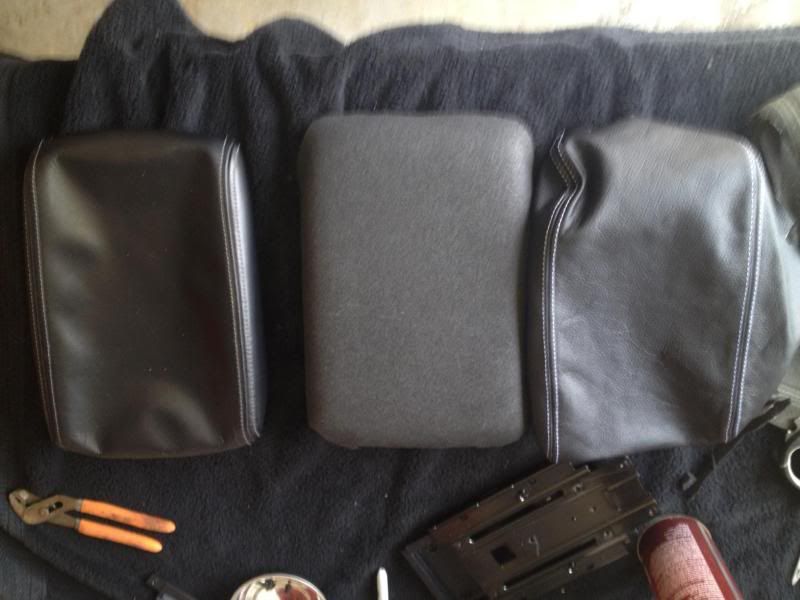 [/IMG]
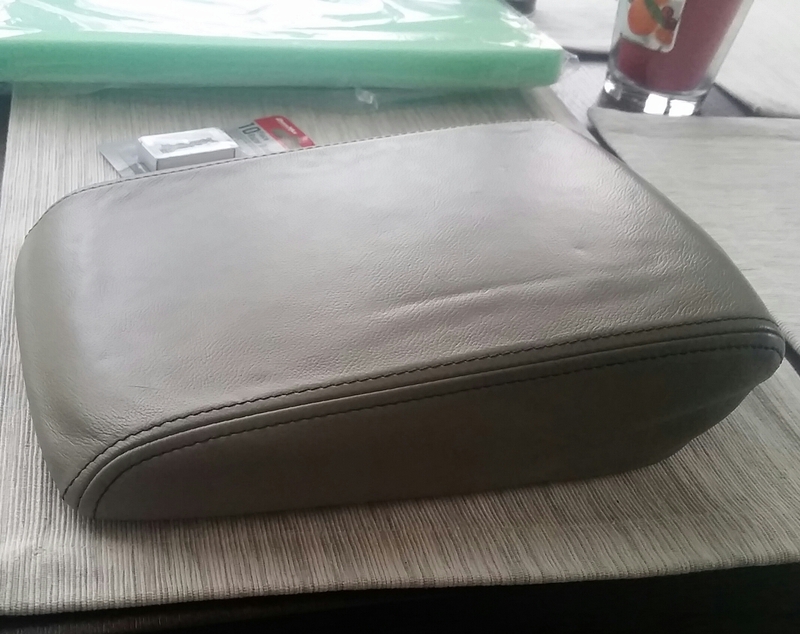
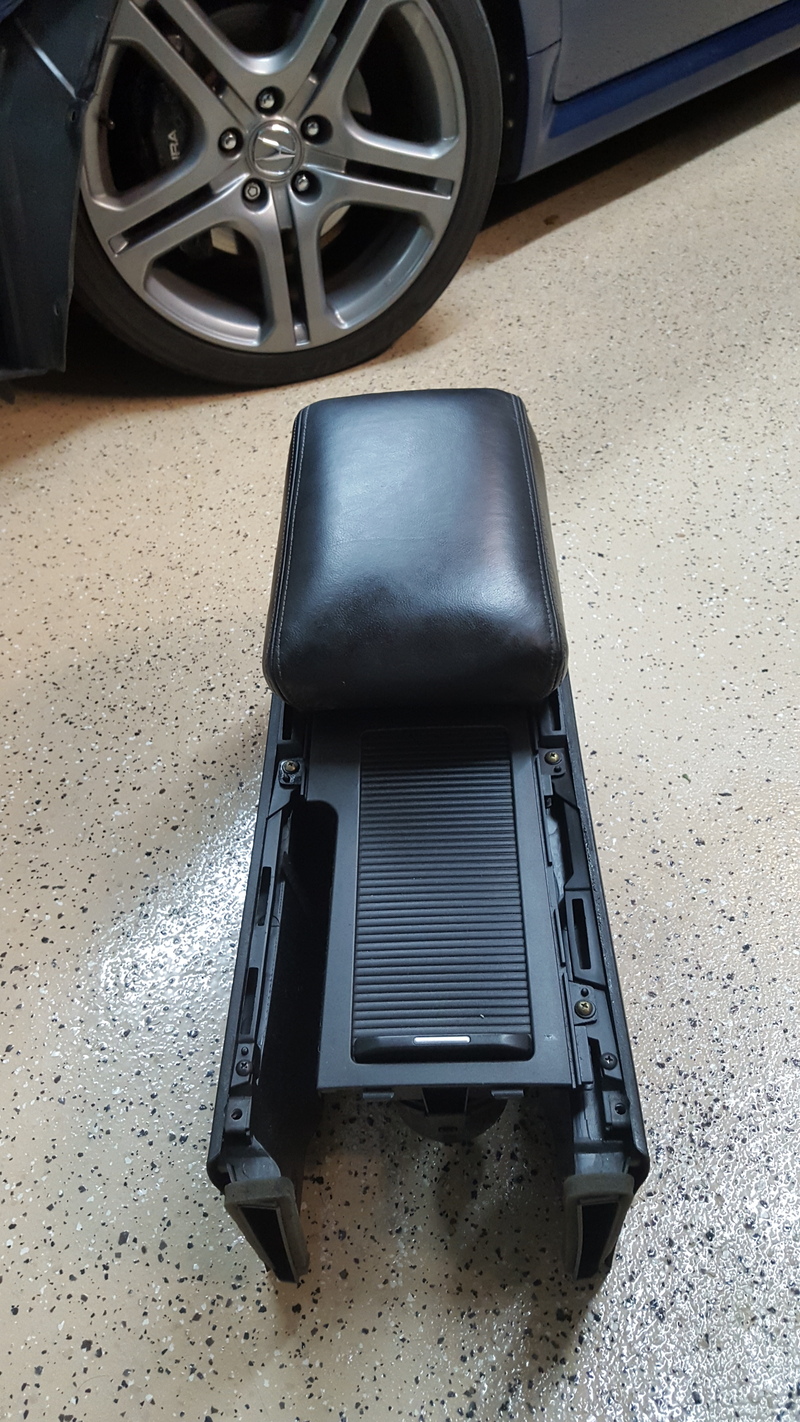
Turned out perfect. The pad I used it not near as tall as others mentioned BUT much stiffer. (pun intended)
[IMG] [/IMG]
I had some of this left over from an audio install. I suppose you could use any Closed Cell Foam (CCF)
http://store.secondskinaudio.com/ove...sq-ft-1-sheet/
Old padding worn in the shape of a fore arm.
[IMG]
 [/IMG]
From left to right: Old padding removed, OEM arm rest, new padding, new leather cover.
[IMG]
 [/IMG]
Old pad, OEM cover with new padding, new pad.
[IMG]
 [/IMG]
Turned out perfect. The pad I used it not near as tall as others mentioned BUT much stiffer. (pun intended)
[IMG]
 [/IMG]
I had some of this left over from an audio install. I suppose you could use any Closed Cell Foam (CCF)
http://store.secondskinaudio.com/ove...sq-ft-1-sheet/


Instructor


Joined: Jun 2011
Posts: 145
Likes: 6
From: Long Island,NY
Just did this...used .5" foam on the sides and 1" on the top. Used pliers to pull on the leather to get it sufficiently taught.( I think that's how u spell it.) and when u put it back on, don't forget to slip the bracket between the space on the armrest. I didn't the first time and the cover wouldn't close. Very easy. Less than an hour from start to finish.
.:KCCO:.
Joined: Sep 2004
Posts: 2,174
Likes: 4
From: Irvine
I just did mine. The old foam was completely rotted and it was like a thick pasty mess...
I wanted to chime in and say thanks for the write-up and tips.
I went with 1" foam. It is thick and a little more difficult to work with, but I love the extra padding that it gives. I couldn't imagine .5" being much padding. It's important to make sure to compress it while putting the leather back on. Gives it a nice dense feel.
Question, for anyone that has done it a while back, how is it holding up?
Tip: When you are putting the leather back on, invert the leather on the corners so it is inside-out, start with the top part of the foam (very center of the leather and foam pad), compress it from there, and work your way toward the edges making sure it is smooth, then invert the corners over the foam and onto the plastic. Be sure to compress as you are tugging evenly. I used the spray between the foam and leather as well.

Hey guys, I am tackling this project right now. I wanted to let you guys in on a cheapskate bargain right NOW if you want to get this done.
Head down to your nearest Joann fabrics. They have 50% off foam right now. They had the 1" in stock prepackaged. I thought about it, even though 1" is less compressible and may last longer with my ulnar assault than the 0.5", I decided the 0.5" would look cleaner and be easier to work with.
The 1" comes prepackaged, the 0.5" is sold by the yard for $12. I only needed half a yard so that came to only $3. Super 77 is $19.99 at Home Depot, which is actually not a bad price. But I knew that I would have only limited uses out of that huge can. Well good news! Joann's was the only place I could find that has a special small size of Super 77 for only $9.99. And if you look online, now till tomorrow; 50% coupon for any regular priced item.
Grand total for this project? $8!
Registered TL Owner
Joined: Oct 2006
Posts: 1,487
Likes: 95
From: California
Hey guys, I am tackling this project right now. I wanted to let you guys in on a cheapskate bargain right NOW if you want to get this done.
Head down to your nearest Joann fabrics. They have 50% off foam right now. They had the 1" in stock prepackaged. I thought about it, even though 1" is less compressible and may last longer with my ulnar assault than the 0.5", I decided the 0.5" would look cleaner and be easier to work with.
The 1" comes prepackaged, the 0.5" is sold by the yard for $12. I only needed half a yard so that came to only $3. Super 77 is $19.99 at Home Depot, which is actually not a bad price. But I knew that I would have only limited uses out of that huge can. Well good news! Joann's was the only place I could find that has a special small size of Super 77 for only $9.99. And if you look online, now till tomorrow; 50% coupon for any regular priced item.
Grand total for this project? $8!
Head down to your nearest Joann fabrics. They have 50% off foam right now. They had the 1" in stock prepackaged. I thought about it, even though 1" is less compressible and may last longer with my ulnar assault than the 0.5", I decided the 0.5" would look cleaner and be easier to work with.
The 1" comes prepackaged, the 0.5" is sold by the yard for $12. I only needed half a yard so that came to only $3. Super 77 is $19.99 at Home Depot, which is actually not a bad price. But I knew that I would have only limited uses out of that huge can. Well good news! Joann's was the only place I could find that has a special small size of Super 77 for only $9.99. And if you look online, now till tomorrow; 50% coupon for any regular priced item.
Grand total for this project? $8!
^^You're welcome. But more thanks to SRT-11 for this thread!
As others have said, this is definitely something I should have done way sooner. Had it not been for this DIY, I would have never tackled anything seemingly crazy like taking the leather off the armrest. But it really is easier than it looks.
What is up with that CRAP OEM stuff they but under there?!? It is not even .25" thick, and a crumbly mess. (1hr to clean off the damn glue with goo gone.) I wouldn't even call it "foam". How long did Acura think a material like that would last? Planned obsolescence at it's best.
I know a lot of people said they used the 1" foam, but that just sounds like such a struggle. I made a really GOOD decision in opting with 0.5", because even at that thickness (double the OEM crap) it still was a tight fit. I can't imagine how much compression, tugging and pulling would have been required with double the thickness. 0.5" is really just perfect, it provides adequate cushioning and the end result is a stock looking smooth armrest that feels better than new. Hell I'd even do this even if my armrest wasn't worn out yet, just because it is so much better now.

Racer
Joined: Jul 2008
Posts: 293
Likes: 14
From: Redondo Beach, Ca.
+1 for an '08
Tips from previous posts that helped:
1). When removing the leather cover leave one side attached
2). GooGone was indispensable for cleaning the glue residue from the plastic form
3). 1" Joanne's foam. I tacked the foam to the plastic form on the side where I left the leather cover attached. Then when stretching the leather back over the foam there is a place for the foam to push out to and can then be trimmed.
Thanks to all previous posters, made the job easy.

1st Gear
Joined: Jul 2015
Posts: 1
Likes: 0
Armrest limp and worthless? Here's the cure! My first DIY
Tools/materials:
-Unused (sharp) razor blades
-Philips screwdriver
-Pliers (not needlenose)
-1/2 inch high density foam sheet, a 2' x 2' square piece should be plenty but it's cheap and wouldn't hurt to get extra. available at jo-ann fabrics.
-3M #77 Spray Adhesive (other adhesives would probably work, but this worked quite well for me
And begin.
Take the existing armrest off, it's 4 philips head screws and it pulls off

Flip the armrest cushion upside down, then remove the screws from the (first) plastic trim piece

then under that is a sliding metal bracket with 4 screws to remove it from the lower plastic piece (sorry no pic of bracket, screws went into these 4 screwholes).
Two of the screws are accessible easily, two you'll have to stick the screwdriver through the tracks to get at, not hard

Finally you should have the armrest cushion with only one plastic piece over it, with 8 small exposed philips screws, undo these and you're down to leather & the frame.

Tools/materials:
-Unused (sharp) razor blades
-Philips screwdriver
-Pliers (not needlenose)
-1/2 inch high density foam sheet, a 2' x 2' square piece should be plenty but it's cheap and wouldn't hurt to get extra. available at jo-ann fabrics.
-3M #77 Spray Adhesive (other adhesives would probably work, but this worked quite well for me
And begin.
Take the existing armrest off, it's 4 philips head screws and it pulls off
Flip the armrest cushion upside down, then remove the screws from the (first) plastic trim piece
then under that is a sliding metal bracket with 4 screws to remove it from the lower plastic piece (sorry no pic of bracket, screws went into these 4 screwholes).
Two of the screws are accessible easily, two you'll have to stick the screwdriver through the tracks to get at, not hard
Finally you should have the armrest cushion with only one plastic piece over it, with 8 small exposed philips screws, undo these and you're down to leather & the frame.
Thanks!

-------Tim-------


Joined: Mar 2010
Posts: 2,552
Likes: 613
From: Tampa, Fl


I took apart the armrest and there was no foam. literally the glue melted any type of foam that was in there.
it was so messy! a bunch of sticky black goo.
I bought neoprene matting from joanns and after cleaning the armrest up, I went to work.
I applied two layers of the neoprene mat down and instead of foam, I used fabric.
I used three layers of thick fabric. this way, it shouldnt get flat over time
I love the results. It's plushy!! and comfortable
in retrospect, I would have applied more layers of the neoprene matting.
4 layers of mat
and
4 or 5 layers of thick fabric
Last edited by justnspace; Oct 27, 2015 at 07:00 PM.
+1 for pics. How much neoprene did you buy and what thickness did you use or is it one size only. Might use that over the foam too. Also did you lay the fabric all at the top? or inbetween the padding layers?
Thanks
Thanks
Last edited by mvp2765; Oct 28, 2015 at 01:53 PM.
please excuse my offwhite walls. 

this was the neoprene matting.
Honestly, I walked into Joanns without knowing what I was going to buy.
I just browsed through the store till I found what I thought would go well.
it came in a sheet of like 3 or 4 feet. I measured my armrest and found I could layer the sheet maybe 3 or 4 times. I chose to only layer it twice.
as for the fabric, it was something I had laying in an arts and crafts box. i estimate I had about 3 or 4 feet of that as well. I chose to layer this only 3 times.
i didnt take any pics of the fabric, as it's just fabric...almost like a cotton or felt, material.

this shows the cover on; but not glued down taut.
this was the neoprene matting.
Honestly, I walked into Joanns without knowing what I was going to buy.
I just browsed through the store till I found what I thought would go well.
it came in a sheet of like 3 or 4 feet. I measured my armrest and found I could layer the sheet maybe 3 or 4 times. I chose to only layer it twice.
as for the fabric, it was something I had laying in an arts and crafts box. i estimate I had about 3 or 4 feet of that as well. I chose to layer this only 3 times.
i didnt take any pics of the fabric, as it's just fabric...almost like a cotton or felt, material.
this shows the cover on; but not glued down taut.
I was thinking of alternating the matting with the fabric, but after the whole black goo mess, I just wanted to get it done as quickly as possible.
I assume or think you can layer fabric and matting however you please. if you wanted to do an alternating fabric and matting, you can. and I would assume that it would be even more spongy and comfortable.
I assume or think you can layer fabric and matting however you please. if you wanted to do an alternating fabric and matting, you can. and I would assume that it would be even more spongy and comfortable.

no problem. since it was my first time doing it, I was afraid that I couldnt put the cover back on, thus why I chose conservative layers.
now that I've done it; I'm comfortable and confident that I can stick more layers in there to make it extra plush!!
now that I've done it; I'm comfortable and confident that I can stick more layers in there to make it extra plush!!
Registered Bunny
Joined: Nov 2014
Posts: 8,307
Likes: 1,073
From: Montreal
Yup, when I did mine with the redline goods armrest cover + padding, the foam just turned into a flat pancake of glue and grime. It took forever to cleanup, made a real mess on my kitchen table.


 [/URL]
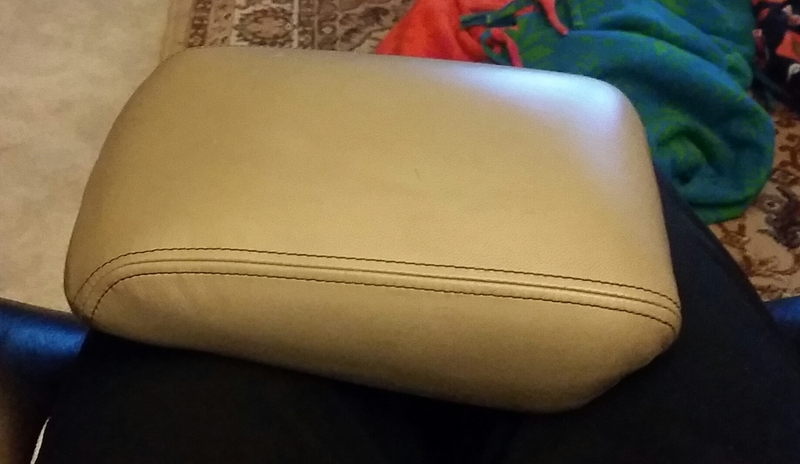 [/URL]
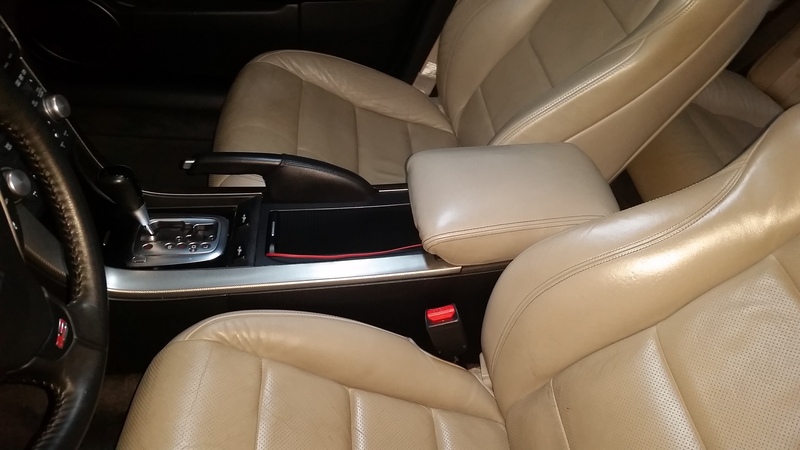 [/URL]
Joined: Sep 2008
Posts: 78,234
Likes: 20,190
Figured I'd share here too...since I read through and decided how I'd tackle it based on other's trial and error. I hate right brain car projects!
Nice!
I just finished, and would have gone that route. I stopped at Walmart yesterday and they had nothing special...today, I went to Michael's and they had 1" foam...so I decided to give it another go (since I've done this twice before). It then dawned on me that I had the perfect material...leftover Snap-Op tool box drawer liner.
I also realized that after overstuffing my last one...you need the stuffing to fill in all the corners and you also DON'T need foam on the sides since you never put anything on that.
So, I went at it...I took a mildly different approach, same as I did last time...masking tape to hold everything in place until leather sealed it in...and hot glue to pull and hold the tabs down instantly. Worked like a charm on my black TL...why not now. Only reason I'd redone that first attempt a couple of years later were that the foam I used was shitty and it disintegrated.
I appreciate all the tips, guys!
It came out perfectly.
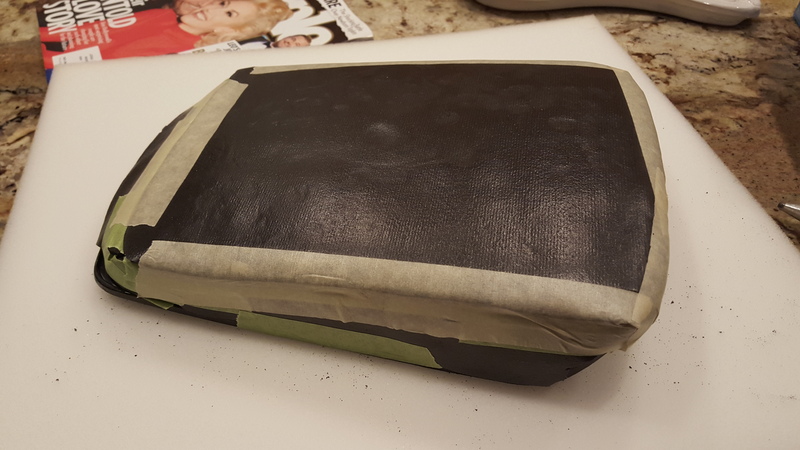
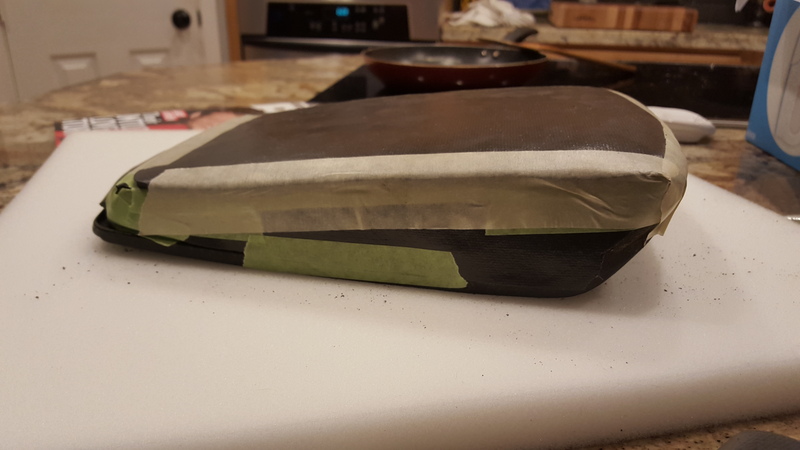
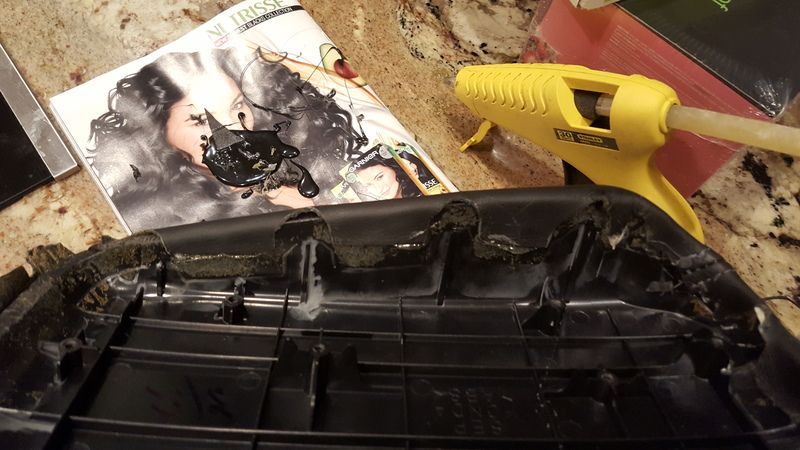
Here's what we started with. The limpest dick ever...tried to suck it, nothing.
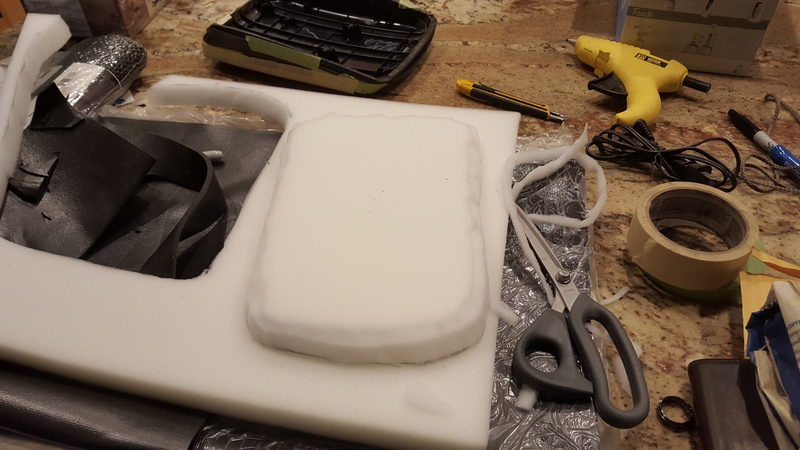
Here, the drawer liner, doubled up, basically matched the sides to the lip so it sat flush.
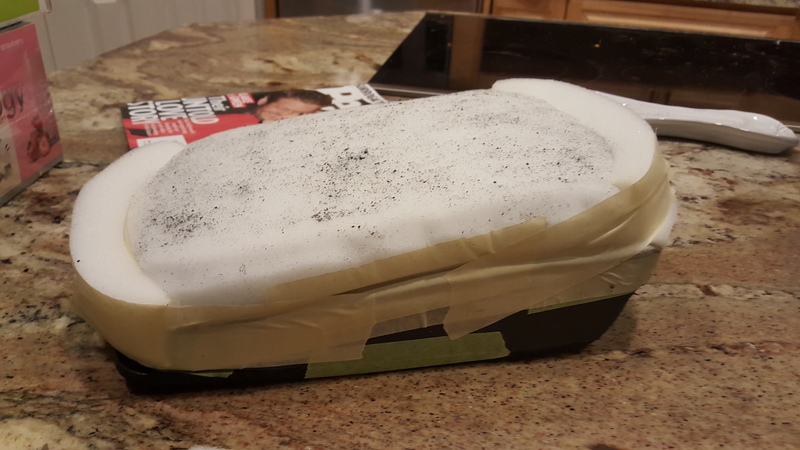
Next up I did the top...(thanks for the recommendation of this as a foundation, Chad)
then, I got to work on the foam...
almost done...then realized, it didn't fill the front/rear too well...

no need to start over, just cut and tape on the new section, it's pulled together so tightly with the leather, it won't move.
Hot glue! I didn't see anyone suggest it...much less mess, and much easier to clean up and redo if the day comes where it needs doing since we didn't add any adhesive anywhere.
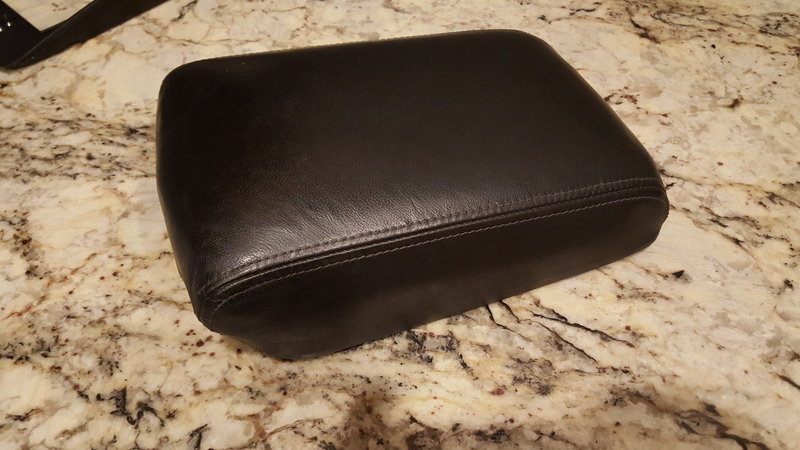
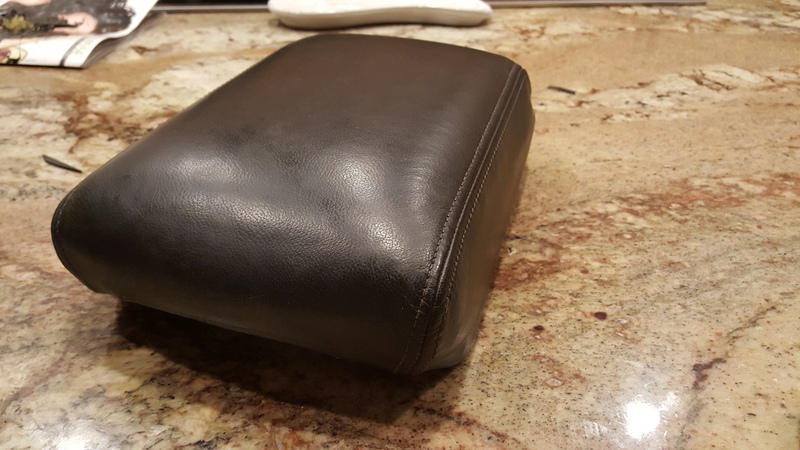
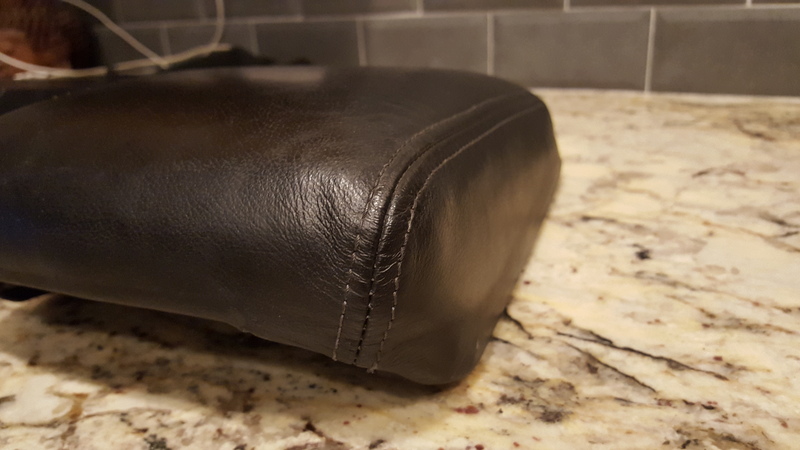
and, done...perfection...top is thick as kim kardashian after an all night pizza binge...
and sides are slender like Chloe after lamar's cocaine fueled hooker mishap.
Nice!
I just finished, and would have gone that route. I stopped at Walmart yesterday and they had nothing special...today, I went to Michael's and they had 1" foam...so I decided to give it another go (since I've done this twice before). It then dawned on me that I had the perfect material...leftover Snap-Op tool box drawer liner.
I also realized that after overstuffing my last one...you need the stuffing to fill in all the corners and you also DON'T need foam on the sides since you never put anything on that.
So, I went at it...I took a mildly different approach, same as I did last time...masking tape to hold everything in place until leather sealed it in...and hot glue to pull and hold the tabs down instantly. Worked like a charm on my black TL...why not now. Only reason I'd redone that first attempt a couple of years later were that the foam I used was shitty and it disintegrated.
I appreciate all the tips, guys!
It came out perfectly.
Here's what we started with. The limpest dick ever...tried to suck it, nothing.

Here, the drawer liner, doubled up, basically matched the sides to the lip so it sat flush.

Next up I did the top...(thanks for the recommendation of this as a foundation, Chad)


then, I got to work on the foam...

almost done...then realized, it didn't fill the front/rear too well...

no need to start over, just cut and tape on the new section, it's pulled together so tightly with the leather, it won't move.

Hot glue! I didn't see anyone suggest it...much less mess, and much easier to clean up and redo if the day comes where it needs doing since we didn't add any adhesive anywhere.

and, done...perfection...top is thick as kim kardashian after an all night pizza binge...
and sides are slender like Chloe after lamar's cocaine fueled hooker mishap.


Last edited by rockstar143; Mar 10, 2016 at 07:59 PM.


