When you click on links to various merchants on this site and make a purchase, this can result in this site earning a commission. Affiliate programs and affiliations include, but are not limited to, the eBay Partner Network.
So it turns out just my front engine mount and upper tranny mount were shot. Everything else was fine. I asked about that upper bolt and the shop concurred "that bolt was on there good!". I am sure they shot it with the airgun.
It did seem as though the upper mount was OK externally. But just as 4drviper stated, there is no way to know about the rubber inside without taking it all out. The bolt masks what's underneath.
It's good to know your rear engine mount is fine. Mechanics know from experience when you put the car in gear, HOLD brake, and tap the gas. The engine should move "that" much. I personally don't know lol.
Anyway, about the upper transmission mount, in the latest picture, that holds down a piece of metal to cover up the X-shaped rubber, I think it can very well be rusted because under that it's pretty much empty space, then wheel well.
I don't think you'd have to take the whole mount out (which involves removing battery tray) to see the upper transmission mount's condition. That one stubborn bolt needs ot be removed, then take out the piece of metal, and that will be all you need to see to determine if the mount is shot or not. But sorry I can't advise you on how to tell if a rubber mount is shot by appearance, other than obvious rips or rots. I really don't know lol.
So it turns out just my front engine mount and upper tranny mount were shot. Everything else was fine. I asked about that upper bolt and the shop concurred "that bolt was on there good!". I am sure they shot it with the airgun.
It did seem as though the upper mount was OK externally. But just as 4drviper stated, there is no way to know about the rubber inside without taking it all out. The bolt masks what's underneath.
for the upper transmission, do you (or anyone) know which part is needed to replace the mount? is it just the rubber part or do you have to buy the rubber and the metal mount together? maybe it will tell you on your service receipt when you got yours changed out (or at least mention a price for the parts which will tell me what they had to buy for you)
for the upper transmission, do you (or anyone) know which part is needed to replace the mount? is it just the rubber part or do you have to buy the rubber and the metal mount together? maybe it will tell you on your service receipt when you got yours changed out (or at least mention a price for the parts which will tell me what they had to buy for you)
Hey guys, I just did the upper transmission mount on my 2007 base the other day, so I wrote down all the steps for those that are less mechanically inclined and may need a little help.
Original equipment part number is: 50870-SEP-A92, which I got from Bernardi because they were cheaper than Delray Acura.
Tools needed:
Jack
torque wrench
8/10/12/14/17mm deep, and shallow sockets, as well as their box-end wrench counterparts
Note 1. Put the jack under the j-pipe, but don't jack it up, just barely touch it with the jack to support the engine/trans Note 2. Have radio and navi codes ready since you'll be disconnecting the battery
Assuming you have removed any plastic engine covers, remove the parts in this order:
1. Battery tie-down - 2 10mm bolts
2. Battery terminals, negative first - 2 10mm bolts
3. Remove the battery and put it on a shelf, not on the ground
4. Plastic battery tray (not held in by anything)
5. Remove 4 8mm airbox-lid bolts (these don't come all the way out, so just loosen as much as possible) [see photo]
6. Intake hose - pull the sensor wire out of its holder and over to the side. Then loosen the big band by the throttle body with a 10mm, then pinch and slide the small hose clamp down and pull the pipe out. Once this is out the intake hose and airbox lid will just slide off of the throttle body. [see photos]
7. Air-filter
8. Remove 2 10mm airbox-bottom bolts, and slide the bottom of the airbox out (it's connected to an air tube on the bottom right side)
9. Remove small plastic piece from front of radiator support, and the tube below it. The tube just pulls out. [see photo]
There are 5 bolts in the battery support tray, 4 are 12mm and hold the tray in place, and the other is a 10mm that holds a wire.
10. Remove 1 10mm bolt holding the wire
11. Remove 2 12mm battery support tray bolts from the top
12. Remove 1 12mm battery support tray bolt from the front-most part of the tray with box-end wrench
13. Remove 1 12mm battery support tray bolt from the bottom rear-most (closest to the firewall) part of the tray with a box-end wrench. This is the first pain-in-the-ass bolt, prepare for some wrist/arm cuts. [see photo]
Remove the battery support tray.
14. Remove the 17mm long bolt from the front of the trans mount
15. Remove all 3 of the 14mm lower bolts holding the trans mount to the body. These are easy except for the rear-most (closest to the firewall) bolt, which is the biggest pain-in-the-ass for this job. You will need a standard 14mm box-end wrench, and it needs to be angled towards the driver's side tire. There really is no need for this bolt to be there, so when you put the car back together, leave it off. Also, the middle bolt is shorter than the end bolts, so keep that in mind when you put them back in. [see photos]
That's really it, just install the new mount and do everything in reverse.
I window welded my upper Trans mount. Works like a dream now
Also window welded the passenger side mount and bought solid mounts front and rear.
I think that's what I'm going to do as well is window weld the transmission mounts. How long did you let the window weld to cure before installing it back in?
Mine is missing the top metal plate on the upper tranny mount. Is that a problem? In gonna window weld mine as well.
Any response on the metal plate being needed? Also see how mine is torn. It looks like the center bolt is not center.
The guy before me had installed innovative front, back and side motor mounts. Do you think if I install another one will the same thing happen due to it being off center? Anyone use the $15 one off rockauto?
Well seems no one answered my questions on here. I went with the $15 rock auto mount with no top cover. We'll see how long she holds up. Mcalles see below.
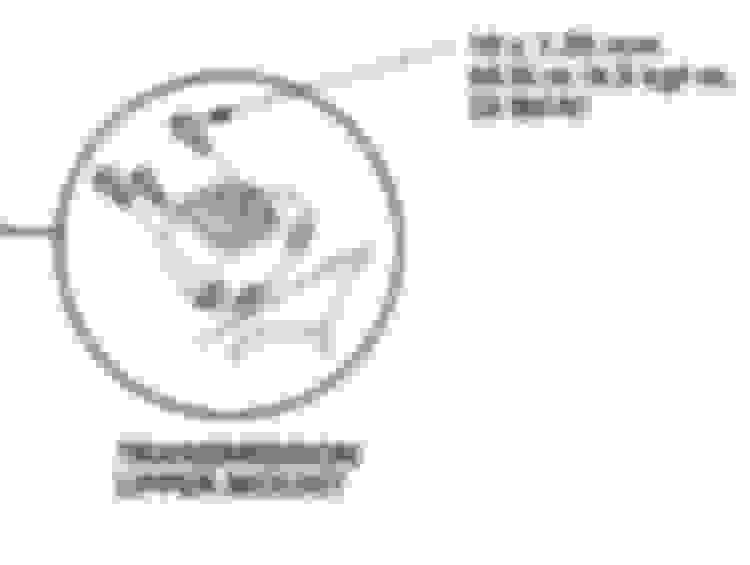
Thank you very much REMSPOT!!!
I greatly appreciate it. That is a nice blowup of that area.
I could not locate it on any of the other diagrams that I found online, or on here. I apologize if it was indeed posted prior. This helps a lot!
Hey guys, I just did the upper transmission mount on my 2007 base the other day, so I wrote down all the steps for those that are less mechanically inclined and may need a little help.
Original equipment part number is: 50870-SEP-A92, which I got from Bernardi because they were cheaper than Delray Acura.
Tools needed:
Jack
torque wrench
8/10/12/14/17mm deep, and shallow sockets, as well as their box-end wrench counterparts
Note 1. Put the jack under the j-pipe, but don't jack it up, just barely touch it with the jack to support the engine/trans Note 2. Have radio and navi codes ready since you'll be disconnecting the battery
Assuming you have removed any plastic engine covers, remove the parts in this order:
1. Battery tie-down - 2 10mm bolts
2. Battery terminals, negative first - 2 10mm bolts
3. Remove the battery and put it on a shelf, not on the ground
4. Plastic battery tray (not held in by anything)
5. Remove 4 8mm airbox-lid bolts (these don't come all the way out, so just loosen as much as possible) [see photo]
6. Intake hose - pull the sensor wire out of its holder and over to the side. Then loosen the big band by the throttle body with a 10mm, then pinch and slide the small hose clamp down and pull the pipe out. Once this is out the intake hose and airbox lid will just slide off of the throttle body. [see photos]
7. Air-filter
8. Remove 2 10mm airbox-bottom bolts, and slide the bottom of the airbox out (it's connected to an air tube on the bottom right side)
9. Remove small plastic piece from front of radiator support, and the tube below it. The tube just pulls out. [see photo]
There are 5 bolts in the battery support tray, 4 are 12mm and hold the tray in place, and the other is a 10mm that holds a wire.
10. Remove 1 10mm bolt holding the wire
11. Remove 2 12mm battery support tray bolts from the top
12. Remove 1 12mm battery support tray bolt from the front-most part of the tray with box-end wrench
13. Remove 1 12mm battery support tray bolt from the bottom rear-most (closest to the firewall) part of the tray with a box-end wrench. This is the first pain-in-the-ass bolt, prepare for some wrist/arm cuts. [see photo]
Remove the battery support tray.
14. Remove the 17mm long bolt from the front of the trans mount
15. Remove all 3 of the 14mm lower bolts holding the trans mount to the body. These are easy except for the rear-most (closest to the firewall) bolt, which is the biggest pain-in-the-ass for this job. You will need a standard 14mm box-end wrench, and it needs to be angled towards the driver's side tire. There really is no need for this bolt to be there, so when you put the car back together, leave it off. Also, the middle bolt is shorter than the end bolts, so keep that in mind when you put them back in. [see photos]
That's really it, just install the new mount and do everything in reverse.
Where is this mount located?
I am very new to doing repairs on my own. Truly appreciate the input! Thank you !
- I know that this is a very old comment but if you never figured it out. That my friend is a lower transmission Mount one of two located underneath the 3G TL�s tranny
 02-11-2015, 11:48 AM