When you click on links to various merchants on this site and make a purchase, this can result in this site earning a commission. Affiliate programs and affiliations include, but are not limited to, the eBay Partner Network.
[DIY] Alternator Replacement 04-08 Acura TL + other J series engines
This is a guide with steps + photos for replacing your alternator. I personally have an 2006 TL, but this should work for many of the J series engines. If you have anything other than a 3G TL, I suggest referencing the service manual to confirm these steps. I also do not recommend following this on a mobile phone, as my photo upload sizes appear to be bigger than I thought they would be.
A) Tools and parts required
- New alternator. I got a rebuilt DENSO one from rockauto. DENSO brand (to my knowledge) is OEM, so I would highly suggest that.
- 10mm socket
- 12mm socket
- 14mm socket
- Breaker bar
- Wrench/Ratchet
- Pry bar
1. Using the 10mm socket, remove the negative terminal of the battery, then remove the positive terminal of the battery.
You do not want to electrocute yourself or short the system when working with the alternator, so you need to disconnect the battery.
I wrap the terminals in shop towels just to make sure they don't come in contact with anything.
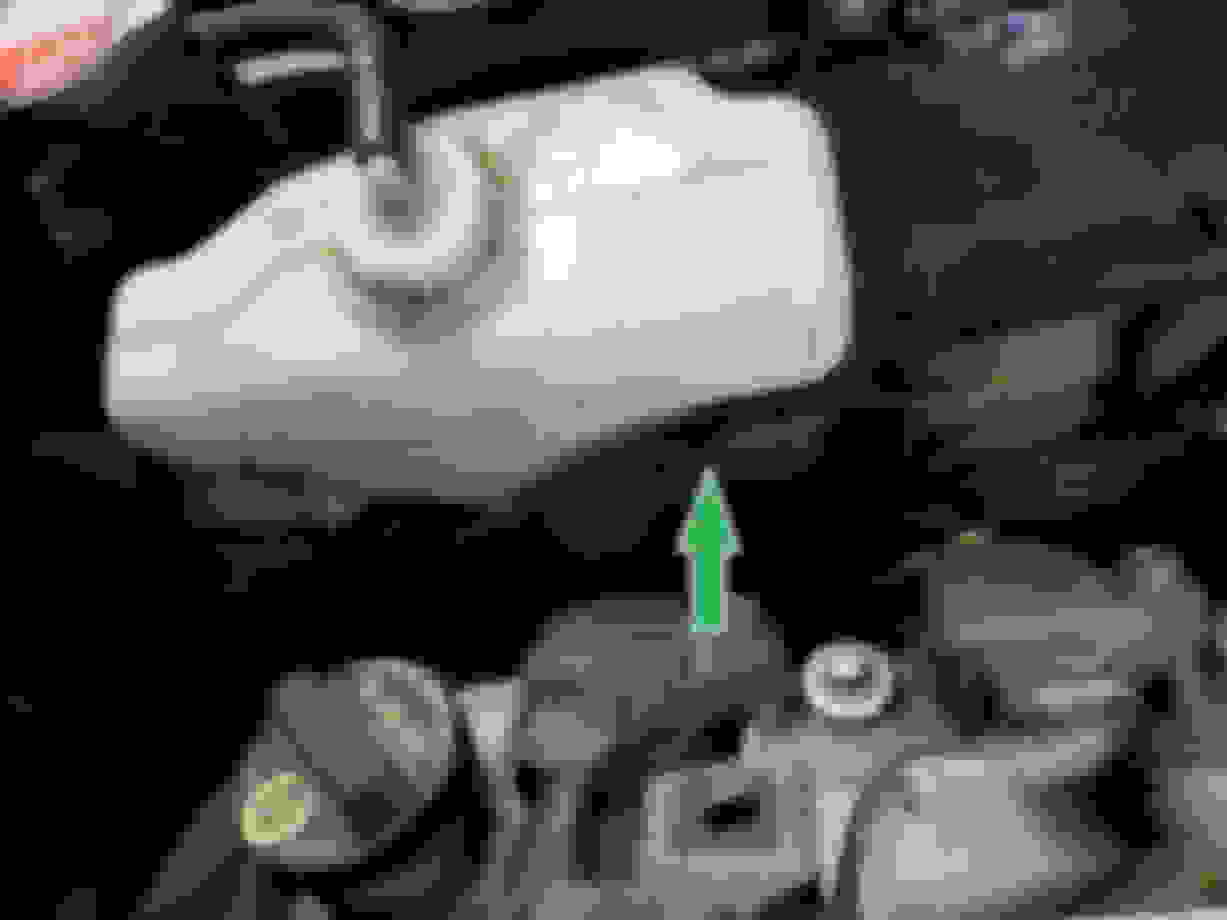
2. Use the 10mm socket to remove the radiator reservoir.
Set the reservoir, screw, and shielding aside, and use a shop towel to wrap the discharge hose to prevent any extra fluid from leaking out.
The green arrow below shows the bolt location for the reservoir.
Service manual pic
3. Unhook the fan motor connector and the AC clutch connector.
The fan motor is relatively straightforward, but I had a hell of a time with the AC clutch connector. It turns out that you technically don't need to "unplug" this, as much as just dismount it from the fan. It mounts on the fan using the metal hook in the third pic below, you should be able to just lift the connector off of it.
The photo below shows the fan motor connector.
The next photo below shows the AC clutch connector. You can lift up on this entire connector to remove it from its mounting point.
And finally, this is what the mounting point looks like on the fan housing once you remove the AC clutch connector. This would have been helpful for me to see beforehand so I would have known just to pull and dismount the entire connector.
4. Remove the (3) screws holding the fan on the radiator.
The top two are easy, but the bottom one was a pain for me, plus it was a bit corroded.
My hand was small enough where I actually just reached up through the opening where the coolant drain plug is, and reached over with my ratchet to remove it. Otherwise, you may have to remove the splash guard on the bottom front of the vehicle.
Refer to the diagram in step #2 for screw size and location.
5. Lift the fan from the radiator.
Lift straight up. Be careful not to ding or smash the fan corners into the radiator or cause any other damage to the radiator surface.
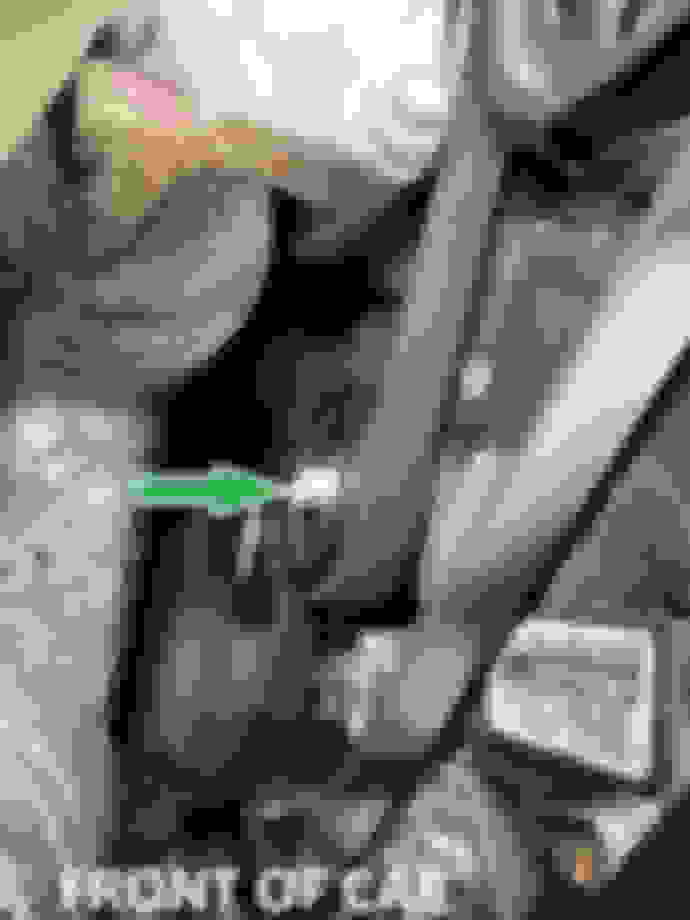
6. Remove the power steering fluid reservoir and tuck it away.
Lift straight up on the reservoir to remove it from the mounting point (green arrow in pic below) then tuck it near the headlight so you have a bit more room to work with.
7. Release belt tension.
Some people struggle with this, but I've never had issues with it. You don't need a special tool, in my opinion. Skip over this step if you already know how.
Using a 14mm socket (deep socket preferred, but any should work as long as you have clearance), attach it to the nut pictured below.
You want to be pushing the nut counter-clockwise towards the dash of the car. Having a long breaker bar, or at least a long cheater bar is the key here. Once you push against it, hold the bar with one hand (will require some effort) while using your free hand to slip the belt off at the pulley where your socket is attached. I've always found it easiest to remove and realign the belt at this point, because it slips on the easiest. I used a hockey stick as my breaker bar here...
Always be careful when removing your belt - if you accidentally slip and the tensioner snaps back, it can catch your fingers or damage the belt itself if not aligned properly. There are youtube videos to help with this process if necessary.
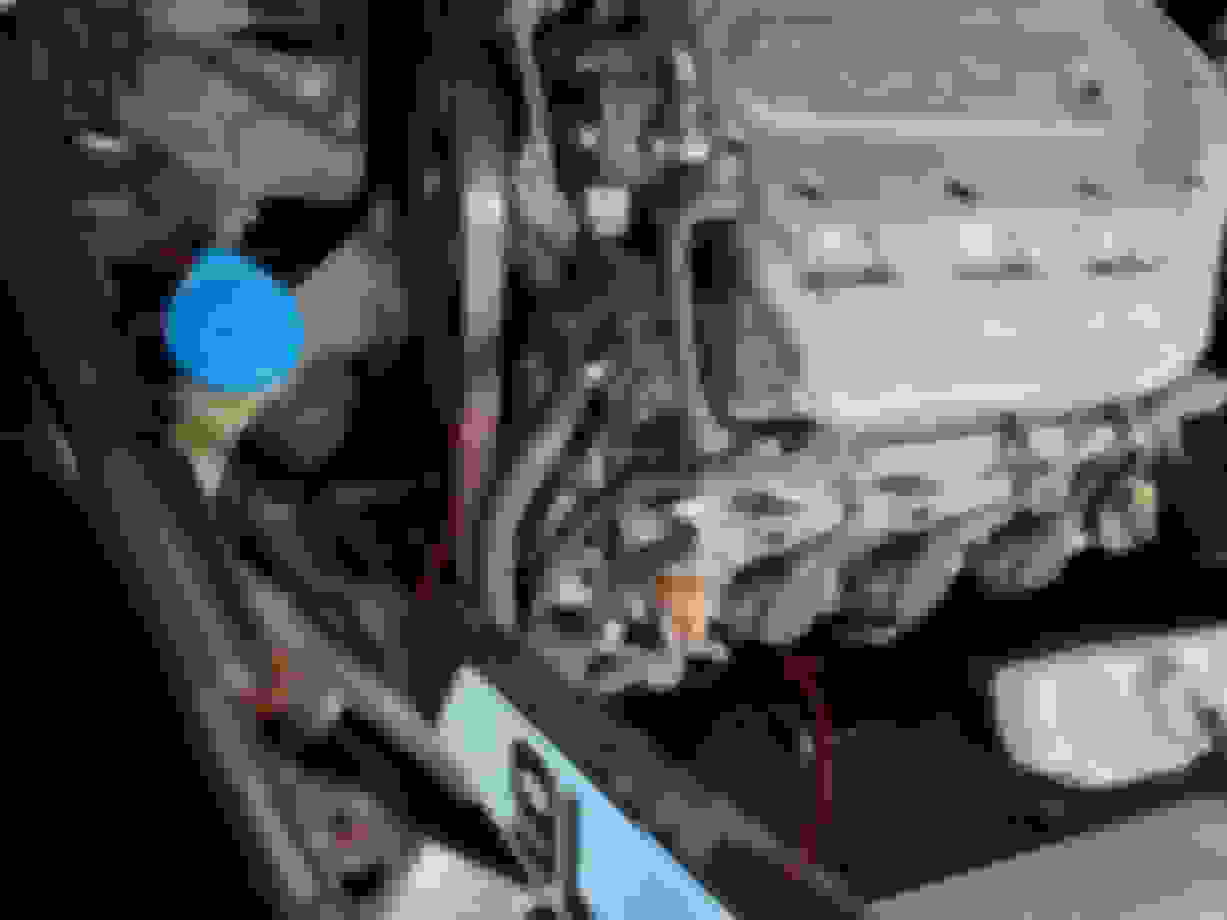
8. Remove alternator connections + bracket.
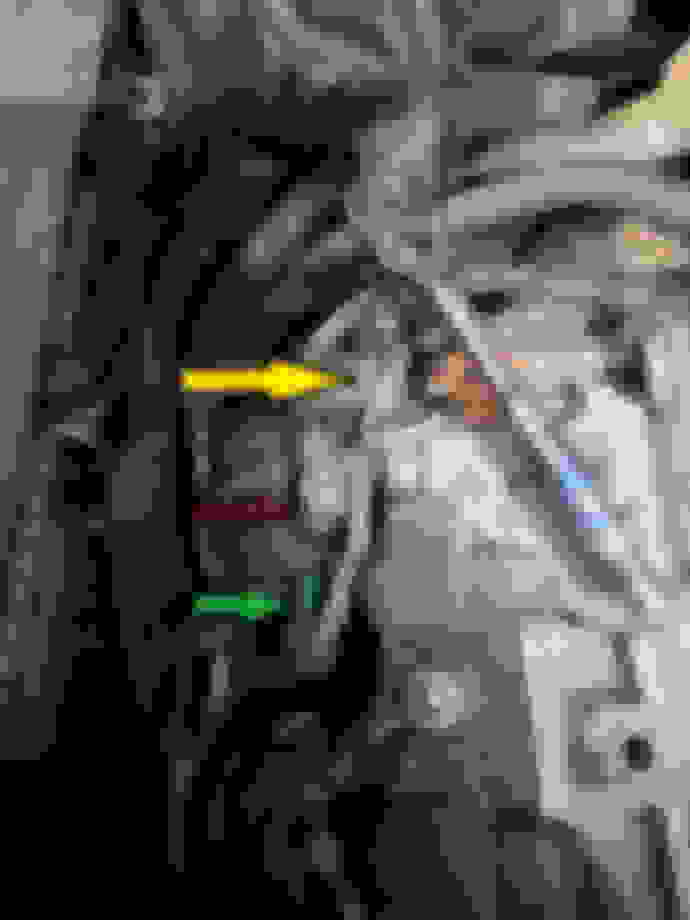
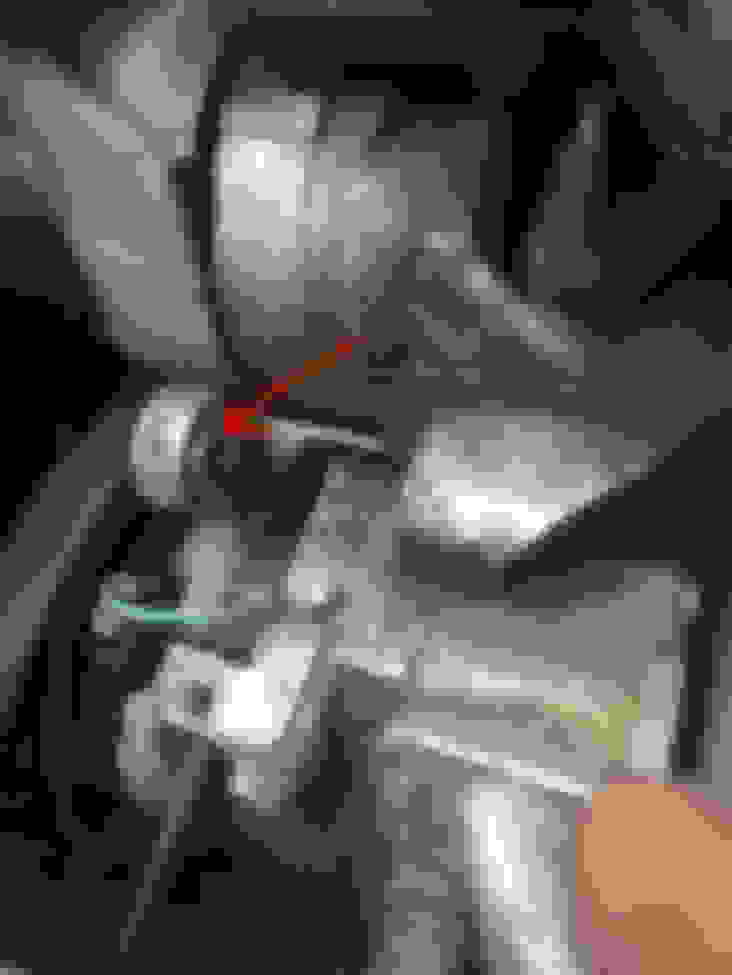
Once your belt tension is released (and your battery is CONFIRMED disconnected), you can unclip the alternator positive connector (green) and the alternator negative (striped red + black). Both will have protective boots on them that you need to peel back. Use your 12mm socket to remove the negative wire from the alternator and set the nut aside.
Use a 10mm socket to disconnect the screw here. (yellow arrow). This one is easily accessible with an impact, so I would save yourself the effort of manually wrenching it off like I did in the pic. Using an impact will also remove the chance of accidentally damaging your radiator or your hand when the nut breaks loose and you smash your hand into the ignition coil�. (ask me how I know)
Service manual pic
What it looks like when the terminals are disconnected and the bracket is removed
9. Remove the 2 bolts holding the alternator to the engine block.
With your belt and PS reservoir out of the way, both of these bolts should be easy to spot. They both took a decent amount of turning to get them completely out, the threads are long...
10. Use a crowbar/prybar to remove alternator from mount.
If you�re lucky, you might be able to just pull the alternator out with your hands, but I needed to wedge mine out, it was a tight fit. Be mindful of the radiator, there is a very small clearance between the block and the radiator for you to lift the alternator out, but if you turn it the right way, you should be able to lift it straight up and out. In the pic below, the alternator is already removed, but you should put your wedge right under the PCV valve/oil dipstick, and push up on the end closest to you, so the opposite end of the bar will move downwards and push the alternator out.
11. Transfer the harness bracket to the new alternator and complete the steps in reverse to re-attach new alternator.
That's it! Sorry if this is hard to follow, I tried to be technically detailed yet at the same time somewhat simplistic....either way, feel free to ask questions or suggest changes/improvements.
The alternator is removable without pry bar, however putting it back is another story. I quickly learn the trick to push the C collar on the left hand side (if you looking from the front to the back vehicle) toward the passenger wheel. Yes they have move-able don't worry about this since the lower bolt will push it snug back into place once torque apply on the bolt. This will make your job of install 100000000% easier.
BTW i used a 4 degrees long nose pliers, but its best if you have brake spade spreader.
This is what get me piss off, out of all the car the Alternator goes out on a car that has 82k miles that barely driven.
Thanks for the info - interestingly, I had no issues putting the new alternator in the proper place, but since it's a tight fit, I'm sure it could go either way depending on your car + manufacturing quality of the replacement alt.
Thanks for the info - interestingly, I had no issues putting the new alternator in the proper place, but since it's a tight fit, I'm sure it could go either way depending on your car + manufacturing quality of the replacement alt.
lol mine replacement is Denso so I know its a direct fit.
Did mine today. I actually did my alternator, belt and tensioner. The belt needed to be done and the tensioner was never replaced so I figured it was worth the extra cash. I've got almost 260K miles on my TL.
Question for you all - What voltage should I read when the car is running? I am getting close to 14 V but I was expecting to get closer to 14.4 V. The car is running fine and my battery light is off. I do not see any power loss. I am just curious.
BTW the tensioner pulley assembly was a PITA. Not a lot of clearance. I had enough to get the bolt loose with a breaker bar (old torque wrench) but had to remove it with a small hand wrench. It took forever.
I heard from a "friend" that if that old torque wrench is used to back the bolt out too far it will get trapped against the side and it will lead to lots of fucking cursing and wasted time.
This is a guide with steps + photos for replacing your alternator. I personally have an 2006 TL, but this should work for many of the J series engines. If you have anything other than a 3G TL, I suggest referencing the service manual to confirm these steps. I also do not recommend following this on a mobile phone, as my photo upload sizes appear to be bigger than I thought they would be.
A) Tools and parts required
- New alternator. I got a rebuilt DENSO one from rockauto. DENSO brand (to my knowledge) is OEM, so I would highly suggest that.
- 10mm socket
- 12mm socket
- 14mm socket
- Breaker bar
- Wrench/Ratchet
- Pry bar
1. Using the 10mm socket, remove the negative terminal of the battery, then remove the positive terminal of the battery.
You do not want to electrocute yourself or short the system when working with the alternator, so you need to disconnect the battery.
I wrap the terminals in shop towels just to make sure they don't come in contact with anything.
2. Use the 10mm socket to remove the radiator reservoir.
Set the reservoir, screw, and shielding aside, and use a shop towel to wrap the discharge hose to prevent any extra fluid from leaking out.
The green arrow below shows the bolt location for the reservoir.
Service manual pic
3. Unhook the fan motor connector and the AC clutch connector.
The fan motor is relatively straightforward, but I had a hell of a time with the AC clutch connector. It turns out that you technically don't need to "unplug" this, as much as just dismount it from the fan. It mounts on the fan using the metal hook in the third pic below, you should be able to just lift the connector off of it.
The photo below shows the fan motor connector.
The next photo below shows the AC clutch connector. You can lift up on this entire connector to remove it from its mounting point.
And finally, this is what the mounting point looks like on the fan housing once you remove the AC clutch connector. This would have been helpful for me to see beforehand so I would have known just to pull and dismount the entire connector.
4. Remove the (3) screws holding the fan on the radiator.
The top two are easy, but the bottom one was a pain for me, plus it was a bit corroded.
My hand was small enough where I actually just reached up through the opening where the coolant drain plug is, and reached over with my ratchet to remove it. Otherwise, you may have to remove the splash guard on the bottom front of the vehicle.
Refer to the diagram in step #2 for screw size and location.
5. Lift the fan from the radiator.
Lift straight up. Be careful not to ding or smash the fan corners into the radiator or cause any other damage to the radiator surface.
6. Remove the power steering fluid reservoir and tuck it away.
Lift straight up on the reservoir to remove it from the mounting point (green arrow in pic below) then tuck it near the headlight so you have a bit more room to work with.
7. Release belt tension.
Some people struggle with this, but I've never had issues with it. You don't need a special tool, in my opinion. Skip over this step if you already know how.
Using a 14mm socket (deep socket preferred, but any should work as long as you have clearance), attach it to the nut pictured below.
You want to be pushing the nut counter-clockwise towards the dash of the car. Having a long breaker bar, or at least a long cheater bar is the key here. Once you push against it, hold the bar with one hand (will require some effort) while using your free hand to slip the belt off at the pulley where your socket is attached. I've always found it easiest to remove and realign the belt at this point, because it slips on the easiest. I used a hockey stick as my breaker bar here...
Always be careful when removing your belt - if you accidentally slip and the tensioner snaps back, it can catch your fingers or damage the belt itself if not aligned properly. There are youtube videos to help with this process if necessary.
8. Remove alternator connections + bracket.
Once your belt tension is released (and your battery is CONFIRMED disconnected), you can unclip the alternator positive connector (green) and the alternator negative (striped red + black). Both will have protective boots on them that you need to peel back. Use your 12mm socket to remove the negative wire from the alternator and set the nut aside.
Use a 10mm socket to disconnect the screw here. (yellow arrow). This one is easily accessible with an impact, so I would save yourself the effort of manually wrenching it off like I did in the pic. Using an impact will also remove the chance of accidentally damaging your radiator or your hand when the nut breaks loose and you smash your hand into the ignition coil�. (ask me how I know)
Service manual pic
What it looks like when the terminals are disconnected and the bracket is removed
9. Remove the 2 bolts holding the alternator to the engine block.
With your belt and PS reservoir out of the way, both of these bolts should be easy to spot. They both took a decent amount of turning to get them completely out, the threads are long...
10. Use a crowbar/prybar to remove alternator from mount.
If you�re lucky, you might be able to just pull the alternator out with your hands, but I needed to wedge mine out, it was a tight fit. Be mindful of the radiator, there is a very small clearance between the block and the radiator for you to lift the alternator out, but if you turn it the right way, you should be able to lift it straight up and out. In the pic below, the alternator is already removed, but you should put your wedge right under the PCV valve/oil dipstick, and push up on the end closest to you, so the opposite end of the bar will move downwards and push the alternator out.
11. Transfer the harness bracket to the new alternator and complete the steps in reverse to re-attach new alternator.
That's it! Sorry if this is hard to follow, I tried to be technically detailed yet at the same time somewhat simplistic....either way, feel free to ask questions or suggest changes/improvements.
These instructions helped a total newb who barely knows the difference between a socket and a wrench get my old alternator out.
I ordered a new one recommended on this site and the darn thing won�t fit into the lower mount!Help!lol
Grab a long breaker bar, screw driver, etc. and a hammer and hit this sleeve out. (You just need to move it very slightly)
Lazy guys in the shop preferred to grind some of alternator off, but moving it is the right way.
If I remember right, going next to the radiator (where the hood latch is) gives you a really nice angle to hit this sleeve and slightly move it out.
When you're torquing the lower bolt, it will give you slight resistance first and it need to press that sleeve in first, and then it will tighten to spec.
I was able to borrow a long breaker bar and move the bushing in literally two seconds.
kinda humbling to spend hour in an issue and fix it in seconds just because i suddenly have the right tool.lol
its getting dark here now so I will have to continue tomorrow.
anybithe potential pitfalls or challenges I need to be aware of in the reinstall?
Im a little nervous retightening ghe tensioner after attaching the belt to the alternator pulley.
also,I read some people take the old mount off the old alternator to use with the new one.
I had Autozone dispose of my old alternator so is that a necessary step?
 02-28-2020, 09:22 PM