
Rockyfeller's newest mods and unseen PICTURES of my interior. LEDmaniac!!


Originally Posted by nightrider69
hey how did you do the puddle lights and where did you purchase them from?
http://www.jlevistreetwerks.com/p321...duct_info.html
OK this will be my best attempt at a DIY for the puddle lights:
The easy way to get a power source would be to simply to tap power for them from the front door lights. But then you would just get on/off action with the door. That's no fun. You wouldn't get the cool "fade" effect which makes this mod worth it.
Mounting the puddle lights to the side skirt wasn't too difficult. Running the wires is the hard part of this mod. There was only 2 possible sources to go to. The front dome lights or the rear dome lights....I chose the rear for 2 reasons. 1) Because the rear would be easier to access and easier to run to the exterior of the car and 2) If I ever turn the front maplight on at night while I am driving, (it will be used on more occasions than a rear maplight.) the puddle lights on that side will activate....yeah really, I am that detail oriented.
Maplight was dismantled from the roof. The wires were spliced in to each maplight. As many panels were removed as possible to run the wire. It was run through the headliner, down through the C-pillars (I hate playin around near that airbag!!) down through the side bolster of the rear seatback. Under the bottom seat cushion you will see a rubber grommet. If you take it off you will see that it goes to the exterior of the car! I put it back in and put a small hole in it and ran the wire through it. Voila! No drilling or going through the door jambs to get the wires outside the car! I ran each wire to the corresponding side of the car towards the side skirt. I went back and put wire loom on all the wiring and zip tied it up nice and tidy. (As with all my installs. I only do clean safe wiring work. My work looks Acuraistic.)
I spent time and liberally covered the sides of the LED modules with silicone to weatherproof them. Just keep the silicone off of the base and the lens. I was installing my A-Spec kit for the 1st time. For you guys you'd probably want to spend an hour and take them off. Unless you have a lift, it would make your life easier. My kit has a total of 10 modules. It came all wired as 1 string. I wanted 5 on each side of course so I cut the string in 2. I stretched the string taut and marked where I wanted them on the skirt. I made every effort to make sure they were perfectly evenly spaced, arranged straight and centered on the side skirt. (It paid off because it came out perfect.) The kit came with metal mounts but I didn't use them. Each puddle lamp comes with 3M adhesive tape on the back of it. It didn't look like strong enough stuff for me though. I fortified it with the heavy duty gray 3M double sided tape. I swear by this stuff, it's great! I put a square of this on each puddle light. Also each puddle lamp has 2 holes on each side to hold a screw in. They take only REALLY tiny screws. (The smallest screws I could find at the hardware store!) I drove these self-tapping screws in as well and mounted them. Drill a tiny pilot hole first and then you can hand-tighten the screws. Remember the side sill is plastic, so you don't have to tighten them all the way, you will just thread any grip it has on the sill. The double sided tape and screws will act together to have them on there pretty secure. Mine ain't going anywhere unless they got knocked REAL hard. I could have weaved the wires in and out to keep the wiring on the inside of the sill but that would have been too many holes to drill. I left the wires on the outside. I cleaned and prepped the area. I used Gorilla tape (Another highly recommended product I SWEAR by. It is essentially a very heavy duty black duct tape.) and applied it over the wire to keep in out of the way, protected, camouflaged and weatherproofed. You will only notice this if the car is on a lift. I then applied a final dose of silicone again (covering the screws too which could rust..) The modules were visible from the sides. A few months later I painted the sides of them with black paint and now they are totally camouflaged.
The lights fade on when I hit unlock on the remote and fade off just like the interior lights when I get in or press lock on the remote. I can turn them on or off at will with the interior light switch near the front dome. Mind you, you can also do this mod with a separate switch to control them totally independently or partially independently with a relay if you wanted. This is another one of my mods that I didn't do too much permanent damage to the car. It is reversible with minimal scarring.
Ever since I lowered my car, My real worry is knocking them on a speed bump.....Yeah I am a bitch, I have actually gotten out of my car half way on a speed bump to make sure they would clear....haha lol nobody understands me! Hey it's my labor that was invested! Not to be pessimistic but I know this mod is not one that will last for years. It has high chance of getting a leak or getting hit. If I redo them I will do them recessed like I mentioned. It is more work, but I love these lights that much.
Last edited by rockyfeller; Nov 16, 2008 at 09:12 PM.
Dam Rocky... simply amazing. The amount of attention you paid to detail is very evident and let me add very rewarding in your case. All mods are done with class and style. If it wasn't so cold, I would try to link up with you for some projects!! 


As to where I got them I did answer it already but here is the link again:
http://www.jlevistreetwerks.com/p321...duct_info.html
http://www.jlevistreetwerks.com/p321...duct_info.html
So i tried ordering from these guys a long long time ago. But they dont have the white lights, and havnt had them for some time.
How long ago did you actually order these??
I ordered a different set from another site but they got lost in the mail and i just lost interest in the project, but if i could find a quality bulb set-up id be back all over this.
Looks great
I ordered them around October/November 2007. My units got leaked and shorted out and I complained to him. He sent me new units in February/March 2008.
Even if he doesn't have them it's OK. They are not the best or anything. I saw another type of puddle lights on Ebay for a bit more $$ but I am not too convinced they are any better.
There are 2 other smart (and budget conscious) sources to maybe look into. Go to oznium.com, he sells some great LED stuff and he probably has something you can work with. Otherwise if you have some real skills you can fabricate something from scratch like terry 919 did.
OK so since I am getting so much positivity on this thread I am going to contribute a bit more to AZine!
Here we go: DIY for underdash ambient lighting.
Yeah the ambient lighting is a cool thing. So you know what blue looks like now. I don't know what color you plan on using but I think red would be a natural choice if you have a TL-S. How would it look in your car? Here you go!

(I apologize, this is from elsewhere on the forum, all credit goes to the respective owner!)
I bought my LED strips from ua6spec. I don't know if he sells them anymore. You can get them also at oznium.com or even cheaper from Ebay nowadays. My strips are low profile, flexible and 15" long (I think...)
LEDs are very low draw so they are pretty safe from a wiring standpoint. I mounted a strip in each location I mentioned on the thread using the included double sided tape. The rear ones are attached to the bottom cushion of the backseat so I used a light duty multi-purpose adhesive here. You might want to remove the bottom cushion if you want, it makes running the wires under the carpet easier. The wires run forward along the central "hump" under the carpet. I snaked them through with a special grabber tool I have. I partially unscrewed the rear of my center console to facilitate access. If you want the best access though I recommend totally removing the rear portion of the console. (It is an extra hour of work but it may be worth it!) The wires from the front passenger side had to pass through across the center console as well. I snaked that also with my tool (If you don't know what tool I am talking about I can source it for you cheap, it is invaluable in my toolbox to many mods.) All wires were tucked and hidden and converge to where my switch is.
You can mount the switch near your power mirror switch if you have space. Me? I have too many switches and stuff goin on so the only place to keep it accessible but out of the way was by my right leg on the side of the center console. I have an LED switch that has 3 contacts on it. One is positive (+) contact, one is a ground contact and one is labeled "ACC" or accessory. I always have a spool of bulk 12V accessory wire handy. I have connectors that would crimp onto the wire and fit and plug into these contacts. I searched for a good ground contact (Luckily the TL has many points of access for this. You just need a place there is a solid metal screw contact a part of the chassis.) and wired it to the ground contact of the switch. I needed a power source. There is a little light in your center console compartment. It turns on whenever your parking lights come on. I tapped into this and wired it to the power (+) contact of the switch. (The advantage of using this point is that it is close by, the lights will come on with the rest of your dash, and they will all turn off when you leave your car....they also flash when you arm/disarm you alarm.) All the positive wires from the LED strips were spliced together and wired into the "ACC" contact of the switch. All the negative wires from all the strips were wired together and crimped onto a mini ring terminal and grounded elsewhere as well.
That's it, pretty simple and you have your lights go on off with the other lights and a semi-independent switch to control it. You could of course have a totally independent switch but risk leaving it on when your car is turned off. Good luck!
Originally Posted by Steven Bell
Rocky,
You have inspired me to do the interior lights in my Type S-just like yours. Can you please tell me more about your installation? You mentioned that there is a switch close to the driver's side knee that you hooked in to. Did you just tap into that? Or how did you get the front and back lights hooked up? If you could go thru that whole thing with me, I would REALLY appreciate it.
You have inspired me to do the interior lights in my Type S-just like yours. Can you please tell me more about your installation? You mentioned that there is a switch close to the driver's side knee that you hooked in to. Did you just tap into that? Or how did you get the front and back lights hooked up? If you could go thru that whole thing with me, I would REALLY appreciate it.
Here we go: DIY for underdash ambient lighting.
Yeah the ambient lighting is a cool thing. So you know what blue looks like now. I don't know what color you plan on using but I think red would be a natural choice if you have a TL-S. How would it look in your car? Here you go!
(I apologize, this is from elsewhere on the forum, all credit goes to the respective owner!)
I bought my LED strips from ua6spec. I don't know if he sells them anymore. You can get them also at oznium.com or even cheaper from Ebay nowadays. My strips are low profile, flexible and 15" long (I think...)
LEDs are very low draw so they are pretty safe from a wiring standpoint. I mounted a strip in each location I mentioned on the thread using the included double sided tape. The rear ones are attached to the bottom cushion of the backseat so I used a light duty multi-purpose adhesive here. You might want to remove the bottom cushion if you want, it makes running the wires under the carpet easier. The wires run forward along the central "hump" under the carpet. I snaked them through with a special grabber tool I have. I partially unscrewed the rear of my center console to facilitate access. If you want the best access though I recommend totally removing the rear portion of the console. (It is an extra hour of work but it may be worth it!) The wires from the front passenger side had to pass through across the center console as well. I snaked that also with my tool (If you don't know what tool I am talking about I can source it for you cheap, it is invaluable in my toolbox to many mods.) All wires were tucked and hidden and converge to where my switch is.
You can mount the switch near your power mirror switch if you have space. Me? I have too many switches and stuff goin on so the only place to keep it accessible but out of the way was by my right leg on the side of the center console. I have an LED switch that has 3 contacts on it. One is positive (+) contact, one is a ground contact and one is labeled "ACC" or accessory. I always have a spool of bulk 12V accessory wire handy. I have connectors that would crimp onto the wire and fit and plug into these contacts. I searched for a good ground contact (Luckily the TL has many points of access for this. You just need a place there is a solid metal screw contact a part of the chassis.) and wired it to the ground contact of the switch. I needed a power source. There is a little light in your center console compartment. It turns on whenever your parking lights come on. I tapped into this and wired it to the power (+) contact of the switch. (The advantage of using this point is that it is close by, the lights will come on with the rest of your dash, and they will all turn off when you leave your car....they also flash when you arm/disarm you alarm.) All the positive wires from the LED strips were spliced together and wired into the "ACC" contact of the switch. All the negative wires from all the strips were wired together and crimped onto a mini ring terminal and grounded elsewhere as well.
That's it, pretty simple and you have your lights go on off with the other lights and a semi-independent switch to control it. You could of course have a totally independent switch but risk leaving it on when your car is turned off. Good luck!
Last edited by rockyfeller; Nov 17, 2008 at 05:02 PM.

These colors don't run
Joined: Oct 2008
Posts: 397
Likes: 0
From: Chino, CA
Hahaha! Thanks man, trying to bust my chops huh? Go deliver some milk or somethin! lol.
Yeah exactly why I was impressed, I didn't expect anybody born after 1980 to get it. Not only that but they were never as big here in the US as they were in Europe and Asia. You will usually hear hip-hop and techno from my car but really I listen to everything! Even Scorpions booming bass from my trunk, lol.
Yeah exactly why I was impressed, I didn't expect anybody born after 1980 to get it. Not only that but they were never as big here in the US as they were in Europe and Asia. You will usually hear hip-hop and techno from my car but really I listen to everything! Even Scorpions booming bass from my trunk, lol.


 car is rocking like a hurricane!!!! i had to haha
NOT my TL or ME
Joined: Jul 2008
Posts: 75
Likes: 0
From: AtLaNtA, GA
Just got to this thread.....
very nice indeed!
so how did you hide the slack needed under the seats, well, did u bring through carpet near the front of the seat with it all the way back?
thanks.
very nice indeed!
so how did you hide the slack needed under the seats, well, did u bring through carpet near the front of the seat with it all the way back?
thanks.

See it's one of these claw tools I use to snake and run wiring everywhere. It is a cheap tool you can find in auto stores and a must have for the toolbox.

The wires used for the LED strips is quite thin gauge so I didn't wireloom and ziptie them up like my other installs. Maybe that is the better thing to do but there was a LOT of wiring to cover. Instead I ran them underpanels and carpet and wherever possible I "buddy taped" them to other existing wire loom bundles with small strips of "Gorilla tape". This way they stay up and out of the way and also if I ever have to pull the wiring for any reason, just cut the tape. The wires run from the rear forwards along the driver's side of the center console along the floor.
The wires used for the LED strips is quite thin gauge so I didn't wireloom and ziptie them up like my other installs. Maybe that is the better thing to do but there was a LOT of wiring to cover. Instead I ran them underpanels and carpet and wherever possible I "buddy taped" them to other existing wire loom bundles with small strips of "Gorilla tape". This way they stay up and out of the way and also if I ever have to pull the wiring for any reason, just cut the tape. The wires run from the rear forwards along the driver's side of the center console along the floor.
Thanks man.....How are the headlights holdin up? Halos still glowing? We were talking about the shoddy switchbacks at the LI meet.....Mine have now conked out too! This sucks!
Pro
Joined: Feb 2007
Posts: 598
Likes: 1
From: Queens, N.Y.
I guess it really has been a long time now since we've spoken. I sold the headlights when I traded in my car.
Team Owner
iTrader: (2)
Joined: Jan 2008
Posts: 36,545
Likes: 6,470
From: Kansas City, MO (Overland Park, KS)
Rocky...I have a question for you. I'm going to do my lights on Tuesday of next week. In regards to the rear LED strips-where is the best place to mount them? Someone said they will get kicked if they are under the front seats. Someone else said that you'll see the LED strip if you mount them to the bottom of the back seat though. I'm just trying to figure out the best place for the rear LED's.
damn rod your switchbacks died already? i remember you installed yours after me. mine are still going strong. mine aren't switchbacks though, all hyper white when i signal they just get wayyy brighter.
Last edited by jptl04; Nov 24, 2008 at 12:05 AM.
Rocky...I have a question for you. I'm going to do my lights on Tuesday of next week. In regards to the rear LED strips-where is the best place to mount them? Someone said they will get kicked if they are under the front seats. Someone else said that you'll see the LED strip if you mount them to the bottom of the back seat though. I'm just trying to figure out the best place for the rear LED's.
Originally Posted by Dreamz29
Rockyfeller
how much was it for the whole interior?
how much was it for the whole interior?
Yeah that's right I know how to get it done cheap because my interior looks like I spent a LOT more.
Originally Posted by gungrave
Looks SICK. what are you droped on? It's just perfect.
Originally Posted by jptl04
mine aren't switchbacks though, all hyper white when i signal they just get wayyy brighter.
Originally Posted by ballerjai
You're always a big help and inpiration! I'm interested in the 5 led lights under the side skirts! Where did you buy them?

3rd Gear
Joined: Nov 2008
Posts: 3
Likes: 0
Breakdown: $90 all the 12-LED LEDs, $50 for LED strips, Supercomputers blue sills $140, switches/wiring/misc. $20, Headrest logos $15, LED puddle lights $25.
Yeah that's right I know how to get it done cheap because my interior looks like I spent a LOT more.
Thanks man that's cheap I'ma try to fix my interior like that. I just fell in love with it lol, Im not to handy so if I take my car somewere you think they will be able to do it?
Yeah that's right I know how to get it done cheap because my interior looks like I spent a LOT more.
Thanks man that's cheap I'ma try to fix my interior like that. I just fell in love with it lol, Im not to handy so if I take my car somewere you think they will be able to do it?
Yeah go to a car accessory shop....you know the kind that specializes in rims, bodykits tint etc. they should take care of it. Only thing is you will probably have to buy from them. All those prices I listed are some good deals I found online.
Team Owner
iTrader: (2)
Joined: Jan 2008
Posts: 36,545
Likes: 6,470
From: Kansas City, MO (Overland Park, KS)
Rocky,
I got my LED's installed today. I really like them...they look great and really set off the interior of the Type S. Here's one picture for not-it's not great, but I'll take more later. Thanks for the inspiration.
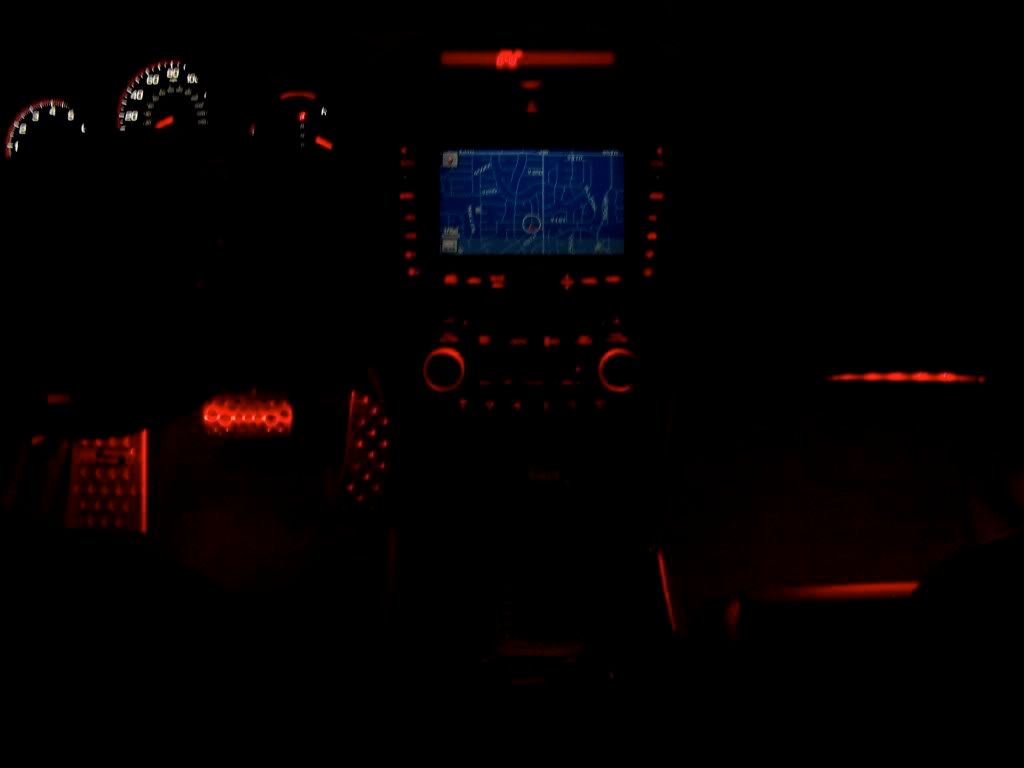
I got my LED's installed today. I really like them...they look great and really set off the interior of the Type S. Here's one picture for not-it's not great, but I'll take more later. Thanks for the inspiration.
WOW I love it!!!! I admit I am not a fan of the red Type-S interior. I knew if I had bought one like you, I would have no choice but to go with red all the way. I would dress it up like that because it looks MUCH better now!
Make Nice, Not Rice
Joined: Jan 2007
Posts: 815
Likes: 0
From: San Francisco, CA
Oh darn, I feel like such a noob for that one, sorry bro. HAha, I guess I was too excited to finish reading all your post.
Anyways, thanks again! Were you able to get those 8k angel eyes? If not, I'll talk to him personally again and I'm sure we can get them.
Anyways, thanks again! Were you able to get those 8k angel eyes? If not, I'll talk to him personally again and I'm sure we can get them.
Team Owner
iTrader: (2)
Joined: Jan 2008
Posts: 36,545
Likes: 6,470
From: Kansas City, MO (Overland Park, KS)
Thanks Rocky!!! Hey, it's all from your inspiration dude. I need to get better pictures to post, but it really looks awesome and truly adds to the car.