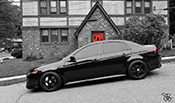
My 2006 TL progress Thread

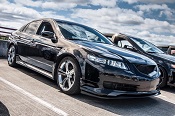
Well, I plan on doing more and more so I thought I would start a progress thread and build on it and also get some opinions from other members as I go.
Here she is after detail today, I have only owned her for 5 days.
 [/IMG]
 [/IMG]
 [/IMG]
photo DSC03310_zps3e72cd04.jpg
and apparently I cant upload photos! lol... different than the other sites i have been on, whats the trick for this site?
Here she is after detail today, I have only owned her for 5 days.
[/IMG][/IMG][/IMG]photo DSC03310_zps3e72cd04.jpg
and apparently I cant upload photos! lol... different than the other sites i have been on, whats the trick for this site?
Last edited by Steven Bell; Apr 11, 2014 at 07:56 PM. Reason: Merged Posts
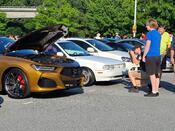


I did, and I tried the Image copy link and the URL.....

testing
ok here are some more pics. to many .img's in the first. Sorry about that.
So, what are peoples thoughts on the rims? I am really on the fence about the chrome. they are nice MOMO rims though.
On the badges on the back, should I Plasti them black or just go badgeless?


testing
ok here are some more pics. to many .img's in the first. Sorry about that.
So, what are peoples thoughts on the rims? I am really on the fence about the chrome. they are nice MOMO rims though.
On the badges on the back, should I Plasti them black or just go badgeless?
Last edited by Steven Bell; Apr 11, 2014 at 07:57 PM. Reason: Merged Posts
 but not feeling the wheels

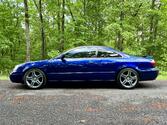


The wheel design isn't horrid, but the chrome is. An easy fix would be to paint them, but do gunmetal instead of black so you still have some contrast between the wheel, tire, and car.
Besides that, welcome! You've already got the A-Spec kit installed so that's one mod you don't have to worry about adding. Ditch the front plate and enjoy
Besides that, welcome! You've already got the A-Spec kit installed so that's one mod you don't have to worry about adding. Ditch the front plate and enjoy
Trending Topics


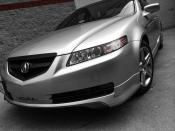
You can, but Id recommend glossing it. Regular matte black looks... nasty.
This is how mine looks with gloss right after I painted it. Shines just like the body paint.
Attachment 106979
And this is 7 months later, it's held up great. It's still shiny in normal daylight. We had a thunderstorm rolling in when I took this pic so it's kinda dark.

This is how mine looks with gloss right after I painted it. Shines just like the body paint.
Attachment 106979
And this is 7 months later, it's held up great. It's still shiny in normal daylight. We had a thunderstorm rolling in when I took this pic so it's kinda dark.

So been a while since I have updated so Wanted to share some love and pics.
A pre mod picture -

New tails? new to who? water logged!

AIM V2 Cold air Intake -

Clear LED side Markers -

Lowered and tint.

Got some Custom Headlights and plasti dipped the grill also did a license plate removal

New Roof Spoiler -

New Tails, debadged and looking pretty -

New grille -
and during install -

and now after install with lights and Switchback LED side marker / Turn Signals. Got a couple more fun things coming in the next few days. sorry for the late update.

A pre mod picture -
New tails? new to who? water logged!
AIM V2 Cold air Intake -
Clear LED side Markers -
Lowered and tint.
Got some Custom Headlights and plasti dipped the grill also did a license plate removal
New Roof Spoiler -
New Tails, debadged and looking pretty -
New grille -
and during install -
and now after install with lights and Switchback LED side marker / Turn Signals. Got a couple more fun things coming in the next few days. sorry for the late update.
Here is an updated shot from a meet last weekend. I'm going to break out the camera and do some qaulity all around pics this week some time and update with everything done.
Thanks for checking it out.

Thanks for checking it out.
Alright, Got some more done, and some more still on the way.
These pics were taken today after a spray down.
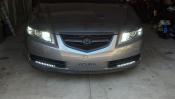
Front shot - License plate delete, Carbon fiber vinyl letters in the "ACURA" part on the front bumper. A spec Kit with a STI lip. Also rocking the C mod Grill and some Endless RPM headlights with ZKR Lenses and upgraded lights with 5K LED Switchbacks.


Engine Bay Shots - Carbon Fiber Wrapped all plastics in the engine bay, V2 AEM CAI with "ACURA" Carbon vinyl letters. Has a new Alternator, Serp belt, and a XLR8 Crank Pulley.


Interior - Running LED lights throughout the interior. Sub that I am building a custom enclosure for, Hacked Nav System and Carbon Fiber Vinyl letters in each door sill.

Side shot - Lowered on Meagan racing sprints, Momo 18's wrapped in Parelli tires. Clear LED side Markers front and back along with ACURA Caliper Covers.


Roof Spoiler Painted to match, and also has the Trunk thumb nail spoiler.

Custom Tails, Debaged with LED reverse and plate lights. also has 2.25 Cat back system with Magnaflow Mufflers on it stock tips.


and then just cause I think this is my favorite shot so far taken, here it is again.

Still on the books - Window Visors, TB Spacer, upgraded Injectors, Custom under body lighting, custom trunk enclosure, Nitrous wet shot system, Digital Monitoring gauges with custom gauge pods.
Maybe some new rims down the road but probably last on my list of things to do. Thanks for checking it out. updates after I get a few more things in.
These pics were taken today after a spray down.
Front shot - License plate delete, Carbon fiber vinyl letters in the "ACURA" part on the front bumper. A spec Kit with a STI lip. Also rocking the C mod Grill and some Endless RPM headlights with ZKR Lenses and upgraded lights with 5K LED Switchbacks.
Engine Bay Shots - Carbon Fiber Wrapped all plastics in the engine bay, V2 AEM CAI with "ACURA" Carbon vinyl letters. Has a new Alternator, Serp belt, and a XLR8 Crank Pulley.
Interior - Running LED lights throughout the interior. Sub that I am building a custom enclosure for, Hacked Nav System and Carbon Fiber Vinyl letters in each door sill.
Side shot - Lowered on Meagan racing sprints, Momo 18's wrapped in Parelli tires. Clear LED side Markers front and back along with ACURA Caliper Covers.
Roof Spoiler Painted to match, and also has the Trunk thumb nail spoiler.
Custom Tails, Debaged with LED reverse and plate lights. also has 2.25 Cat back system with Magnaflow Mufflers on it stock tips.
and then just cause I think this is my favorite shot so far taken, here it is again.
Still on the books - Window Visors, TB Spacer, upgraded Injectors, Custom under body lighting, custom trunk enclosure, Nitrous wet shot system, Digital Monitoring gauges with custom gauge pods.
Maybe some new rims down the road but probably last on my list of things to do. Thanks for checking it out. updates after I get a few more things in.





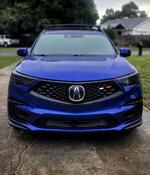

Alright, Got the Trunk Underway and got the Surprise to Unleash!
Just started everything today so its dirty and in progress, however want to share none the less.
False wall to hide my subs and amp, and then a kick panel to hold the bottle and hide all the wires and hose.


Just started everything today so its dirty and in progress, however want to share none the less.
False wall to hide my subs and amp, and then a kick panel to hold the bottle and hide all the wires and hose.
and it is time for another update!
Got all the nitrous in, testing done, ran through 2 bottles and got some dyno runs in.
Bottle in trunk and wired and running strong. bottle heater in, lines run, pressure gauge, and pressure gauge activation switch for the bottle heater.


Drivers side during install - wiring in the activation switch and peddle WOT switch


Then on to the passenger side to wire in the Tach Adapter and RPM Window Switch


Then tapping into the fuel line, mounting the Solenoid, and tapping into the intake with the nozzle.


and the final result is a dyno run today - need to do some more correction factor and take into consideration the 18" wheels over 17's but the numbers are 280WHP and 318WTQ.
Got all the nitrous in, testing done, ran through 2 bottles and got some dyno runs in.
Bottle in trunk and wired and running strong. bottle heater in, lines run, pressure gauge, and pressure gauge activation switch for the bottle heater.
Drivers side during install - wiring in the activation switch and peddle WOT switch
Then on to the passenger side to wire in the Tach Adapter and RPM Window Switch
Then tapping into the fuel line, mounting the Solenoid, and tapping into the intake with the nozzle.
and the final result is a dyno run today - need to do some more correction factor and take into consideration the 18" wheels over 17's but the numbers are 280WHP and 318WTQ.
Last edited by Speeden6; Jul 23, 2014 at 11:08 PM.

So got the run file, compensated tire size, Smoothing Factor and SAE Correction at 0.98
Nitrous is set up on a RPM window switch to activate at 3500 RPM and Kill at 6200 RPM.
287WHP and 313WTQ

Nitrous is set up on a RPM window switch to activate at 3500 RPM and Kill at 6200 RPM.
287WHP and 313WTQ