
I get HIGH on spray paint, oh my....
 01-10-2013 | 10:28 PM
#1
I get HIGH on spray paint, oh my....
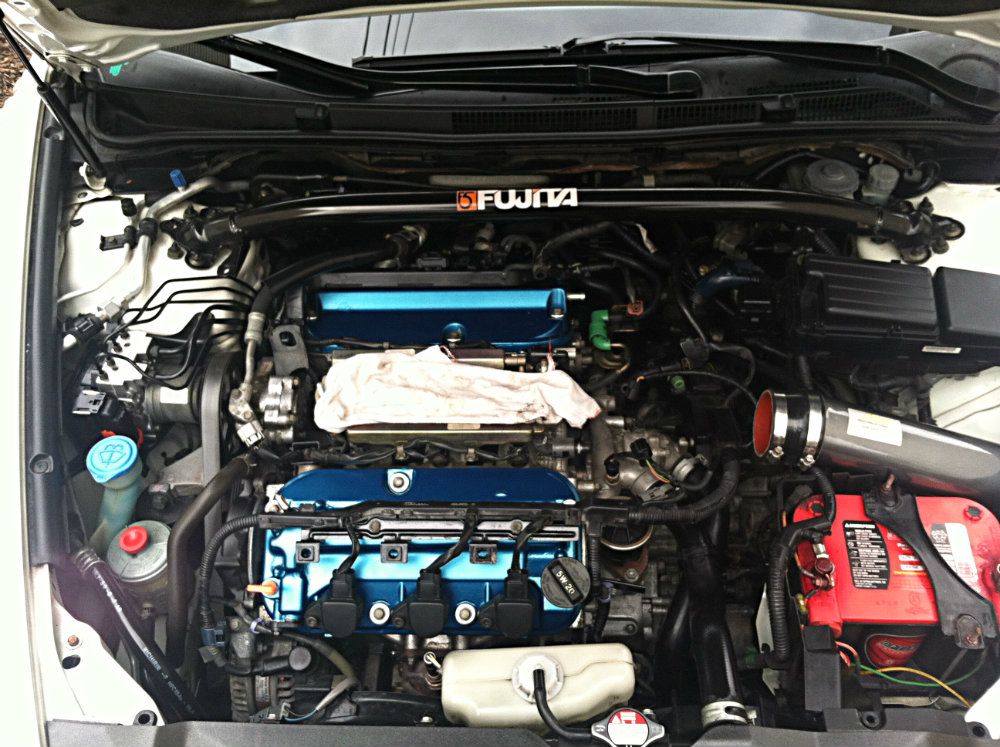
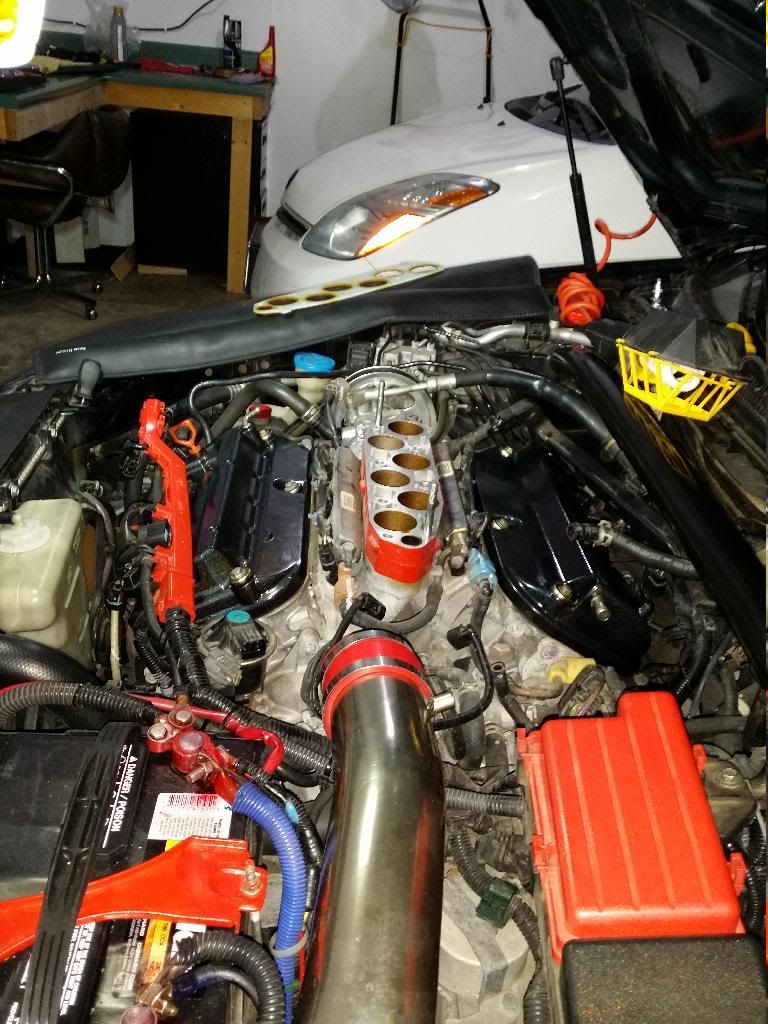
So I learned how to spray paint today.... But before we get started. My engine bay needed some TLC. This is prep work for the supercharger install. I started with a engine cleaner wash down then the removal of intake manifold with valve cover gaskets. Let's just say, the OEM finish on the valve cover gaskets have seen better days...
(MY INSPIRATION was ERIC )
)
LET'S BEGIN!
Engine bay with cleaner sprayed on.
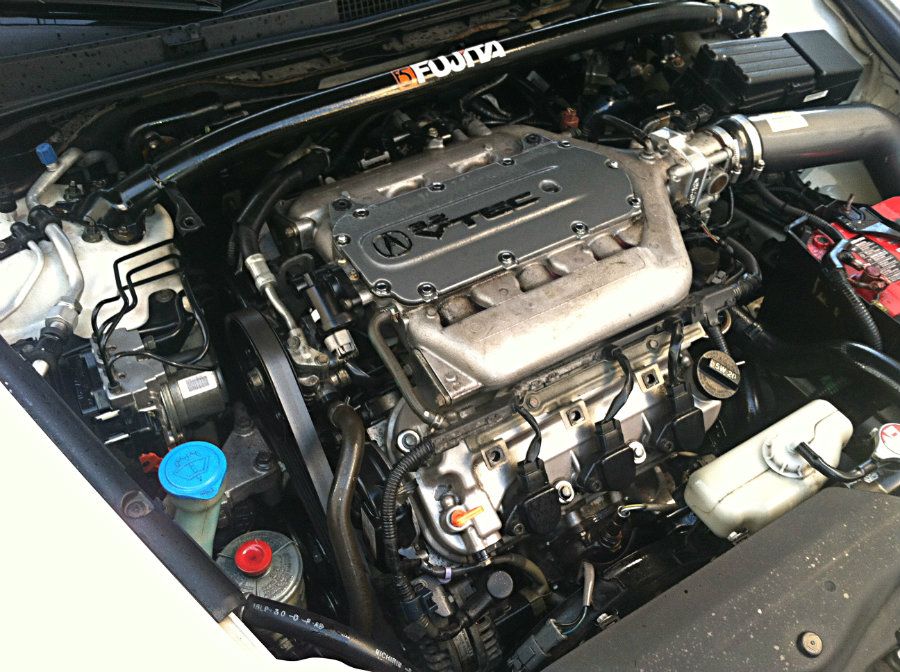
After a wash down and a half ass wipe down, I removed my intake and valve covers.
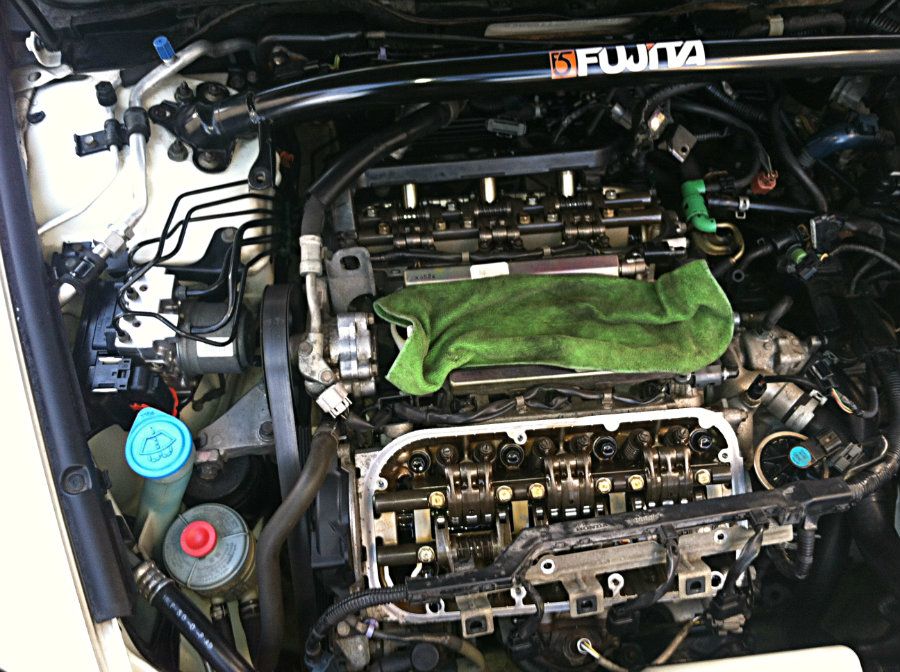
With valve covers off... they sure look YUMMY!
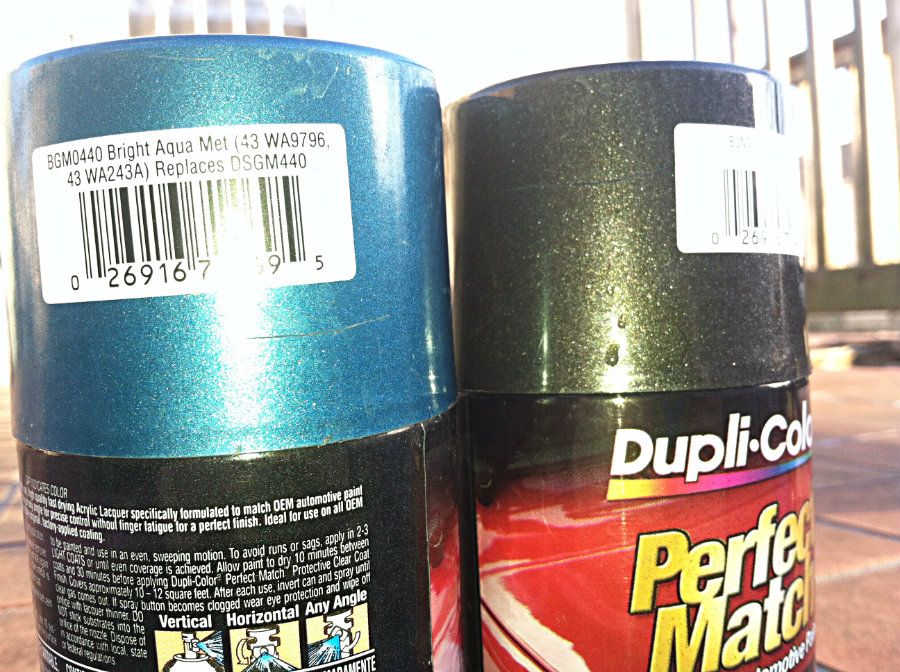
Next Spray paint used... (TEAL AND BLACK METALLIC PEARL)
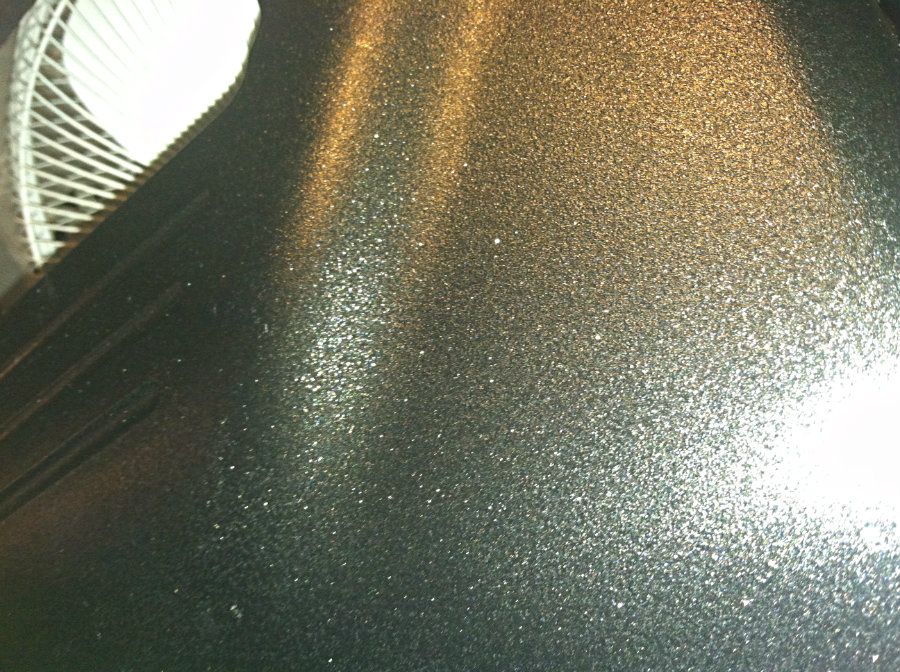
Welcome to my professional paint booth.... A few coats of TEAL
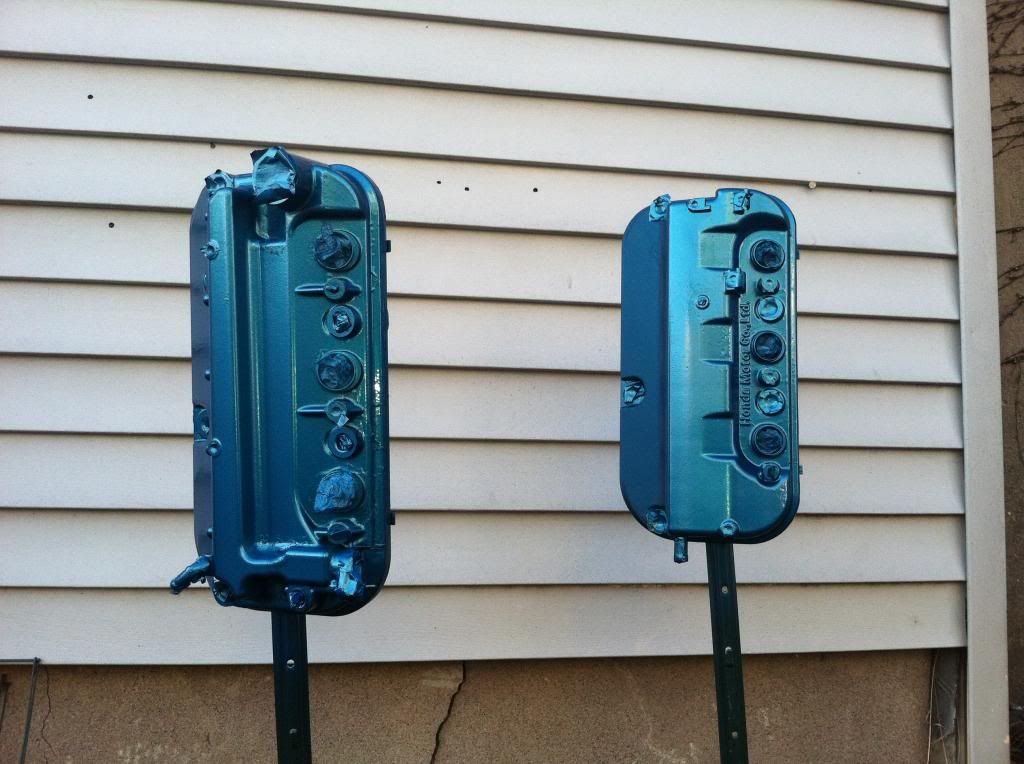
Black metallic pearl on the under hood plastic's
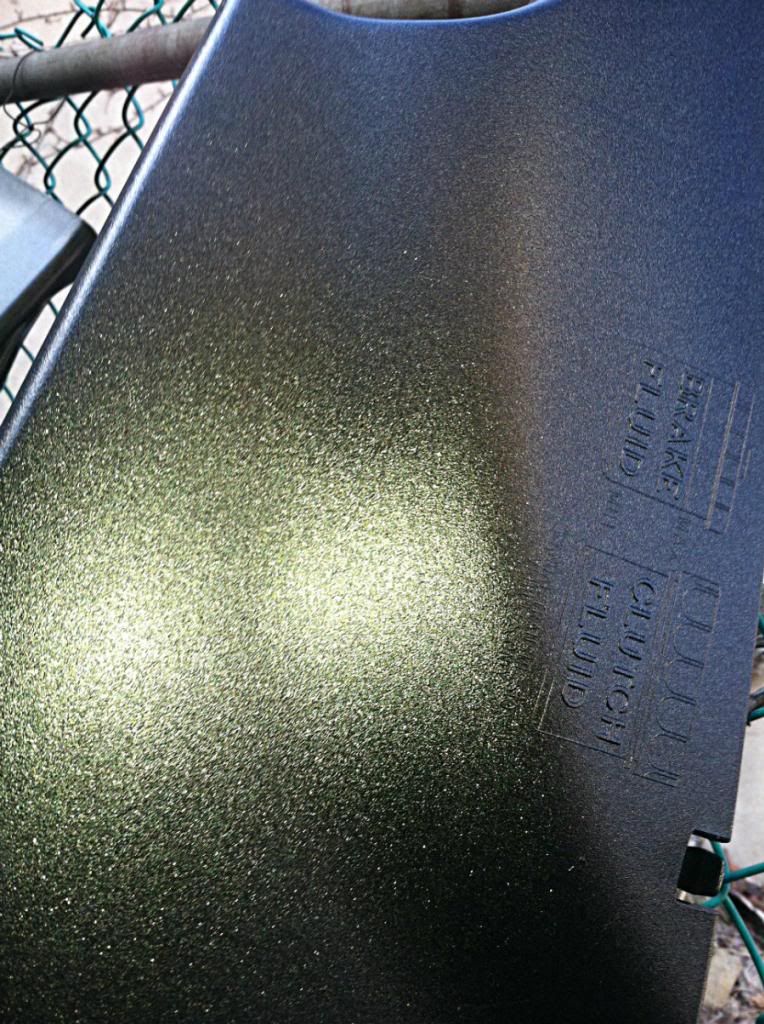
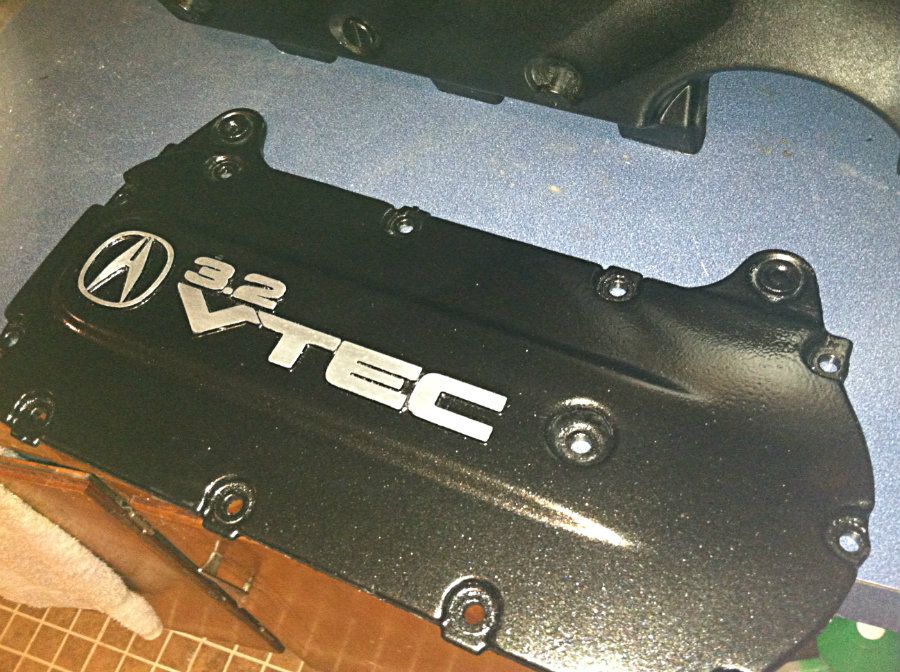
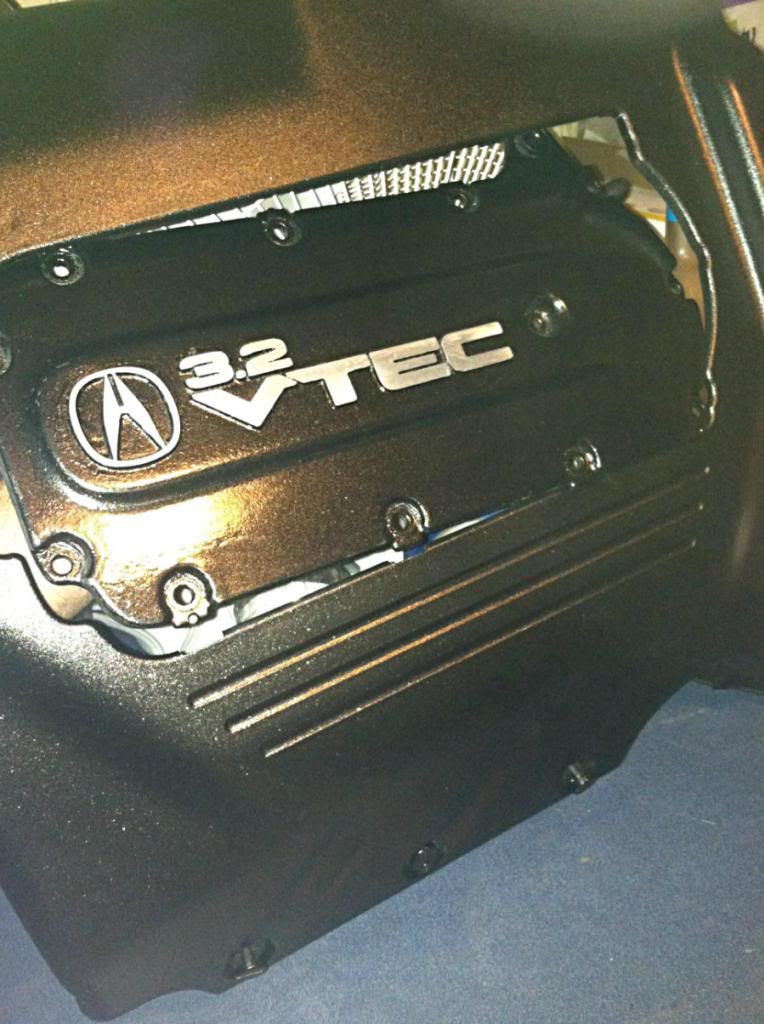
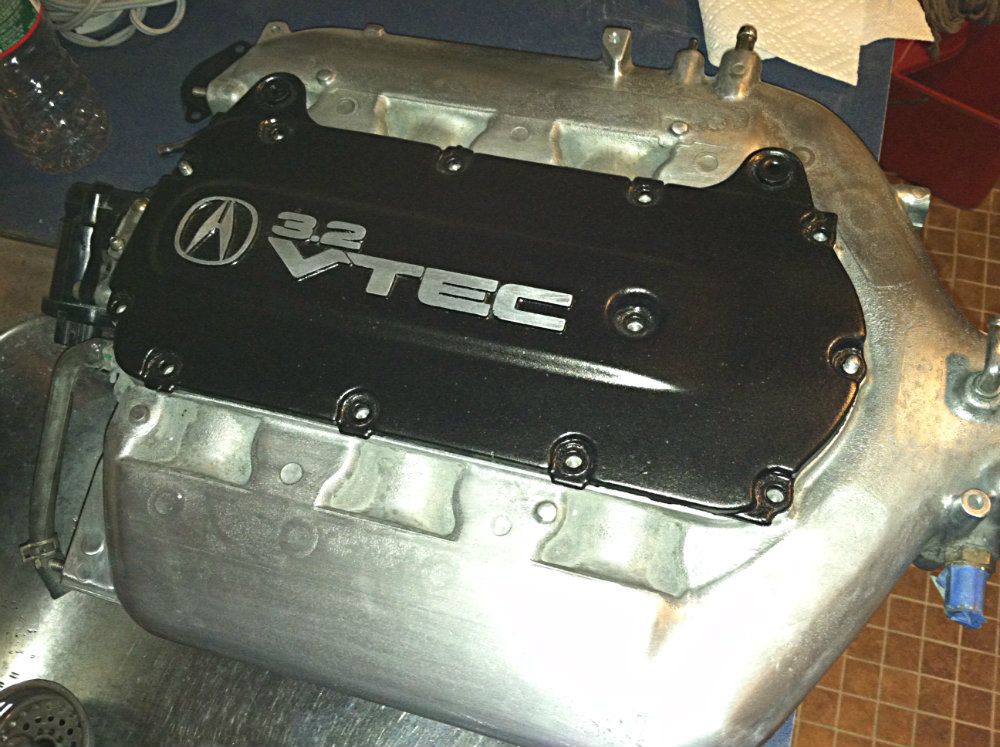
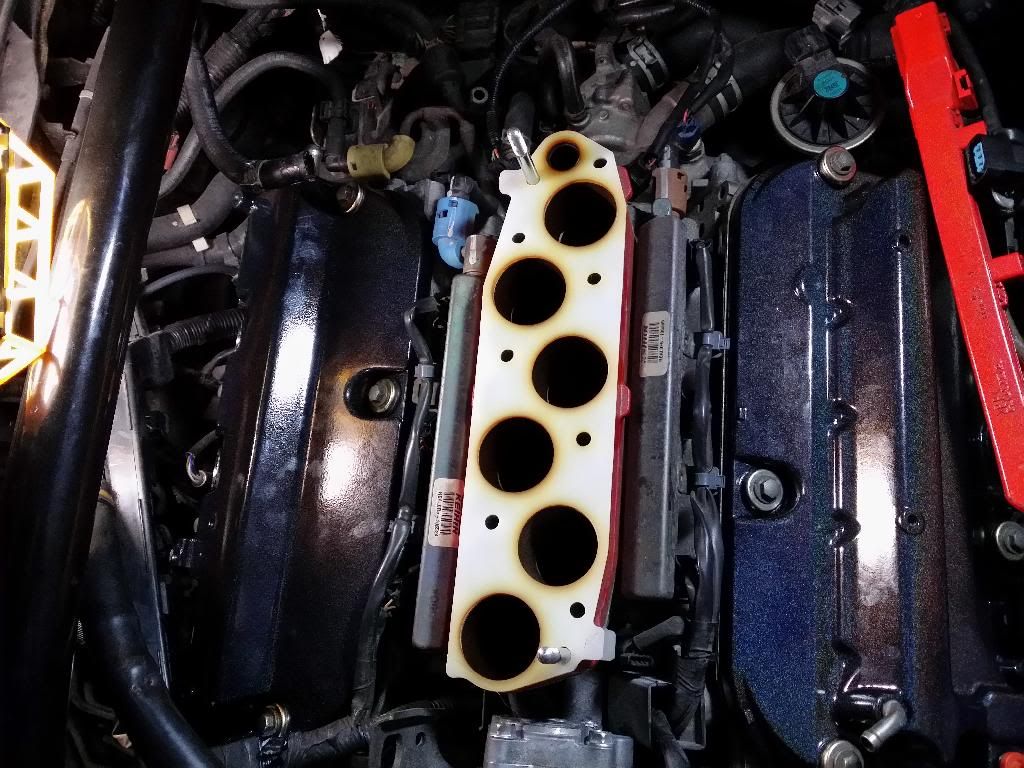
I did the cover for the intake manifold same color but sanded down and polished best as possible the Acura 3.2 VTEC, then applied 3x clear coats.
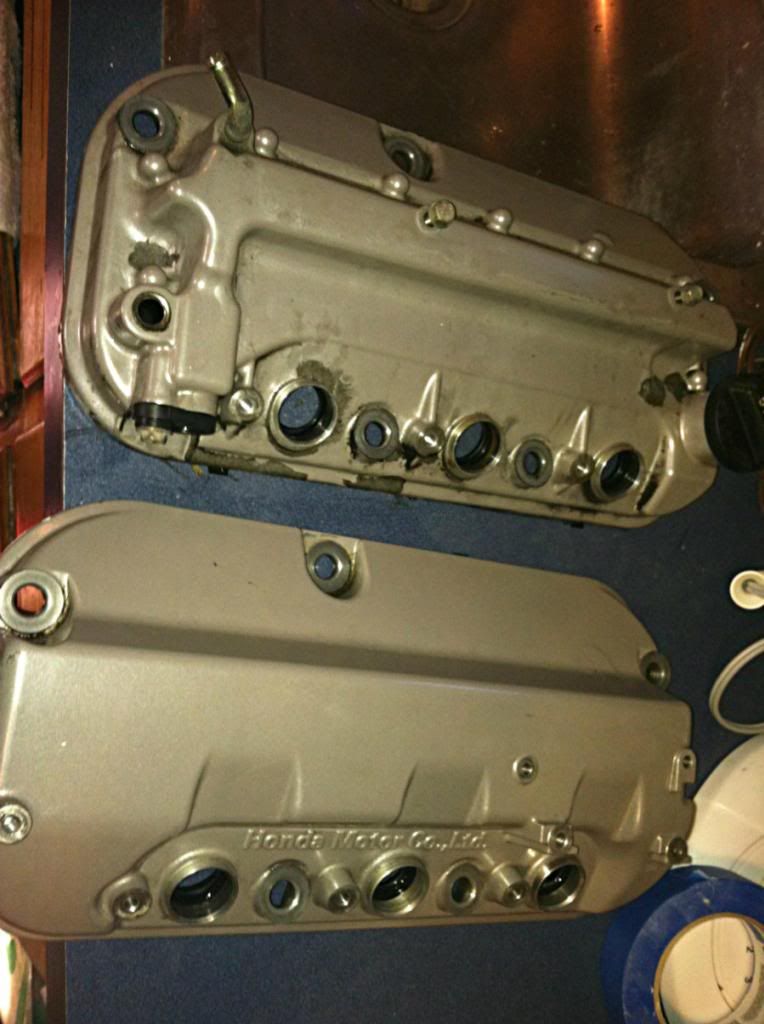
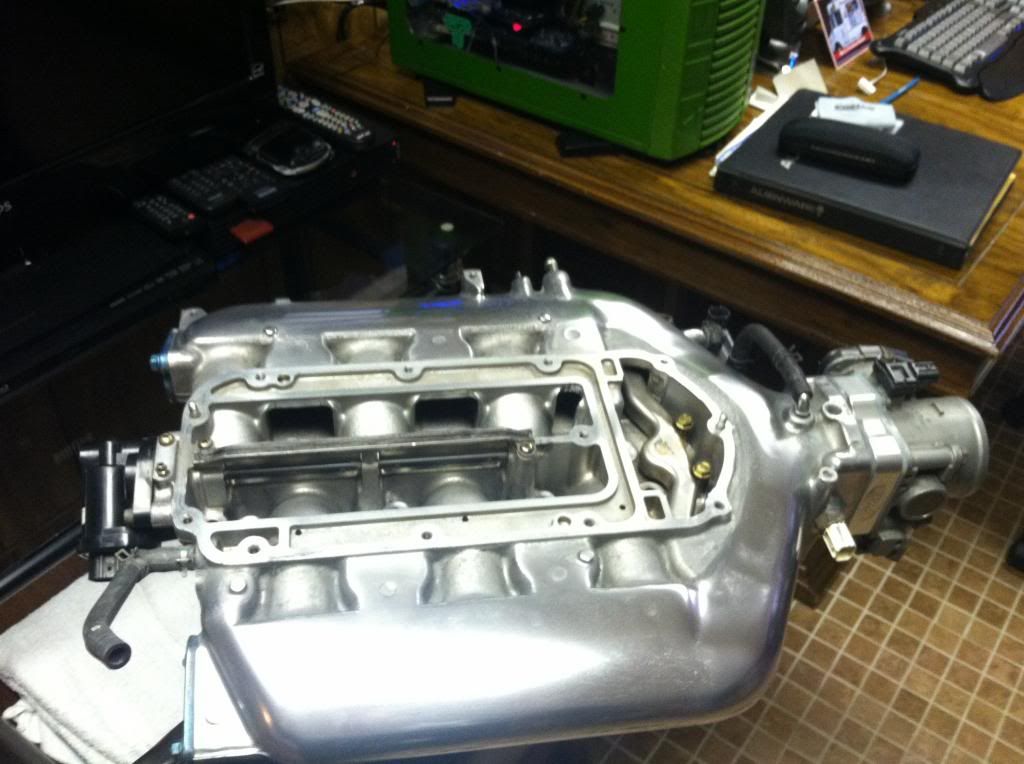
As you can see, the UNFINISHED PRODUCT (Not sure what's going to happen with the cover yet...)
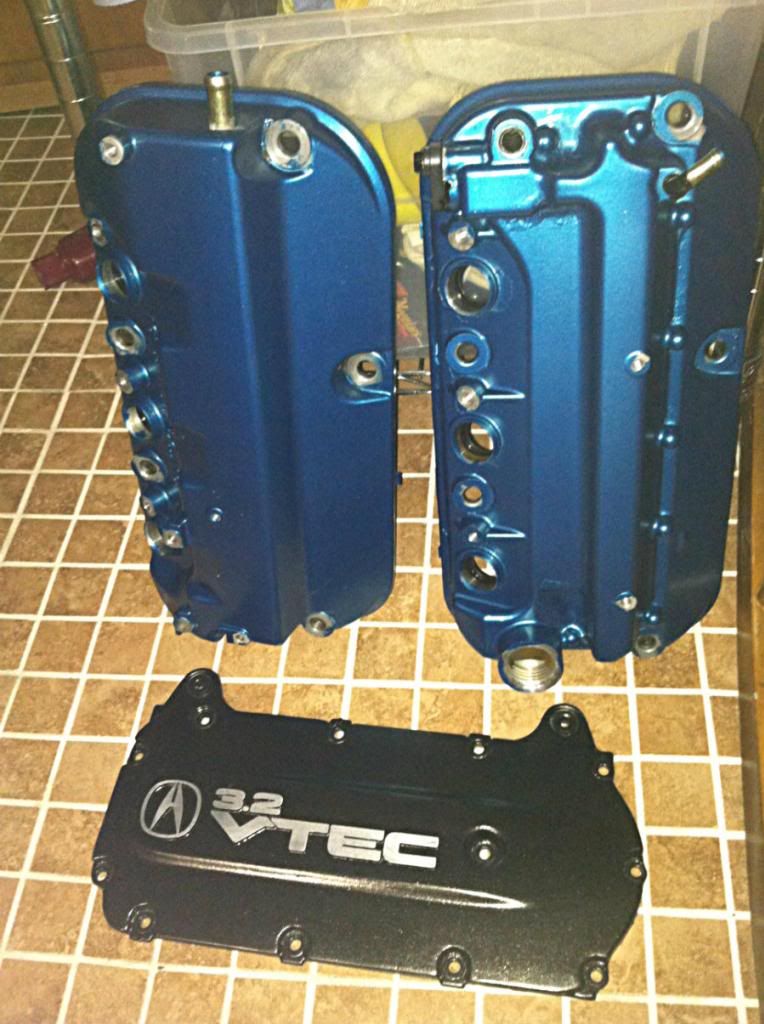
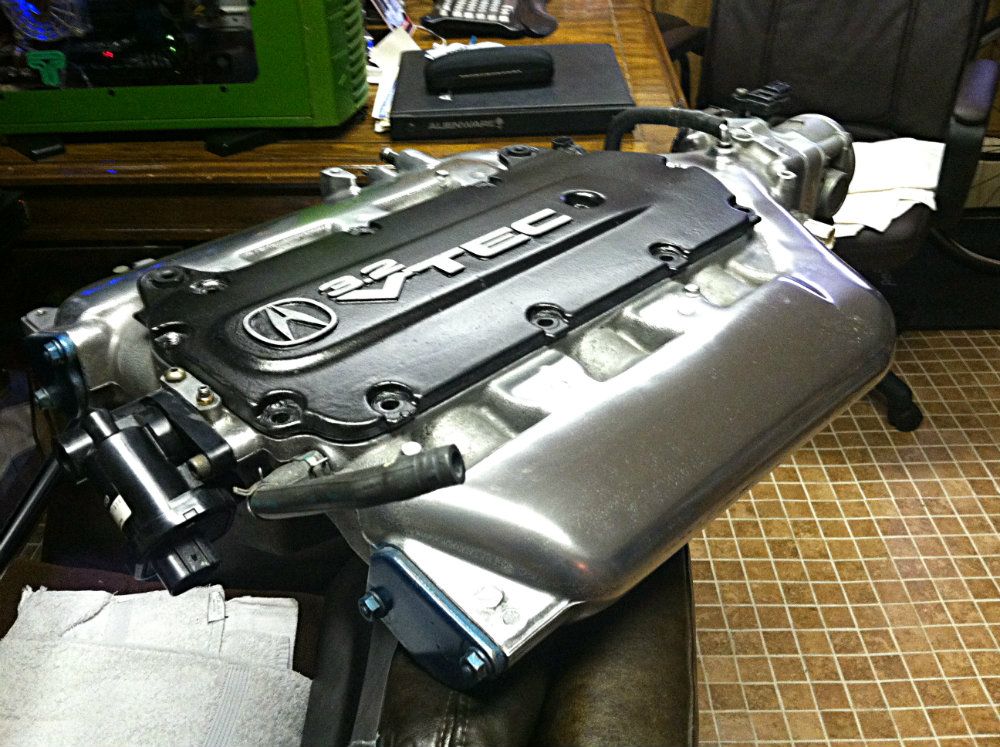
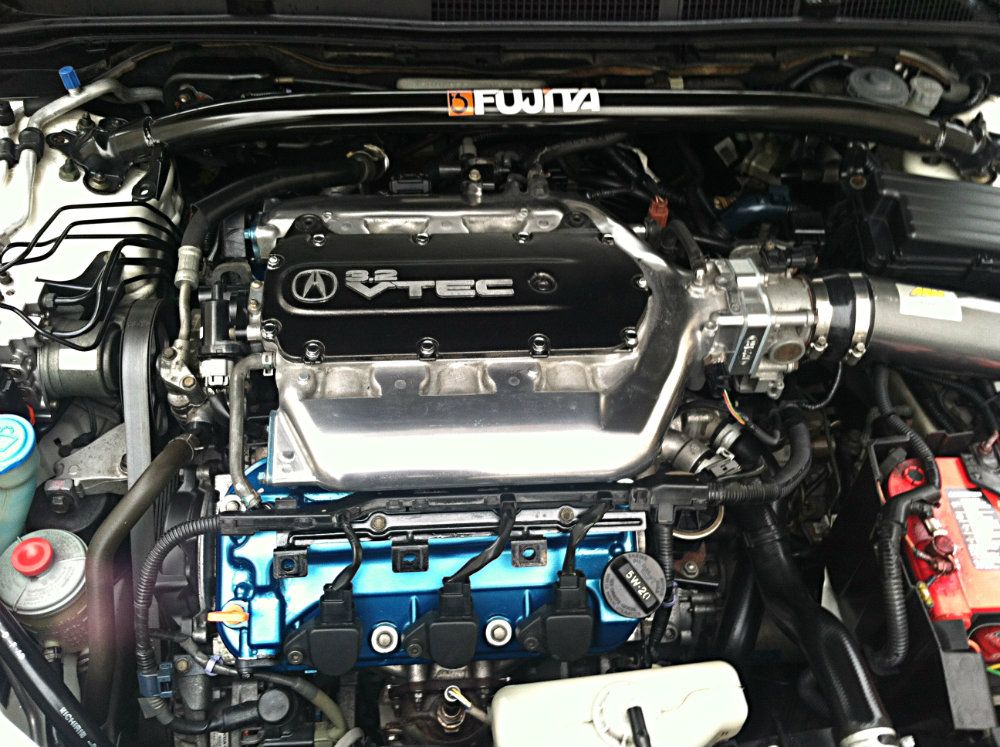
And the valve cover's with the finished clear coat with the intake manifold plate also finished..
Still got a long way to go. I have a few plastics to finish up on and the intake manifold is next for some work. The Comptech blower might get either polished by hand or painted or left alone.. I will see.. Stay tuned.
BTW SORRY FOR THE iPhone pictures.
(MY INSPIRATION was ERIC
)LET'S BEGIN!
Engine bay with cleaner sprayed on.
After a wash down and a half ass wipe down, I removed my intake and valve covers.
With valve covers off... they sure look YUMMY!
Next Spray paint used... (TEAL AND BLACK METALLIC PEARL)
Welcome to my professional paint booth.... A few coats of TEAL
Black metallic pearl on the under hood plastic's
I did the cover for the intake manifold same color but sanded down and polished best as possible the Acura 3.2 VTEC, then applied 3x clear coats.
As you can see, the UNFINISHED PRODUCT (Not sure what's going to happen with the cover yet...)
And the valve cover's with the finished clear coat with the intake manifold plate also finished..
Still got a long way to go. I have a few plastics to finish up on and the intake manifold is next for some work. The Comptech blower might get either polished by hand or painted or left alone.. I will see.. Stay tuned.
BTW SORRY FOR THE iPhone pictures.
The following 3 users liked this post by 04WDPSeDaN:
The following users liked this post:
04WDPSeDaN (01-11-2013)

The following users liked this post:
04WDPSeDaN (01-11-2013)
 You did use hi-temp paint right??
01-11-2013 | 12:13 AM
You did use hi-temp paint right??
01-11-2013 | 12:13 AM
#5
Looks like just regular engine paint
Looks awesome. Wish I had the energy! Hope it holds up though...
I used regular paint on my engine plastics and its held up fine for almost a year now. Not sure if those get as hot as the valve covers though... I'd love to lave them polished instead
Looks awesome. Wish I had the energy! Hope it holds up though...
I used regular paint on my engine plastics and its held up fine for almost a year now. Not sure if those get as hot as the valve covers though... I'd love to lave them polished instead
The following users liked this post:
04WDPSeDaN (01-11-2013)
The following users liked this post:
04WDPSeDaN (01-11-2013)

Trending Topics
01-11-2013 | 07:26 AM
#8
Hi temp heat primer, reg paint, high temp clear coat.
I was full aware about the paint, and didn't really care about it.
After breakfast, back to painting then working on the intake manifold to see what i can accomplish.. Will be back later. Enjoy yourselves.
I was full aware about the paint, and didn't really care about it.
After breakfast, back to painting then working on the intake manifold to see what i can accomplish.. Will be back later. Enjoy yourselves.
01-11-2013 | 09:34 PM
#9
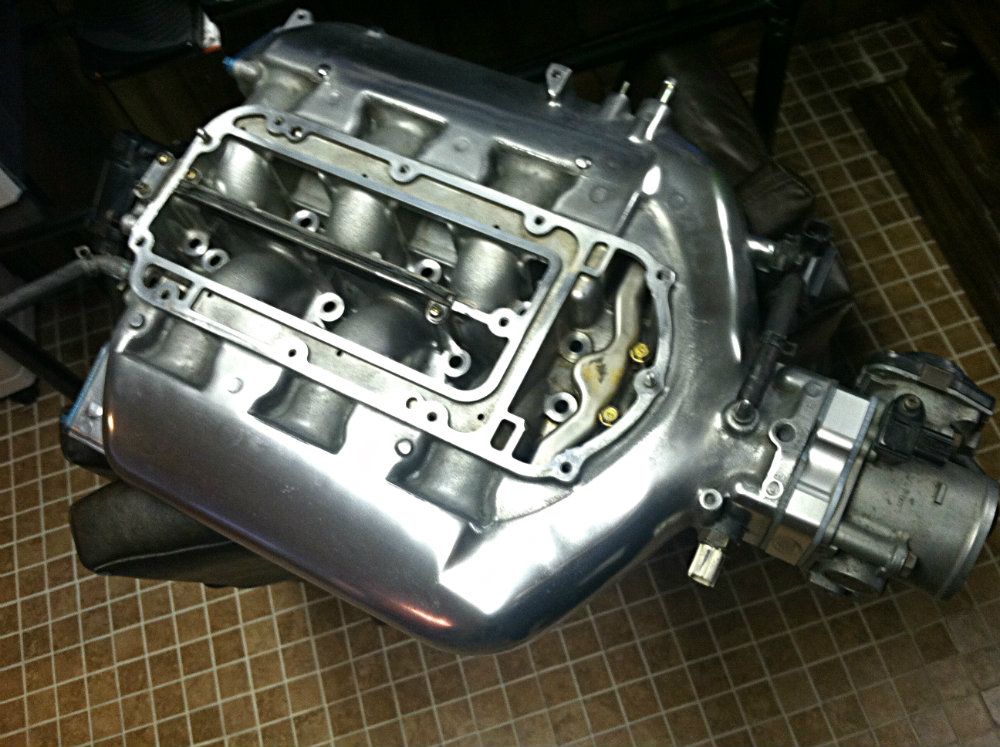
Well, Long day today... Took a very long time to polish the intake manifold. Went from 80-4000 grit. I have a few spots left to get into before polishing the manifold to a chrome look.
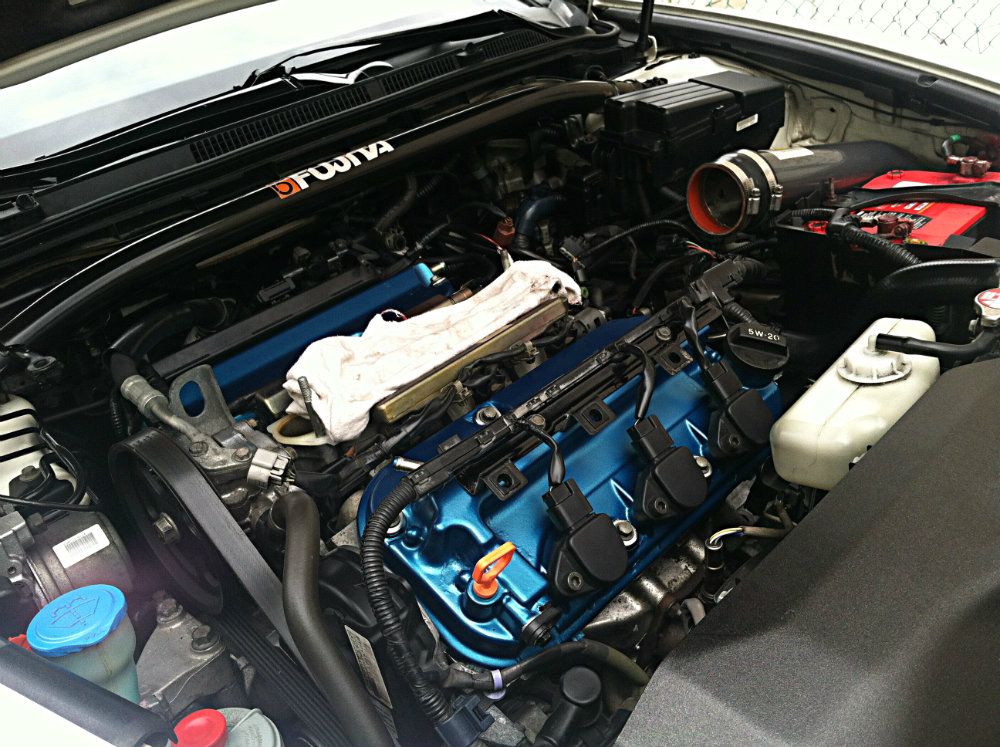
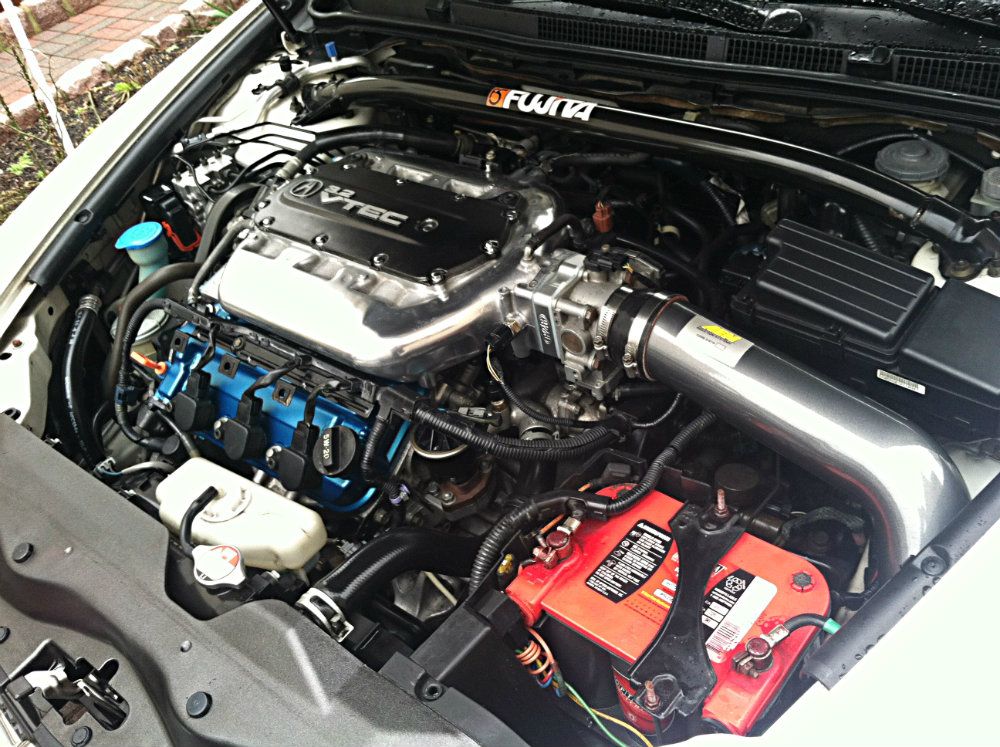
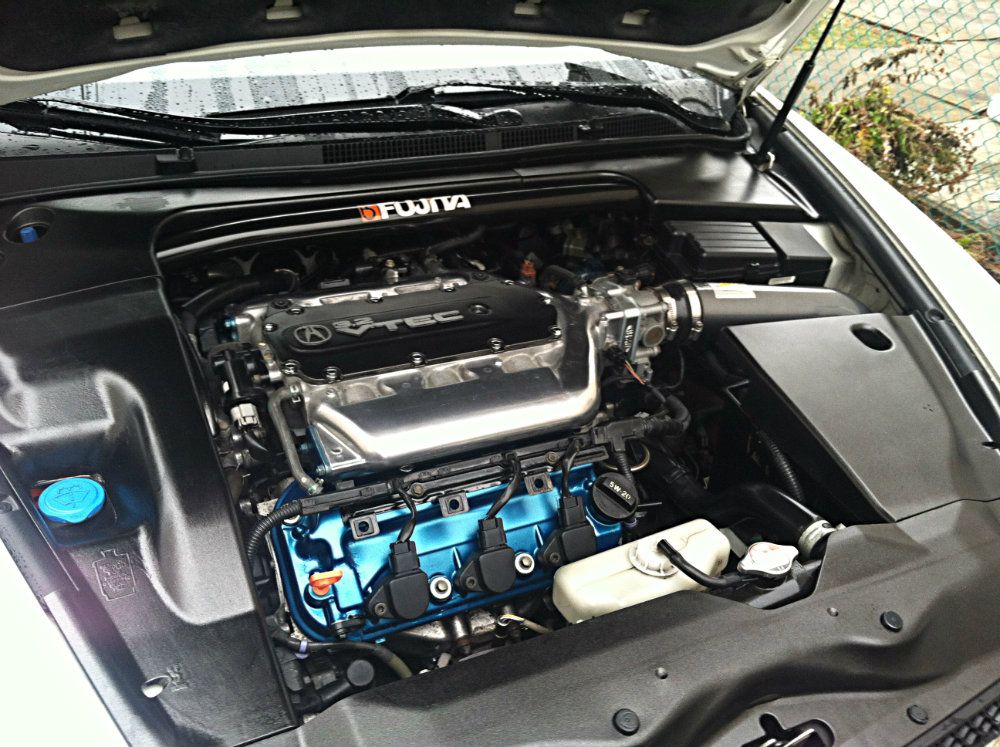
Install the Valve covers after a final coat of clear, then I cleaned up engine bay even better and snapped some pictures.
So... I wanted to polished my intake manifold.. I have done this before with the maxima where I polished a lot of engine (Intake manifold, timing change cover, p/s line ect ect)
I also have fixed the lips on my work wheels, with this same process. It's a long task but worth it. I am not finished yet, took a break for the night.
The following users liked this post:
04WDPSeDaN (01-12-2013)
The following users liked this post:
04WDPSeDaN (01-12-2013)
01-12-2013 | 11:15 AM
#14
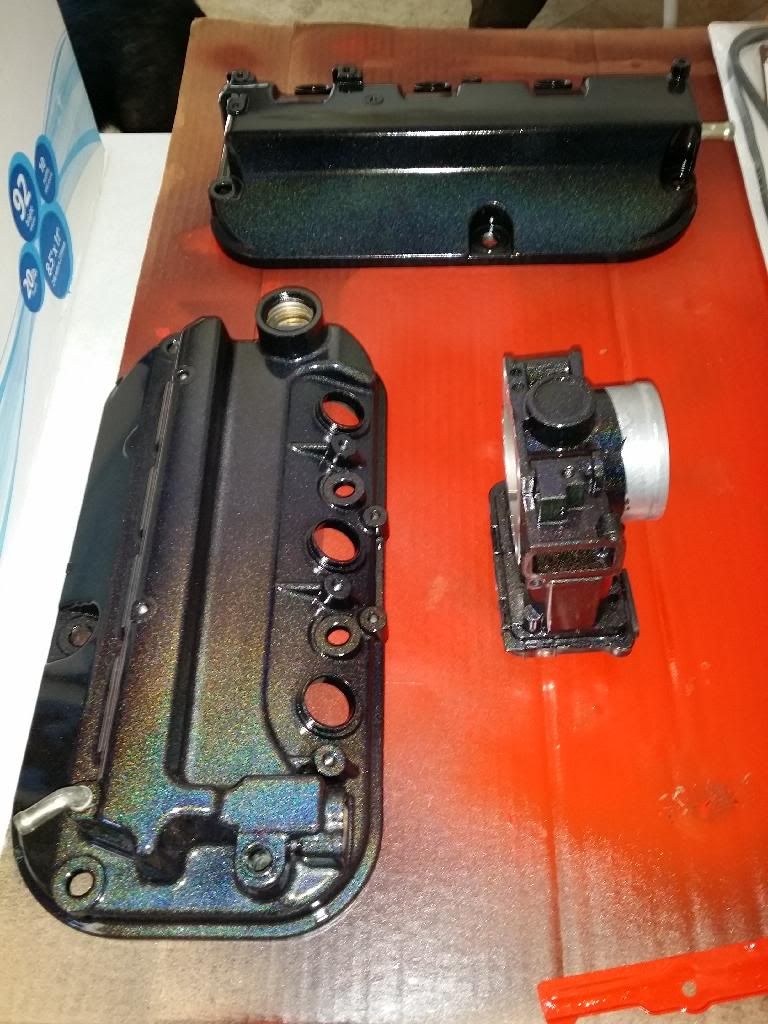
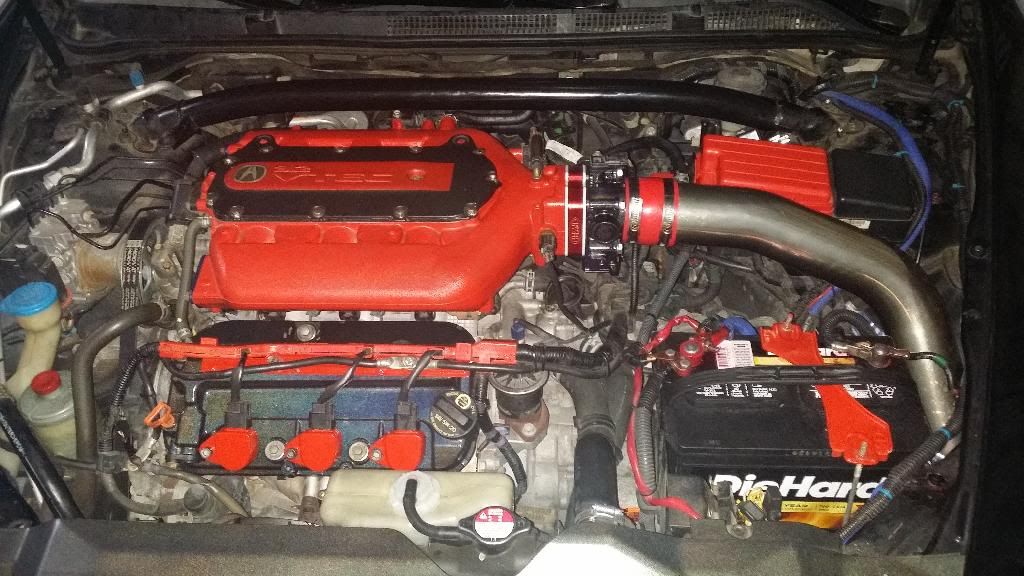
Alright, I finished the intake manifold. I polished the shit out of it. The end caps on the intake manifold were painted TEAL and clear coated, the rest of the intake ports and center were cleaned out very well. I left the TB alone, it would be easy to polish it but with the blower on you won't notice.. The covers are installed and were painted a black metallic paint, hard to see it in pictures, but wont be on when the S/C is installed...
Debating on polishing the supercharger.. I gotta see how how smooth the finish is, and if its already coated with anything. I know only a very few people have attempted it, but I got time to mess around with it.. Well, Enjoy the pictures.
Debating on polishing the supercharger.. I gotta see how how smooth the finish is, and if its already coated with anything. I know only a very few people have attempted it, but I got time to mess around with it.. Well, Enjoy the pictures.
The following users liked this post:
04WDPSeDaN (01-12-2013)
The following users liked this post:
04WDPSeDaN (01-14-2013)
The following users liked this post:
04WDPSeDaN (01-14-2013)
01-14-2013 | 09:24 AM
#25
The heavy sanding was done by the sander and all the wet sanding, buffing was by hand. This intake manifold is very rough with a lot of high spots, you have to get down to smooth surface to polish it out. Anything on the casting that's higher up from the surface must be sanded down.. it's a long task, worth it in the end.
I decided to leave the blower unit alone as I don't want to really tamper with it. I would like to throw on color with some polish but when I decide to part ways I think it would hurt the resale.
I decided to leave the blower unit alone as I don't want to really tamper with it. I would like to throw on color with some polish but when I decide to part ways I think it would hurt the resale.
01-15-2013 | 12:05 PM
#26
UPDATE:
I decided to mess with the blower. I removed the side and bottom elbows and polish them, then use a high temp black gloss paint on the blower barrel while leaving the silver fins alone and polished the blower shaft. Long process again, but worth it. I did a lot of research on line, lots of people fully polished the blower or just fully painted the barrel black. Not to take anyone's credit, I wanted to be different, enjoy!
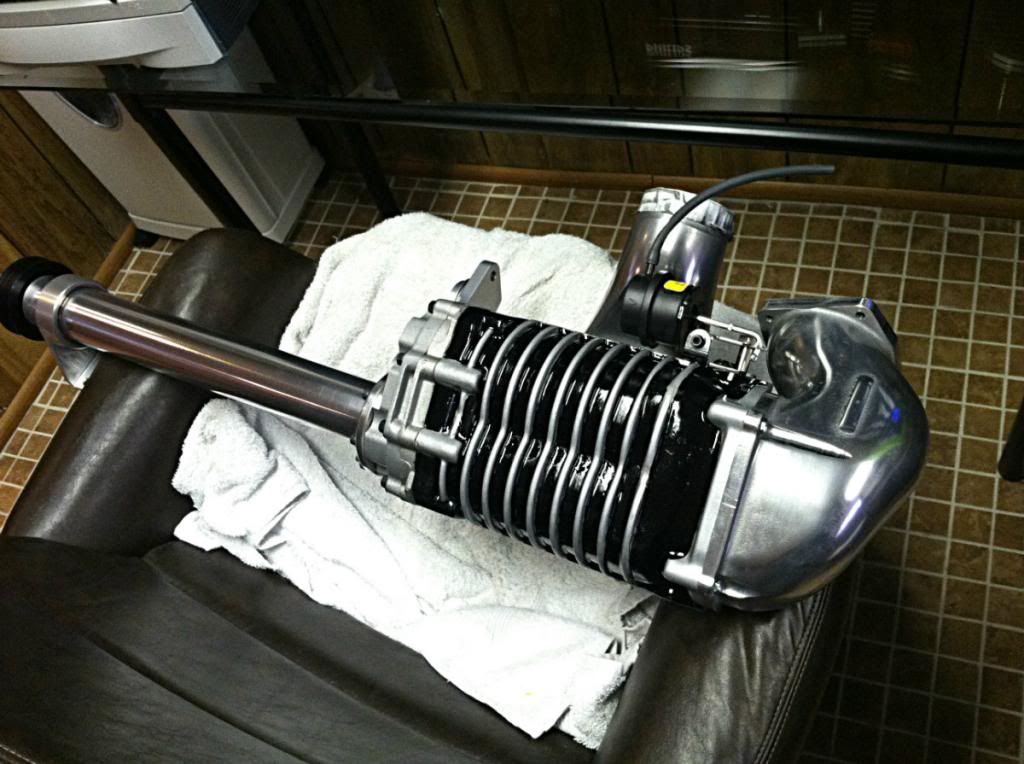
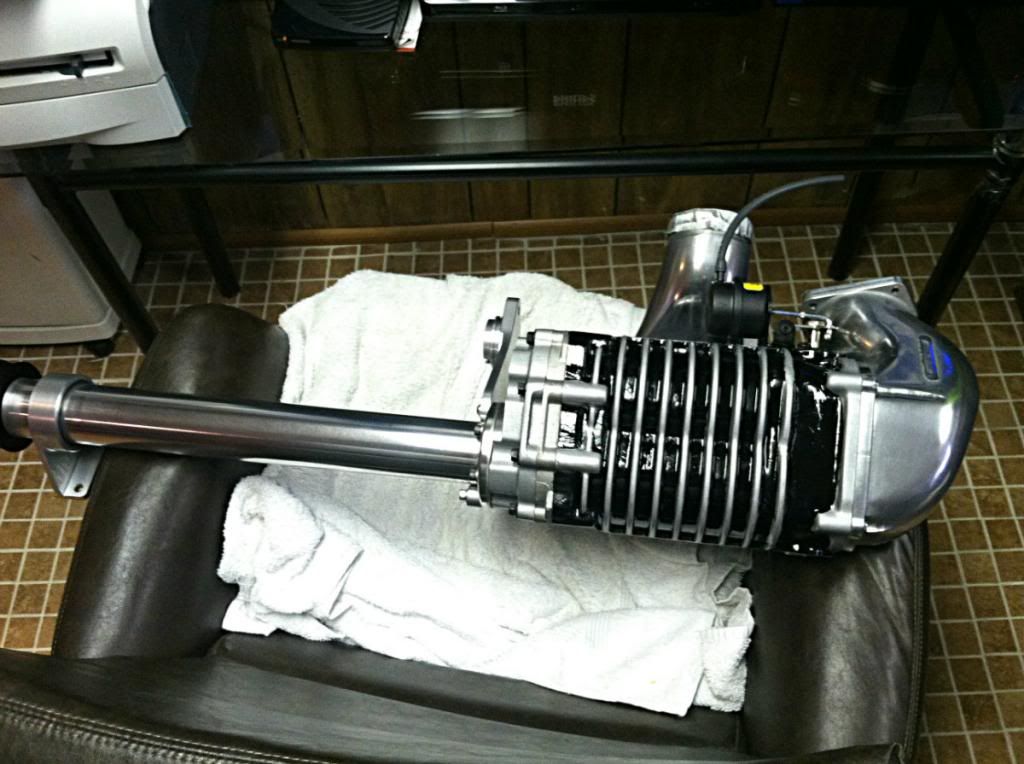

I decided to mess with the blower. I removed the side and bottom elbows and polish them, then use a high temp black gloss paint on the blower barrel while leaving the silver fins alone and polished the blower shaft. Long process again, but worth it. I did a lot of research on line, lots of people fully polished the blower or just fully painted the barrel black. Not to take anyone's credit, I wanted to be different, enjoy!
The following users liked this post:
04WDPSeDaN (01-18-2013)
01-08-2014 | 07:06 PM
#29
What color
Inspired by your pics,thanks.
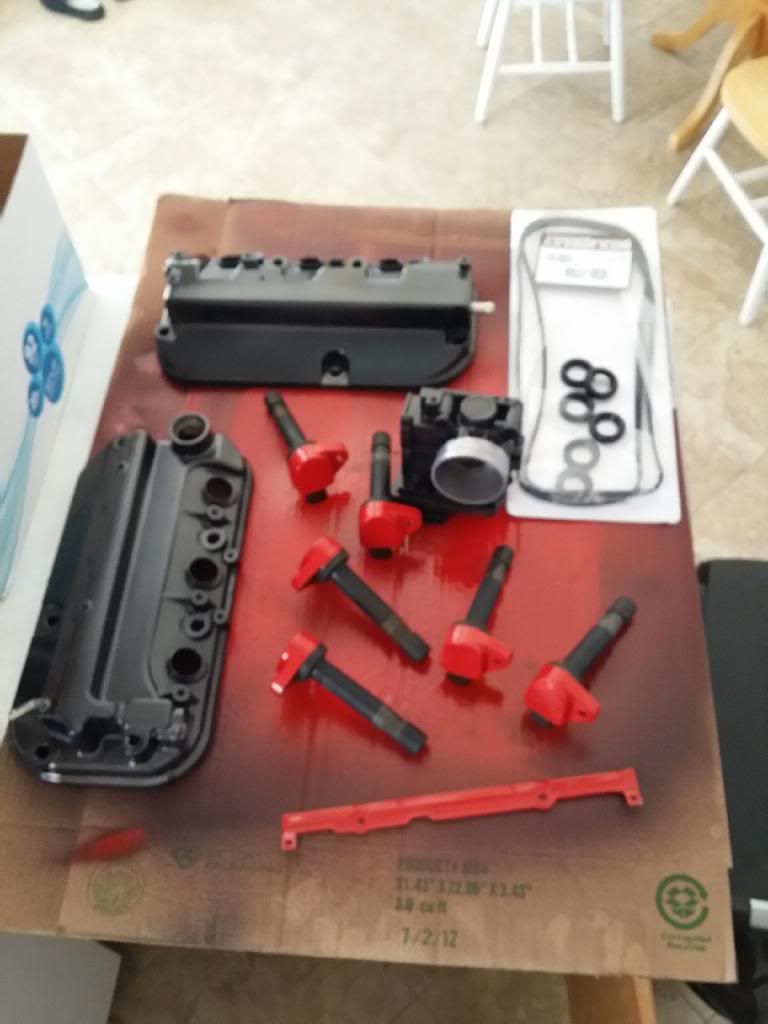
As predicted lots of red. I found some oil leaking out of the 2 front valve cover bolts so time to replace the gaskets. Was thinking of doing the valve covers red or black,thoughts? Also is it a good idea to bake these for 15-20 minutes at 200 F? Never baked parts before only heat gun but am considering it. A little worried about the smell, damage to the over, and taste of any food I cook in there afterwards.
Current
Last edited by Sezniko; 01-08-2014 at 07:08 PM. Reason: forgot something
The following users liked this post:
04WDPSeDaN (02-09-2014)
The following users liked this post:
04WDPSeDaN (02-09-2014)
The following users liked this post:
04WDPSeDaN (02-09-2014)
02-08-2014 | 04:58 PM
#33
Steven -Had to miss the show due to a wedding then got a house so been keeping busy.
Finished replacing valve covers and doing a valve adjustment, now I have pictures to share https://acurazine.com/forums/3g-tl-2004-2008-93/valve-adjustment-pics-854094/
Painted the valve covers,throttle body,and spark plug covers. Baked the valve covers which turned out nice but still able to chip off. Used engine enamel black with Clear Effx on top.
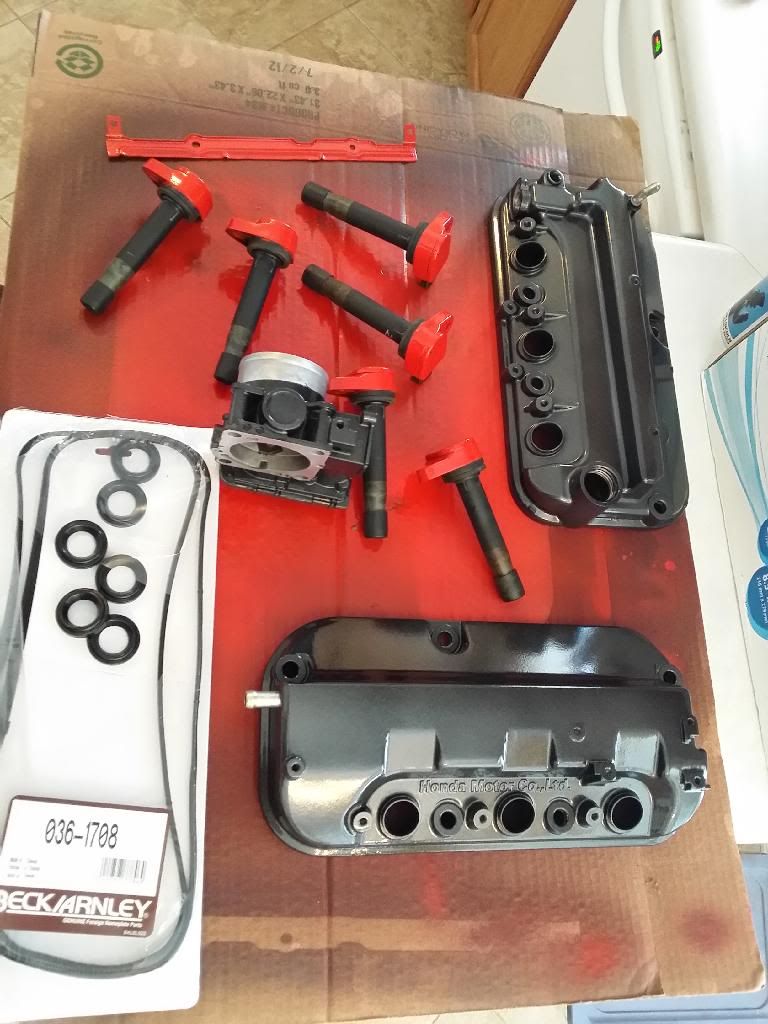
DONE
I'll take more when it warms up outside.
Finished replacing valve covers and doing a valve adjustment, now I have pictures to share https://acurazine.com/forums/3g-tl-2004-2008-93/valve-adjustment-pics-854094/
Painted the valve covers,throttle body,and spark plug covers. Baked the valve covers which turned out nice but still able to chip off. Used engine enamel black with Clear Effx on top.


DONE

I'll take more when it warms up outside.

The following 2 users liked this post by cjTL:
04WDPSeDaN (02-09-2014),
thoiboi (02-11-2014)

The following 3 users liked this post by Noober:
The following users liked this post:
04WDPSeDaN (02-09-2014)
02-09-2014 | 06:59 PM
#40
Inspired by your pics,thanks.
As predicted lots of red. I found some oil leaking out of the 2 front valve cover bolts so time to replace the gaskets. Was thinking of doing the valve covers red or black,thoughts? Also is it a good idea to bake these for 15-20 minutes at 200 F? Never baked parts before only heat gun but am considering it. A little worried about the smell, damage to the over, and taste of any food I cook in there afterwards.
Current
Thank you
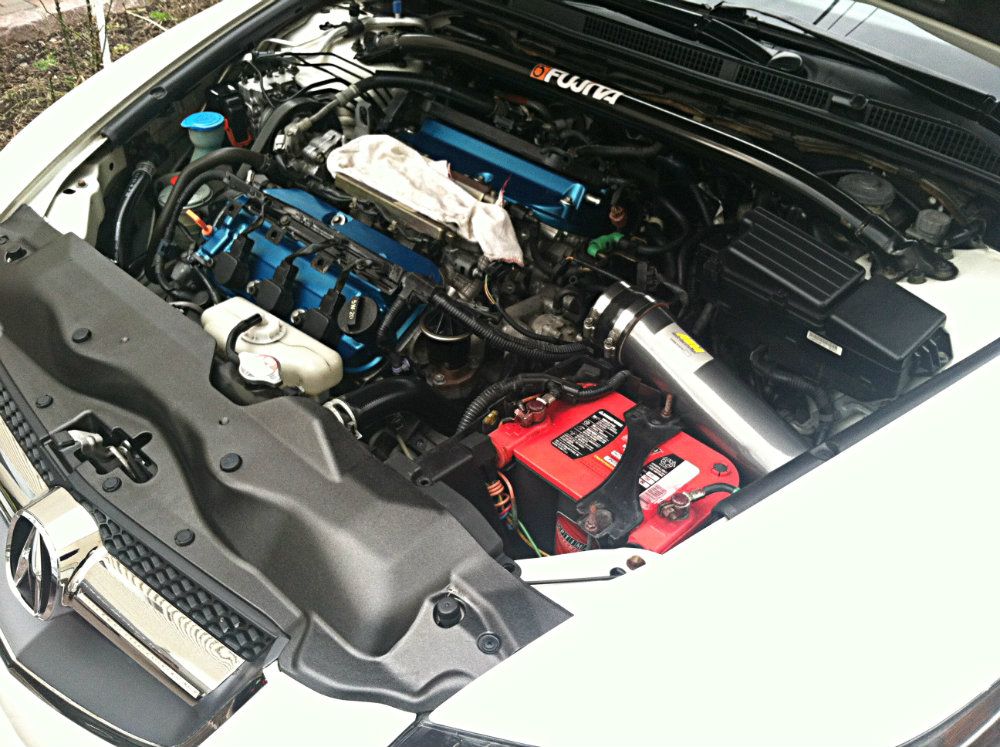
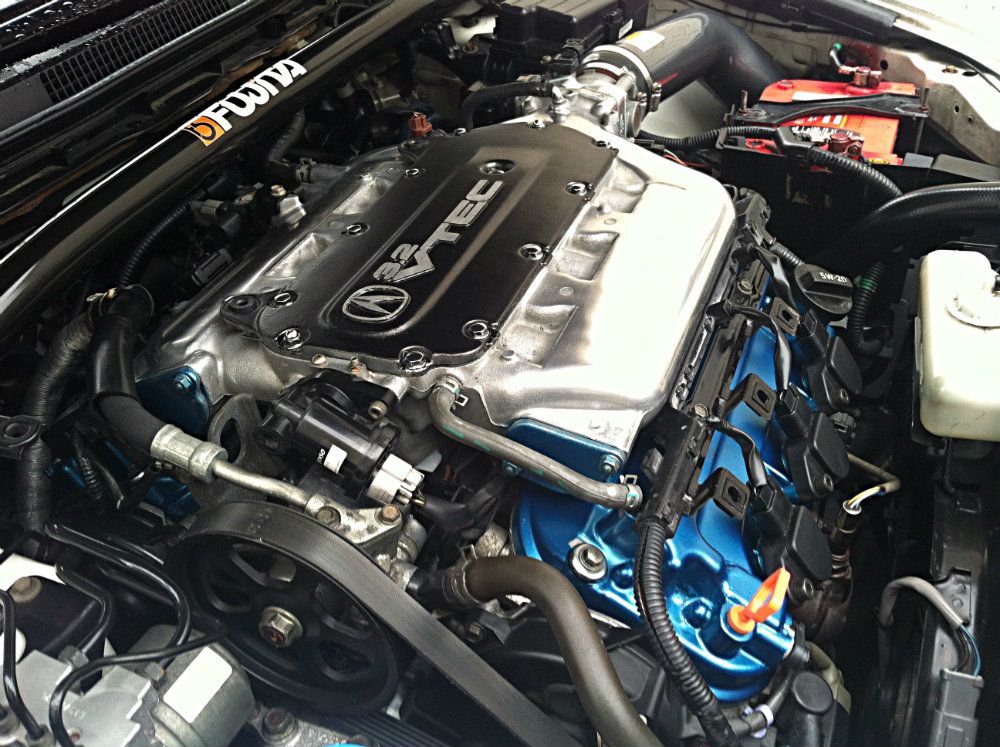
Here are photos with the blower installed.


The following users liked this post:
Undying Dreams (02-13-2014)