Got my carbon fiber interior and custom taillights installed
 04-20-2012, 06:56 PM
#1
Burning Brakes
Thread Starter
iTrader: (3)
Got my carbon fiber interior and custom taillights installed
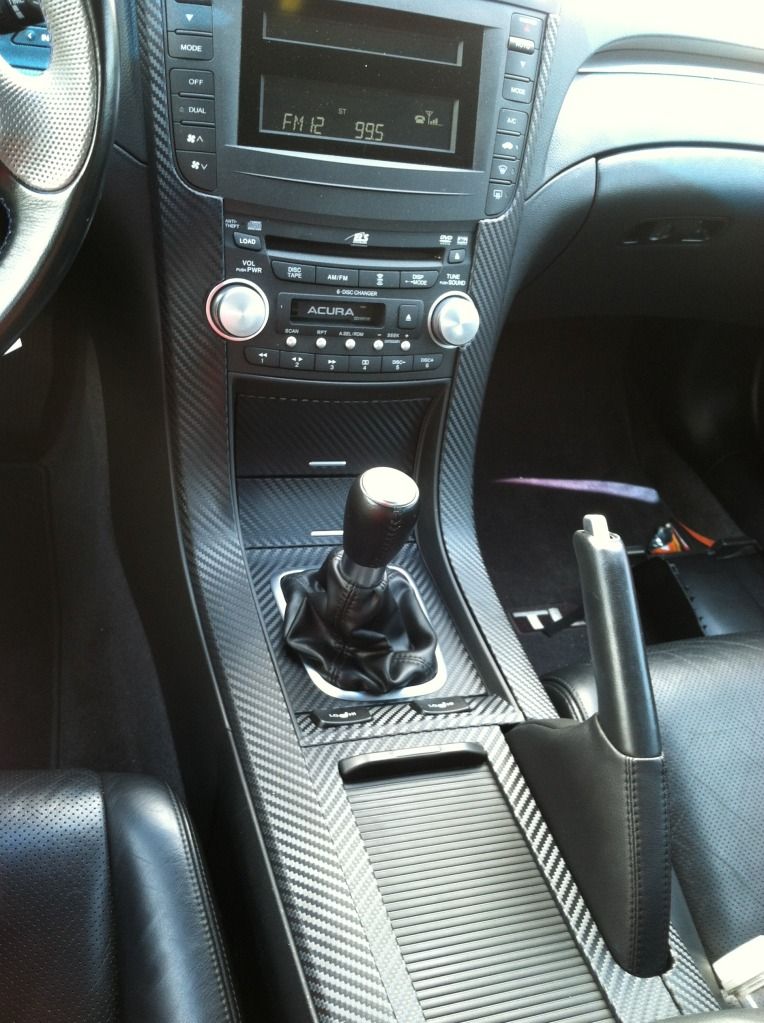
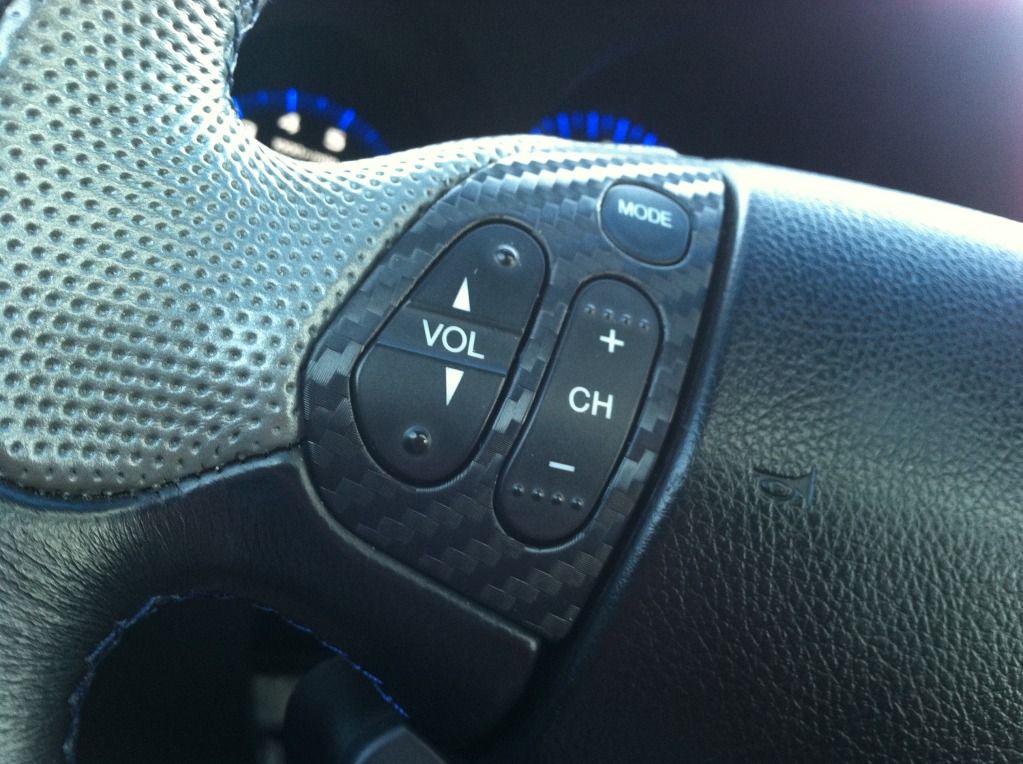
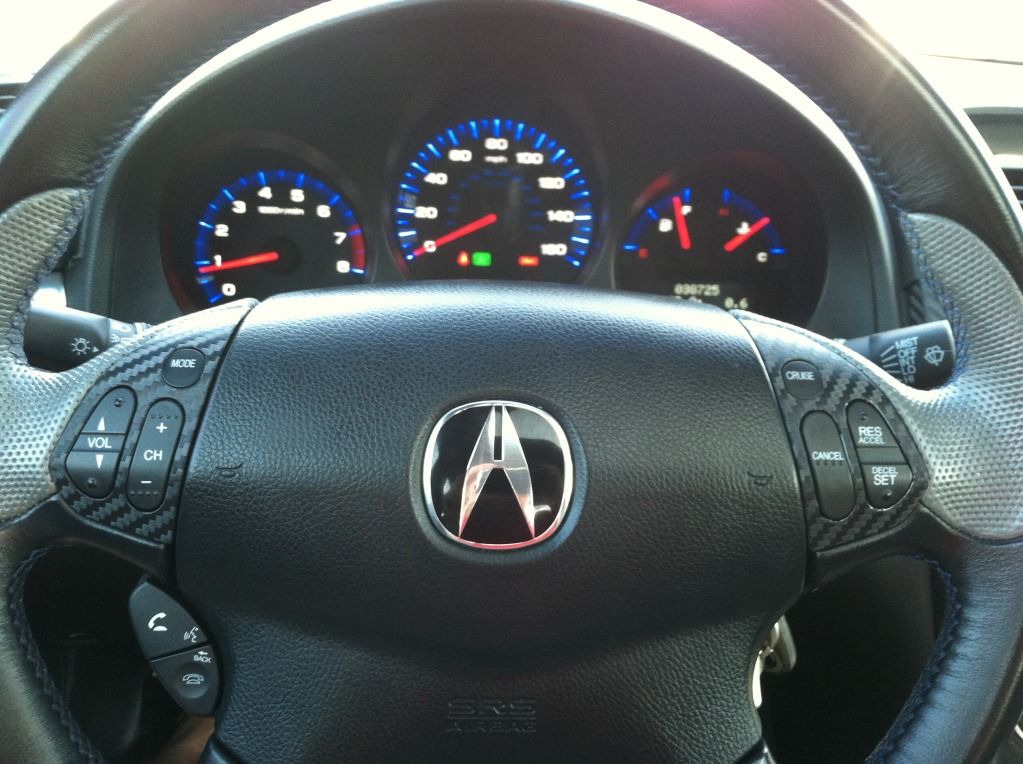
I did the interior pieces last weekend, it was pretty easy with the 3M DiNoc stuff- but you HAVE to have a heat gun to get it to fit the curves. Im gonna do the fake CF pieces in the doors soon...
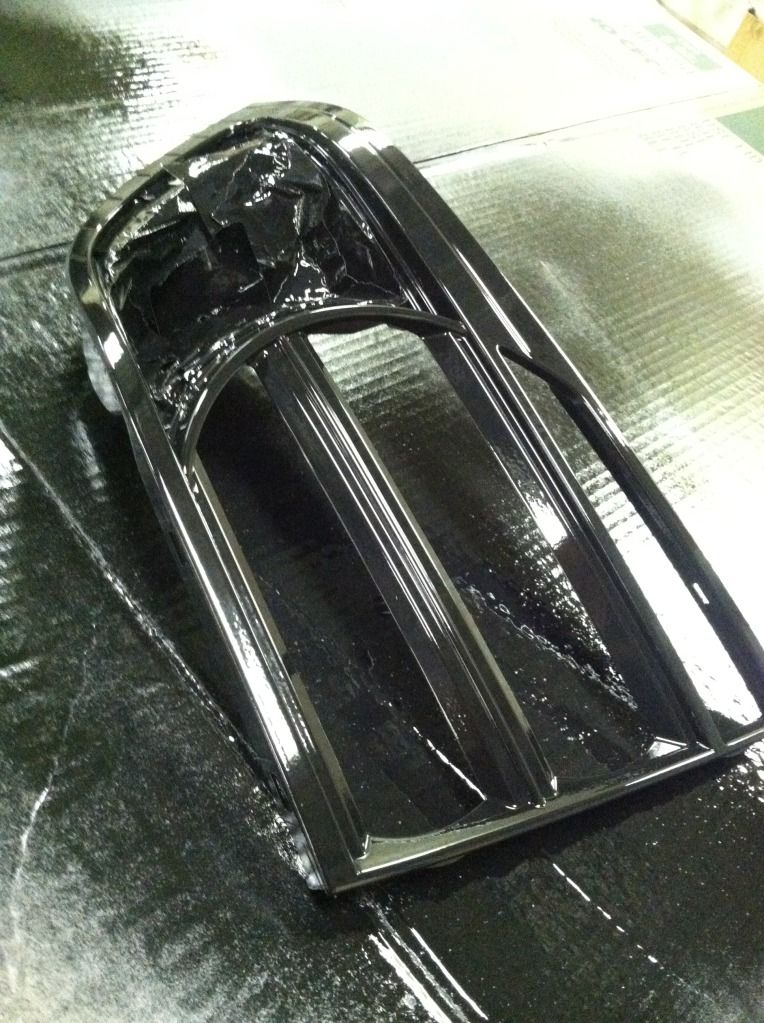
Now the taillights were a different story. First of all, I accidentally ordered eagle eyes lights- I sent them back because they looked like shit. Then a week or 2 later I finally got my DEPO 07-08 base lights and cut them up. This was like a week long process because I live in the barracks on a military base and I dont have a nice big garage to work in. I had to cut the lights apart on my lunch break at work, then I had to go to the hobby shop across base to paint the parts black... They went together pretty easy, but having them sit around for a week back and forth from my car, to my room, to work, to the hobby shop, etc... wasnt good because they got some shit in the lenses. Its not noticeable unless youre close up, but Im a perfectionist when it come to my car so it bugs me. Oh well... I have to take them off and re-seal because after I washed it today they were leaking a little. I dont know how because I epoxied the absolute shit out of them??? Hopefully the 30 packets of silica I put in there will help a bit
So- this is the first and last time I will be doing custom taillights myself. I shouldve listened to everyone else and just sent them to Ack to get em done, but Im poor cause Im in the military.
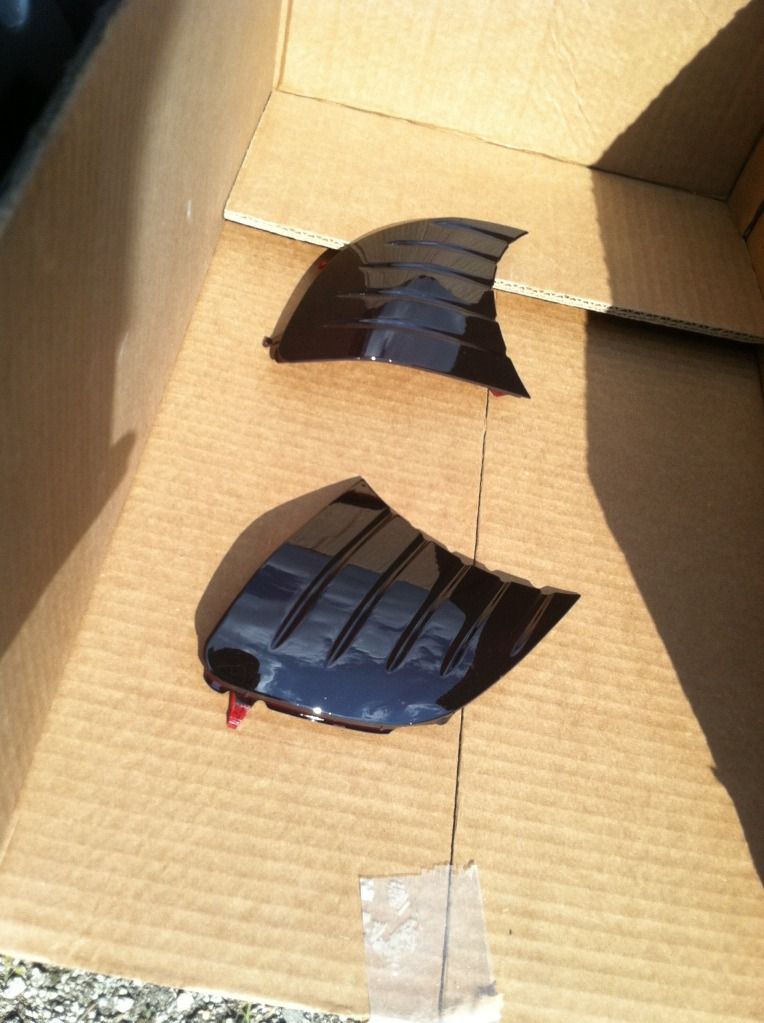
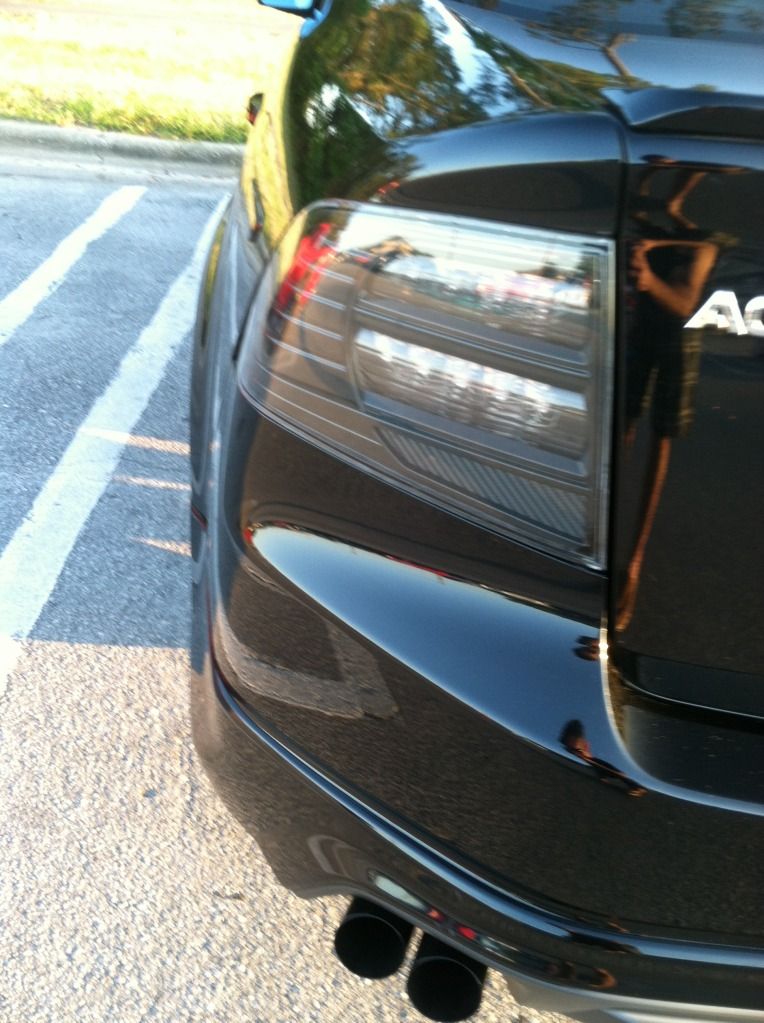
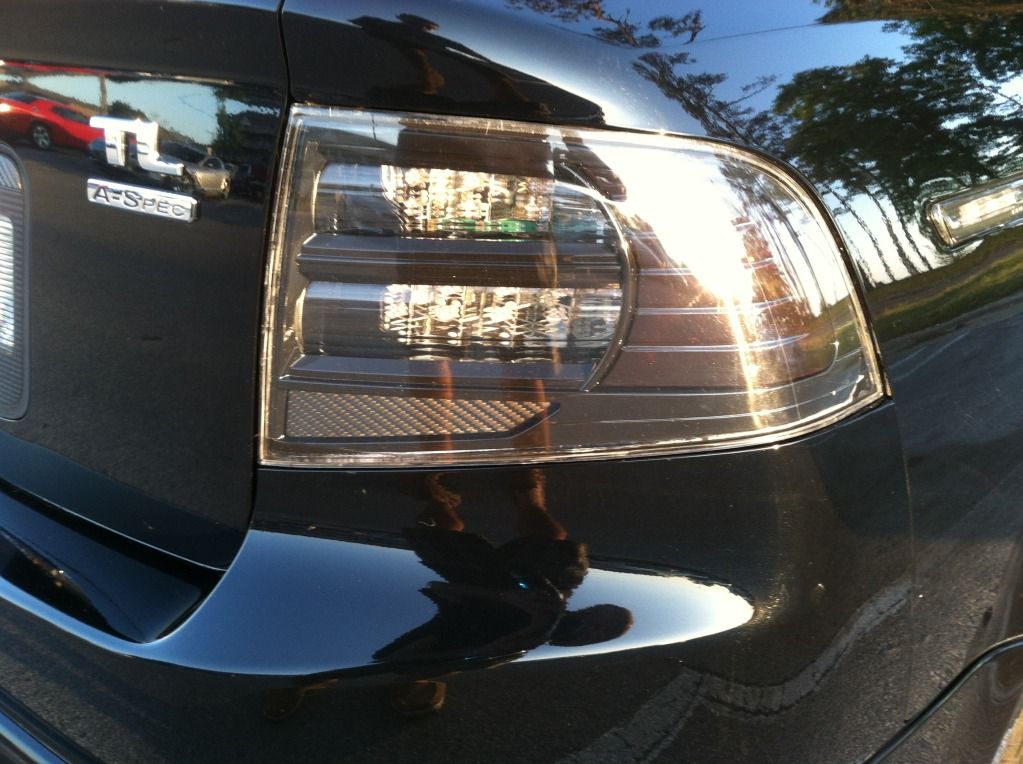
I removed the diffusers, painted the bezel gloss black, tinted the turn signal lens, and put carbon fiber over the reflector. Ill take some shots in the dark a little later. On to the pics:


Now the taillights were a different story. First of all, I accidentally ordered eagle eyes lights- I sent them back because they looked like shit. Then a week or 2 later I finally got my DEPO 07-08 base lights and cut them up. This was like a week long process because I live in the barracks on a military base and I dont have a nice big garage to work in. I had to cut the lights apart on my lunch break at work, then I had to go to the hobby shop across base to paint the parts black... They went together pretty easy, but having them sit around for a week back and forth from my car, to my room, to work, to the hobby shop, etc... wasnt good because they got some shit in the lenses. Its not noticeable unless youre close up, but Im a perfectionist when it come to my car so it bugs me. Oh well... I have to take them off and re-seal because after I washed it today they were leaking a little. I dont know how because I epoxied the absolute shit out of them??? Hopefully the 30 packets of silica I put in there will help a bit
So- this is the first and last time I will be doing custom taillights myself. I shouldve listened to everyone else and just sent them to Ack to get em done, but Im poor cause Im in the military.
I removed the diffusers, painted the bezel gloss black, tinted the turn signal lens, and put carbon fiber over the reflector. Ill take some shots in the dark a little later. On to the pics:
Last edited by Turbocoop; 04-20-2012 at 06:58 PM.
 04-20-2012, 07:22 PM
#4
Team Owner
iTrader: (2)
Join Date: Jan 2008
Location: Kansas City, MO (Overland Park, KS)
Posts: 36,545
Received 6,470 Likes
on
5,162 Posts
Those look excellent Turbo, especially for your color TL! They are very similar to the one's I just got from Ack. Mine go on Sunday.
The following users liked this post:
Turbocoop (04-20-2012)
The following users liked this post:
Aretardedorange (04-22-2012)
04-20-2012, 07:48 PM
#7
Moderator
iTrader: (3)
Nicely done sir  Hopefully I can see that beast in person sometime!
Nice plaid shorts
Hopefully I can see that beast in person sometime! Nice plaid shorts
The following users liked this post:
Turbocoop (04-20-2012)
Trending Topics
The following users liked this post:
Turbocoop (04-20-2012)
04-20-2012, 08:13 PM
#9
Burning Brakes
Thread Starter
iTrader: (3)
Yeah its 38K miles, I got lucky as hell finding it. The price was even better...
The silica packets are doing wonders- the insides are completely dry already, Im still gonna take em back off and try to seal em better though.
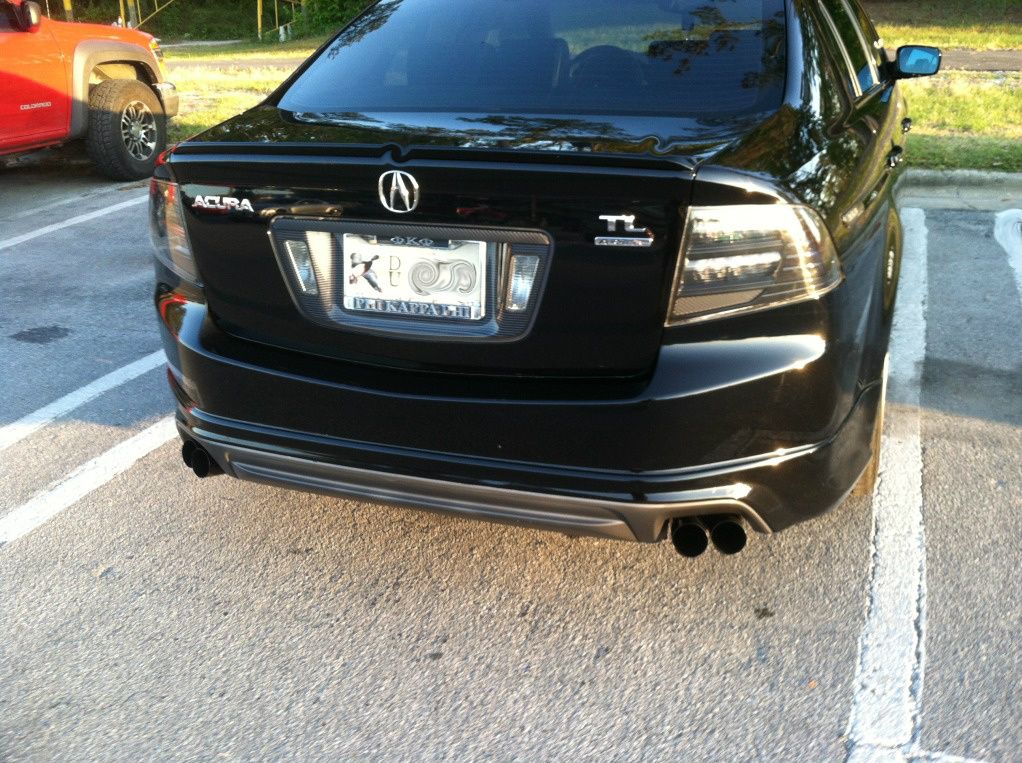
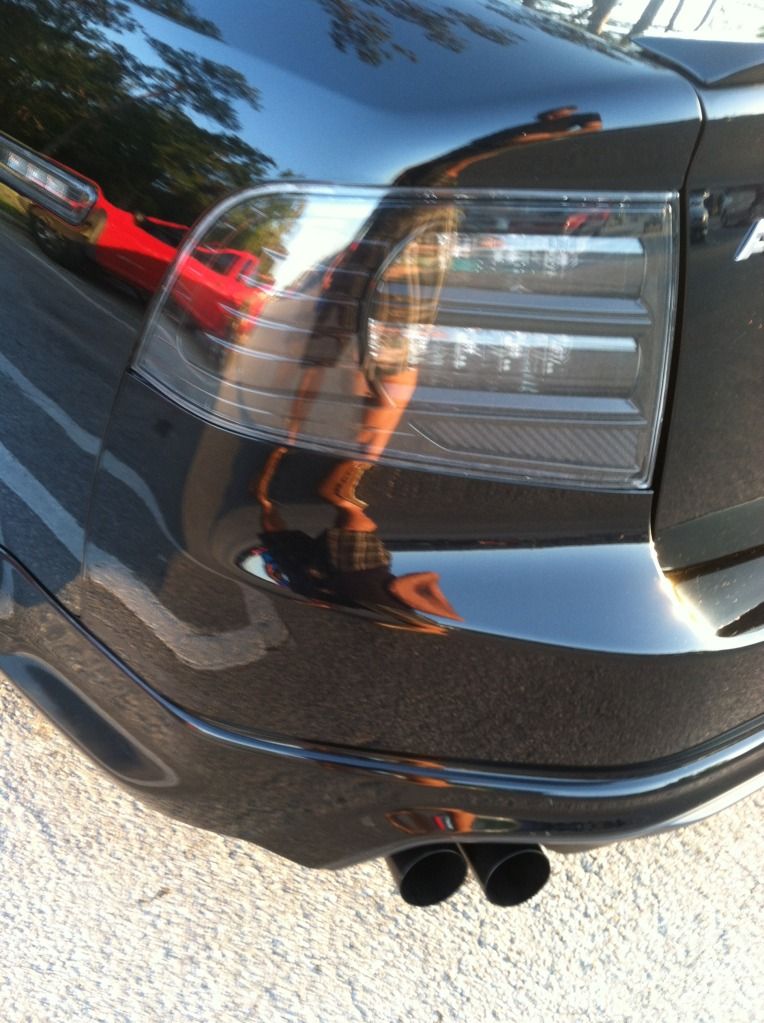
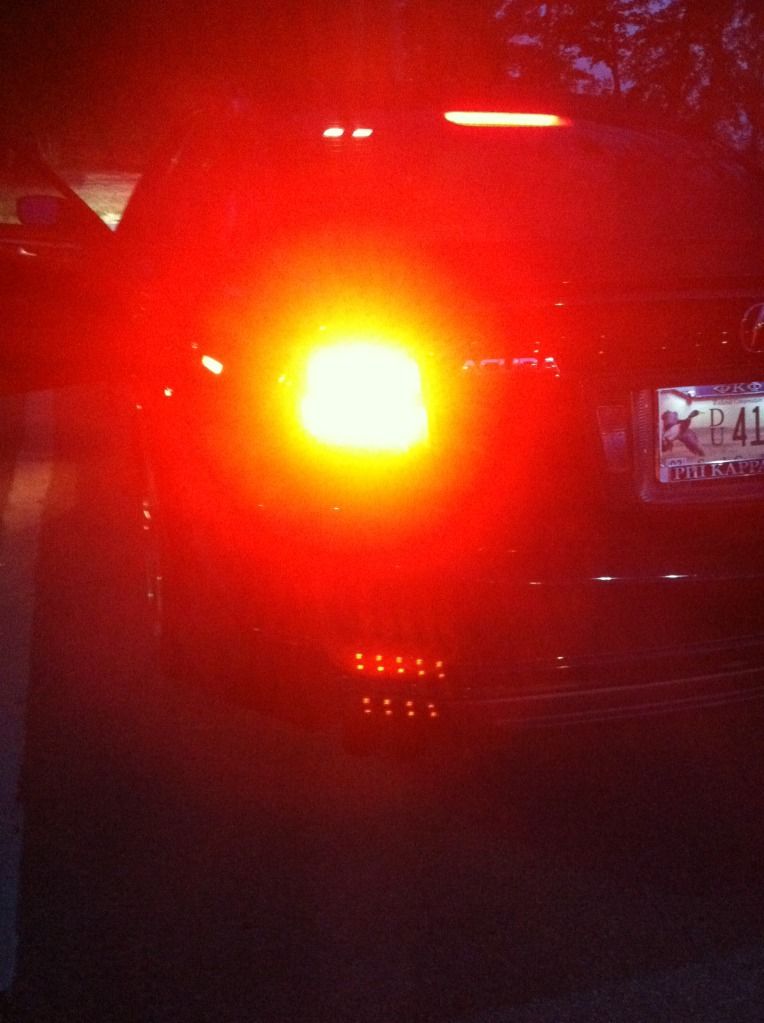
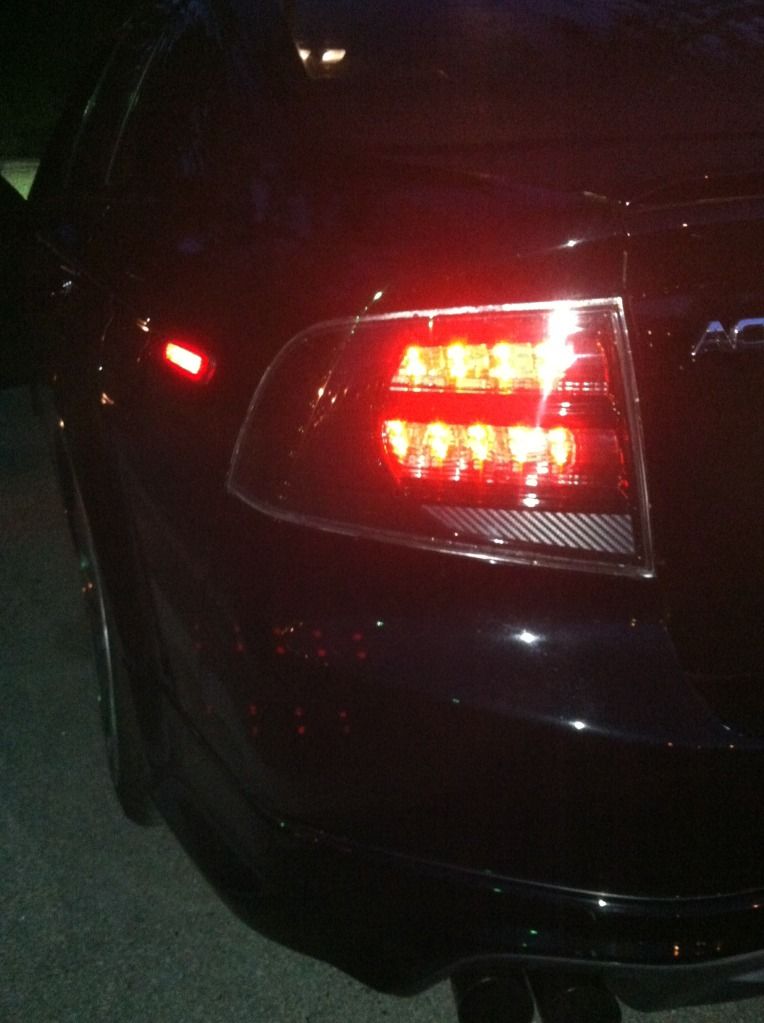
turn signal
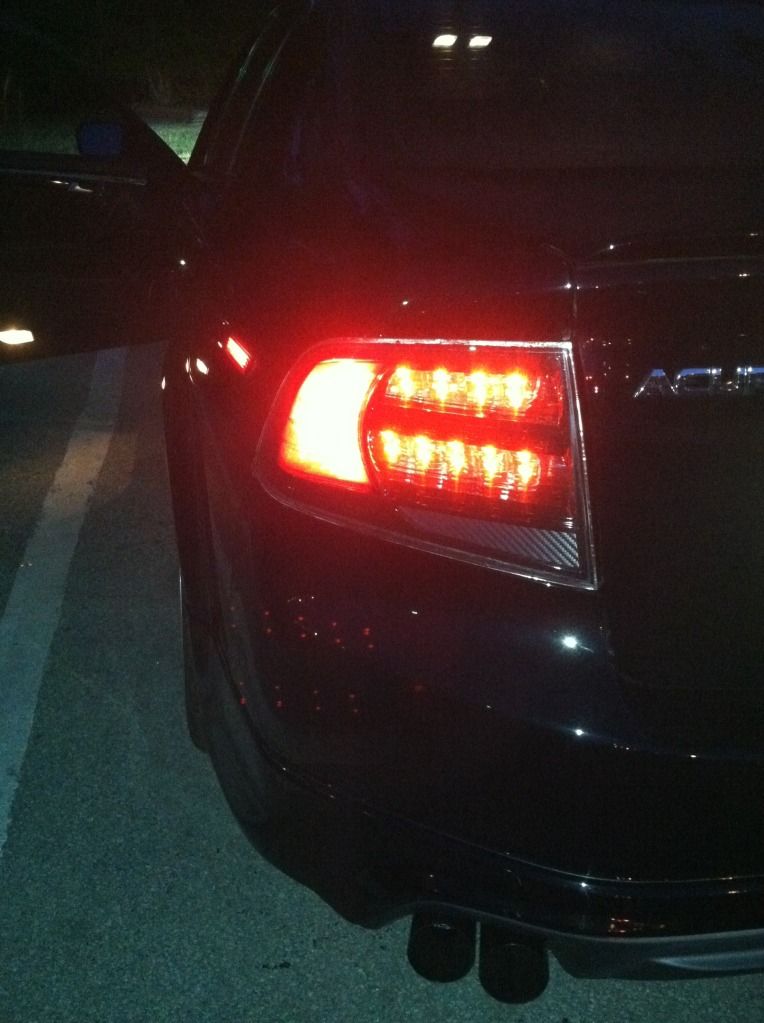
with brakes(sorry shitty pic)
without brakes applied
The silica packets are doing wonders- the insides are completely dry already, Im still gonna take em back off and try to seal em better though.
turn signal
with brakes(sorry shitty pic)
without brakes applied
04-20-2012, 08:18 PM
#10
Moderator
iTrader: (3)
That CF looks sick!
The following users liked this post:
Turbocoop (04-21-2012)
The following users liked this post:
Turbocoop (04-21-2012)
04-20-2012, 10:08 PM
#13
Why does it piss me off that you're in the military and poor...wtf. Could there be a more important job?
Anyway, thank you sir, for your service and dedication to modding. I tried to cut open an old cracked spare set to practice and what do you know...it sucked...I couldn't figure out where cutting it would make me not cringe or crack lense when pulling apart. SO. I gave up...
IMO, like with headlights, while open, humidity is introduced...it just needs to be reacclimated...I think resealing will be a waste of your time and not necessary...if you still have the problem in a month, maybe, but give it some sun/night cycles first.
J.
The following users liked this post:
Turbocoop (04-21-2012)
04-20-2012, 10:48 PM
#15
Safety Car
I'd get pulled over all the time if I had those tails. Nice interior work though. Flows really nice and it looks really clean.

The following users liked this post:
Turbocoop (04-21-2012)
04-21-2012, 09:09 AM
#17
Burning Brakes
Thread Starter
iTrader: (3)
Why does it piss me off that you're in the military and poor...wtf. Could there be a more important job?
Anyway, thank you sir, for your service and dedication to modding. I tried to cut open an old cracked spare set to practice and what do you know...it sucked...I couldn't figure out where cutting it would make me not cringe or crack lense when pulling apart. SO. I gave up...
IMO, like with headlights, while open, humidity is introduced...it just needs to be reacclimated...I think resealing will be a waste of your time and not necessary...if you still have the problem in a month, maybe, but give it some sun/night cycles first.
J.
Anyway, thank you sir, for your service and dedication to modding. I tried to cut open an old cracked spare set to practice and what do you know...it sucked...I couldn't figure out where cutting it would make me not cringe or crack lense when pulling apart. SO. I gave up...
IMO, like with headlights, while open, humidity is introduced...it just needs to be reacclimated...I think resealing will be a waste of your time and not necessary...if you still have the problem in a month, maybe, but give it some sun/night cycles first.
J.
Im not gonna cut em back open, I think ill just spray soapy water around th epoxy and blow air into the turn signal bulb hole and see if there are any leaks (just like you do to find a tire leak). If theres no leaks around the edges its gotta be the foam gasket that seals the opening for the harness plugs, and Ill have to double em up or something. I think they will be ok because I put 15 silica packs in each one, I jsut dont want water to keep pouring in every time I wash it or it rains...
04-21-2012, 09:13 AM
#18
Burning Brakes
Thread Starter
iTrader: (3)
When doing the interior I just took all the pieces out of the car and brought em inside, including the steering wheel pieces. You have to use a heat gun, you will never be able to get it to fit good and smooth without one. I got mine for $15 at harbor freight and it works perfect. For the little compartments that open up under the radio- take two little screws off the top of em, youll see em when you take the dash part out. Then you can remove the little fake CF metal covers and put the overlay on them.
04-21-2012, 09:38 AM
#19
Suzuka Master
iTrader: (1)
Wow what a interior... nice
Why don't you get LED's for interior
Why don't you get LED's for interior
The following users liked this post:
Turbocoop (04-21-2012)
The following users liked this post:
Turbocoop (04-21-2012)
04-21-2012, 08:09 PM
#21
Burning Brakes
Thread Starter
iTrader: (3)
I was thinkin about it, I might do it eventually. I just dont have the time or money right now.
Im gonna take the lights back off tomorrow and see if I can re-seal em and fix the fitment issues. Has anyone ever had problems with the LED boards after some water gets in there? Thats what Im most afraid of- one light has about a 1/4" of water in the bottom cause its raining tonight...
Im gonna take the lights back off tomorrow and see if I can re-seal em and fix the fitment issues. Has anyone ever had problems with the LED boards after some water gets in there? Thats what Im most afraid of- one light has about a 1/4" of water in the bottom cause its raining tonight...
04-22-2012, 12:50 AM
#22

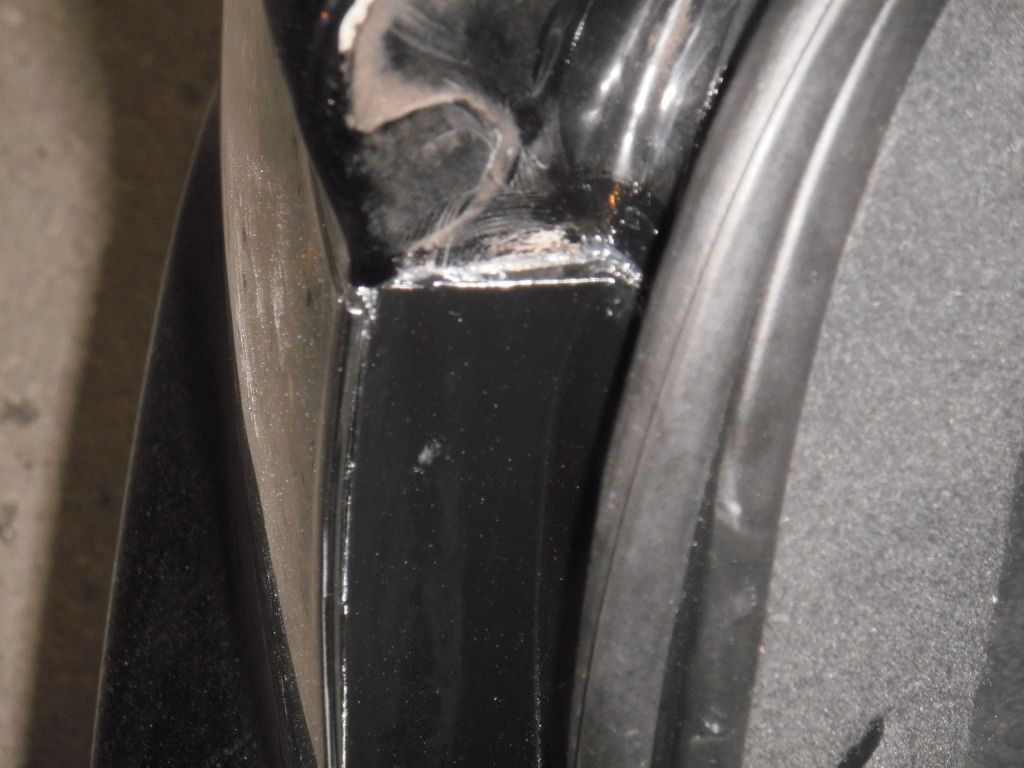
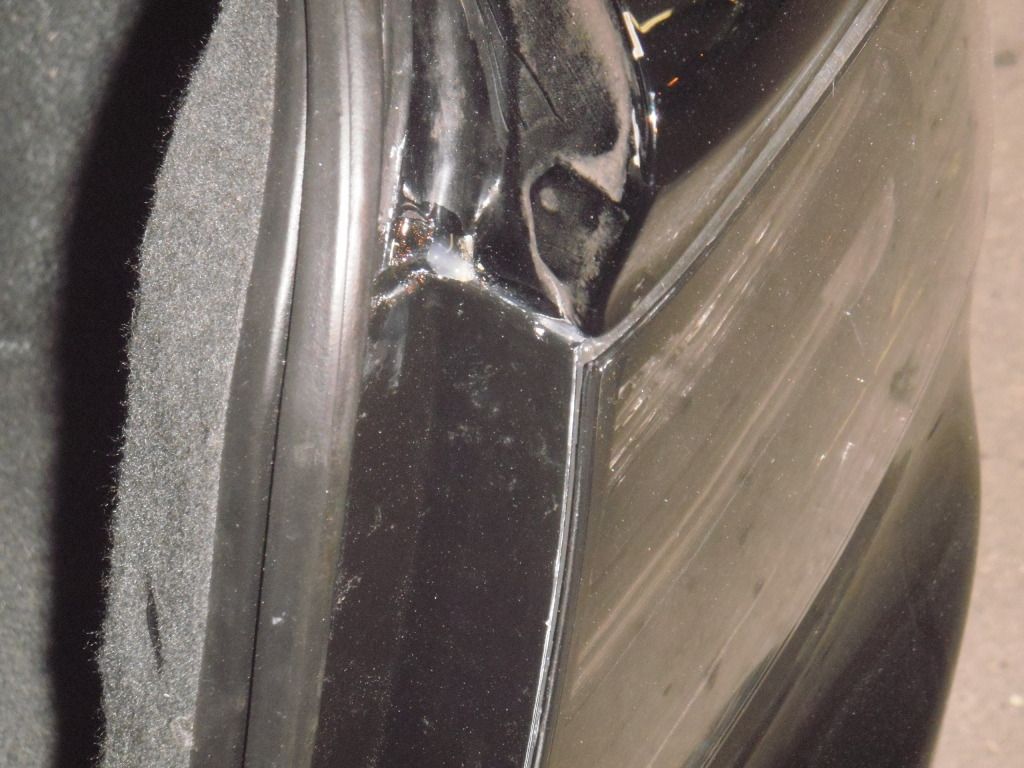
When you take the tail lights off in the upper corner where the water runs down the trunk there is a small tab...cut that flush to the quarter panel (what I make all customers do), because it allows for one the tail light's seal to be compromised when you put them on and two allows water to run down and get into the tail light...try cutting that tab off and resealing that area, you will notice it ripped it up...hope that helps..
Also, put some sealer in that area so the water runs over it like a bridge and doesn't get around that area..it could also be from too much of a cut and its not flush against the bumper and getting in around the gasket in the back...you can also put some sealer there..
When I open and close them there is a guide line I follow and when I seal them I actually put spacers in between them so there isn't too much of a gap compromise, its a custom job so its not 100% but I am a perfectionist and no one is perfect...its a long process...
Last edited by AckTL05; 04-22-2012 at 12:53 AM.
The following users liked this post:
Turbocoop (04-22-2012)
04-22-2012, 01:02 AM
#24
Suzuka Master
iTrader: (1)
I was thinkin about it, I might do it eventually. I just dont have the time or money right now.
Im gonna take the lights back off tomorrow and see if I can re-seal em and fix the fitment issues. Has anyone ever had problems with the LED boards after some water gets in there? Thats what Im most afraid of- one light has about a 1/4" of water in the bottom cause its raining tonight...
Im gonna take the lights back off tomorrow and see if I can re-seal em and fix the fitment issues. Has anyone ever had problems with the LED boards after some water gets in there? Thats what Im most afraid of- one light has about a 1/4" of water in the bottom cause its raining tonight...
Might be helpful.
https://acurazine.com/forums/showthr...8#post13719378
Trunk bulb type is same as interior.
And again, work you did is just amazing...details are perfect. I loved it
The following users liked this post:
Turbocoop (04-22-2012)
04-22-2012, 08:23 AM
#25
Burning Brakes
Thread Starter
iTrader: (3)
When you take the tail lights off in the upper corner where the water runs down the trunk there is a small tab...cut that flush to the quarter panel (what I make all customers do), because it allows for one the tail light's seal to be compromised when you put them on and two allows water to run down and get into the tail light...try cutting that tab off and resealing that area, you will notice it ripped it up...hope that helps..
Also, put some sealer in that area so the water runs over it like a bridge and doesn't get around that area..it could also be from too much of a cut and its not flush against the bumper and getting in around the gasket in the back...you can also put some sealer there..
When I open and close them there is a guide line I follow and when I seal them I actually put spacers in between them so there isn't too much of a gap compromise, its a custom job so its not 100% but I am a perfectionist and no one is perfect...its a long process...
Also, put some sealer in that area so the water runs over it like a bridge and doesn't get around that area..it could also be from too much of a cut and its not flush against the bumper and getting in around the gasket in the back...you can also put some sealer there..
When I open and close them there is a guide line I follow and when I seal them I actually put spacers in between them so there isn't too much of a gap compromise, its a custom job so its not 100% but I am a perfectionist and no one is perfect...its a long process...
I wish I had the money to pay you to do em, cause this is getting to be a pain in the ass... Thanks for the pointers though
The following users liked this post:
Turbocoop (04-22-2012)
04-22-2012, 01:10 PM
#27
Burning Brakes
Thread Starter
iTrader: (3)
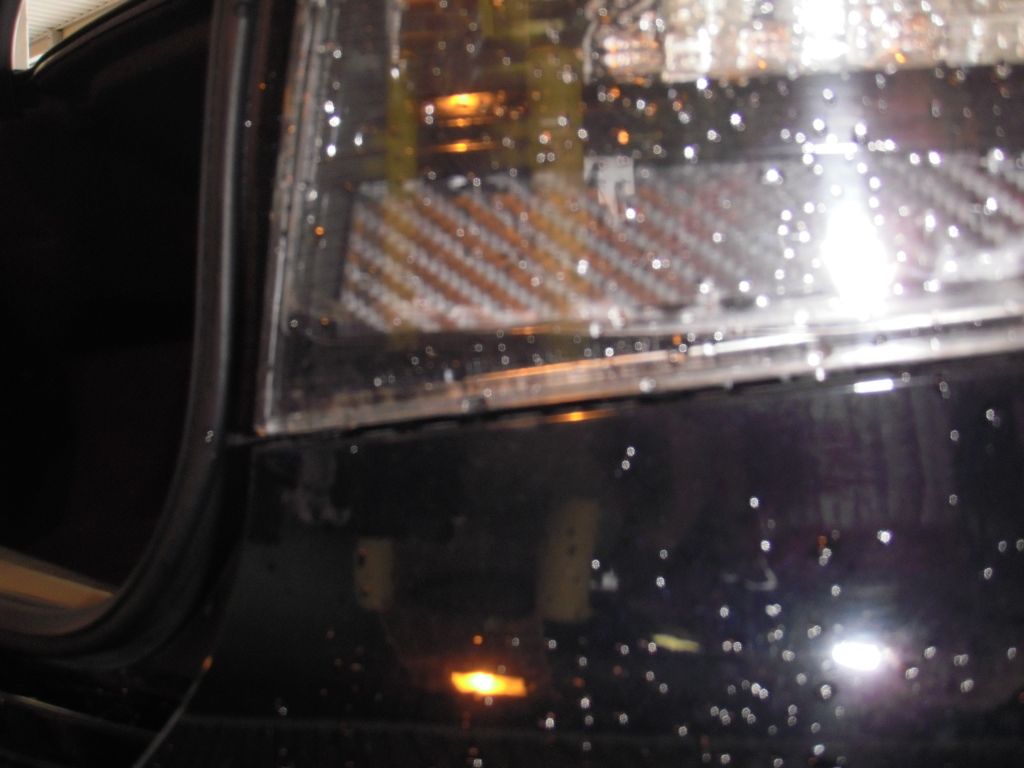
Well I took em back off and I think I took care of the problem. I didnt tighten down the 4 nuts on the back enough and water got in through there on the passenger side. On the drivers side I found a small gap in the epoxy that I missed. I drained the water and dried it out, and sealed up the back gaskets with silicon and double sided tape. If that doesnt do it I give up. Oh I also put silicon at the top near the trunk edge like Ack told me to... Heres some pics to clarify:
water in the pass side-
water in the pass side-

Thread
Thread Starter
Forum
Replies
Last Post
Yumcha
Automotive News
3
09-14-2015 10:48 AM
oyayjoe
Member Cars for Sale
1
09-12-2015 04:40 PM
Yumcha
Automotive News
2
09-04-2015 08:03 AM