
XLR8 Motor Mounts HELP! 62A


Thread Starter
Instructor


Joined: May 2012
Posts: 144
Likes: 6
From: Montreal
XLR8 Motor Mounts HELP! 62A
I was trying to install my side mount that i received from XLR8 and i ran into 2 issues.
first you can see all the way in back there is a ground on the original mounts.
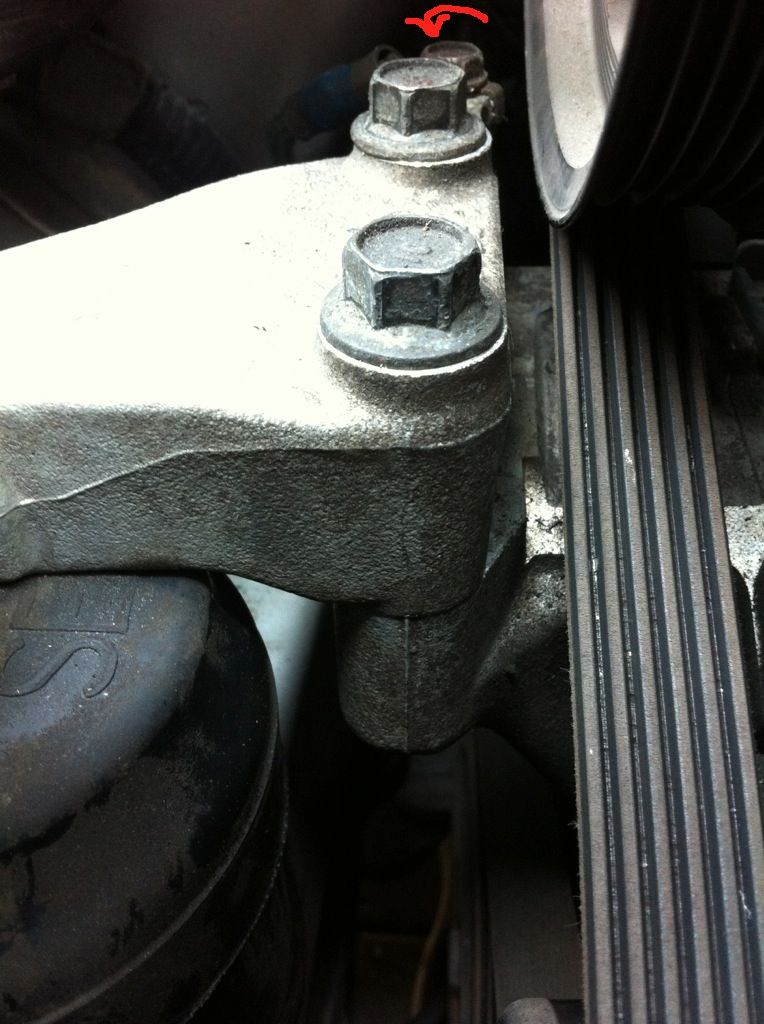
On the new side mount bracket there is no place for the ground to go.
my question is where can i place this ground.
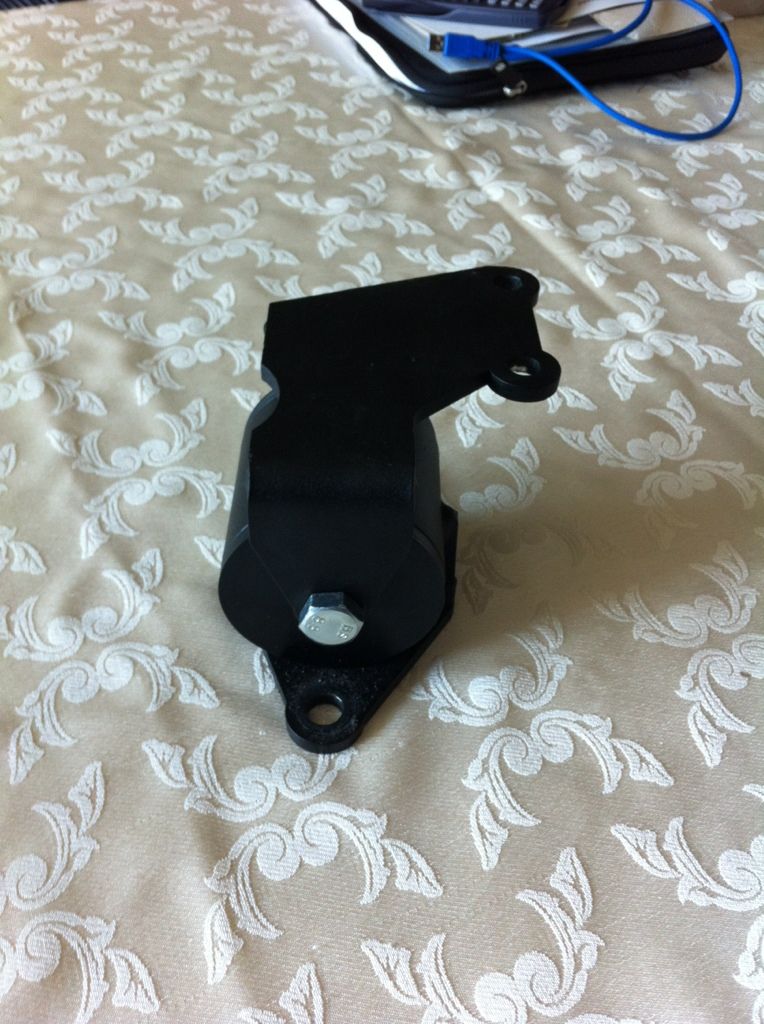
Second question, this might be just my stupidity but ill ask anyway. When i was placing the new mounts in i noticed that in order for the new braket to work i would need to use alot of washers.
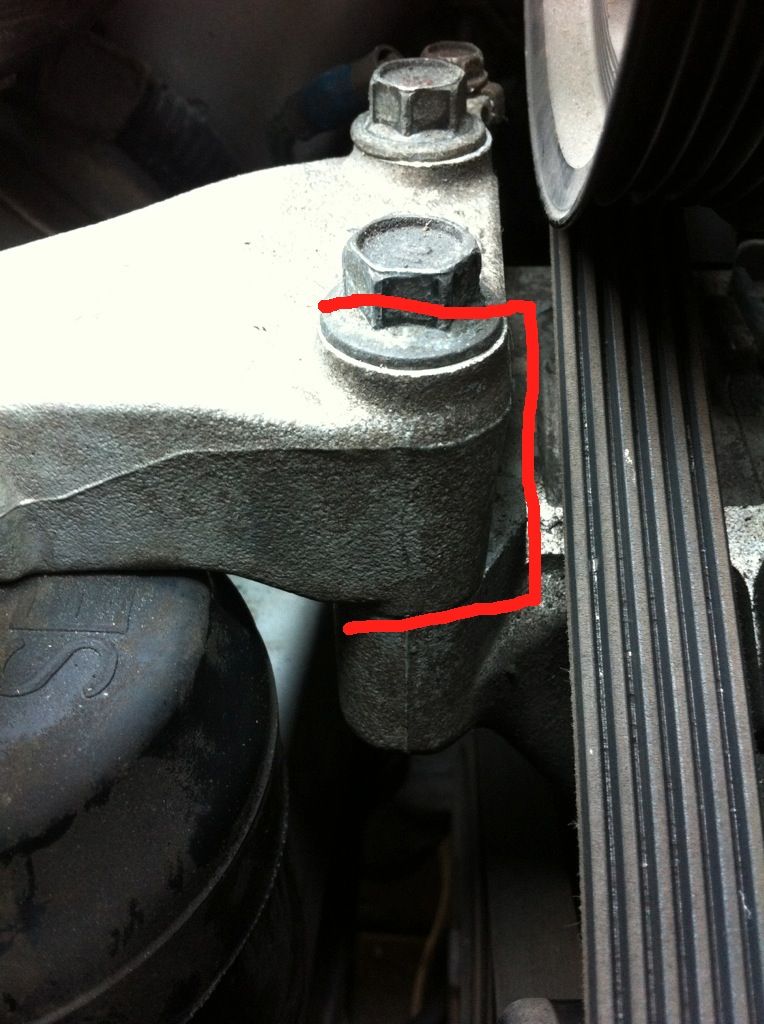
in the above image you can see the see the width of the bracket it farly large. on the new one its extremly thin.
soo the entire space where i highlighted red was actually empty once the bolts had gone through and were tightened.
Is that supposed to be filled with washers ?
Thanks.
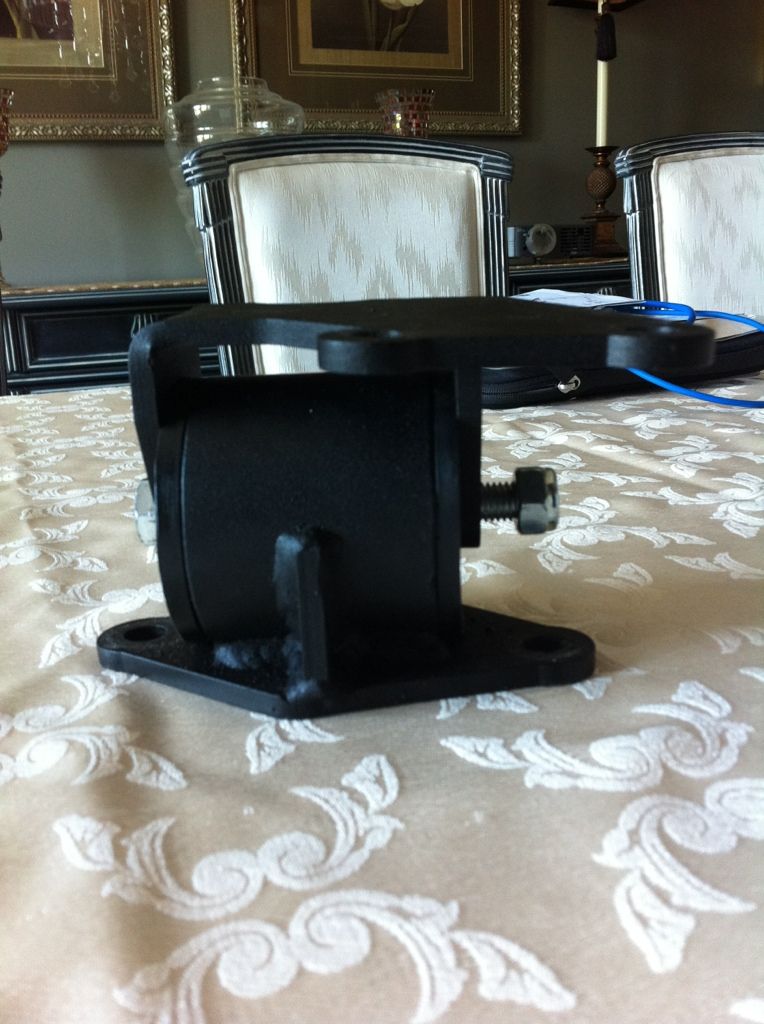
BTW front mount went in really easy and ive already seen great improvement.
first you can see all the way in back there is a ground on the original mounts.
On the new side mount bracket there is no place for the ground to go.
my question is where can i place this ground.
Second question, this might be just my stupidity but ill ask anyway. When i was placing the new mounts in i noticed that in order for the new braket to work i would need to use alot of washers.
in the above image you can see the see the width of the bracket it farly large. on the new one its extremly thin.
soo the entire space where i highlighted red was actually empty once the bolts had gone through and were tightened.
Is that supposed to be filled with washers ?
Thanks.
BTW front mount went in really easy and ive already seen great improvement.

Thread Starter
Instructor
Joined: May 2012
Posts: 144
Likes: 6
From: Montreal
Thread Starter
Instructor
Joined: May 2012
Posts: 144
Likes: 6
From: Montreal
u canot use shorter bolts or you will be put the bracket at an angle, for the bracket to be level u need to fit washers, about 13 on each bolt... Also where would you suggest relocating the ground... there isnt a ton of place.
Just got an email from xlr8:
The mount is shorter now on the side. You don't need the spacers. You will need a few washers to go under the head of the bolt to take up the gap so that the bolt doesn't bottom out before it touches the mount.
The mount is shorter now on the side. You don't need the spacers. You will need a few washers to go under the head of the bolt to take up the gap so that the bolt doesn't bottom out before it touches the mount.
Trending Topics
Former Sponsor
iTrader: (1)
Joined: Mar 2004
Posts: 9,877
Likes: 624
From: www.ExceleratePerformance.com
I thought you were referring to the bolts that hold the side mount to the chassis. You reuse the original 2 bolts that hold it to the engine. You should be installing one motor mount at a time and you should be supporting the motor while you're doing it. You do not need spacers or washers.

04-TL/MDX/77-CELICA GT
Joined: May 2011
Posts: 19
Likes: 3
From: Michigan
Rather than big stacks of washers I got two M10-1.25 x 30mm bolts. Even though the hex head is a bit larger on the replacements (I "think" it went from a 14mm to a 15mm) the overall bolt head base is a bit smaller than the flared base OEM bolt heads. Because of this I threw a washer on each bolt. This also helped better cover the ring terminal that I attached to the grounding wire that is now secured by the the bolt on the mount closest to the back of the engine.

Instructor
Joined: Apr 2014
Posts: 162
Likes: 4
From: New York
Rather than big stacks of washers I got two M10-1.25 x 30mm bolts. Even though the hex head is a bit larger on the replacements (I "think" it went from a 14mm to a 15mm) the overall bolt head base is a bit smaller than the flared base OEM bolt heads. Because of this I threw a washer on each bolt. This also helped better cover the ring terminal that I attached to the grounding wire that is now secured by the the bolt on the mount closest to the back of the engine.

Thread
Thread Starter
Forum
Replies
Last Post
rp_guy
Member Cars for Sale
9
Jul 16, 2017 07:33 AM
08_UA7_Gr33k
Member Cars for Sale
13
Feb 11, 2016 02:17 PM
xsilverhawkx
2G TL Problems & Fixes
5
Sep 28, 2015 06:51 PM