
XLR8 Engine Torque Damper: '04-'08 TL Manual
 03-31-2010 | 10:25 PM
#121
Stick with the red ones. You'll hardly notice the vibration. But you will notice the improvement in how your ride feels. I promise.
03-31-2010 | 11:38 PM
#123
what area do u have the damper, and what website to order parts from?lmk please i ingalls have the damper on the belt side of the motor.. between the the strut bolts and the power steering, w/ special bracket
04-01-2010 | 08:12 AM
#124
Three Wheelin'
Joined: Jul 2006
Posts: 1,329
Likes: 27
From: Spring TX
 04-01-2010 | 07:02 PM
#127

Safety Car
Joined: Oct 2001
Posts: 4,563
Likes: 2
From: USA
L i believe it will, the 7th n 8th gen mounts stayed the same on the MT, but im not sure about auto transmission or the engine mount bracket for the accord.....i believe someone already made one for the accord no?? or it was an older model??
04-14-2010 | 10:40 AM
#130

Instructor
Joined: Jun 2008
Posts: 180
Likes: 0
From: Providence,RI
Anyone have any updates on their experiences with this damper? I have a 6spd with original mounts (120k on them) and am looking to stiffen up my motor.
Would this be recommended for use with my stock mounts?
Would this be recommended for use with my stock mounts?
04-18-2010 | 07:35 PM
#133
Just installed mine finally!!!! WOW what a difference it feels great! and I just used the black bushings. I don't feel any excess vibrations or anything! Now I can drive slowly in a parking lot without my car bouncing around!! Shifting from 1-2 is much much better and crisp that was a big issue for me. Also while driving/coasting and taking my foot off the pedal it doesn't "bogg" at all like it did.
The only issue I found was I had to adjust the threads on the damper out much further then I felt was safe. It kind of makes me wonder if the bracket was designed using a TL with a busted front engine mounts. I DO NOT have busted mounts and only have 36K which might explain why the distance required for the damper was so much greater on my car. Anyone else experience this?
The only issue I found was I had to adjust the threads on the damper out much further then I felt was safe. It kind of makes me wonder if the bracket was designed using a TL with a busted front engine mounts. I DO NOT have busted mounts and only have 36K which might explain why the distance required for the damper was so much greater on my car. Anyone else experience this?
04-19-2010 | 09:54 AM
#136
Instructor
Joined: Jun 2008
Posts: 180
Likes: 0
From: Providence,RI
Cant wait to do this. Is it safe to say, that this mod would help extend the life of the axles on our car? I've always heard that wheel-hop alot of the times directly contribute to the breakdown of axles and other parts.
Mc
Mc
 04-19-2010 | 05:56 PM
#142
Excelerate any comment on my fitment issues? What was the condition of the car the bracket was designed for? Miles/Mount condition? If the bottom hole in my bracket was longer then it is I could probably slide it down more so the damper isn't maxed out.
04-19-2010 | 10:51 PM
#143
Instructor
Joined: Nov 2009
Posts: 158
Likes: 0
From: GR, MI
Just got my TL 2 weeks ago and noticed the bouncing inbetween 1st and 2nd gear and after reading this glad there is a solution.
Contacting Excelerate to see if I can add this to the order I placed today for an AEM V2, hopefully its not too late!
Contacting Excelerate to see if I can add this to the order I placed today for an AEM V2, hopefully its not too late!
04-26-2010 | 02:33 PM
#147
TYPE-S CBP MT
Joined: Jun 2006
Posts: 415
Likes: 0
From: Queens, NY
Just installed mine finally!!!! WOW what a difference it feels great! and I just used the black bushings. I don't feel any excess vibrations or anything! Now I can drive slowly in a parking lot without my car bouncing around!! Shifting from 1-2 is much much better and crisp that was a big issue for me. Also while driving/coasting and taking my foot off the pedal it doesn't "bogg" at all like it did.
The only issue I found was I had to adjust the threads on the damper out much further then I felt was safe. It kind of makes me wonder if the bracket was designed using a TL with a busted front engine mounts. I DO NOT have busted mounts and only have 36K which might explain why the distance required for the damper was so much greater on my car. Anyone else experience this?

The only issue I found was I had to adjust the threads on the damper out much further then I felt was safe. It kind of makes me wonder if the bracket was designed using a TL with a busted front engine mounts. I DO NOT have busted mounts and only have 36K which might explain why the distance required for the damper was so much greater on my car. Anyone else experience this?
I did the install over the weekend and noticed a drastic improvement between 1st and 2nd gear. But, I have the same problem with adjusting the threads on the damper further out than i wanted too. Josh is the normal/safe?
04-27-2010 | 08:19 AM
#150
TYPE-S CBP MT
Joined: Jun 2006
Posts: 415
Likes: 0
From: Queens, NY
04-27-2010 | 11:30 AM
#151
04-27-2010 | 11:30 AM
#152
Thread Starter
Former Sponsor
iTrader: (1)
Joined: Mar 2004
Posts: 9,877
Likes: 624
From: www.ExceleratePerformance.com
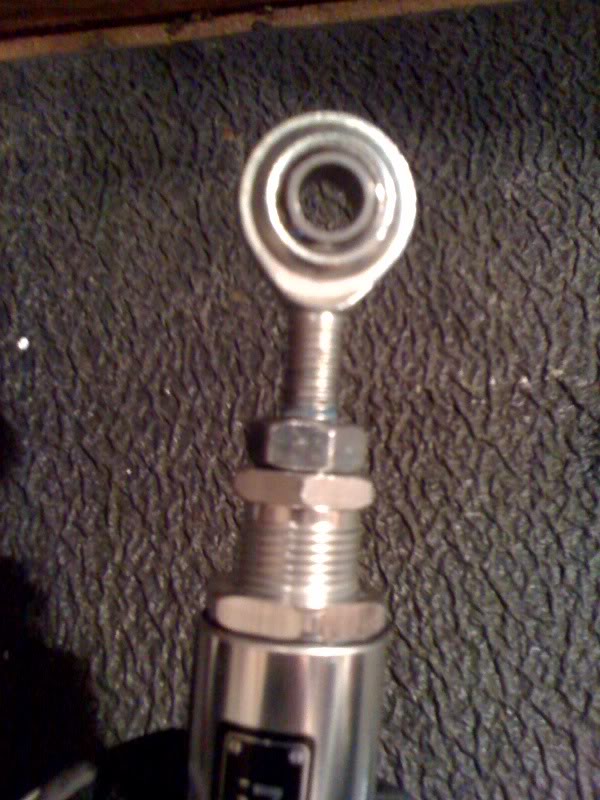
Here is what we found, with the help of an insightful member:
Just insert the pin that goes inside the bracket the opposite way. By doing this, the bracket can be used upside down giving the extra inch that was needed to properly close the gap. The bracket design remains exactly the same, only now it mounts upside down vs the original setup.
The way it is now is fine. There isn't any sort of structural issue.
I went over all the internals on my damper; it looked as good as it did out the box. The red bushings showed no wear at all. I applied blue loctite to a few threads and put it back together.
I personally took a different approach to close the gap more since I had already ordered the coupler and then cut a few things
In conclusion, there is no harm in using it extended, especially if loctite is applied once you got the length right.
The other approach would involve the following (taken from another forum):
- M10 x 1.5 x 90mm bolt (1)
- M10 x 1.5 nut (2)
- M10 x 1.5 x 35mm coupling nut(1)
Step 1: Remove the adjusting rod end from the ETD
Step 2: Cut the head off one 35mm length bolt.
Step 3: Insert one end of the cut bolt into the coupling nut (about 1/2 way), then install this new extender into the ETD unit.
Step 4: Reinstall the adjusting rod end into the other end of the coupling nut.
04-27-2010 | 11:43 AM
#153
Just insert the pin that goes inside the bracket the opposite way. By doing this, the bracket can be used upside down giving the extra inch that was needed to properly close the gap. The bracket design remains exactly the same, only now it mounts upside down vs the original setup.
04-28-2010 | 08:26 AM
#156

Advanced
Joined: Nov 2005
Posts: 87
Likes: 0
How much has anyone left the large adjustment nut? I looks like you can increase the throw by extending the large nut out and screwing the connection in so that the length stays correct. I plan on using stock mounts with red bushings in the damper. I know one or two members had to extend both out to make it fit but it looks like this may be uncommon.
Thanks, ML
Thanks, ML
04-28-2010 | 08:44 AM
#157
Instructor
Joined: Jun 2008
Posts: 180
Likes: 0
From: Providence,RI
If its not too much, I think a good D.I.Y. would be a great idea. Especially with the differing accounts (ie. amount of threads shown) of how peoples installs have went.
04-28-2010 | 02:41 PM
#159
Thread Starter
Former Sponsor
iTrader: (1)
Joined: Mar 2004
Posts: 9,877
Likes: 624
From: www.ExceleratePerformance.com
Just a few updates:
Here's some comments from the original tester:
As the original tester, I haven't had one problem with this set-up for well over 2 months. Looks exactly the same as the ones posted above. One thing is make sure you adjust both threads evenly, don't over extend one more than the other (as shown on page one).
Also:
1) In order to use the coupling nut, it needs to be shorter than 35mm, closer to 25mm.
2) It would also require cutting 40% of the rod end threads off.
04-28-2010 | 10:32 PM
#160
installed. bye bye wheel hop. it is almost non existent and it seemed like my car pulled more. it was incredible how i felt so much more power.
so i had to test it...
removed the dampener and had a buddy drive my car with me next to him...
turns out my car was slipping the tires in 1st and 2nd all the way through vtec!!
THEY WERENT COMPLETELY HOOKING!!!!!!
put the dampener back on and the problem is gone. it just pulls and pulllss
edit: i didnt get mine from xlr8 because i figured the brackets wouldnt work on my car. but the one i bought is the EXACT SAME THING