RacingBrake 2-Piece Rotors 6MT Pics


 05-17-2007, 09:51 AM
#44

The quality of the rotor metal and cooling design make it well worth the initial investment.
Way later down the road, when you need a rotor - it unbolts from the hat-center hub and is less costly to replace - you only need a part- not the whole new thing!
Way later down the road, when you need a rotor - it unbolts from the hat-center hub and is less costly to replace - you only need a part- not the whole new thing!
 05-17-2007, 09:06 PM
#46
Originally Posted by stevenr
I can't find it? Thanks.
it is in: AcuraZine Community� Black Market
06-12-2007, 04:01 PM
#51
Originally Posted by 01tl4tl
Way later down the road, when you need a rotor - it unbolts from the hat-center hub and is less costly to replace - you only need a part- not the whole new thing!
Also, how is the rotor ring attached to the aluminum hat? I know Wilwood's "non-floating" rotors use safety wire (pain in the ass) to lock down each bolt. This is a necessity as there is inherent risk involved in bolting two different types of metals together in a constant heat cycled application like this. Is this also the case with the RB's 2-piece non-floating rotors?
06-15-2007, 11:23 AM
#52
Originally Posted by 94eg!
OEM 6MT (brembo) front rotors can be had for $128 each from online Acura parts dealers. How much does RB's replacement rotor ring cost? At $700 for the kit ($100 pads, $600 rotors), I can only assume each ring is gonna be more expensive than $128. Especially considering each side should be a different casting with directional slots & vanes...
Also, how is the rotor ring attached to the aluminum hat? I know Wilwood's "non-floating" rotors use safety wire (pain in the ass) to lock down each bolt. This is a necessity as there is inherent risk involved in bolting two different types of metals together in a constant heat cycled application like this. Is this also the case with the RB's 2-piece non-floating rotors?
Also, how is the rotor ring attached to the aluminum hat? I know Wilwood's "non-floating" rotors use safety wire (pain in the ass) to lock down each bolt. This is a necessity as there is inherent risk involved in bolting two different types of metals together in a constant heat cycled application like this. Is this also the case with the RB's 2-piece non-floating rotors?
Anybody?
 10-17-2007, 02:49 AM
#53
Originally Posted by 94eg!
You keep saying this, but I would like to know if it's really true. OEM 6MT (brembo) front rotors can be had for $128 each from online Acura parts dealers. How much does RB's replacement rotor ring cost? At $700 for the kit ($100 pads, $600 rotors), I can only assume each ring is gonna be more expensive than $128. Especially considering each side should be a different casting with directional slots & vanes...
Also, how is the rotor ring attached to the aluminum hat? I know Wilwood's "non-floating" rotors use safety wire (pain in the ass) to lock down each bolt. This is a necessity as there is inherent risk involved in bolting two different types of metals together in a constant heat cycled application like this. Is this also the case with the RB's 2-piece non-floating rotors?
Also, how is the rotor ring attached to the aluminum hat? I know Wilwood's "non-floating" rotors use safety wire (pain in the ass) to lock down each bolt. This is a necessity as there is inherent risk involved in bolting two different types of metals together in a constant heat cycled application like this. Is this also the case with the RB's 2-piece non-floating rotors?
Back from the dead....
replacement rings are $180 each or so. But you are forgetting about the fact that these rotors will last 2-3 x longer than stock rotors, even with more aggressive pads.
Rings attach to hubs with high-end self-locking hardware:
http://www.racingbrake.com/main/two-...asp?i=hardware
These are full-floating rotors too. Not non-floating as you mention.
Read up here:
http://www.racingbrake.com/TL_Brembo...p/2108-311.htm
Marcus
10-21-2007, 11:08 PM
#56
Originally Posted by crzygosu87
I would guess the RB pads would be more compatible with the RB rotors since they were designed to work together??? Anyone??
This is actually correct. For any other rotor I say it is user choice. But RB pads are specifically designed to work with the RB rotor formulation. Indeed, the pads only exist out of need for the special rotors.
10-21-2007, 11:21 PM
#57
Cool. Thanks for the info. I had a few more questions about creating a RB package through your website + installation ... I'll pm or email you about that later. This is John btw if you don't remember (anthracite tl ... forgot my wheel lock @__@ lol)
10-21-2007, 11:34 PM
#58
Team Anthracite

can i ask for help or something?
i installed RB 2-piece for my TL in july, and now its the end of october... but guess what...
IT WARPED!!! what am i suppose to do now.........
i installed RB 2-piece for my TL in july, and now its the end of october... but guess what...
IT WARPED!!! what am i suppose to do now.........
10-22-2007, 02:03 AM
#60
Originally Posted by tidus888
can i ask for help or something?
i installed RB 2-piece for my TL in july, and now its the end of october... but guess what...
IT WARPED!!! what am i suppose to do now.........
i installed RB 2-piece for my TL in july, and now its the end of october... but guess what...
IT WARPED!!! what am i suppose to do now.........
I can pretty much promise they are not warped, unless you really REALLY cooked them (it would take a LOT of heat to warp these). RB has a warranty against it so you can send them in. But if they inspect and the runout is in spec (as it probably will be) you will be out the shipping fees back and forth. It is not impossible to warp these rotors, but it is very unlikely.
I expect the problem is brake pad material buildup. Possibly driving style contributed to is, as well as probably improper bed-in. Read these links for more info:
http://heeltoeauto.com/httech/YaBB.pl?num=1186131097
http://heeltoeauto.com/httech/YaBB.pl?num=1184261899
Marcus
10-22-2007, 02:05 AM
#61
I would like to know how it was measured and determined to be warped?
note- this info more towards the regular TL brake crowd with "warp"
Another possiblity is failure of a brake caliper- first it gets weak and you get
weird shimmy- then it gets weaker and you get shake of the wheel-
everyone jumps up and says !!warped- told you those were crap!!!
You can try other rotors and it doesnt fix it.
Finally you look inside the calipers or you find uneven wear across the disc face-
caliper not pressing evenly
How often was the brake fluid changed??
Were the calipers pushed all the way flush when retracted- thats way too far in!!!!
SS lines installed at same time? Air gets trapped in the controller and finally works out to a caliper
Do 2 stops in a row from 45 mph- full ABS useage
if the pedal gets soft on 2nd try- air in system still.
rebleed brakes
10-22-2007, 02:10 AM
#62
Note on bleeding brembo calipers on TL
the order is LF driver front then clockwise around the car
LF RF RR LR
do the outside bleeder first till clean and clear- then the inside bleeder valve.
move to next wheel
the order is LF driver front then clockwise around the car
LF RF RR LR
do the outside bleeder first till clean and clear- then the inside bleeder valve.
move to next wheel
10-22-2007, 10:54 AM
#64
Mine did that too and it was a bad caliper
Other cause is air in the caliper
Bleed the brakes and see if it helps
No one can just look at the rotors and tell if they have a prob
You cant drive it and be sure- only specific measurements will tell
So often with RacingBrake its actually a problem of user not using brakes correctly- not hard enough- and they glaze- you can clean that and rebed- but if you put badazz brakes on your car- you cant drive it like grandma is with you and expect it to work right
10-23-2007, 04:10 PM
#65
Originally Posted by tidus888
oh.. i am pretty sure its warped....
when you brake... the steering wheel would shake side to side... creating a lot of vibration....
when you brake... the steering wheel would shake side to side... creating a lot of vibration....
That is conventional thinking really. There is not necessarily a singular link between shaking wheel and warped rotors. There are other causes for a shaking wheel.
How hard do you generally brake?
10-23-2007, 04:14 PM
#66
Team Anthracite
Originally Posted by MrHeeltoe
That is conventional thinking really. There is not necessarily a singular link between shaking wheel and warped rotors. There are other causes for a shaking wheel.
How hard do you generally brake?
How hard do you generally brake?
coz i go to school in downtown... you can be going 120km/h then suddenly the traffic would be packed forcing you to go in a complete stop.
10-23-2007, 04:31 PM
#67
Bleed the brakes- any air- hows the fluid look?
check the pads for even wear on each pad- its face and wear amount
check for even wear on rotor surface- do they all look the same?
How is the color and surface of the rotor
Hard braking and then no cooling off drive glazes the pads
If uneven wear on any pad or across the width of the rotor- you have a caliper issue
The RB rotors- when properly bedded- and this make take several doings to make it really good, should have a purple tinge/tint to them on the high spots of the surface.
The pads should be making some small scrapes along the rotor- thats normal
If they are blue tint- you are geting close to having them bedded but need more
See Heeltoes article on brake bedding
The brembo brake calipers take hard core efforts to make the pads hot enough to smoke, - not fire, but brake pad smell is what you are aiming for, then do the transfer layer sets of braking, then cool off drive at highway speed 15 minutes
Report back here with results
Dont assume its the rotors- yes it may be- but all other parts of the system are getting put thru extreme use now - with your new brakes being so fun to use- it may expose another prob in ball joints or hub or rims or......
10-23-2007, 04:32 PM
#68
When you installed the new rotors and pads- what method- what tool did you use to retract the caliper pistons?
12-07-2007, 02:56 AM
#69

Originally Posted by aznbo187
Well, we only got the front's installed as for now because they shipped the wrong rotors for the back. 
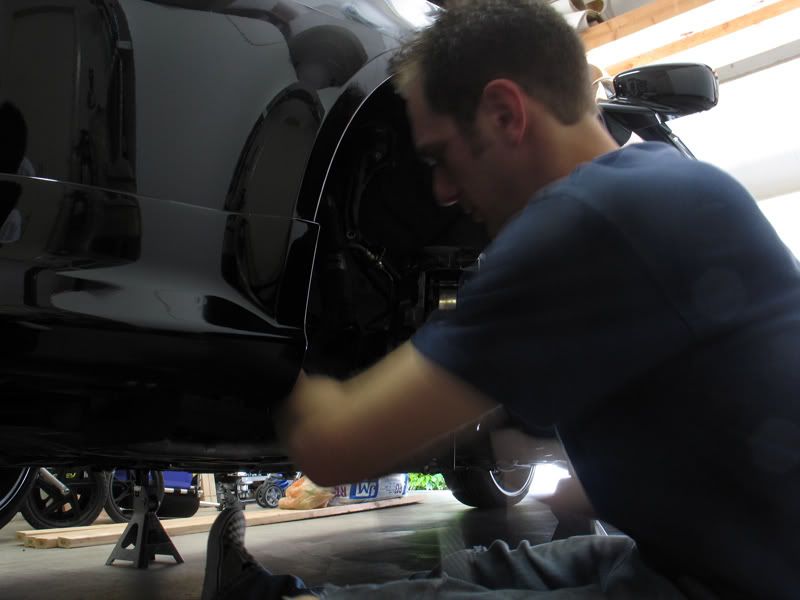
Let's begin.
Upon arriving at MrHeelToe, with no time wasted the car was lifted and all wheels were removed. To remove the stock rotors, you need to lift up the calipers away from the rotors.
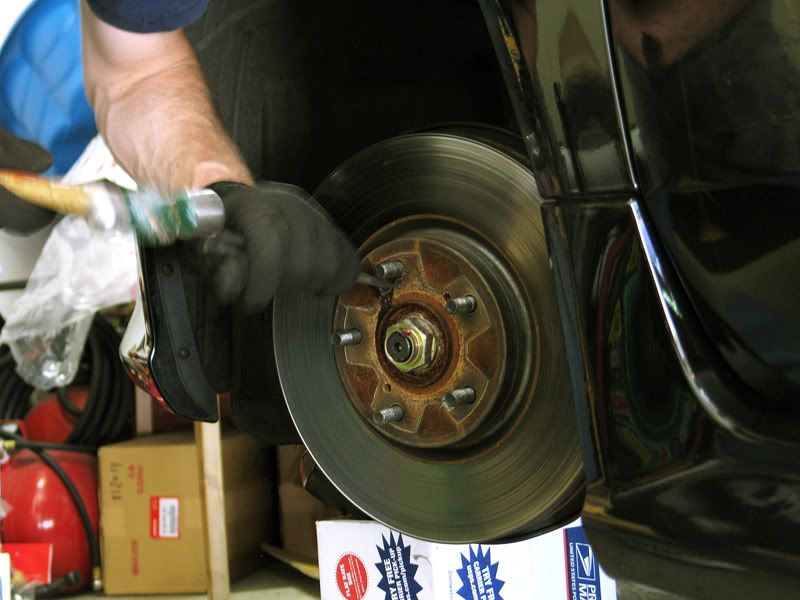
After the wheel and caliper is removed, each rotor is only secured with two phillips head screws, which may be very hard to break loose. There are a few methods you can use to remove it, because they really don't have a purpose except to help keep the rotor secure when you take the wheel of.
One way is using a phillips head screwdriver.
If that doesn't work, you can try a chisel and a hammer, pretty much tapping the screw into the direction you want it to loosen.
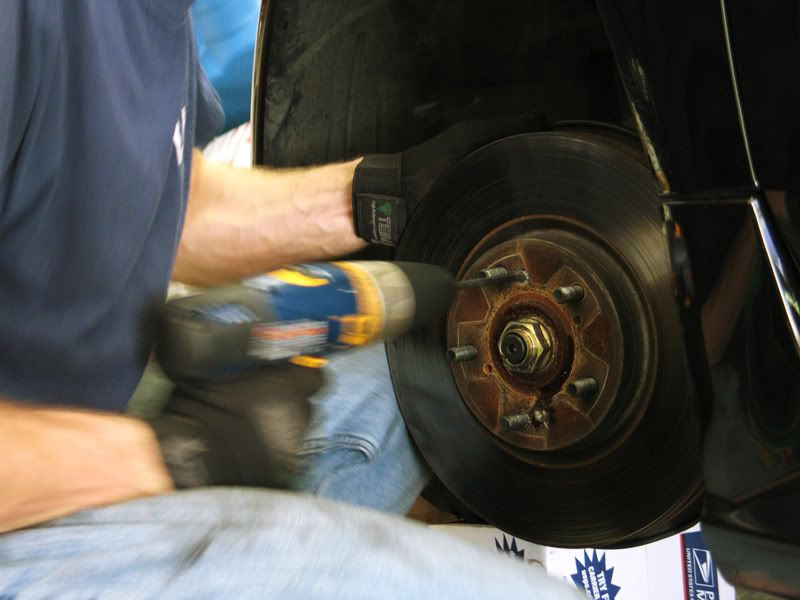
Sometimes it may not even budge, and you can try using a drill.
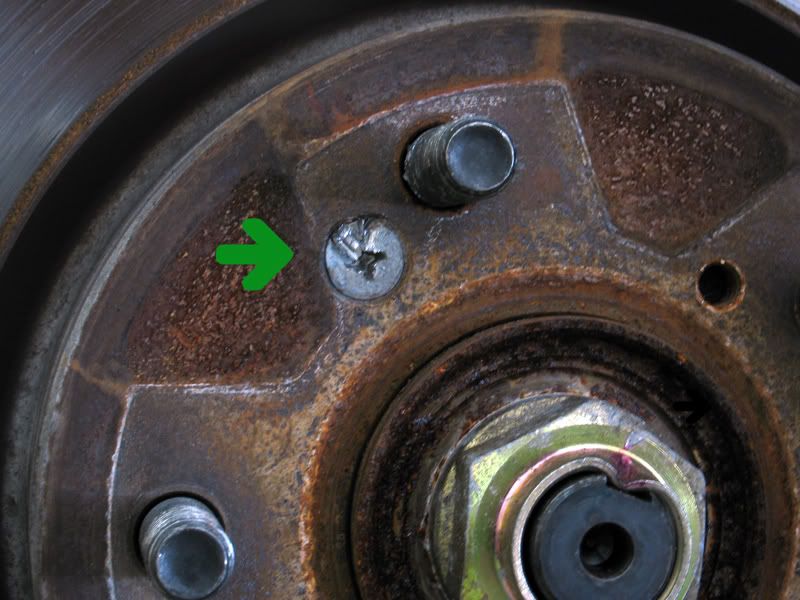
Here is the screw in description. It's not absolutely necessary, so you shouldn't worry much about keeping it in good condition if you can't get it out. The main thing that secures the rotor to the hub/axle are the wheel lug nuts. So go figure how much these actually help in securing the rotors.
Here is how the stock rotor looked like. You can see how the stock pads wore down the rotor creating a lip at the edges of the rotor.


Rust doesn't look good, and it also adds unnecessary weight!
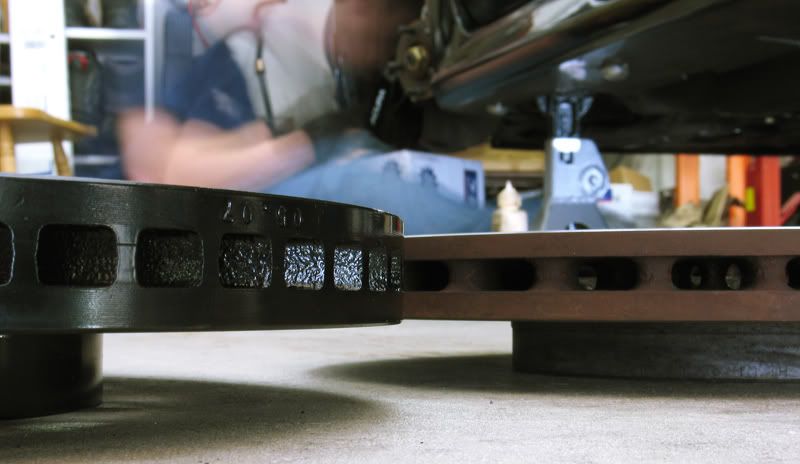
The RacingBrake 2-piece rotors installed right on without any hesitations and look right at home with the OE brembo calipers.
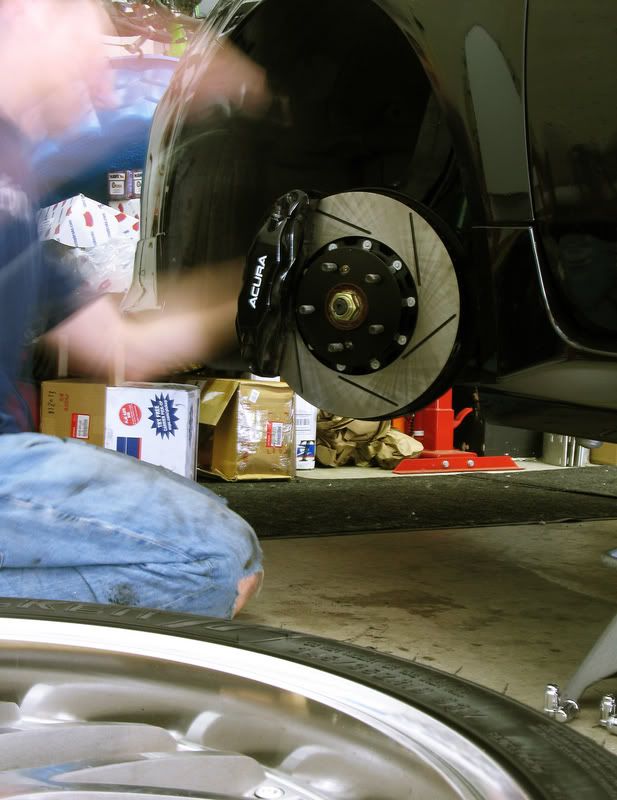
The black calipers sure matches the black accents of the rotors.
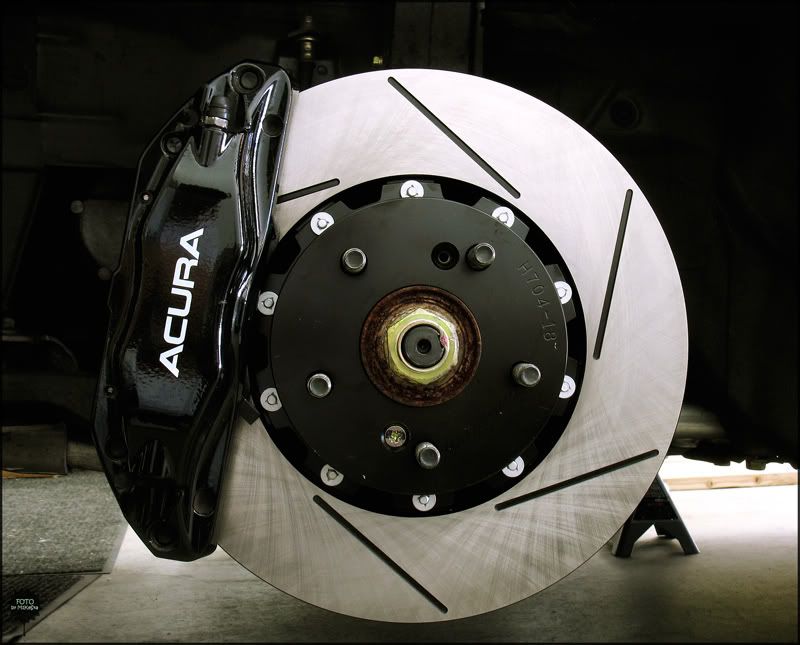
And one more.
Impressions so far.
Normal driving, pedal feels a bit stiffer. I've also replaced the fluid with Motul RBF600, and the pads with Hawk HPS pads. I'm sure the feeling is mainly because of the fluid and pads.
I also took the car on a canyon run (angeles crest highway) this weekend with the new setup.
Before:
With the stock setup, halfway through the run, my brakes would give out, pedals became extremely mushy, stock fluid overheated too quickly, and rotors didn't help it much in cooling.
Now, I'm able to brake in much later, and it feels much safer and predictable. We went up 2 runs, and down both. I can't comment on the cooling efficiency of these rotors yet because I try and try, but I just can't get these to heat up enough to lose any stopping power. So far so good!
Let's begin.
Upon arriving at MrHeelToe, with no time wasted the car was lifted and all wheels were removed. To remove the stock rotors, you need to lift up the calipers away from the rotors.
After the wheel and caliper is removed, each rotor is only secured with two phillips head screws, which may be very hard to break loose. There are a few methods you can use to remove it, because they really don't have a purpose except to help keep the rotor secure when you take the wheel of.
One way is using a phillips head screwdriver.
If that doesn't work, you can try a chisel and a hammer, pretty much tapping the screw into the direction you want it to loosen.
Sometimes it may not even budge, and you can try using a drill.
Here is the screw in description. It's not absolutely necessary, so you shouldn't worry much about keeping it in good condition if you can't get it out. The main thing that secures the rotor to the hub/axle are the wheel lug nuts. So go figure how much these actually help in securing the rotors.
Here is how the stock rotor looked like. You can see how the stock pads wore down the rotor creating a lip at the edges of the rotor.
Rust doesn't look good, and it also adds unnecessary weight!
The RacingBrake 2-piece rotors installed right on without any hesitations and look right at home with the OE brembo calipers.
The black calipers sure matches the black accents of the rotors.
And one more.
Impressions so far.
Normal driving, pedal feels a bit stiffer. I've also replaced the fluid with Motul RBF600, and the pads with Hawk HPS pads. I'm sure the feeling is mainly because of the fluid and pads.
I also took the car on a canyon run (angeles crest highway) this weekend with the new setup.
Before:
With the stock setup, halfway through the run, my brakes would give out, pedals became extremely mushy, stock fluid overheated too quickly, and rotors didn't help it much in cooling.
Now, I'm able to brake in much later, and it feels much safer and predictable. We went up 2 runs, and down both. I can't comment on the cooling efficiency of these rotors yet because I try and try, but I just can't get these to heat up enough to lose any stopping power. So far so good!
12-07-2007, 02:59 AM
#70
They are holding up great, actually.
Starting to see a tiny bit of wear, finally. I was wondering if I ever needed to replace them.
I've had 3 full track events on these, with Hawk HPS pads, and Motul 600Rbf.
My brakes were the least of my concern.
Coating is holding up just fine.
Starting to see a tiny bit of wear, finally. I was wondering if I ever needed to replace them.
I've had 3 full track events on these, with Hawk HPS pads, and Motul 600Rbf.
My brakes were the least of my concern.
Coating is holding up just fine.
12-07-2007, 06:19 AM
#71
Originally Posted by aznbo187
They are holding up great, actually.
Starting to see a tiny bit of wear, finally. I was wondering if I ever needed to replace them.
I've had 3 full track events on these, with Hawk HPS pads, and Motul 600Rbf.
My brakes were the least of my concern.
Coating is holding up just fine.
Starting to see a tiny bit of wear, finally. I was wondering if I ever needed to replace them.
I've had 3 full track events on these, with Hawk HPS pads, and Motul 600Rbf.
My brakes were the least of my concern.
Coating is holding up just fine.
12-07-2007, 10:17 AM
#72
It takes a lot of effort to get the rotors bedded and showing normal wear, following the procedure on Heeltoes website works very well and helps everything last and last.
12-10-2007, 09:51 PM
#75
Banned

Join Date: Nov 2007
Location: MIAMI, FL
Age: 42
Posts: 19
Likes: 0
Received 0 Likes
on
0 Posts
Originally Posted by aznbo187
Well, we only got the front's installed as for now because they shipped the wrong rotors for the back.
Let's begin.
Upon arriving at MrHeelToe, with no time wasted the car was lifted and all wheels were removed. To remove the stock rotors, you need to lift up the calipers away from the rotors.
After the wheel and caliper is removed, each rotor is only secured with two phillips head screws, which may be very hard to break loose. There are a few methods you can use to remove it, because they really don't have a purpose except to help keep the rotor secure when you take the wheel of.
One way is using a phillips head screwdriver.
If that doesn't work, you can try a chisel and a hammer, pretty much tapping the screw into the direction you want it to loosen.
Sometimes it may not even budge, and you can try using a drill.
Here is the screw in description. It's not absolutely necessary, so you shouldn't worry much about keeping it in good condition if you can't get it out. The main thing that secures the rotor to the hub/axle are the wheel lug nuts. So go figure how much these actually help in securing the rotors.
Here is how the stock rotor looked like. You can see how the stock pads wore down the rotor creating a lip at the edges of the rotor.
Rust doesn't look good, and it also adds unnecessary weight!
The RacingBrake 2-piece rotors installed right on without any hesitations and look right at home with the OE brembo calipers.
The black calipers sure matches the black accents of the rotors.
And one more.
Impressions so far.
Normal driving, pedal feels a bit stiffer. I've also replaced the fluid with Motul RBF600, and the pads with Hawk HPS pads. I'm sure the feeling is mainly because of the fluid and pads.
I also took the car on a canyon run (angeles crest highway) this weekend with the new setup.
Before:
With the stock setup, halfway through the run, my brakes would give out, pedals became extremely mushy, stock fluid overheated too quickly, and rotors didn't help it much in cooling.
Now, I'm able to brake in much later, and it feels much safer and predictable. We went up 2 runs, and down both. I can't comment on the cooling efficiency of these rotors yet because I try and try, but I just can't get these to heat up enough to lose any stopping power. So far so good!
12-10-2007, 11:13 PM
#76
n20- you need 5 post then you can go into Your Account and enable PMs then
Send me a message- you get these at MrHeelToe- heeltoeauto.com
http://heeltoeauto.com/Acura-TL-2004-UA6-c-2090.html
Now available for Brembo and non brembo gen3 TLs!!
Send me a message- you get these at MrHeelToe- heeltoeauto.com
http://heeltoeauto.com/Acura-TL-2004-UA6-c-2090.html
Now available for Brembo and non brembo gen3 TLs!!
01-29-2008, 11:52 PM
#77
Three Wheelin'
Join Date: Jul 2005
Location: Central NJ
Age: 39
Posts: 1,435
Likes: 0
Received 0 Likes
on
0 Posts
hey, any follow up on these? I JUST found out that the guy who owns RacingBrake goes to my church, lived in my old town, and is good friends with my parents.
I expected the guy's son to be taking over the business, but his son isnt' into cars.
my good friend who does lots of tracking events just got free pads and brake lines from him during a church Christmas party, so hopefully i can get these for free, or super super discounted
(my rotors are already shot and i have about 34k miles on them; is that abnormal?)
01-30-2008, 02:01 AM
#78
Your stock rotors are shot at 34? one set of pads? thats pretty good
Many are replacing pads at 20-30
The RacingBrake rotors will go thru 2-3 sets of pads and not require surfacing
When the slots disappear- its time for new rotors, or new rotor rings for the 2 piece crowd
I think the RacingBrake in-house designed pads ET300 or ET500- made for their rotors capability- are the hot ticket for stopping, and are very low dust and noise- what noise!~
01-30-2008, 08:02 AM
#79
Three Wheelin'
Join Date: Jul 2005
Location: Central NJ
Age: 39
Posts: 1,435
Likes: 0
Received 0 Likes
on
0 Posts
Originally Posted by 01tl4tl
Your stock rotors are shot at 34? one set of pads? thats pretty good
Many are replacing pads at 20-30
The RacingBrake rotors will go thru 2-3 sets of pads and not require surfacing
When the slots disappear- its time for new rotors, or new rotor rings for the 2 piece crowd
I think the RacingBrake in-house designed pads ET300 or ET500- made for their rotors capability- are the hot ticket for stopping, and are very low dust and noise- what noise!~
Many are replacing pads at 20-30
The RacingBrake rotors will go thru 2-3 sets of pads and not require surfacing
When the slots disappear- its time for new rotors, or new rotor rings for the 2 piece crowd
I think the RacingBrake in-house designed pads ET300 or ET500- made for their rotors capability- are the hot ticket for stopping, and are very low dust and noise- what noise!~
thanks for the info 01tl4t
01-30-2008, 10:54 AM
#80
With 70 percent of the cars braking force in the front- its normal to go thru 2-3 sets of front pads before the rears are gone