When you click on links to various merchants on this site and make a purchase, this can result in this site earning a commission. Affiliate programs and affiliations include, but are not limited to, the eBay Partner Network.
*18 gauge wire
*locking quick splice connectors
*electrical tape
*multimeter a MUST!
*common sense
*dremel-must cut the middle piece of the tag holder up top and this tool made it a lot easier and cleaner look.
* drill and bits
camera has:
*video (yellow cable) just run it down to the Navtool and connect to Video 2.
*Power ( red cable) has 2 small wires red for 12v which i spliced into the back up light wire (green wire) which i also used for the navtool reverse +12v and black for ground.
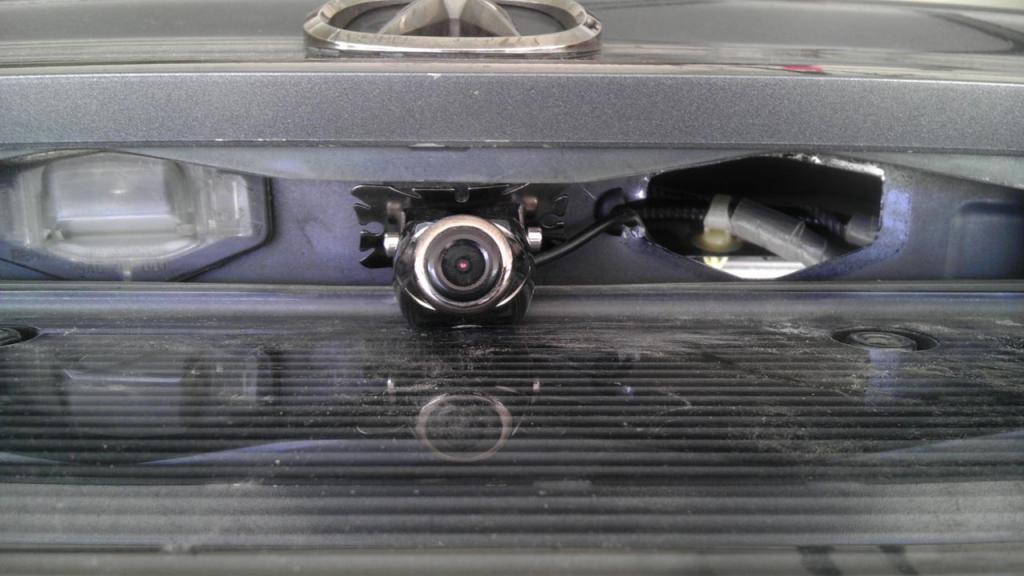
*i made my camera screw holes with a 1/8 bit and got some self-tapping screws worked great
* in order to make the wire fit thru license bulb assembly you will need to cut about 6 inches from the camera and then rejoin the connection.. its cake dont sweat it!!
*i added some velcro between the camera and car to give it a better angle before i tightened down the screws so my camera would not point down so much and i got it perfect i think!!
navtool has:
*red wire (accessory 12+v) this wire goes on the yellow and red wire on the 8 pin white connector behind the navi dvd player (located in the trunk right rear)
*Orange (reverse lights 12+v) goes on the + wire (green wire) of the back up lights harness
*gray (parking brake cable) black (ground) goes on splice on to one of the existing ground on the chassis ( cant miss it it has about 6 ground on it)
* yellow (push button or switch cable) you can run to the center console to switch from video 1 and video 2. (i did not use it but i left it prepped when i receive tvs and dvd player)
MAKE SURE YOU DISCONNECT BATTERY BEFORE SPLICING INTO ANYTHING!!! COMMON SENSE BUT JUST A REMINDER!!!
i was rushing thru it so i missed a lot of pics but i got the important ones or the ones i had doubts about so i hope it helps a lot of yall!! GL
I just installed the same setup as you last weekend. Navtool and the exact same camera. For my camera I did the wire just to the side of the light and put a grommet in there so it seals perfectly with the light back in place.
Here is pic:
I had to do the same thing with the spacer to get the correct angle on the camera.
Awesome man it looks good!! To me is a must have specially if you have tinted windows. for me it was easier making the hole on the license plate light assembly I did add some rtv so it don't leak and it hasn't yet!! Thanks for sharing!!
Ok. So I just started prepping everything to install.. but maybe I drank way too much and smoked way too much. (I don't smoke or drink)... but for some reason... the wire colors you are taking about does NOT match up with mine.. I have no gray wire, the yellow wire on mines doesn't even have a label on there, I don't have a wire with a label for handbrake., so, I've emailed navtool... but no response. So if anyone could help, it would be greatly appreciated. Thanks everyone
I know this is a very old thread... but does anyone still have their NavTool 3.0 or 5.0 manual? I need to know how to turn off the backup camera guide lines. TIA
To turn off the parking lines on a NavTool device, locate the "MIRROR" switch inside the unit and set it to the "OFF" position; this switch is typically responsible for toggling the visibility of parking lines on the display.
Key points about the NavTool parking line switch:
Switch location: You'll need to access the inside of the NavTool unit to find the switch.
Switch name: The relevant switch is usually labeled as "MIRROR".
On/Off function: Setting the "MIRROR" switch to "OFF" will disable the parking lines on the screen
Thanks for the reply. Unfortunately, the NavTool company did not document their hardware correctly:
- No switches are located within the unit (pls. see photos)
- The �dual dip switches� on the back of the unit, near the gray input harness do nothing
To turn off the parking lines on a NavTool device, locate the "MIRROR" switch inside the unit and set it to the "OFF" position; this switch is typically responsible for toggling the visibility of parking lines on the display.
Key points about the NavTool parking line switch:
Switch location: You'll need to access the inside of the NavTool unit to find the switch.
Switch name: The relevant switch is usually labeled as "MIRROR".
On/Off function: Setting the "MIRROR" switch to "OFF" will disable the parking lines on the screen
Thanks for the reply. Unfortunately, the NavTool company did not document their hardware versions correctly.
- No switches are located within the unit (pls. see photos)
- The �dual dip switches� on the back of the unit, near the gray input harness do nothing
Needless to say, their support team does not answer the phone, nor respond to emails. But their sales team is happy to sell me another unit that �should fix the problem�.


 sucks you had bad experience.