
Momo's audio upgrade journey
 02-08-2012, 06:54 PM
#1
Intermediate
Thread Starter
I've been lurking the forums since I've gotten my 06 TL last month. After reading numerous threads on here and on diyma, I've decided to venture forth into upgrading the audio system. I'd like to say thanks to Niebur3, I hate cars, Trunk Monkey, DeathtoToasters, and JayVee for posting threads and replies that have provided great information!  . I'm going to be doing this install by myself so please don't expect anything mind blowing
  lol. I will be documenting this upgrade from beginning to end. Now with all that said, here we go!
January 26th, 2012
Items installed:
Autotoys Honda/Acura 20 pin backup camera/ipod/video to nav interface
Boyo VTL422C Black rear license plate camera
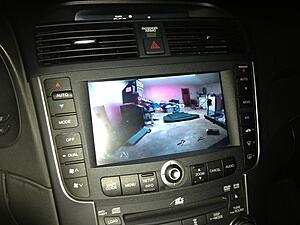
I will honestly say I should've done more research on Autotoys customer service. I received the interface, but it was missing the ipod cable. It took numerous emails to get them to send it to me, but I eventually received it. I don't have pictures of the actual install progress, but I will post some pictures of the unit and the camera. The install of unit was pretty quick. Took literally 5 minutes. Here's a shot of the camera in action with my messy garage lol.
February 7th, 2012
Items Received:
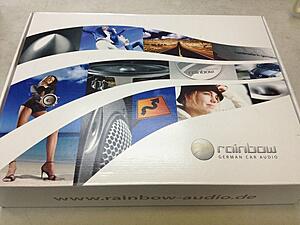
Rainbow 265.25 NG 6.5 Component speaker set
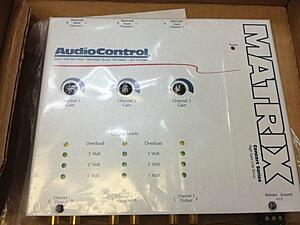
Received my component speakers as recommended by Niebur3 and my AudioControl Matrix as recommended by many others
More to come!
. I'm going to be doing this install by myself so please don't expect anything mind blowing lol. I will be documenting this upgrade from beginning to end. Now with all that said, here we go!January 26th, 2012
Items installed:
Autotoys Honda/Acura 20 pin backup camera/ipod/video to nav interface
Boyo VTL422C Black rear license plate camera
I will honestly say I should've done more research on Autotoys customer service. I received the interface, but it was missing the ipod cable. It took numerous emails to get them to send it to me, but I eventually received it. I don't have pictures of the actual install progress, but I will post some pictures of the unit and the camera. The install of unit was pretty quick. Took literally 5 minutes. Here's a shot of the camera in action with my messy garage lol.

February 7th, 2012
Items Received:
Rainbow 265.25 NG 6.5 Component speaker set
Received my component speakers as recommended by Niebur3 and my AudioControl Matrix as recommended by many others


More to come!
 02-08-2012, 07:14 PM
#2
Instructor
Nice choice with the Rainbows!
I will honestly say I should've done more research on Autotoys customer service. I received the interface, but it was missing the ipod cable. It took numerous emails to get them to send it to me, but I eventually received it. I don't have pictures of the actual install progress, but I will post some pictures of the unit and the camera. The install of unit was pretty quick. Took literally 5 minutes. Here's a shot of the camera in action with my messy garage lol.
Did the backup camera really only take you 5 minutes to hookup? I thought this install was pretty detailed and took a few hours. Maybe I need to go read through a few more threads.
I will honestly say I should've done more research on Autotoys customer service. I received the interface, but it was missing the ipod cable. It took numerous emails to get them to send it to me, but I eventually received it. I don't have pictures of the actual install progress, but I will post some pictures of the unit and the camera. The install of unit was pretty quick. Took literally 5 minutes. Here's a shot of the camera in action with my messy garage lol.
02-08-2012, 08:16 PM
#3
Intermediate
Thread Starter
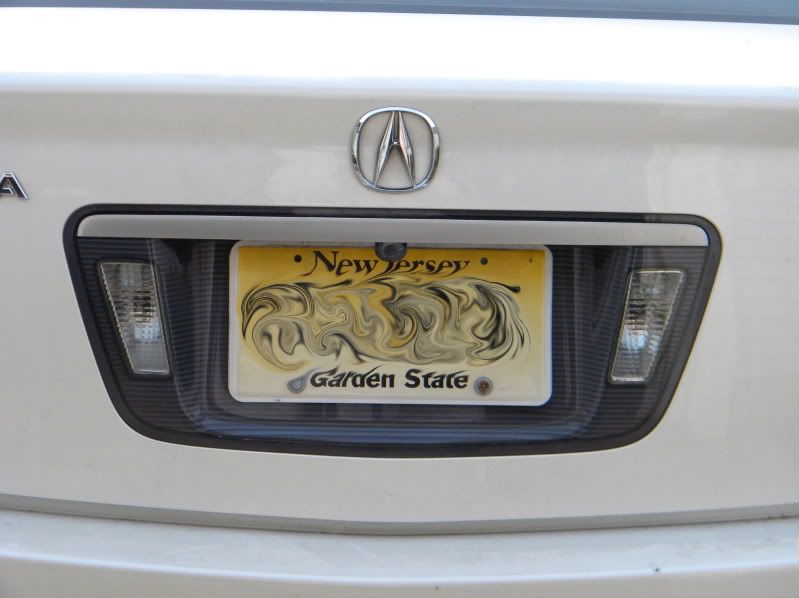
Lol I wish it took 5 minutes. The actual interface box itself took 5 minutes. The backup camera install took me about 20-30 minutes. I guess the time depends on the camera input unit itself. I drilled a small hole on the left license plate light and routed the wires for the camera through there. The autotoys unit provides a 12 volt power line for the camera. It also has a 12v input signal for the reverse light (which makes the camera take over the navigation screen when the car is put into reverse).
02-16-2012, 03:46 PM
#4
Intermediate
Did you end up going with the Auto Toys one as its PNP and Dom's you have to do a lil more wiring? Trying to figure out which the best one is for my Android/iPod use. The camera looks nice...got a shot of the installed product by chance?
02-16-2012, 07:04 PM
#5
Intermediate
Thread Starter
Yeah I did the autotoys unit. I've read before on a previous thread that this was a hassle, but with the new units it's literally plug and play.
I may change the mounting location, but for now it works fine for me. You have 2 Y cables that come with the unit, one remote ir receiver and one ipod video out/control cable. One set of Y cables plugs into the back of the Nav unit and the other plugs into the XM Radio unit. I routed the ir receiver to the front dash underneath the info button.
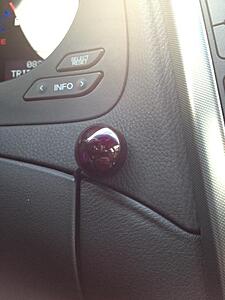
One downfall to the unit (some may think) is that you have to control the ipod with the supplied remote as opposed to the other units which let you use the xm controls on the hu (but the onscreen album art display looks cool imo)
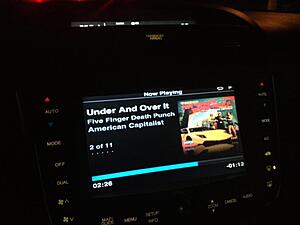
There is a catch though. To get the album art display to display like it does with my unit, you will need to use at least a 3rd generation ipod/iphone on IOS 4 or above. Any other ipod/iphone will just show artist/song/time remaining text.
Last edited by UA6Momo; 02-16-2012 at 07:11 PM.
The following users liked this post:
Noriega713 (03-27-2013)
02-16-2012, 09:48 PM
#7
Intermediate
Thread Starter
No problem man  One thing I forgot to mention. When you go to order the unit, you'll notice a drop down menu that says "Location of wiring of audio plug". For 04-06 TL's, leave it at "Wiring at xm tuner in trunk". For 07-08's TL's, you have to select the 2nd option "XM nav traffic harness" which is $29 bucks more. If you need any help with installing this unit just shoot me msg
One thing I forgot to mention. When you go to order the unit, you'll notice a drop down menu that says "Location of wiring of audio plug". For 04-06 TL's, leave it at "Wiring at xm tuner in trunk". For 07-08's TL's, you have to select the 2nd option "XM nav traffic harness" which is $29 bucks more. If you need any help with installing this unit just shoot me msg
Trending Topics
02-17-2012, 01:19 AM
#10
Intermediate
Thread Starter
Also quintuple post for the lose!
 Damn you TWC!
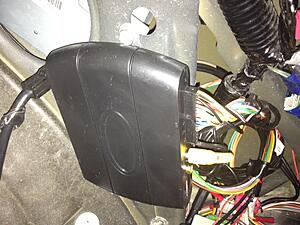
@klept0: Here's a pic of my camera mounted

Last edited by Steven Bell; 03-30-2012 at 09:58 PM. Reason: Merged Posts.
 02-17-2012, 05:10 PM
#12
Intermediate
Thread Starter
I know lol. In the future I may look into a different option, or take this apart and mount the camera eye in a little more stealthy location. Got my parts in today for "The Big 3". It's probably not needed for my application, but better current flow is never a bad thing.
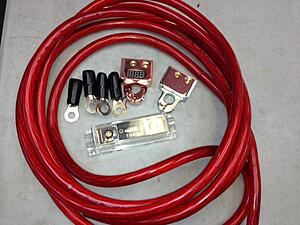
Jerry, I won't be needing the 0 gauge cable anymore like I had asked over txt (but I am still going to get the amplifier and the sub). I bartered with a local car customization shop for the cabling. Owning a liquor store has it's perks since I gave the owner a 20 pack of coors light in exchange for the cable lol. Hopefully tonight I'll get this installed. I'll post pics of my progress later on tonight!

Jerry, I won't be needing the 0 gauge cable anymore like I had asked over txt (but I am still going to get the amplifier and the sub). I bartered with a local car customization shop for the cabling. Owning a liquor store has it's perks since I gave the owner a 20 pack of coors light in exchange for the cable lol. Hopefully tonight I'll get this installed. I'll post pics of my progress later on tonight!
02-17-2012, 05:12 PM
#13
Instructor
I thought the camera was supposed to be mounted upside down on the top ridge (near where the license plate LEDs are)? Niebur3's right -- that's way too revealing!
02-17-2012, 05:40 PM
#15
Instructor
Well, to do so you'll need to flip the camera over and then the signal might need to be reversed some how. I just can't imagine how it currently sits was the intention because it's too "out there".
Here's what I'm referring to:
Edit, here's a thread with a good example: https://acurazine.com/forums/showthr...=boyo&t=711386
Here's what I'm referring to:
Edit, here's a thread with a good example: https://acurazine.com/forums/showthr...=boyo&t=711386
02-17-2012, 06:05 PM
#16
Intermediate
Thread Starter
Unfortunately my camera is just that one long solid piece as shown. I'll see what I can do though, but for now it can wait lol. Thanks for the concerns though guys Glad to see forum members looking out for each other.
Glad to see forum members looking out for each other.
02-24-2012, 08:45 AM
#17

With the Autotoys Honda/Acura 20 pin backup camera/ipod/video to nav interface for the TL's without the traffic XM (04-06), it looks like one connector goes to the gps dvd unit in the trunk and another cable goes to the xm tuner in the dash? For the 07-08 TL's that have the XM traffic option everything seems to connect in the trunk.
Just wanted to check as I have read mixed things. Thanks!
Just wanted to check as I have read mixed things. Thanks!
02-24-2012, 06:13 PM
#18
Intermediate
Thread Starter
04-06 connects at the xm tuner in the trunk, not at the head unit. Hope this clears anything up!
Also my apologies for the lack of updates. I've been working a lot and I haven't received anything towards this project that is worth posting. I did get all the cable/wires in, so I guess that's something lol.
I would like give a huge thanks to Jerry (Niebur3) @ High Definition Mobile Audio. I put in my order for an Image Dynamics i5800 Amplifier and his price could NOT be beaten. Hell even AMAZON wanted more than what Jerry charged
Last edited by UA6Momo; 02-24-2012 at 06:17 PM.
03-06-2012, 03:05 PM
#19
Intermediate
Thread Starter
March 6th, 2012
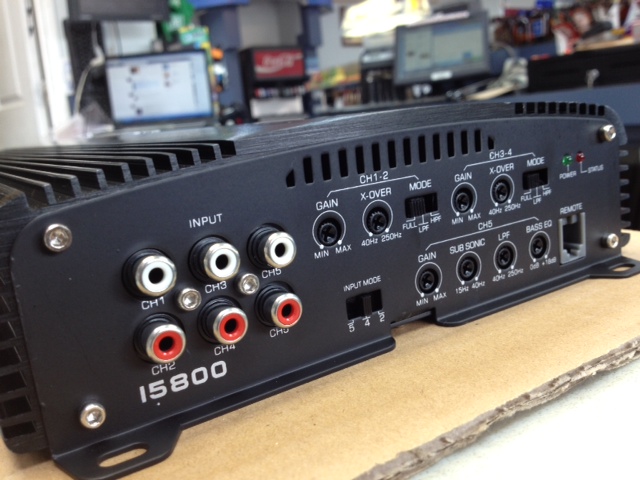
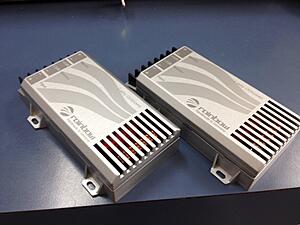
Image Dynamics i5800 Amplifier
Received my amplifier today. Jerry (Niebur3) over at High Definition Mobile Audio is the man and I highly recommend him to EVERYONE ON THE BOARD!!!! Here are some pics
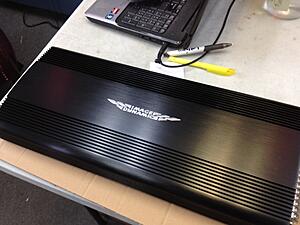
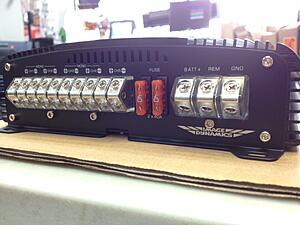

Image Dynamics i5800 Amplifier
Received my amplifier today. Jerry (Niebur3) over at High Definition Mobile Audio is the man and I highly recommend him to EVERYONE ON THE BOARD!!!!
Here are some pics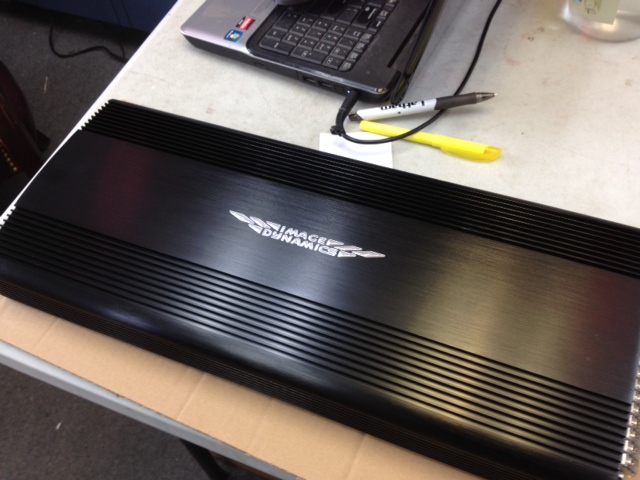

 03-30-2012, 11:50 AM
#20
Intermediate
Thread Starter
Finally an update. For the most part I am finished with my install. It took 9 days for me to do this all, and it was quite the learning experience. I wish I had taken more pictures of my progress but I'll get some pictures of the wiring and such. Before I continue I'd like to once again extend my greatest thanks to Jerry aka Niebur3. He suggested my exact setup which I'm blown away by, helped me out with purchasing some of my setup and helping me troubleshoot some problems.
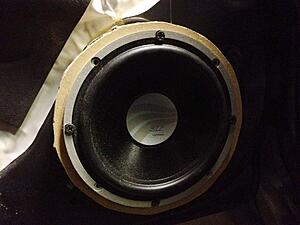
My front stage consists of a set of Rainbow Sound Line components. I read in various threads that some people cut the metal on their speaker openings. I didn't want to go that route (more like afraid of messing up). I used 2 3/4 mdf rings I made and mounted the speaker in. I placed a gasket type matereial between the door and each of the rings. My jigsaw skills aren't that great as you can tell
I didn't get a picture of the tweeters installed, but I will in the future.
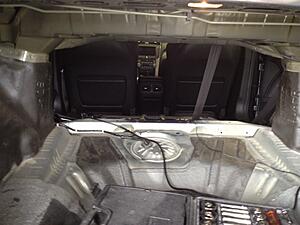
Back seat taken out and ready for that baffle board install.
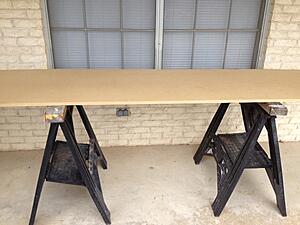
I was blessed with having a trainee at home depot at ring me up for a 8ft x 4ft 3/4" mdf board. Not bad for being rung up for a wrench that was 14.99
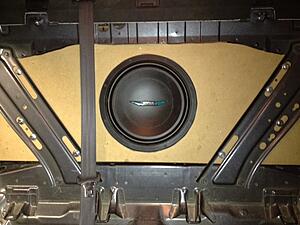
Here it is installed. This is probably what took the most time to do. I'm happy with the result though. This was a pic when I first put it in. There's sound deadending in place and all the holes are filled/sealed to the best of my ability.
I made a hinged floor board that houses the amp, cross overs, and the matrix. I made it hinged so that I can still have access to my spare tire without having to take out the entire setup. You'll notice that the crossovers in the picture are not rainbows, but infact crossovers.
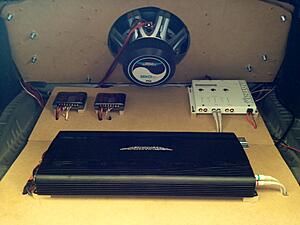
The set of rainbows that I bought had a bad crossover. The woofer output wasn't working and it was too late for me to return it. Thankfully Jerry had a set of rainbow vanadium crossovers lying around and sold those to me which I literally just got in today!
Being my first install of this nature, I'm happy with the results. The highs sound good and the bass hits hard, precise and clear. A friend of mine described my bass as not sounding "ghetto like those donks" haha. Things to do now are false floor, false wall and more sound deading applied to the trunk area.
My front stage consists of a set of Rainbow Sound Line components. I read in various threads that some people cut the metal on their speaker openings. I didn't want to go that route (more like afraid of messing up). I used 2 3/4 mdf rings I made and mounted the speaker in. I placed a gasket type matereial between the door and each of the rings. My jigsaw skills aren't that great as you can tell

I didn't get a picture of the tweeters installed, but I will in the future.
Back seat taken out and ready for that baffle board install.

I was blessed with having a trainee at home depot at ring me up for a 8ft x 4ft 3/4" mdf board. Not bad for being rung up for a wrench that was 14.99

Here it is installed. This is probably what took the most time to do. I'm happy with the result though. This was a pic when I first put it in. There's sound deadending in place and all the holes are filled/sealed to the best of my ability.

I made a hinged floor board that houses the amp, cross overs, and the matrix. I made it hinged so that I can still have access to my spare tire without having to take out the entire setup. You'll notice that the crossovers in the picture are not rainbows, but infact crossovers.

The set of rainbows that I bought had a bad crossover. The woofer output wasn't working and it was too late for me to return it.
Thankfully Jerry had a set of rainbow vanadium crossovers lying around and sold those to me which I literally just got in today! 
Being my first install of this nature, I'm happy with the results. The highs sound good and the bass hits hard, precise and clear. A friend of mine described my bass as not sounding "ghetto like those donks" haha. Things to do now are false floor, false wall and more sound deading applied to the trunk area.
03-30-2012, 03:03 PM
#21
Burning Brakes
Looks awesome! Can't wait to see the finished trunk. I have a question. For the front door speakers, how far out do you think we can go with spacers before we hit the door panel?
Wow, that Autotoys unit is awesome! Can you comment on how well it works now that you have had it for a while?
Wow, that Autotoys unit is awesome! Can you comment on how well it works now that you have had it for a while?
Last edited by Steven Bell; 03-30-2012 at 09:59 PM. Reason: Merged Posts.
03-30-2012, 09:55 PM
#22
Finally an update. For the most part I am finished with my install. It took 9 days for me to do this all, and it was quite the learning experience. I wish I had taken more pictures of my progress but I'll get some pictures of the wiring and such. Before I continue I'd like to once again extend my greatest thanks to Jerry aka Niebur3. He suggested my exact setup which I'm blown away by, helped me out with purchasing some of my setup and helping me troubleshoot some problems.
My front stage consists of a set of Rainbow Sound Line components. I read in various threads that some people cut the metal on their speaker openings. I didn't want to go that route (more like afraid of messing up). I used 2 3/4 mdf rings I made and mounted the speaker in. I placed a gasket type matereial between the door and each of the rings. My jigsaw skills aren't that great as you can tell

I didn't get a picture of the tweeters installed, but I will in the future.
Back seat taken out and ready for that baffle board install.

I was blessed with having a trainee at home depot at ring me up for a 8ft x 4ft 3/4" mdf board. Not bad for being rung up for a wrench that was 14.99

Here it is installed. This is probably what took the most time to do. I'm happy with the result though. This was a pic when I first put it in. There's sound deadending in place and all the holes are filled/sealed to the best of my ability.

I made a hinged floor board that houses the amp, cross overs, and the matrix. I made it hinged so that I can still have access to my spare tire without having to take out the entire setup. You'll notice that the crossovers in the picture are not rainbows, but infact crossovers.

The set of rainbows that I bought had a bad crossover. The woofer output wasn't working and it was too late for me to return it. Thankfully Jerry had a set of rainbow vanadium crossovers lying around and sold those to me which I literally just got in today!

Being my first install of this nature, I'm happy with the results. The highs sound good and the bass hits hard, precise and clear. A friend of mine described my bass as not sounding "ghetto like those donks" haha. Things to do now are false floor, false wall and more sound deading applied to the trunk area.
My front stage consists of a set of Rainbow Sound Line components. I read in various threads that some people cut the metal on their speaker openings. I didn't want to go that route (more like afraid of messing up). I used 2 3/4 mdf rings I made and mounted the speaker in. I placed a gasket type matereial between the door and each of the rings. My jigsaw skills aren't that great as you can tell
I didn't get a picture of the tweeters installed, but I will in the future.
Back seat taken out and ready for that baffle board install.
I was blessed with having a trainee at home depot at ring me up for a 8ft x 4ft 3/4" mdf board. Not bad for being rung up for a wrench that was 14.99
Here it is installed. This is probably what took the most time to do. I'm happy with the result though. This was a pic when I first put it in. There's sound deadending in place and all the holes are filled/sealed to the best of my ability.
I made a hinged floor board that houses the amp, cross overs, and the matrix. I made it hinged so that I can still have access to my spare tire without having to take out the entire setup. You'll notice that the crossovers in the picture are not rainbows, but infact crossovers.
The set of rainbows that I bought had a bad crossover. The woofer output wasn't working and it was too late for me to return it.
Thankfully Jerry had a set of rainbow vanadium crossovers lying around and sold those to me which I literally just got in today! Being my first install of this nature, I'm happy with the results. The highs sound good and the bass hits hard, precise and clear. A friend of mine described my bass as not sounding "ghetto like those donks" haha. Things to do now are false floor, false wall and more sound deading applied to the trunk area.
The following users liked this post:
UA6Momo (03-31-2012)
03-31-2012, 12:48 PM
#23
Intermediate
Thread Starter
I was completely blown away with quality of the rainbows. Thank you again very much Jerry! You're the man! I wish the edit button stayed on the posts longer since I saw a a few grammatical errors. More specifically I forgot to type in Kenwood before crossovers. Here's a pic from the back seat. In the future I'm going to remove the plastic cover between the back seat and the arm rest.

Here's a pic from the back seat. In the future I'm going to remove the plastic cover between the back seat and the arm rest.
Last edited by UA6Momo; 03-31-2012 at 12:51 PM.
The following users liked this post:
UA6Momo (03-31-2012)
03-31-2012, 01:44 PM
#25
Intermediate
Thread Starter
That means a lot to me coming for you and Jerry
03-31-2012, 02:39 PM
#27
So MOMO...you're using (2) 3/4" MDF rings?? I've always wondered if I could move mine out a bit further so I wouldn't get quite as much door card rattle, though that's pretty much taken care of now. One of these days when I decide if I want to hold on to this car...I might go 3 way and order some 8" MDF rings to see if they'll fit. I really want to get into the 3-way business, but I'd like the mid/tweeter in the a-pillar.
Maybe I just can't imagine it, but I would think it'd be much easier having the mid up there than in the kick. Maybe Jerry and IHC can chime in on that..
Maybe I just can't imagine it, but I would think it'd be much easier having the mid up there than in the kick. Maybe Jerry and IHC can chime in on that..
08-17-2012, 12:19 PM
#28
1st Gear

Join Date: Aug 2012
Location: Richmond, VA
Posts: 1
Likes: 0
Received 0 Likes
on
0 Posts
2006 TL & iPod Integration + Back-Up Camera?
Hey Momo!
Just surfed on & found this site (& registered). VERY interested in your experience since installing the Autotoys Nav to Video/Ipod Interface & Boyo back-up camera. I'm contemplating the exact same thing!
And it appears we have the exact same TL (mine is the 2006 Anthracite Metallic Acura TL).
Any advice or help would be much appreciated! Would love to pull the trigger on this purchase soon.
Best regards!


Thread
Thread Starter
Forum
Replies
Last Post
rp_guy
Member Cars for Sale
9
07-16-2017 07:33 AM