12V power to Radar Detector from cabin light unit in headliner
 01-07-2008, 11:34 PM
#1
Love that TL!
Thread Starter
12V power to Radar Detector from cabin light unit in headliner
Got this great radar detector for Christmas. It has a cig lighter plug so there is a visible cord dangling from the unit as it sticks to the windsheild. I want to get into the light cluster on the front of the headliner and steal some 12V power from the lights. Anyone know how to get this unit open without dropping the headliner?
 01-08-2008, 09:53 PM
#3
Love that TL!
Thread Starter
Power in the A-Pillar
Dont really know. Im new to the TL mods and have not seen any DIY A-pillar notes. Can you point me in the right direction.
My understanding is that the A-Pillar is the structure between the driver/passenger door and the windshield.....
If I got the 12 V there the wire would be longer than if I got it from the map light cluster. I like the radar detector right next to the Rear View Mirror.
My understanding is that the A-Pillar is the structure between the driver/passenger door and the windshield.....
If I got the 12 V there the wire would be longer than if I got it from the map light cluster. I like the radar detector right next to the Rear View Mirror.
01-09-2008, 10:53 AM
#4
I was considering that as a power source too. I started looking into it, and remember thinking it wouldn't be too difficult. I'll grab the PDF later that shows how to remove the relevant panel. The only problem I saw with tapping into an existing power source, was isolating the new circuit with a diode and fuse.
01-09-2008, 12:08 PM
#5
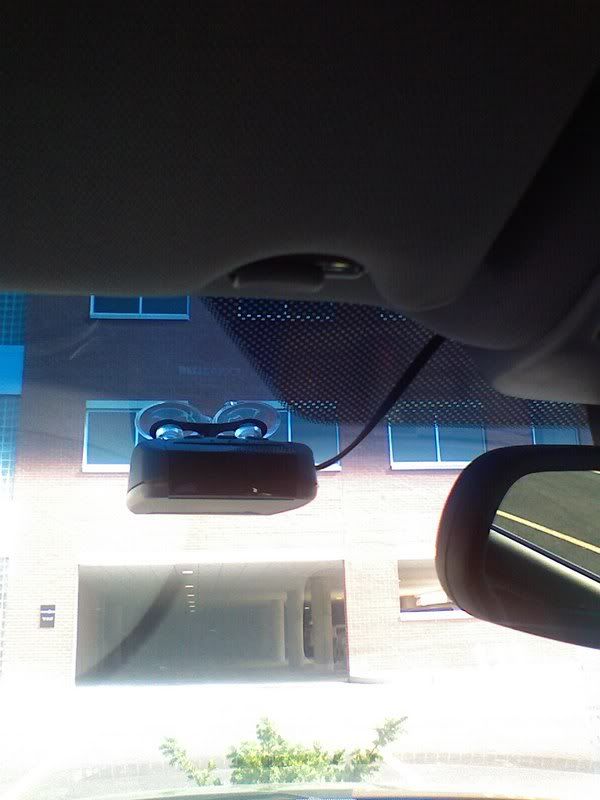
i hardwired my radar detector to the map light area of my TL by tapping into the rear-view mirror power using this product - www.invisicord.com. Some other TLers have used the invisicord as well.
if you do some searching, you can find detailed instructions on how to remove that panel...it was actually pretty easy. Maybe search for "invisicord" or "hardwired."
here is a pic of my setup:
if you do some searching, you can find detailed instructions on how to remove that panel...it was actually pretty easy. Maybe search for "invisicord" or "hardwired."
here is a pic of my setup:
01-09-2008, 12:51 PM
#6
Need for Speed.

Join Date: Oct 2007
Location: Florida
Age: 40
Posts: 7
Likes: 0
Received 0 Likes
on
0 Posts
I cut the 12V power adapter off and spliced the positive and negative and ran them to the fuse box by your left foot. THere are bolts right next to it too so you can ground it. But then again my radar is on the very left bottom of the window. Just above the gauges to the left. and hid the wires easily. Hope it works out for ya.
01-10-2008, 01:41 PM
#7
Here are the relevant removal pages
So I just ordered the 16" invisicord and I'll use the linked PDF pages to get me to the 3-wire connector. Should be a pretty simple install.
how to remove roof console and access dimming mirror connector
how to remove roof console and access dimming mirror connector
Trending Topics
01-10-2008, 11:28 PM
#9
Drifting

I installed with the Inviscord as well. Does anyone know a better positive to tap into in the moonroof coupling? I followed some earlier directions regarding the green wire but that stays powered for a delay interval. I hate the deferred power feature for my detector since it will squawk with a low-power warning until the power fades. I wind up opening/shutting the door muzzle the detector. If nobody posts anything I research and report back. The invisicord is a great way to go- clean and easy.
01-11-2008, 08:47 AM
#10
That green wire with the white stripe is not directly connected to 12V. It comes from the MICU. In the 20 pin light switch, 12V is not switched on/off by the ignition. That's why I'm going to connect mine to the switched 12V that the rear view mirror uses. See the pdf I posted above for the pin and color codes on that 3 pin connector. Pin 1 is 12V switched power and the incoming wire is yellow with a green stripe. Pin 2 is ground and the incoming wire is black. Pin 3 is the reverse gear indicator and the incoming wire is green (DONT USE THIS).
01-12-2008, 06:32 PM
#11
Drifting
Originally Posted by AndrewA
That green wire with the white stripe is not directly connected to 12V. It comes from the MICU. In the 20 pin light switch, 12V is not switched on/off by the ignition. That's why I'm going to connect mine to the switched 12V that the rear view mirror uses. See the pdf I posted above for the pin and color codes on that 3 pin connector. Pin 1 is 12V switched power and the incoming wire is yellow with a green stripe. Pin 2 is ground and the incoming wire is black. Pin 3 is the reverse gear indicator and the incoming wire is green (DONT USE THIS).
01-19-2008, 02:19 PM
#13
Love that TL!
Thread Starter
Guys,
Just did mine with the invisicord. Remember the key is to get the moonroof switch out without damage. Use a feeler gauge to push the latch in and the switch falls out no problem. I will show the whole process below:
This is the feeler gauge. Whatever you use has to be thin enough to slip between the switch body and the moon roof console housing.

Insert the blade into the gap at the top of the switch body.

As you push the blade in the switch will pop out as soon as the latch disengages.


Pull the switch out and then detach it from the connector by pressing in on the center catch on the switch. This will allow the connector to come out. Once the switch is out pull down on the top of the panel from inside of the switch mounting hole and the whole panel will pop out. It only has one center mounted clip and comes out very easily.

The three wire connector that goes to the auto-dimming mirror is the best place to get power. Push the Invisicord probes into the back of the connector. You can see the red and white wire of the Invisicord coming in from the left side of the blue connector. Black is ground, Yellow/green is switched +12VDC from the ignition. You can use wire ties to secure the invisidord wire to the mirror power so the Invisicord connectors do not get pulled out.

It�s a Done deal

Just did mine with the invisicord. Remember the key is to get the moonroof switch out without damage. Use a feeler gauge to push the latch in and the switch falls out no problem. I will show the whole process below:
This is the feeler gauge. Whatever you use has to be thin enough to slip between the switch body and the moon roof console housing.
Insert the blade into the gap at the top of the switch body.
As you push the blade in the switch will pop out as soon as the latch disengages.
Pull the switch out and then detach it from the connector by pressing in on the center catch on the switch. This will allow the connector to come out. Once the switch is out pull down on the top of the panel from inside of the switch mounting hole and the whole panel will pop out. It only has one center mounted clip and comes out very easily.
The three wire connector that goes to the auto-dimming mirror is the best place to get power. Push the Invisicord probes into the back of the connector. You can see the red and white wire of the Invisicord coming in from the left side of the blue connector. Black is ground, Yellow/green is switched +12VDC from the ignition. You can use wire ties to secure the invisidord wire to the mirror power so the Invisicord connectors do not get pulled out.
It�s a Done deal
01-20-2008, 09:07 AM
#14
Very nice "How To." I did mine the other night as well. I wanted to show what I did for strain relief. I know you suggested using a zip tie to secure the invisicord to the rear view mirror cable. Either will work, I just thought I'd suggest an alternative.

01-20-2008, 11:40 AM
#15

Nice DIY
If installing V1 with a conceal display I highly recommend running the wiring to the fuse box thru the A-pillar, the better (stable) the hot source, the better the radar works, plus a bit safer with the fuses burning up than the wiring of the moonroof/mirror.
If installing V1 with a conceal display I highly recommend running the wiring to the fuse box thru the A-pillar, the better (stable) the hot source, the better the radar works, plus a bit safer with the fuses burning up than the wiring of the moonroof/mirror.
01-21-2008, 12:01 PM
#16
Love that TL!
Thread Starter
I guess I dont know what you are refering to as a 'stable' power supply. If you look at the schematic for this install the power supply comes directly from the No20(7.5A) fuse in the underdash fuse box. The mirror and the radar detector are both protected from this fuse. I can post a pic of the schematic if you are interested. Anyway... to each his own.....

Thread
Thread Starter
Forum
Replies
Last Post
mada51589
3G TL Problems & Fixes
79
05-03-2022 08:54 PM
rockyboy
2G RDX (2013-2018)
46
01-25-2016 06:00 PM
chrisr
5G TLX Audio, Bluetooth, Electronics & Navigation
4
12-04-2015 02:17 AM
sockr1
Car Parts for Sale
22
10-01-2015 01:31 AM