ok guys, i know some of you have had problems with your modified side markers, burnt out LEDS. i have had some luck with mine, cuz they still work fine. but i wanted to see if i could make them a bit brighter. so i did some searching i found these bad boys. they have 6 surface mounted LEDS on them and are made to run off 12V so they wont burn out. i ordered a pair and decided to change out my old LEDS for these. this is what i did.
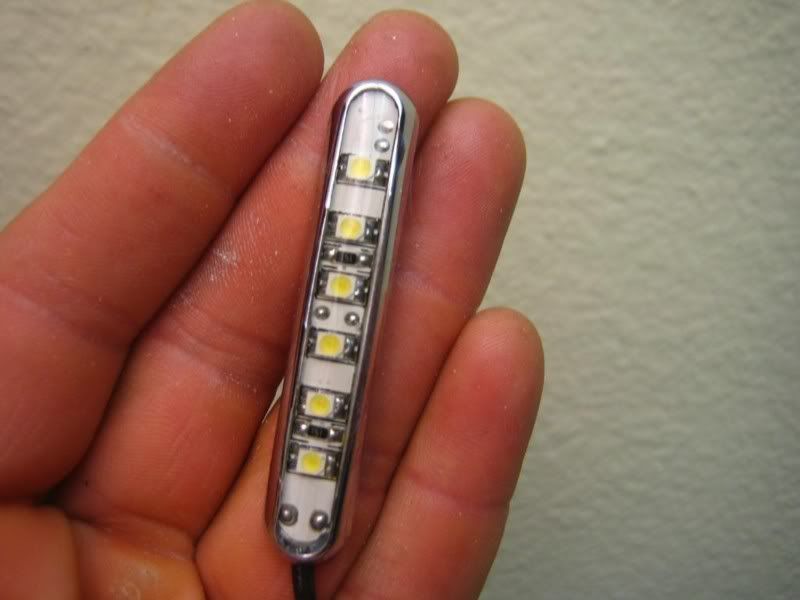
6 surface mounted LEDS in bright white
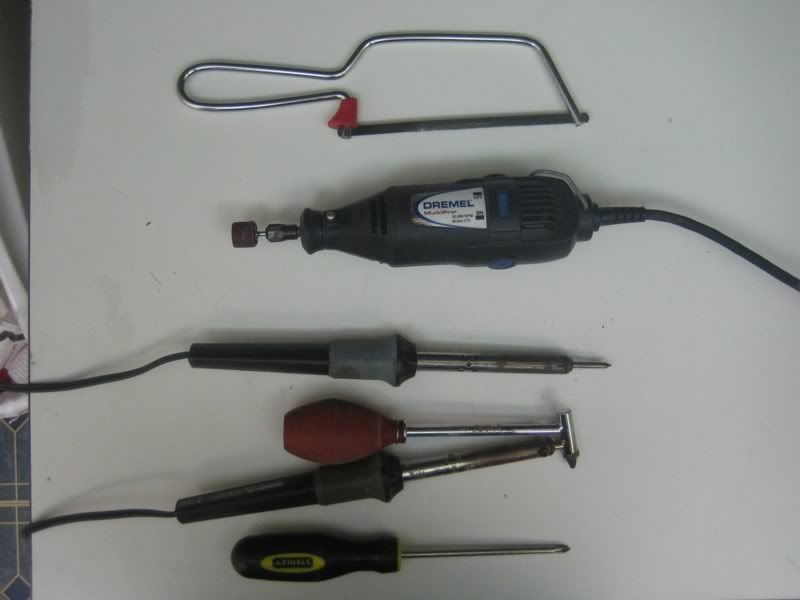
the tools i used
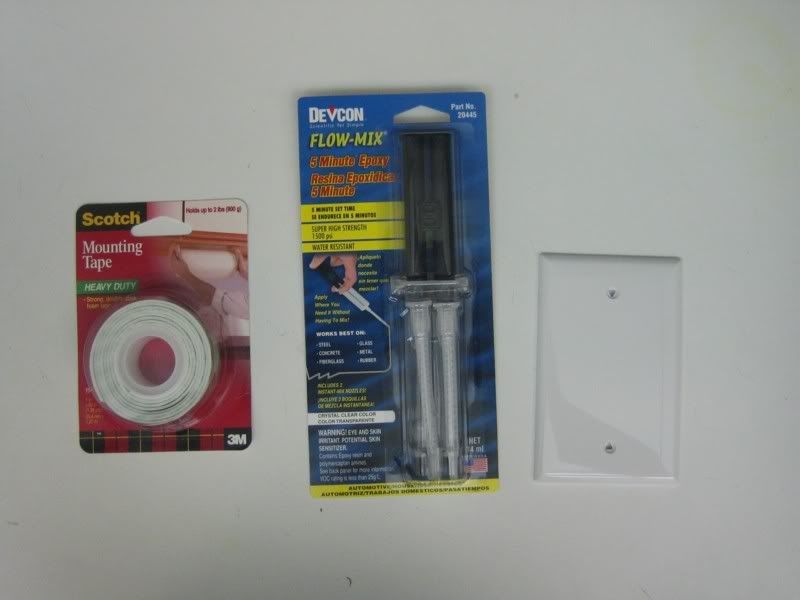
material i used
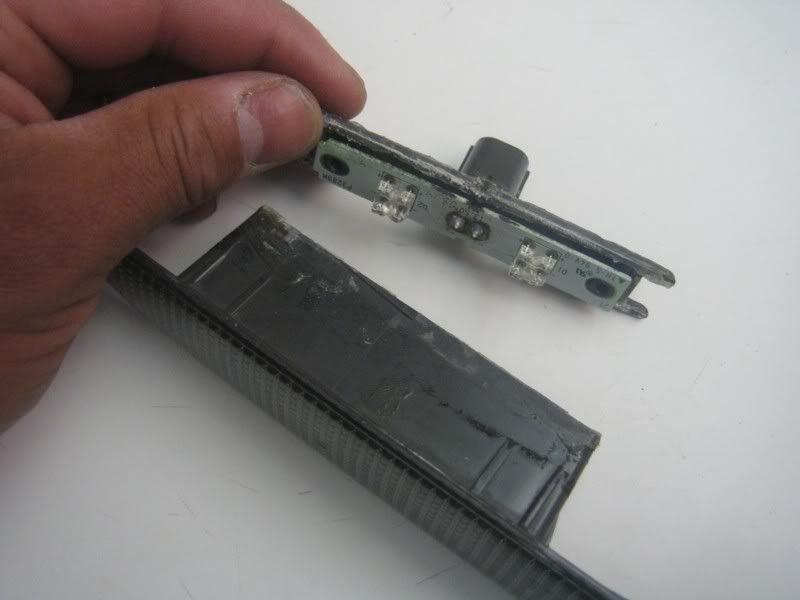
i took my side marker apart. it was pretty easy since i already cut it open and all i had to do was remove the epoxy glue i used a safety cutter with a sharp blade.
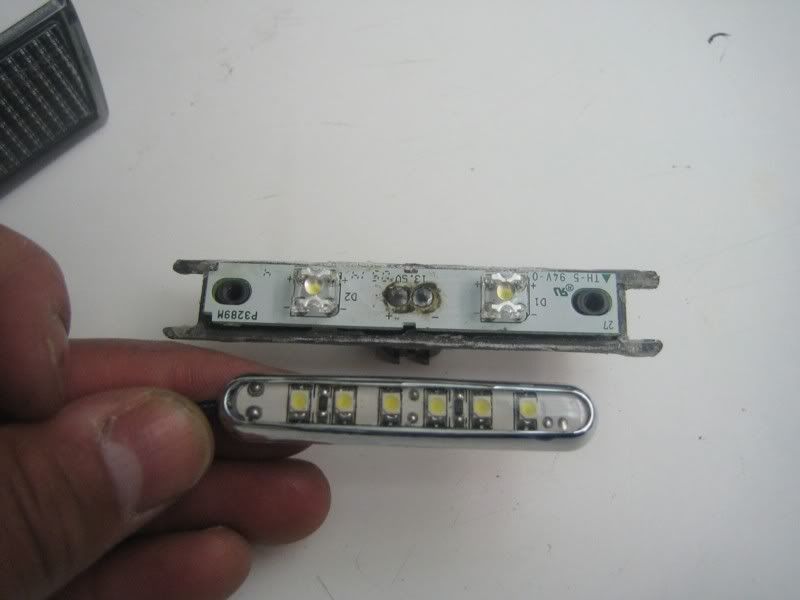
new LED and old LED circuit board just about the same size
i dremeled both sides a bit cus it was just a little too wide once i did it was a perfect fit
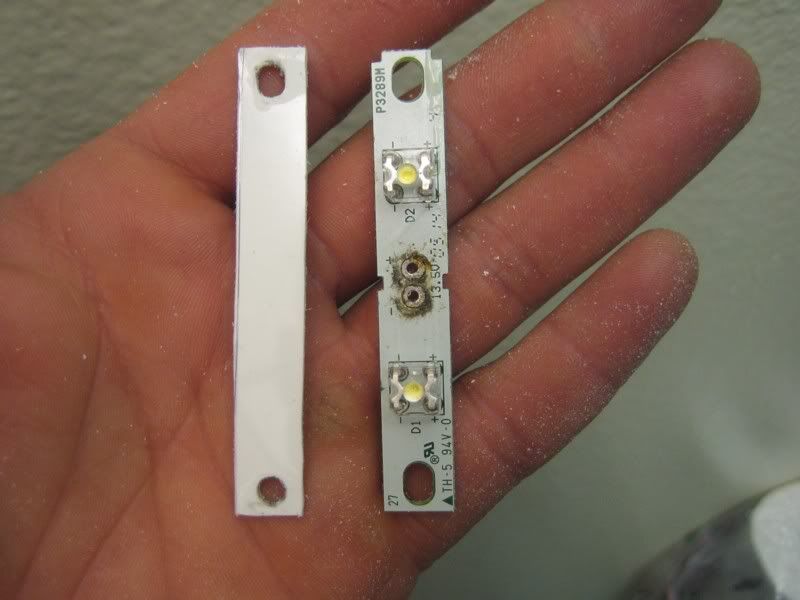
i cut a piece of the outlet cover to make a little platform for the new LED. i used a soldering iron to melt out the two holes for the screws.
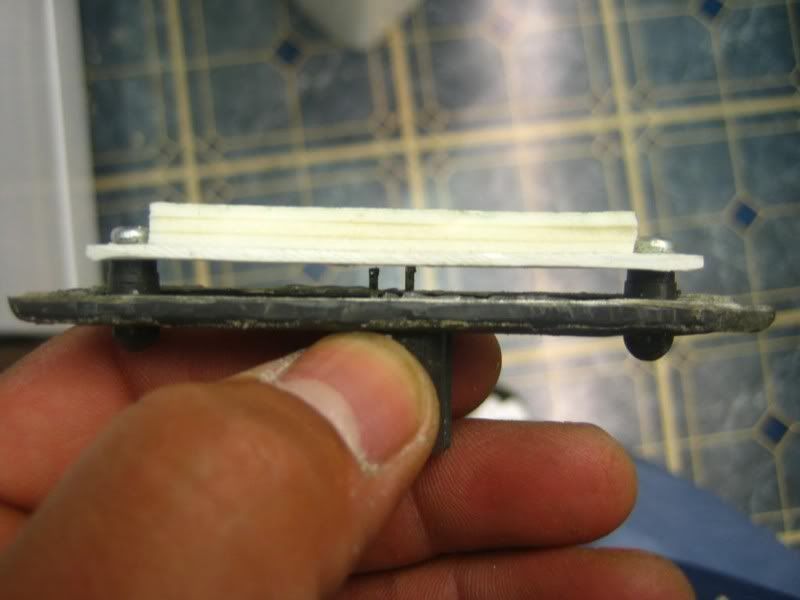
i put down three layers of double side tape to raise the new LED module a bit. its alittle longer than the screw mounts. this way it clears the screw heads.
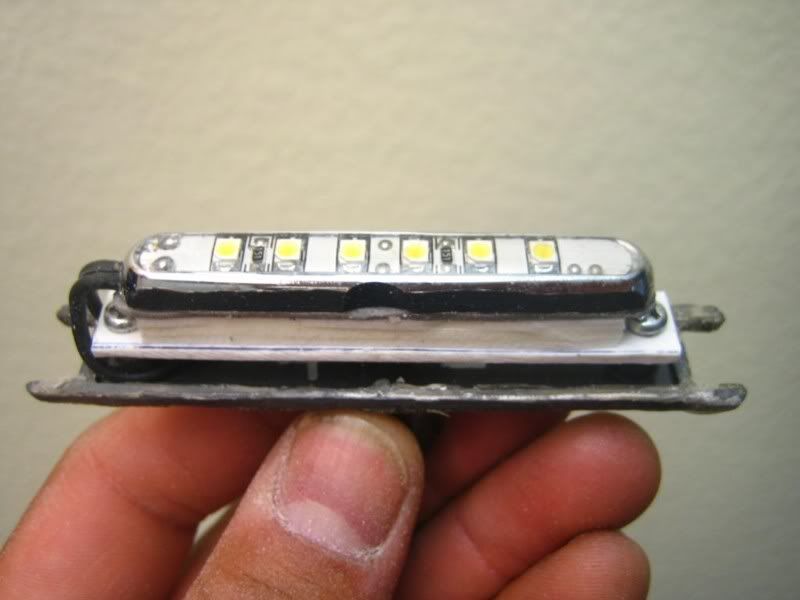
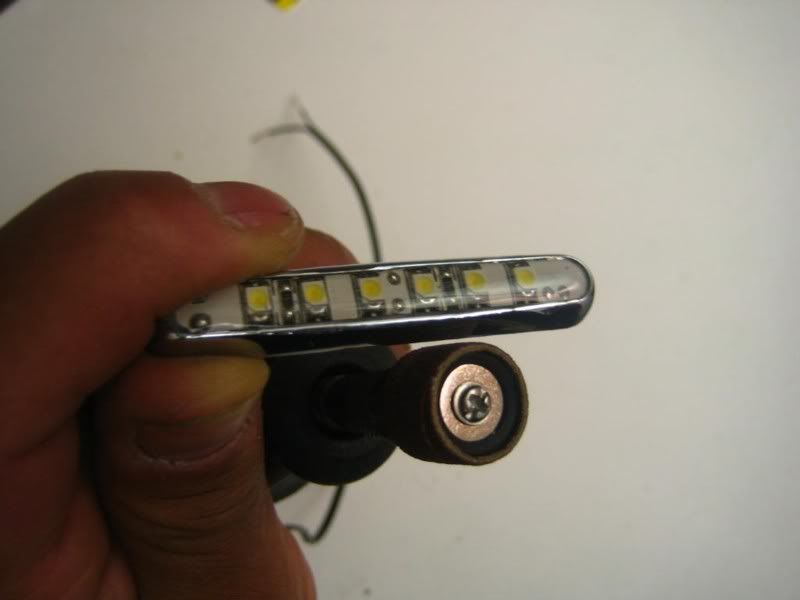
once you cut the wires to size and solder them to the power contacts. mount the new LED in place. should look like this.
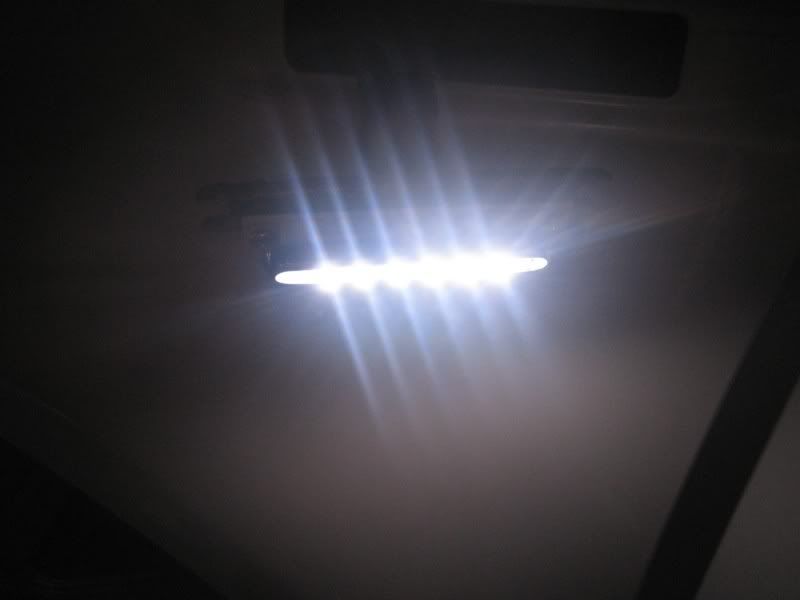
here im testing it out before i put it back together with the epoxy. this thing is bright!
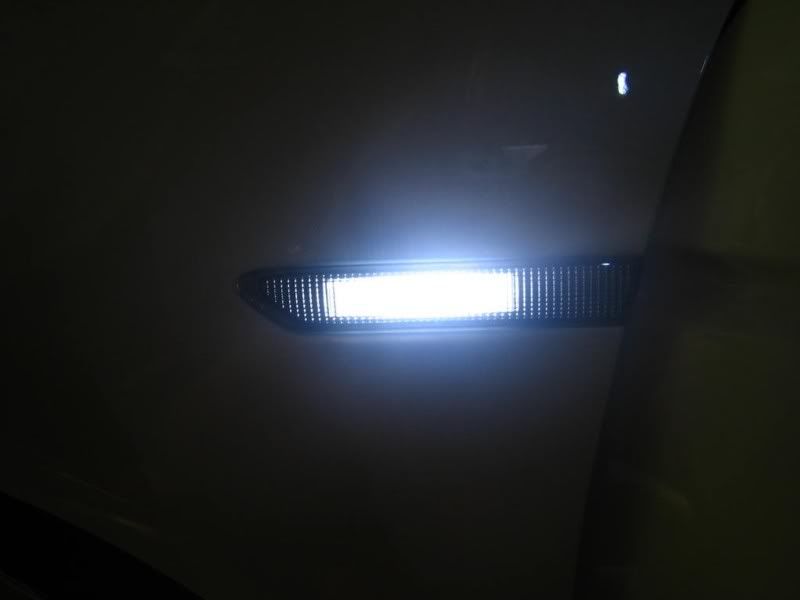
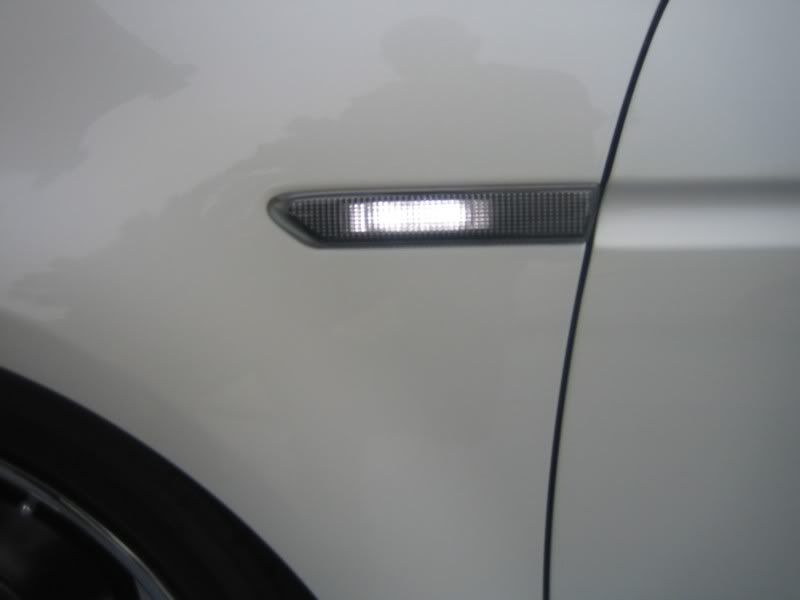
this is the new modified side marker. it's nice and bright. the light output is better than my old LEDS. the light dispersion is alot better, nice and even no hot spots
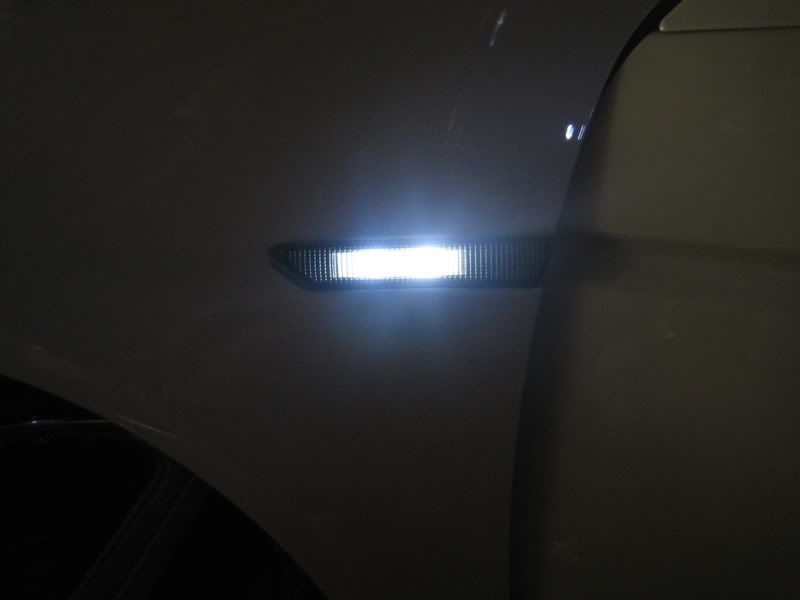
this my side marker before, you cant really tell in the pic but the light output is not as good. it has hot spots you can see where the LED is mounted through the lens
although my side markers never failed. im glad i did this mod. it looks alot better and i dont have to worry that my LEDS will burn out
6 surface mounted LEDS in bright white
the tools i used
material i used
i took my side marker apart. it was pretty easy since i already cut it open and all i had to do was remove the epoxy glue i used a safety cutter with a sharp blade.
new LED and old LED circuit board just about the same size
i dremeled both sides a bit cus it was just a little too wide once i did it was a perfect fit
i cut a piece of the outlet cover to make a little platform for the new LED. i used a soldering iron to melt out the two holes for the screws.
i put down three layers of double side tape to raise the new LED module a bit. its alittle longer than the screw mounts. this way it clears the screw heads.
once you cut the wires to size and solder them to the power contacts. mount the new LED in place. should look like this.
here im testing it out before i put it back together with the epoxy. this thing is bright!
this is the new modified side marker. it's nice and bright. the light output is better than my old LEDS. the light dispersion is alot better, nice and even no hot spots
this my side marker before, you cant really tell in the pic but the light output is not as good. it has hot spots you can see where the LED is mounted through the lens
although my side markers never failed. im glad i did this mod. it looks alot better and i dont have to worry that my LEDS will burn out
94 DC4 RS LSV/Turbo
damn... now that is nice and bright

Quote:
Originally Posted by evnash
nice! link to where we can get the leds?
i got them here http://www.oznium.com/
TEAM_SONIC
Quote:
6 surface mounted LEDS in bright white
the tools i used
material i used
i took my side marker apart. it was pretty easy since i already cut it open and all i had to do was remove the epoxy glue i used a safety cutter with a sharp blade.
new LED and old LED circuit board just about the same size
i dremeled both sides a bit cus it was just a little too wide once i did it was a perfect fit
i cut a piece of the outlet cover to make a little platform for the new LED. i used a soldering iron to melt out the two holes for the screws.
i put down three layers of double side tape to raise the new LED module a bit. its alittle longer than the screw mounts. this way it clears the screw heads.
once you cut the wires to size and solder them to the power contacts. mount the new LED in place. should look like this.
here im testing it out before i put it back together with the epoxy. this thing is bright!
this is the new modified side marker. it's nice and bright. the light output is better than my old LEDS. the light dispersion is alot better, nice and even no hot spots
this my side marker before, you cant really tell in the pic but the light output is not as good. it has hot spots you can see where the LED is mounted through the lens
although my side markers never failed. im glad i did this mod. it looks alot better and i dont have to worry that my LEDS will burn out
Originally Posted by jptl04
ok guys, i know some of you have had problems with your modified side markers, burnt out LEDS. i have had some luck with mine, cuz they still work fine. but i wanted to see if i could make them a bit brighter. so i did some searching i found these bad boys. they have 6 surface mounted LEDS on them and are made to run off 12V so they wont burn out. i ordered a pair and decided to change out my old LEDS for these. this is what i did.6 surface mounted LEDS in bright white
the tools i used
material i used
i took my side marker apart. it was pretty easy since i already cut it open and all i had to do was remove the epoxy glue i used a safety cutter with a sharp blade.
new LED and old LED circuit board just about the same size
i dremeled both sides a bit cus it was just a little too wide once i did it was a perfect fit
i cut a piece of the outlet cover to make a little platform for the new LED. i used a soldering iron to melt out the two holes for the screws.
i put down three layers of double side tape to raise the new LED module a bit. its alittle longer than the screw mounts. this way it clears the screw heads.
once you cut the wires to size and solder them to the power contacts. mount the new LED in place. should look like this.
here im testing it out before i put it back together with the epoxy. this thing is bright!
this is the new modified side marker. it's nice and bright. the light output is better than my old LEDS. the light dispersion is alot better, nice and even no hot spots
this my side marker before, you cant really tell in the pic but the light output is not as good. it has hot spots you can see where the LED is mounted through the lens
although my side markers never failed. im glad i did this mod. it looks alot better and i dont have to worry that my LEDS will burn out
is the rear side markers the same size as the front sidemarkers? Is the front side markers the same length and size as the front? Thank you!
"Advance"
Crazy Man, but can you post the DIRECT link cause I cant find them on that website.
Also can you tell how you did to wire them...
Also can you tell how you did to wire them...

Quote:
Originally Posted by Sondinh
is the rear side markers the same size as the front sidemarkers? Is the front side markers the same length and size as the front? Thank you!
Rears are longer... they have 3 leds, where he fronts have 2.
Quote:
thanks everyone. yea, these look alot better in person. very simple to hook up just connect or solder the + and - wires to the correct contact.Originally Posted by VmtSquad
Crazy!!! Can you tell use how you did to wire them ...
Quote:
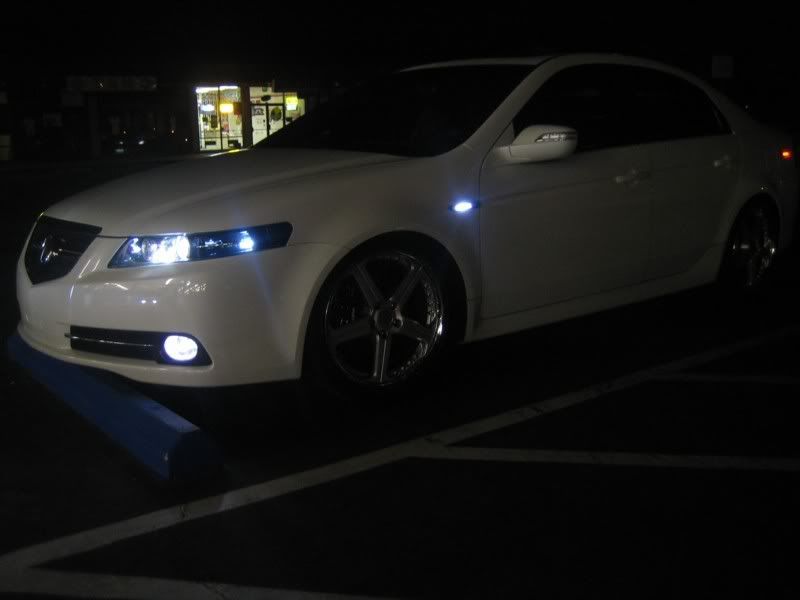
'll take some pics of the whole car and post later tonight.Originally Posted by XjoEnXt
any photos of the entire type-s with the new LEDs (with the rest of the lights on)?
Playing Naked!
TEAM_SONIC
Quote:
Originally Posted by Kennedy
Rears are longer... they have 3 leds, where he fronts have 2.
If I install the same LEDs from the front sidemarkers into the rear sidemarkers, will it still fit without any adjustment?
King of NYC
rockyfeller
King of NYC
close
Sep 17, 2021
- Join DateJul 2006
- LocationNJ
- Posts:3,549
-
iTrader Positive Feedback100
-
iTrader Feedback Score(6)
-
Likes:698
-
Liked:217 Times in 154 Posts
NYCE man!! Good job. Told ya those would look BRIGHT! I'm glad it worked out for you! Well since you were the guniea pig and it's a go, I'm gonna go ahead and order these up.
Like I was telling you before, the rear ones won't be bright enough now, so I am thinking to do all 4??
Like I was telling you before, the rear ones won't be bright enough now, so I am thinking to do all 4??
Quote:
Like I was telling you before, the rear ones won't be bright enough now, so I am thinking to do all 4??
actually rocky. they match up really well. i relly dont see a need to do the rears. the reason i changed them was because of those hot spots. it looked bright. but only in those spots, and thats why it didn't seem as bright. these are perfect.Originally Posted by rockyfeller
NYCE man!! Good job. Told ya those would look BRIGHT! I'm glad it worked out for you! Well since you were the guniea pig and it's a go, I'm gonna go ahead and order these up. Like I was telling you before, the rear ones won't be bright enough now, so I am thinking to do all 4??
i borrowed this pic from another thread so you could compare the two circuit boards

rear circuit board with 3 LEDS
front circuit board and new LED module

Instructor
Quote:
i borrowed this pic from another thread so you could compare the two circuit boards
rear circuit board with 3 LEDS
front circuit board and new LED module
So I'm not completely sure by your answer, but you are saying that you did change out all for sidemarkers, but you didn't see a huge difference from the ones in the rear?Originally Posted by jptl04
actually rocky. they match up really well. i relly dont see a need to do the rears. the reason i changed them was because of those hot spots. it looked bright. but only in those spots, and thats why it didn't seem as bright. these are perfect.i borrowed this pic from another thread so you could compare the two circuit boards
rear circuit board with 3 LEDS
front circuit board and new LED module
Quote:
no i never changed the rear. i said they match well with the new front side marker. so there was no need to change out the rearsOriginally Posted by CrazyFresh
So I'm not completely sure by your answer, but you are saying that you did change out all for sidemarkers, but you didn't see a huge difference from the ones in the rear?
Instructor
Quote:
Thanks JP! I just ordered a set. I guess there's really no need to do the back anyway, I don't even think I ever noticed it much anyway Originally Posted by jptl04
no i never changed the rear. i said they match well with the new front side marker. so there was no need to change out the rears

I have car ADD
crazy bastard!!
ive been dieing to do this since day 1, but the current method proved to be unreliable. seems like you cracked this mystery.... i will have to go ahead and order these!! and then find matching turn signals.. lol. fantastic job man....
ive been dieing to do this since day 1, but the current method proved to be unreliable. seems like you cracked this mystery.... i will have to go ahead and order these!! and then find matching turn signals.. lol. fantastic job man....
Quote:
ive been dieing to do this since day 1, but the current method proved to be unreliable. seems like you cracked this mystery.... i will have to go ahead and order these!! and then find matching turn signals.. lol. fantastic job man....
thanks man! not about the bastard part, lol Originally Posted by BLACKURA_NY
crazy bastard!! ive been dieing to do this since day 1, but the current method proved to be unreliable. seems like you cracked this mystery.... i will have to go ahead and order these!! and then find matching turn signals.. lol. fantastic job man....
yes, i know people been having trouble with this mod. but i haven't started getting crazy yet. soon though, i've taken a break from modding lately, here we go again! stay tuned.
King of NYC
rockyfeller
King of NYC
close
Sep 17, 2021
- Join DateJul 2006
- LocationNJ
- Posts:3,549
-
iTrader Positive Feedback100
-
iTrader Feedback Score(6)
-
Likes:698
-
Liked:217 Times in 154 Posts
well my rear sidemarkers have rockblocker tints on them....so if I think i'll want to do them later I'll have to reorder, I'd rather order all 4..
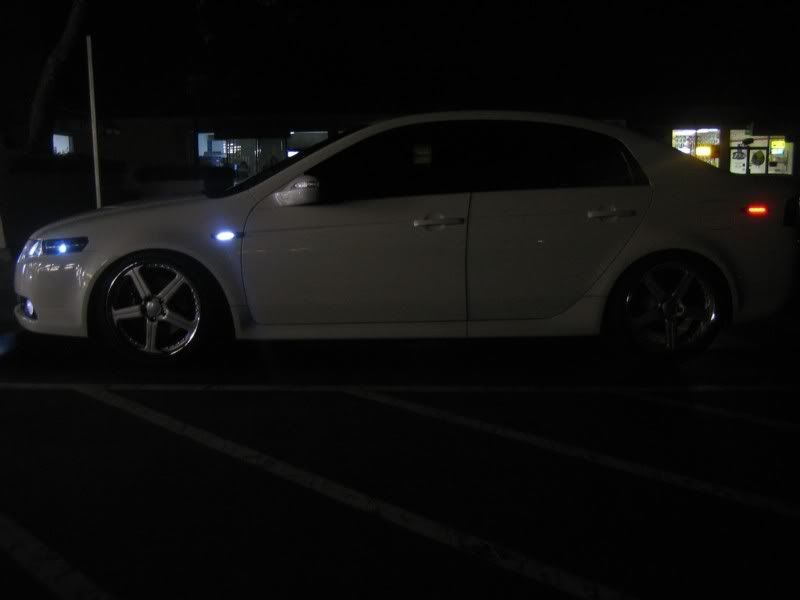
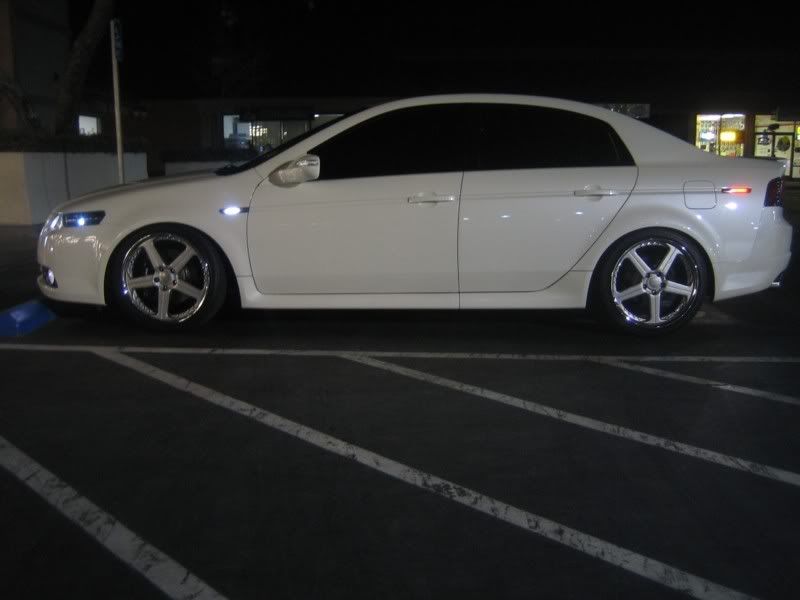
jpt, do you have any side pics at night and day showing the front and back?
jpt, do you have any side pics at night and day showing the front and back?
Quote:
jpt, do you have any side pics at night and day showing the front and back?
Originally Posted by rockyfeller
well my rear sidemarkers have rockblocker tints on them....so if I think i'll want to do them later I'll have to reorder, I'd rather order all 4..jpt, do you have any side pics at night and day showing the front and back?

here is a day shot of the new side marker LED module installed

old high flux LEDs, here you can see those hot spots i was talking about
i'll take some night shots later.


Instructor
I dont know if its just me but I find that the car looks odd with two different color sidemarkers
Quote:
it's just you! Originally Posted by tragic22
I dont know if its just me but I find that the car looks odd with two different color sidemarkers
ALL 3rd gen TL's have two different color side markers. amber and red or like me white and red.