


F-129: DIY 2008 TL Engine Air Filter Replacement with Pics


Thread Starter
Instructor
Joined: Oct 2008
Posts: 153
Likes: 15
F-129: DIY 2008 TL Engine Air Filter Replacement with Pics
lots of info out there but not enough pictures... i had time today and my car is a little over 10,000 so it's time to change... this is a 2008 TL so it might be different from the 04-06s
first remove the 3 black engine bay panels

look closely they are circled. remove the black plastic plug, loose the large clamp (10mm), disconnect the small clamp, loose 4 screws (don't worry about them coming out, they can't, just lose them all the way) at corner of the filter box

remove this drive side trim give you a little more room

again unpluged black plug, loosed 10mm clamp ring, vise grip is good for the small clamp

you want to pull out the big thing first (clamped by the 10mm). then carefully disconnect the small clamp (just hold on the clamp and wiggle the metal hose out
after that you can lift up the filter box and place it on the side, becareful you don't want to bend anything

left new oem from dealer, right old

left new again back side, right old, noticed how dirty it is and my area is pretty clean. so every 10000 is fair game

interestingly the new filter's sides are lubricated out of the package. i think it's easier for sitting snug/smooth into the filter box

notice the uneven filtering. i hope it's normal

old filter in

new filter in
insert new filter - reconnect the large hose (line up the notch and tighten the 10mm clamp) - vise grip the small clamp then wiggle metal hose back in - tighten 4 screws - done
air is definitely better even without the new cabin filter replaced. total time about 30 minutes but next time will be 5 or so heehh. i'm replacing the cabin filter tomorrow.
difficulty level 2/10
first remove the 3 black engine bay panels
look closely they are circled. remove the black plastic plug, loose the large clamp (10mm), disconnect the small clamp, loose 4 screws (don't worry about them coming out, they can't, just lose them all the way) at corner of the filter box
remove this drive side trim give you a little more room
again unpluged black plug, loosed 10mm clamp ring, vise grip is good for the small clamp
you want to pull out the big thing first (clamped by the 10mm). then carefully disconnect the small clamp (just hold on the clamp and wiggle the metal hose out
after that you can lift up the filter box and place it on the side, becareful you don't want to bend anything
left new oem from dealer, right old
left new again back side, right old, noticed how dirty it is and my area is pretty clean. so every 10000 is fair game
interestingly the new filter's sides are lubricated out of the package. i think it's easier for sitting snug/smooth into the filter box
notice the uneven filtering. i hope it's normal
old filter in
new filter in
insert new filter - reconnect the large hose (line up the notch and tighten the 10mm clamp) - vise grip the small clamp then wiggle metal hose back in - tighten 4 screws - done
air is definitely better even without the new cabin filter replaced. total time about 30 minutes but next time will be 5 or so heehh. i'm replacing the cabin filter tomorrow.
difficulty level 2/10

08 TL Bold Beige Metallic
Joined: Sep 2009
Posts: 9
Likes: 0
Excellent illustration for new TL owner like me.
Questions:
Will DIY void the manufacturer warranty? I thought I saw/heard somewhere saying in order for Acura to honor the warranty,
all schedule maintenance is required to be performed at authorized Acura shop. Is this True?
Questions:
Will DIY void the manufacturer warranty? I thought I saw/heard somewhere saying in order for Acura to honor the warranty,
all schedule maintenance is required to be performed at authorized Acura shop. Is this True?

#1 Super Guy!
Joined: May 2007
Posts: 2,337
Likes: 512
No, it's not the edges that are oiled. It's actually the blue side of the filter element that is oiled (similar to K&N). This allows most of the dirt to clump up and catch more dirt over time.
Interestingly, I found that when I recently replaced my OEM filter, I noticed a considerable drop in performance. The motor would stumble when adding throttle in the low rpm, and lacked good power in the mid & high rpm. Thinking perhaps the filter was over-oiled, I decided to pull it and set the oiled side on some folded sheets of newspaper (so it lay directly against the blue pleats). The idea was to wick up as much excess oil as I could. I swapped out the paper every hour (3 times) and couldn't believe how much excess oil was pulled out. After reinstalling, the car performed like normal again. I'm very happy now...

Senior Moderator
Joined: Mar 2005
Posts: 11,999
Likes: 362
From: St. Cloud, FL
No, it's not the edges that are oiled. It's actually the blue side of the filter element that is oiled (similar to K&N). This allows most of the dirt to clump up and catch more dirt over time.
Interestingly, I found that when I recently replaced my OEM filter, I noticed a considerable drop in performance. The motor would stumble when adding throttle in the low rpm, and lacked good power in the mid & high rpm. Thinking perhaps the filter was over-oiled, I decided to pull it and set the oiled side on some folded sheets of newspaper (so it lay directly against the blue pleats). The idea was to wick up as much excess oil as I could. I swapped out the paper every hour (3 times) and couldn't believe how much excess oil was pulled out. After reinstalling, the car performed like normal again. I'm very happy now...
Interestingly, I found that when I recently replaced my OEM filter, I noticed a considerable drop in performance. The motor would stumble when adding throttle in the low rpm, and lacked good power in the mid & high rpm. Thinking perhaps the filter was over-oiled, I decided to pull it and set the oiled side on some folded sheets of newspaper (so it lay directly against the blue pleats). The idea was to wick up as much excess oil as I could. I swapped out the paper every hour (3 times) and couldn't believe how much excess oil was pulled out. After reinstalling, the car performed like normal again. I'm very happy now...


Advanced
Joined: May 2008
Posts: 68
Likes: 1
From: Delaware
Myth
Excellent illustration for new TL owner like me.
Questions:
Will DIY void the manufacturer warranty? I thought I saw/heard somewhere saying in order for Acura to honor the warranty,
all schedule maintenance is required to be performed at authorized Acura shop. Is this True?
Questions:
Will DIY void the manufacturer warranty? I thought I saw/heard somewhere saying in order for Acura to honor the warranty,
all schedule maintenance is required to be performed at authorized Acura shop. Is this True?
Trending Topics

Cruisin'
Joined: Mar 2009
Posts: 19
Likes: 0
From: Pittsburgh/Annapolis
Can you let me know what part number the filter your using is? I searched amazon for a filter that would fit my 05 TL and in the picture it doesn't look like the one your using. It is a complete rectangle, the one corner isn't cut off.
OP -
Nice write up. As a tech, I would like to add my to save you some time, the next time around
  First, that long black trim piece the runs along the fender, you don't need to remove that. Additionally, you also don't need to actually remove the top half of the intake box/hose to the TB.
At work, it takes about 2-3 mins max to change the filter. As you stated, remove the battery cover, unscrew the 4 8mm/Phillips bolts. Now here's where I deviate. Pull the box lid up to seperate it, then push it back, as in towards the engine. The battery tie down will be in the way, but you'll see the motion I'm talking about in regards to why you push it back towards the engine. Then, just simply lift the front section of the box housing up, and remove the old filter, and put the new one in
Again, please don't think I'm saying your write up was incorrect or wrong. On the contrary, like I mentioned, I just want to save you, and others, some time Props for the pics though, I'm sure it's very helpful for those who don't do this often!
Nice write up. As a tech, I would like to add my
to save you some time, the next time around First, that long black trim piece the runs along the fender, you don't need to remove that. Additionally, you also don't need to actually remove the top half of the intake box/hose to the TB.At work, it takes about 2-3 mins max to change the filter. As you stated, remove the battery cover, unscrew the 4 8mm/Phillips bolts. Now here's where I deviate. Pull the box lid up to seperate it, then push it back, as in towards the engine. The battery tie down will be in the way, but you'll see the motion I'm talking about in regards to why you push it back towards the engine. Then, just simply lift the front section of the box housing up, and remove the old filter, and put the new one in
Again, please don't think I'm saying your write up was incorrect or wrong. On the contrary, like I mentioned, I just want to save you, and others, some time
Props for the pics though, I'm sure it's very helpful for those who don't do this often!


2nd Gear
Joined: Feb 2007
Posts: 2
Likes: 0
Oil FIlter Part number for 2007 TL
Apparently some 2007 TL 3.2 engines use a different air filter. FRAM Website lists CA9600 for 3.2TL but my car's air filter is like the TL Type S. It is 5-sided instead of rectangular.
The correct FRAM number is CA10551 which corresponds to Honda Part 17220-RDA-A10. It is also a two stage type and looks very different than the CA9600. The one pictured above is like mine.
The correct FRAM number is CA10551 which corresponds to Honda Part 17220-RDA-A10. It is also a two stage type and looks very different than the CA9600. The one pictured above is like mine.
2nd Gear
Joined: Feb 2007
Posts: 2
Likes: 0
Installed mine in about 10 minutes. Mine looked exactly like the pictures about. I removed the side trim that is pictured and the 4 bolts hlding the cover. Thats it. Did not remove any clamps or connectors. Was able to lift cover up, remove old filter and install new one without any trouble. There is plenty of flex in the air inlet tube. Very easy to do. The FRAM filter CA10551 was an EXACT match to the original Honda filter that came with the car, down to the exact code numbers and name molded into the plastic. My guess is that Honda and Fram have the same source for the filter.

Racer
Joined: Mar 2005
Posts: 347
Likes: 0
From: Mass
Thanks for the write-up. I swapped mine out for a K&N air filter today and only removed the battery cover and the four bolts and then used acuratech's advice. The new filter was only about half the height of the old one but it fit perfectly in the slot.

Pro
Joined: Feb 2005
Posts: 697
Likes: 0
Installed mine in about 10 minutes. Mine looked exactly like the pictures about. I removed the side trim that is pictured and the 4 bolts hlding the cover. Thats it. Did not remove any clamps or connectors. Was able to lift cover up, remove old filter and install new one without any trouble. There is plenty of flex in the air inlet tube. Very easy to do. The FRAM filter CA10551 was an EXACT match to the original Honda filter that came with the car, down to the exact code numbers and name molded into the plastic. My guess is that Honda and Fram have the same source for the filter.
Note that the filters are different between '04-'06 and '07-'08. I bought the '06 one originally and it wouldn't fit. (only because the old ass Pep-Boys "computer" in the filter aisle only went up to '06). Ended up just going to the nearby Acura dealer.


2nd Gear
Joined: Oct 2010
Posts: 2
Likes: 0
 Thanks
I had the same problem with a new OEM filter I put in my 2004 TSX last week (looks like the same filter from your pic). Just seems like the throttle response is slow and until ~ 2,500 RPMs the overall acceleration just seems to lag. I remembered that the filter has the same blue oil yours did (lots of it).
I thought I was imagining it and almost bought a K&N drop-in filter just to be rid of the problem. I will try your solution first. THANK YOU FOR POSTING THIS.
I thought I was imagining it and almost bought a K&N drop-in filter just to be rid of the problem. I will try your solution first. THANK YOU FOR POSTING THIS.
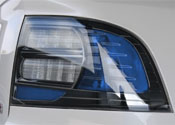
No, it's not the edges that are oiled. It's actually the blue side of the filter element that is oiled (similar to K&N). This allows most of the dirt to clump up and catch more dirt over time.
Interestingly, I found that when I recently replaced my OEM filter, I noticed a considerable drop in performance. The motor would stumble when adding throttle in the low rpm, and lacked good power in the mid & high rpm. Thinking perhaps the filter was over-oiled, I decided to pull it and set the oiled side on some folded sheets of newspaper (so it lay directly against the blue pleats). The idea was to wick up as much excess oil as I could. I swapped out the paper every hour (3 times) and couldn't believe how much excess oil was pulled out. After reinstalling, the car performed like normal again. I'm very happy now...
Interestingly, I found that when I recently replaced my OEM filter, I noticed a considerable drop in performance. The motor would stumble when adding throttle in the low rpm, and lacked good power in the mid & high rpm. Thinking perhaps the filter was over-oiled, I decided to pull it and set the oiled side on some folded sheets of newspaper (so it lay directly against the blue pleats). The idea was to wick up as much excess oil as I could. I swapped out the paper every hour (3 times) and couldn't believe how much excess oil was pulled out. After reinstalling, the car performed like normal again. I'm very happy now...
Advanced
Joined: Mar 2010
Posts: 95
Likes: 5
From: Tustin, CA
 . I forgot to reconnect the "black plug" shown above after the replacement and when I started my car, the first thing I noticed was a very rough idle. Also, the VSA, exclamation mark indicator, and check engine light came on. I then realized what I had forgotten and turned off the car to reconnect the plug. Now, when I start the car, I don't notice anything abnormal but the check engine light is still on. Should this be of any concern?


Advanced
Joined: Apr 2011
Posts: 75
Likes: 1
I swapped out my OEM air filter today with a K&N filter and made a stupid mistake . I forgot to reconnect the "black plug" shown above after the replacement and when I started my car, the first thing I noticed was a very rough idle. Also, the VSA, exclamation mark indicator, and check engine light came on. I then realized what I had forgotten and turned off the car to reconnect the plug. Now, when I start the car, I don't notice anything abnormal but the check engine light is still on. Should this be of any concern?
. I forgot to reconnect the "black plug" shown above after the replacement and when I started my car, the first thing I noticed was a very rough idle. Also, the VSA, exclamation mark indicator, and check engine light came on. I then realized what I had forgotten and turned off the car to reconnect the plug. Now, when I start the car, I don't notice anything abnormal but the check engine light is still on. Should this be of any concern?
Intermediate
Joined: Oct 2008
Posts: 43
Likes: 0
From: Elmhurst, Illinois
just a quick FYI. If you have to disconnect the MAF sensor to swap out the air filter, for some reason the ECM throws a DTC+MIL. It will clear if you disconnect the battery for a min or so, then reconnect and start up again. The problem is, you'll lose your radio and NAV codes and have to reenter factory codes so have them handy.

8th Gear
Joined: Mar 2011
Posts: 8
Likes: 0
From: Manassas, VA
this is an excellent post. I did this change last weekend with a K&N air filter(car has 40K on it but bought it used so I figured what the hell) and noticed immediate performance boost. Side note that side bar removed helps out when taking out the air filter cover. Also I found a dead mouse(petrified) underneath where the air filter goes. Would post pics but newbie to the site.

Instructor
Joined: Aug 2011
Posts: 219
Likes: 23
From: Dallas
you probably don't have to completely remove the filter cover and clamp as the OP did. Prob just need to remove 3 screws. These are meant to just have 1 side open and you should be able to slide in new filter for quick change. I'm changing mine shortly.

Instructor
Joined: Mar 2009
Posts: 137
Likes: 2
I tried getting the screws off with a screw driver however they seem to be to tight, I was concerned that I might destroy the screws if I apply too much force. Is there a better tool that I could use?or am I doing something wrong?

I like turtles
Joined: Mar 2012
Posts: 725
Likes: 186
From: Columbia, MO


Stay Out Of the Left Lane


Joined: Oct 2003
Posts: 9,699
Likes: 1,397
From: SE Mass --- > Central VA --- > SE Mass
You should be able to use a socket on the screws as I believe they are hex bolts.
When I changed my filter, I experienced the same overtightened screws and had to resort to my socket set.
As others have said - I didn't have to take off anything other than the battery cover.

Thread
Thread Starter
Forum
Replies
Last Post
nanos
Car Parts for Sale
26
Nov 12, 2015 08:41 PM
Skirmich
2G TL (1999-2003)
37
Sep 15, 2015 06:41 PM
sputik
2G TL (1999-2003)
4
Sep 7, 2015 01:40 PM
