
DIY: Vanity Light Removal, with pictures


Thread Starter
2nd Gear
Joined: Sep 2012
Posts: 2
Likes: 8
After taking in a lot of information from many posts on lighting modification of the TL, I figured it was time to give back to the community a bit! The one thing I was unable to find that many people have seemed to have trouble with was the removal of the vanity light covers. I could have seriously used some pictures when I was removing mine, so I thought I'd create a thread with just that: a picture-based how-to for vanity light cover removal on the 3G TL!
First things first, what you need:
1: Flathead Screwdriver
2: Patience and a light touch
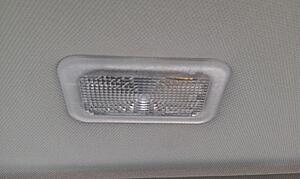
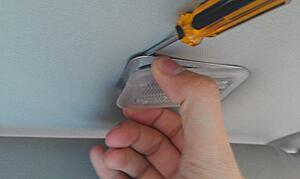
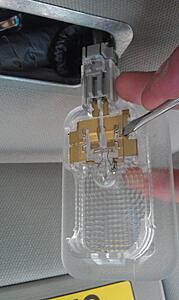
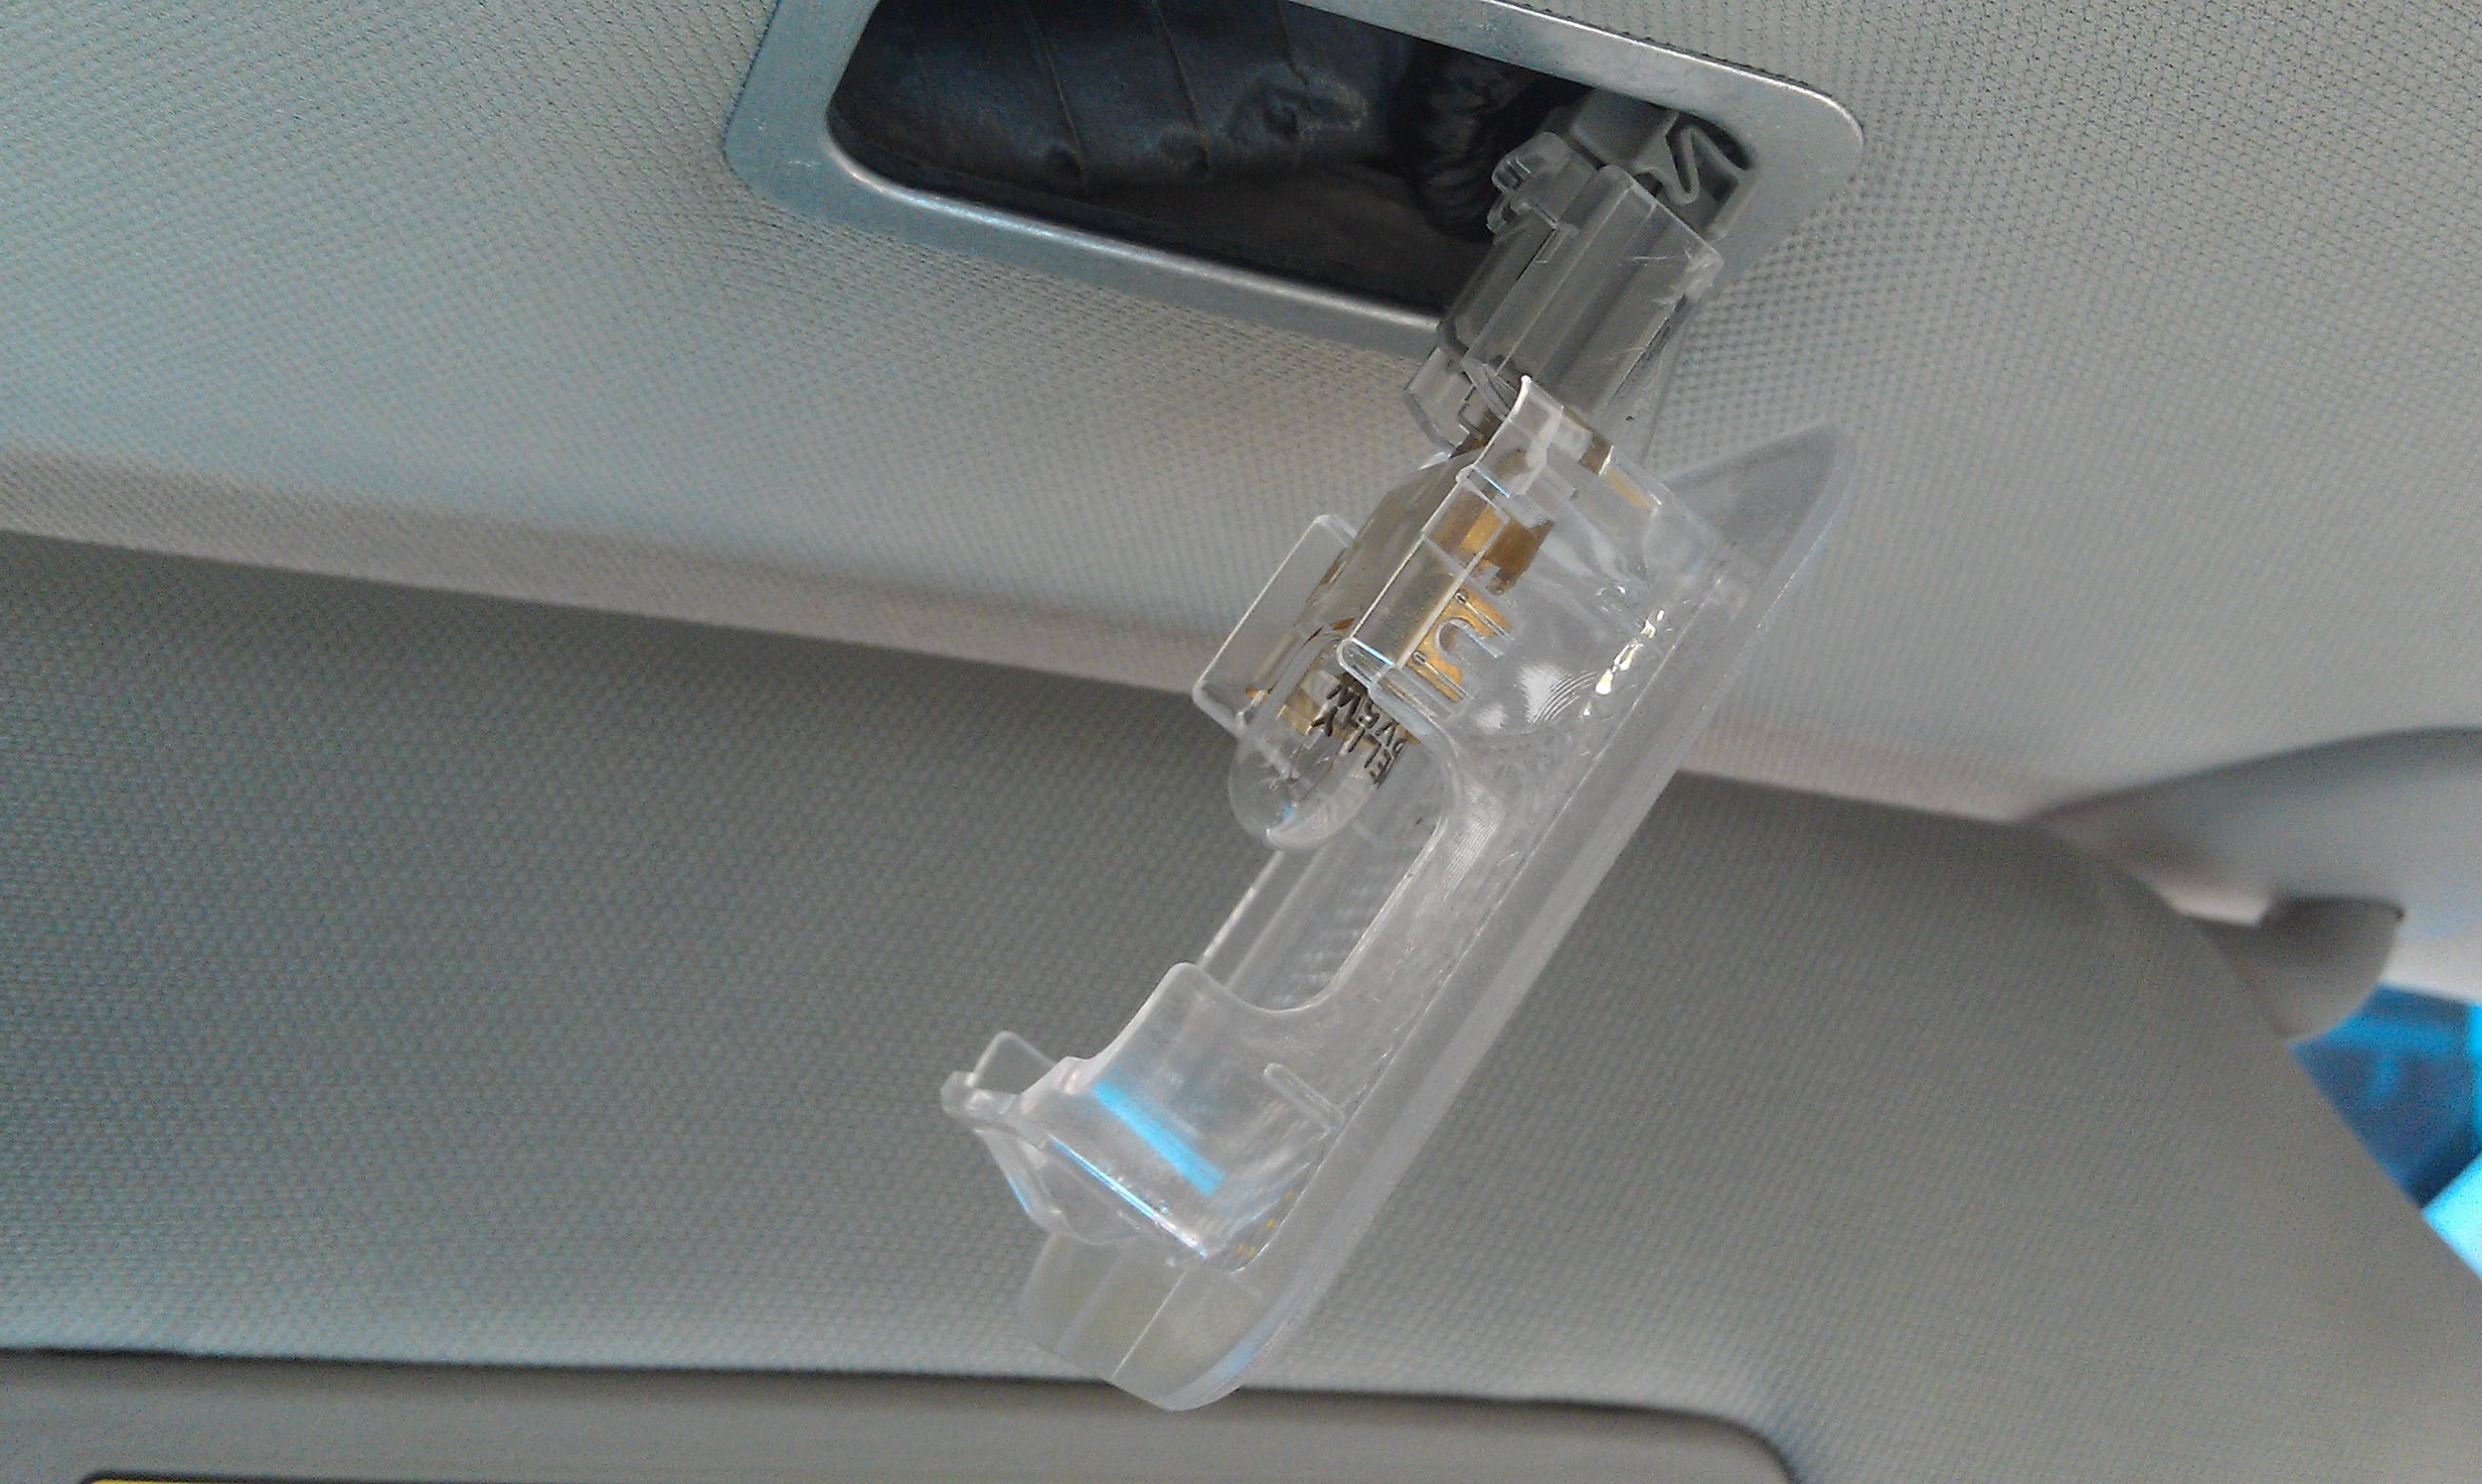
Onto the actual work! Get into the passenger side first and pull down the visor to reveal the vanity light:
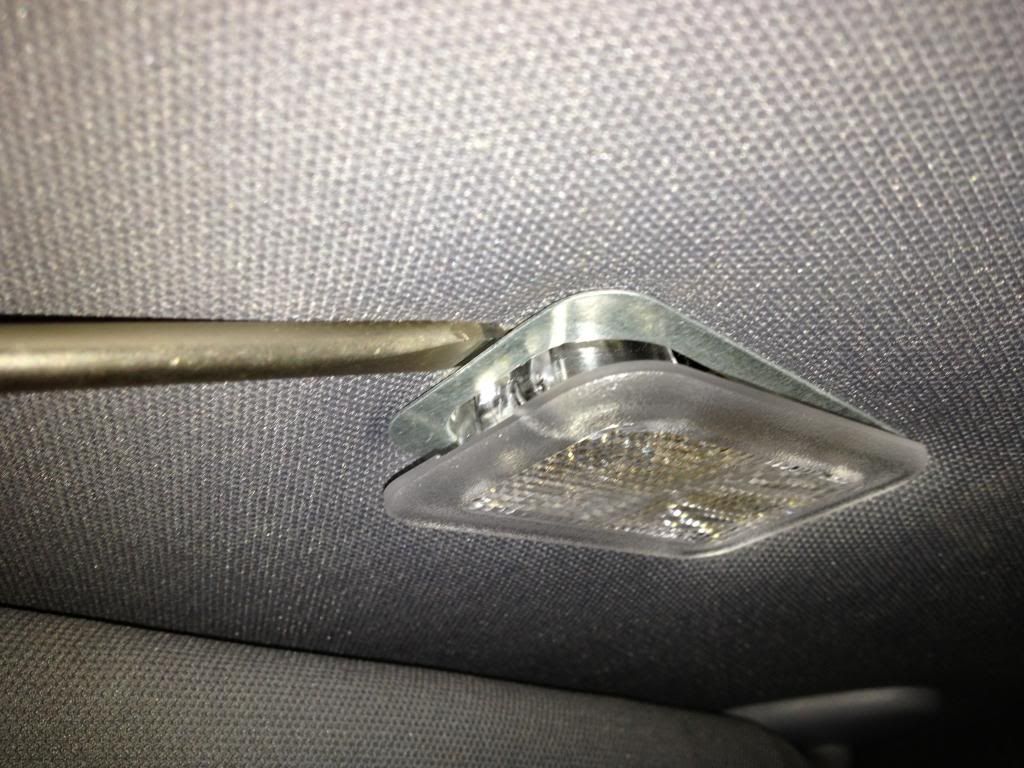
Next, slide your screwdriver underneath the metal plate on the front-side closest to the center console.
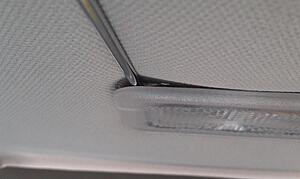
Angle the screwdriver and push it further into the space above the light.
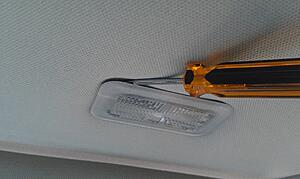
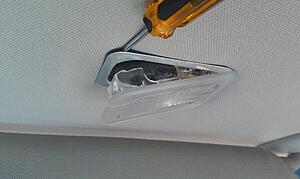
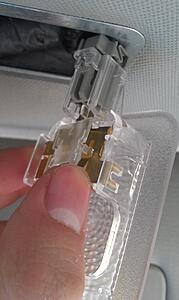
Rotate the screwdriver handle towards the center console. You should feel a slight bit of resistance and see the light cover begin to move downwards as you depress the release tab (you can see this if you look closely in the picture below).
Then just pull the cover out! It might take a bit more force than you expect, but you wont break anything if you take it slow.
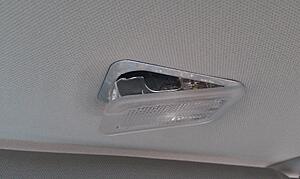

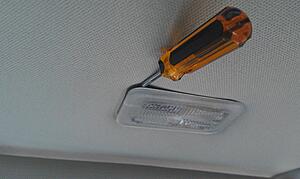
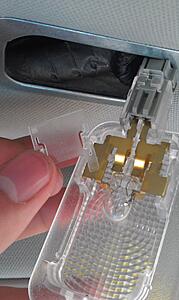
Given that people have also had trouble getting this bulb out, I'll tell you all a very easy way to remove it - take off that little plastic cover and use the screwdriver to push it out.
Be gentle, it's a very easy piece to remove (and lose if you drop it).
Once you've unclipped one side, it's as simple as pulling it off.
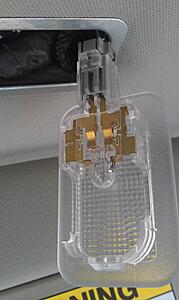
Now for the bulb - just slide you screwdriver gently behind it (it won't fit all the way, just the corner is fine to start) and carefully push outward - the bulb will slowly start to slide out and the screwdriver will eventually slide in behind it. At this point, you're essentially done!
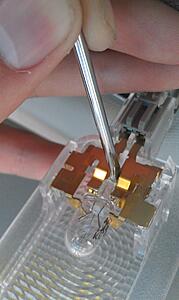
Just throw in your smexy LEDs, pop the plastic cover back on, and slide the light cover back up into the metal housing.
I realize that the majority of you have probably already done this or given up, but I hope this is helpful to any 3G TL owners who are looking to do this still!
First things first, what you need:
1: Flathead Screwdriver
2: Patience and a light touch
Onto the actual work! Get into the passenger side first and pull down the visor to reveal the vanity light:

Next, slide your screwdriver underneath the metal plate on the front-side closest to the center console.

Angle the screwdriver and push it further into the space above the light.

Rotate the screwdriver handle towards the center console. You should feel a slight bit of resistance and see the light cover begin to move downwards as you depress the release tab (you can see this if you look closely in the picture below).

Then just pull the cover out! It might take a bit more force than you expect, but you wont break anything if you take it slow.


Given that people have also had trouble getting this bulb out, I'll tell you all a very easy way to remove it - take off that little plastic cover and use the screwdriver to push it out.

Be gentle, it's a very easy piece to remove (and lose if you drop it).
Once you've unclipped one side, it's as simple as pulling it off.


Now for the bulb - just slide you screwdriver gently behind it (it won't fit all the way, just the corner is fine to start) and carefully push outward - the bulb will slowly start to slide out and the screwdriver will eventually slide in behind it. At this point, you're essentially done!


Just throw in your smexy LEDs, pop the plastic cover back on, and slide the light cover back up into the metal housing.
I realize that the majority of you have probably already done this or given up, but I hope this is helpful to any 3G TL owners who are looking to do this still!
I would actually recommend disconnecting the connector to the vanity light after you remove it.
If you just stick a screw driver in there to pop the bulb out while it's still connected, that will cause a short to ground and you'll most likely blow a fuse of some sort. Possibly something worse.
All in all, very good DIY. It's very nice of you to spend one of your first posts as a DIY to help others. New member and already lending a helping hand. Nice!

Drifting
Joined: May 2006
Posts: 2,499
Likes: 222
From: Carlsbad, CA
Great writeup! I tried a few years ago getting those lights out and gave up. I feel more empowered to make it happen now. The service manual was not helpful- the trick is the rotate-90 of the screwdriver and going under the metal plate.
Thanks
Thanks
Drifting
Joined: Oct 2006
Posts: 2,683
Likes: 213
From: CA
funny thing is that the vanity light is the same as the trunk light, and i got that replaced in a heartbeat. i think what makes this difficult is that the headliner bends as you apply pressure, so you cant really get good leverage on the plastic lens. realistically, the screwdriver should be between the metal frame and the plastic lens, but because everything bends when you apply pressure, it just doesnt let go.
the trunk light, on the other hand, pops off in seconds, since the plastic lens will move independently of the metal body frame that its connecting to.
OP - good job on the DIY! only thing i disagree on is touching the metal contacts with the screwdriver. i actually just wore a rubber glove and i was able to pull it off without the need to remove anything else.
also what will make it easier is that, once you pop it off, you can unplug the power connector so you dont have to work on the light while its hanging from the headliner.


ha, i just cracked the plastic cover the other day. i was trying to wedge the screwdriver between the plastic and the metal instead of between the metal and the headliner. nice write-up!
Also, I removed the bulb by grabbing it with a set of needle nose pliers and tugging gently.
Also, I removed the bulb by grabbing it with a set of needle nose pliers and tugging gently.
Last edited by AndrewA; Sep 12, 2012 at 11:16 AM.

Instructor
Joined: Mar 2012
Posts: 179
Likes: 12
I followed the DIY in the garage and managed to get it out pretty easily. Took a few tries to actually figure it out.
Mine did not have that plastic cover over the bulb? I simply used the tape method to pull the bulbs out, that worked flawlessly.
Nice writeup though.. seeing this would have saved me a little time on all the reading, but oh well.
Mine did not have that plastic cover over the bulb? I simply used the tape method to pull the bulbs out, that worked flawlessly.
Nice writeup though.. seeing this would have saved me a little time on all the reading, but oh well.
Trending Topics

AZ Community Team
Joined: May 2007
Posts: 32,488
Likes: 7,771
From: N35�03'16.75", W 080�51'0.9"
I agree:
Easy for you to say, lol. Those stupid F'n plastic lenses cost like $16 each and, yes, they DO break. 
I have put a curse on engineer who designed the vanities. He will rot in Hell for all eternity replacing vanity bulbs on a 3G TL.
The "trick" is get that small screwdriver between the Lens and the Metal Bracket and push the Lens clip in, then pull down. The clip is on the side closest to the center of the car.
Head a da Family
Joined: Jul 2003
Posts: 5,505
Likes: 568
From: New Friggin Jerzy


Instructor
Joined: Sep 2012
Posts: 119
Likes: 13
From: Nova Scotia, Canada
Hey there, just swapped my vanities for LEDs tonight. Just wanted to add to this DIY, I found what I think is an easier way to get to them. If you look on the edge closest to the middle of the car there's an indent and I found if you just slide a screw driver in there it pops right open.
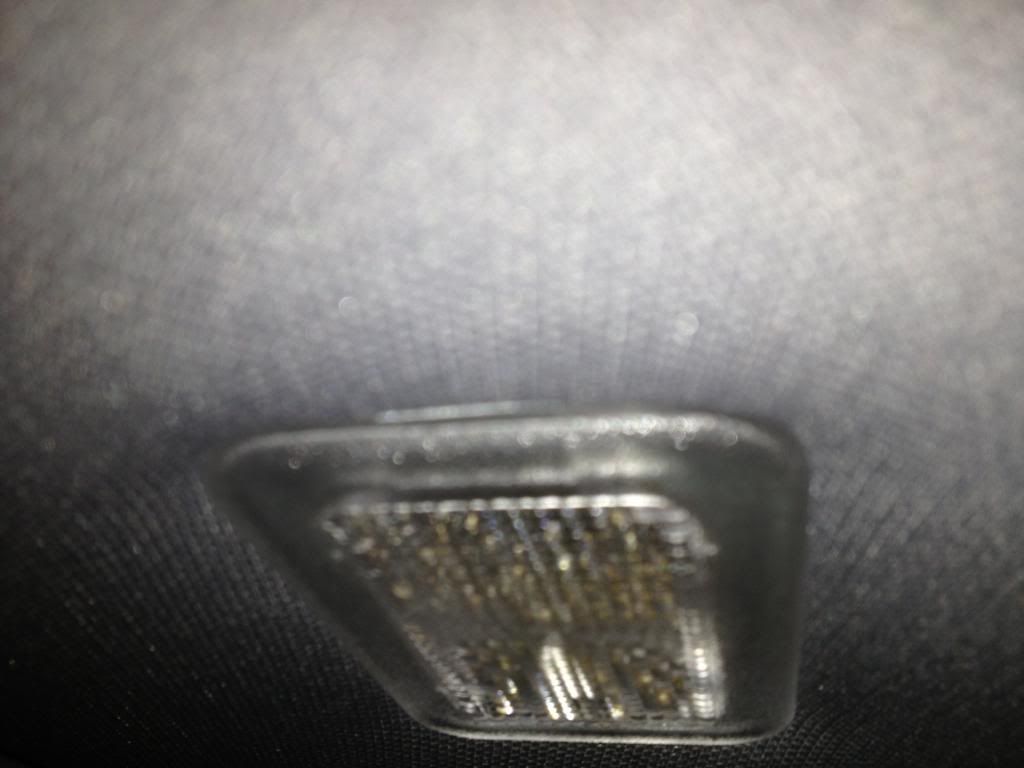
Sorry for the crappy quality pics but you get the idea. And those debating LEDs DO IT!! Looks so much cleaner with the pure white light.
Mak
Sorry for the crappy quality pics but you get the idea. And those debating LEDs DO IT!! Looks so much cleaner with the pure white light.
Mak


10th Gear
Joined: Jun 2012
Posts: 11
Likes: 4
From: Northern California
First of all, thank you and awesome job on the initial writeup and pictures.
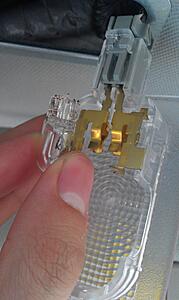
I wanted to add to this great writeup regarding the actual removal of the bulb. You can get the bulb out without removing that plastic by:
1. Unplug the light from the harness (You could leave it in but its easier if removed).
2. Grab the bulb
3. With your other thumb...use your nail to push it out as your pulling with your other hand.
[IMG] [/IMG]
It should come right out...it did for me in both of my TL's.
I wanted to add to this great writeup regarding the actual removal of the bulb. You can get the bulb out without removing that plastic by:
1. Unplug the light from the harness (You could leave it in but its easier if removed).
2. Grab the bulb
3. With your other thumb...use your nail to push it out as your pulling with your other hand.
[IMG]
 [/IMG]
It should come right out...it did for me in both of my TL's.


Yes its 194, I have a ton of LEDS laying around if anyone needs a kit let me know....AND I HIGHLY RECOMMEND NOT USING A SCREWDRIVER UNLESS YOU DISCONNECT THE HOUSING/WIRING. NO POINT IN BLOWING FUSES

7th Gear
Joined: Aug 2015
Posts: 7
Likes: 1
From: West Coast
Hey there, just swapped my vanities for LEDs tonight. Just wanted to add to this DIY, I found what I think is an easier way to get to them. If you look on the edge closest to the middle of the car there's an indent and I found if you just slide a screw driver in there it pops right open.
Sorry for the crappy quality pics but you get the idea. And those debating LEDs DO IT!! Looks so much cleaner with the pure white light.
Mak
Sorry for the crappy quality pics but you get the idea. And those debating LEDs DO IT!! Looks so much cleaner with the pure white light.
Mak
I finally tried this technique and within 5 seconds i felt something shift - and I finally had hope this was going to get done today!!! then with a little more careful prying and pushing - the lense popped out - and I was done !!
thank you very much for this!!

Thread
Thread Starter
Forum
Replies
Last Post
cycdaniel
1G TSX Performance Parts & Modifications
8
Dec 17, 2019 10:58 AM
rockyboy
2G RDX (2013-2018)
46
Jan 25, 2016 06:00 PM
Oakes
Wash & Wax
10
Oct 12, 2015 11:17 AM
sockr1
Car Parts for Sale
22
Oct 1, 2015 01:31 AM