Another Headlight Black out Journal w/ partial orange reflector

Thread Starter
Racer
Joined: Mar 2007
Posts: 404
Likes: 3
From: Baltimore, MD
Another Headlight Black out Journal w/ partial orange reflector
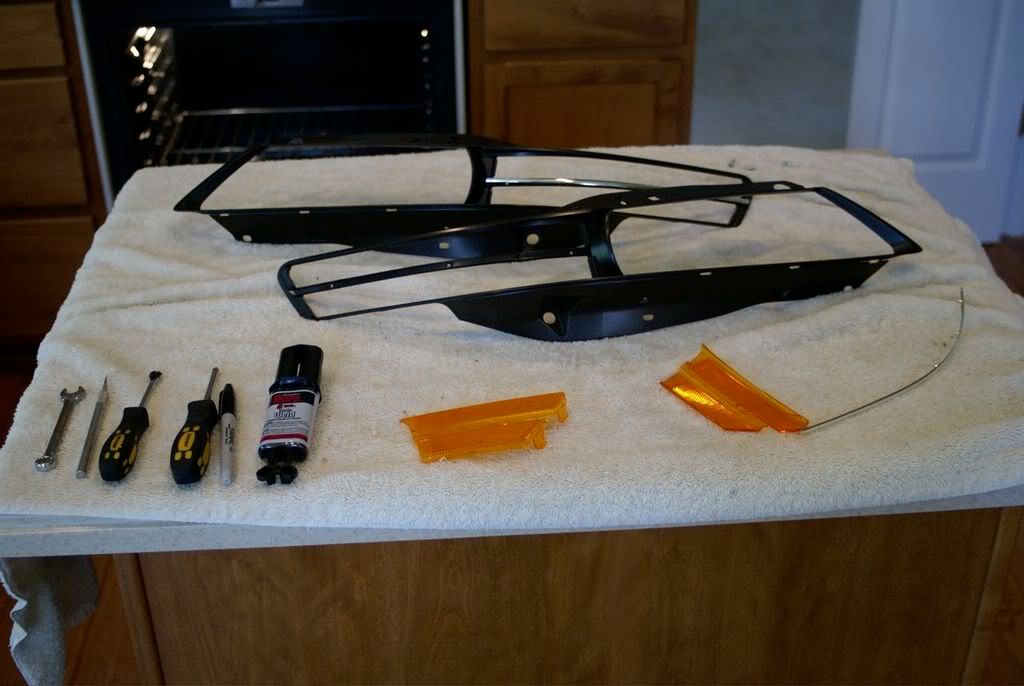
Here is a journal of what I did thanks to the help of others on this forum. I have been contemplating this job for over a year now. It is very easy. Just take it slow and have lots of time. I hope this helps someone as others have helped me.
The bumper is easy enough to take off. If you have the A-spec lip it helps if you drill a hole to access the screw in the wheel well without taking off the kit. It helps a lot. Make sure you have everything ready before you start.
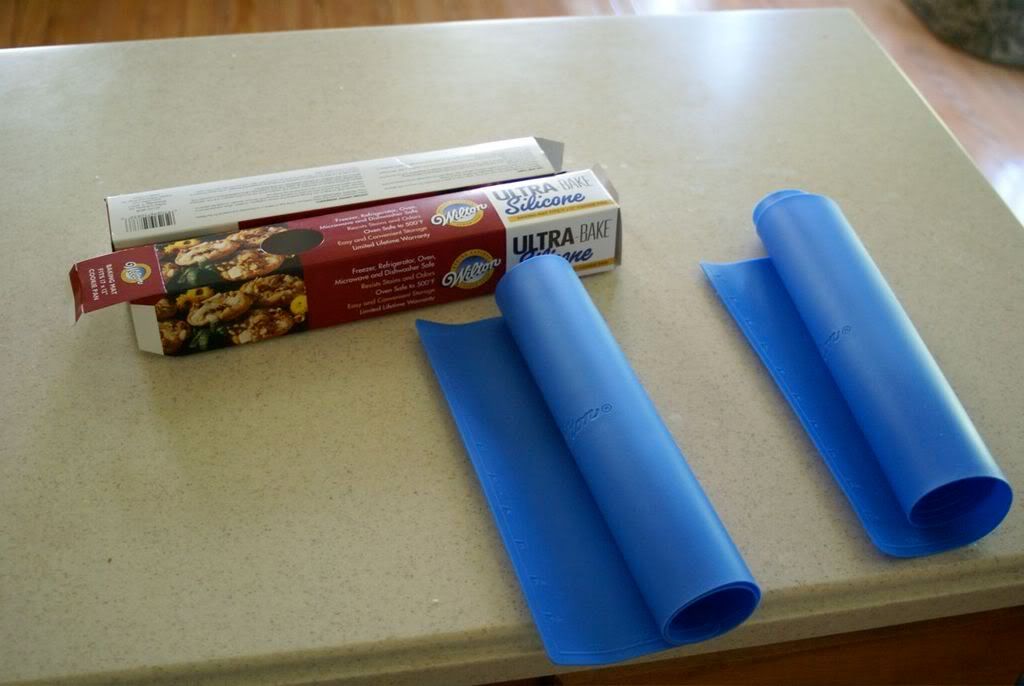
I purchased these silicone sheets from Target.
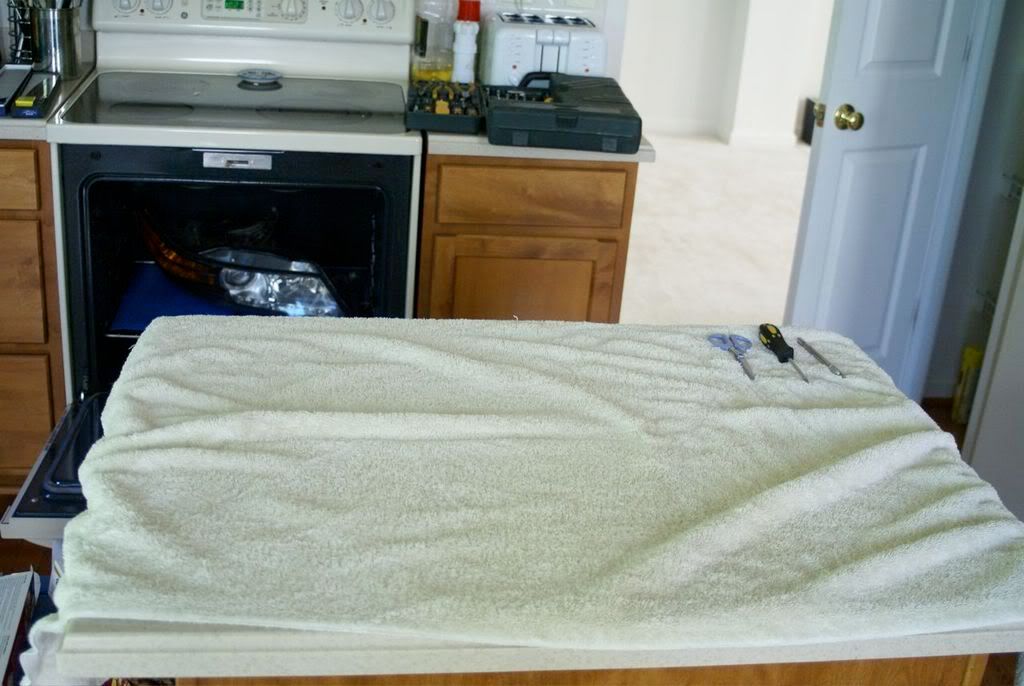
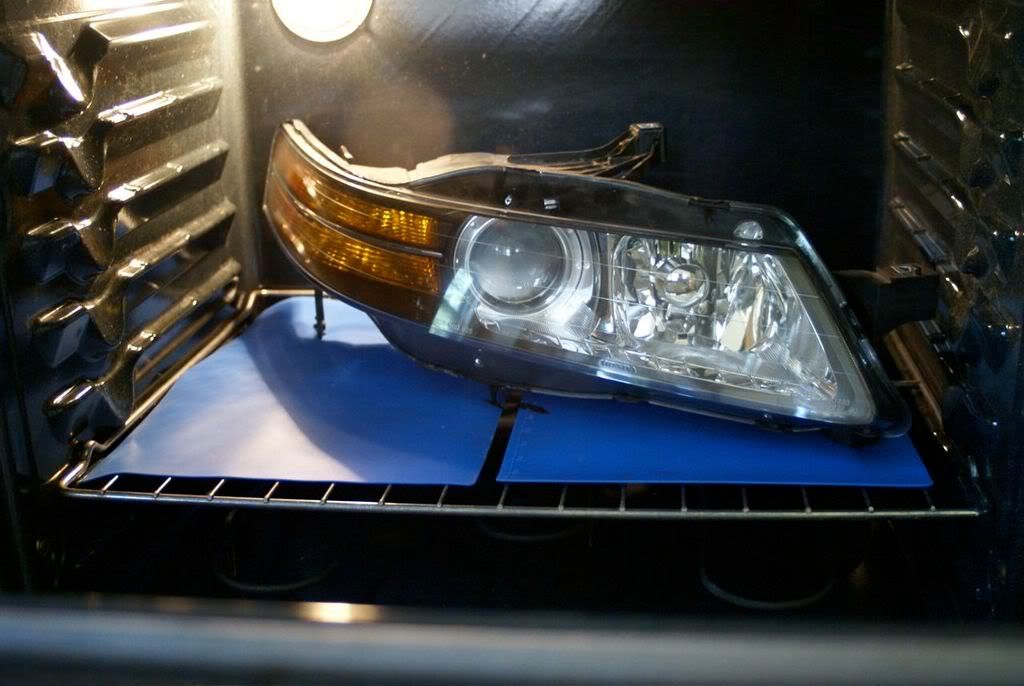
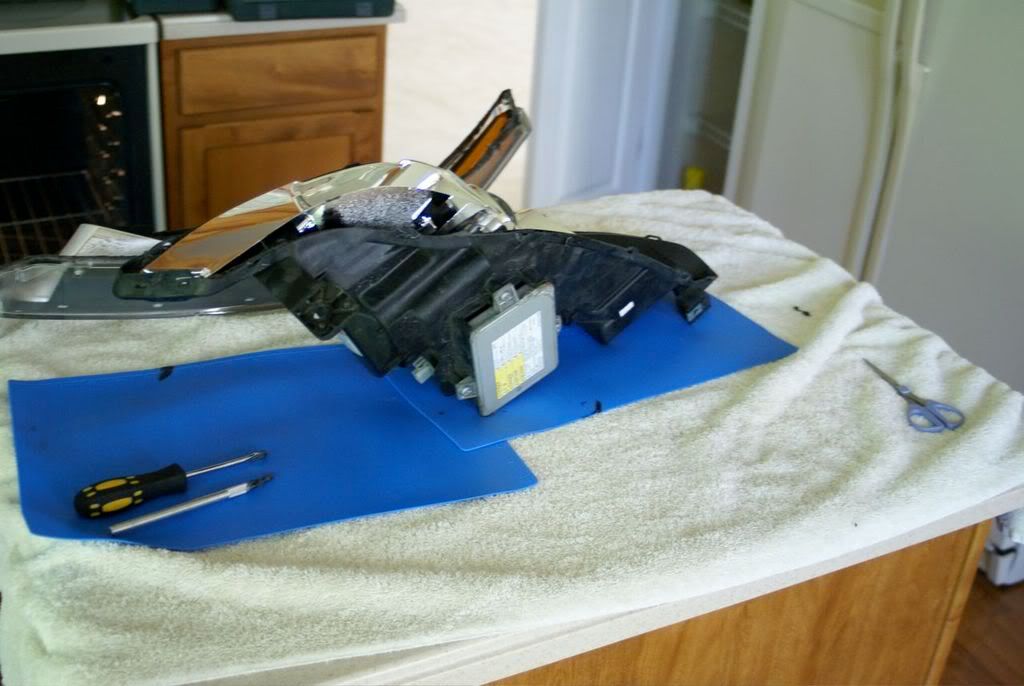
When putting the headlight in the oven I didn't put the headlight in flat and the oven and some of the silicone stuck to the sheet. I did the second one flat with no problem. I had them in there for 20 min at 200 no pre-heat.
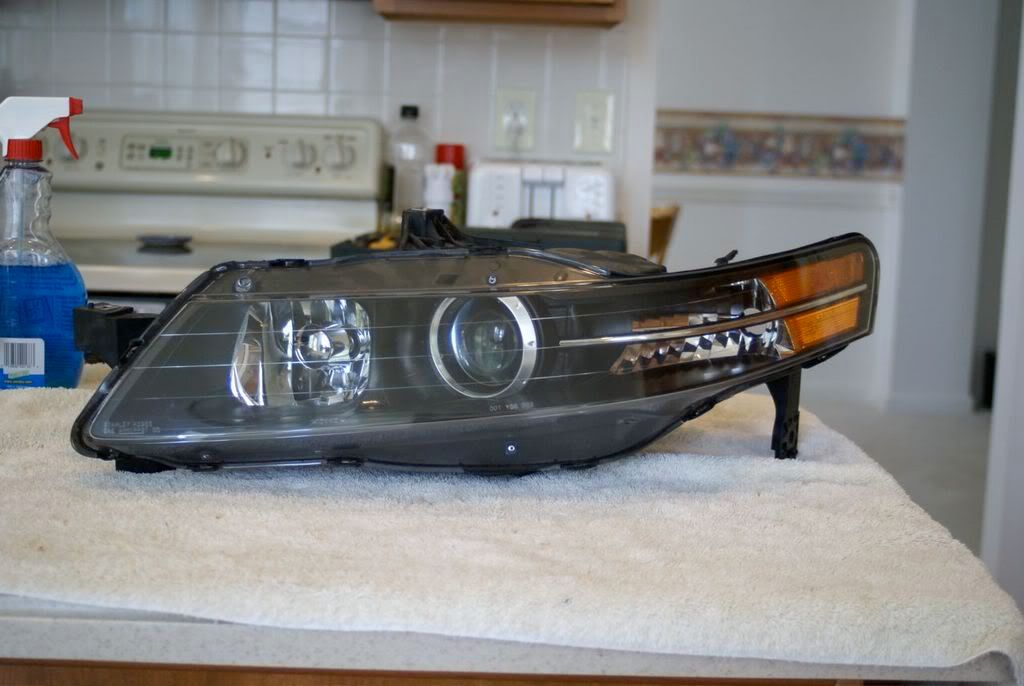
Pulling apart the headlight I started on the inside closest to the grill and cut the silicone with a razor blade as I went. I did this my self, the only problem I broke one clip. I did fix it later.
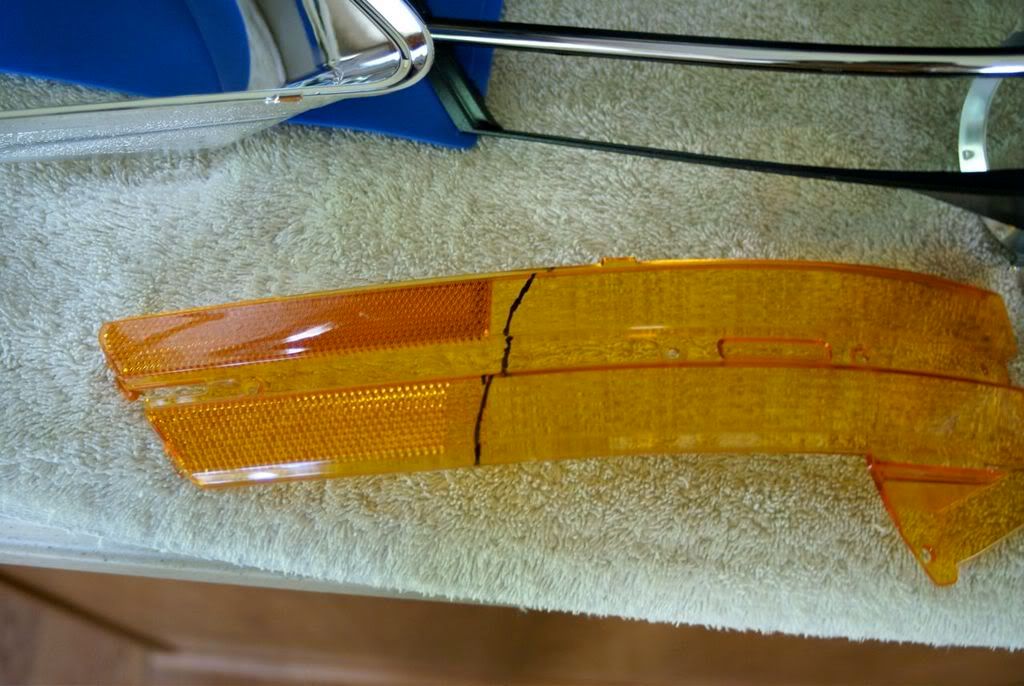
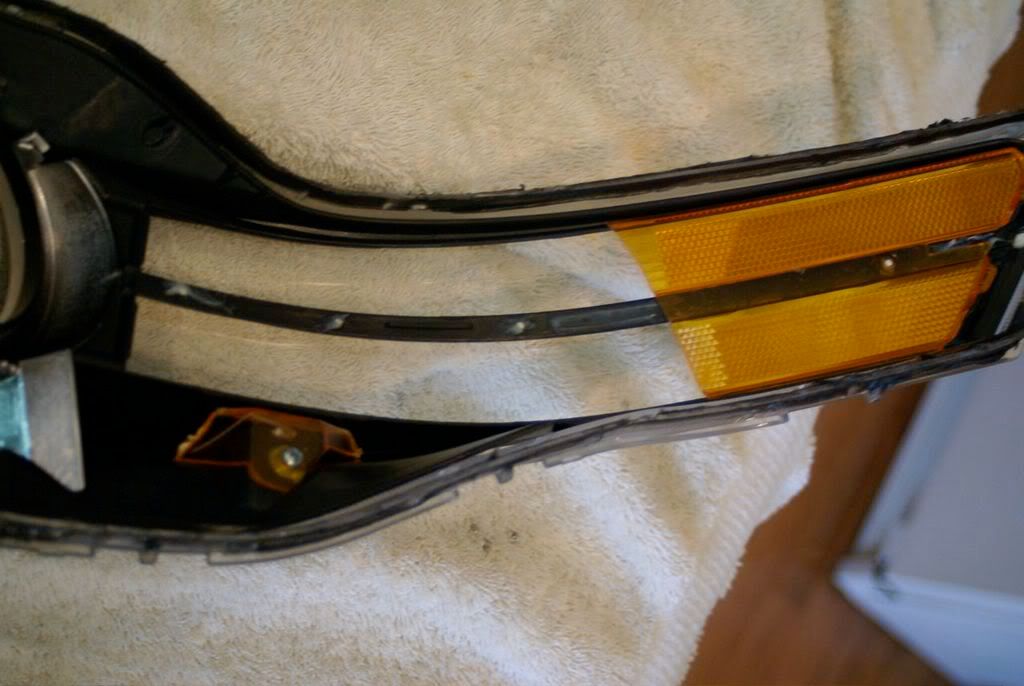
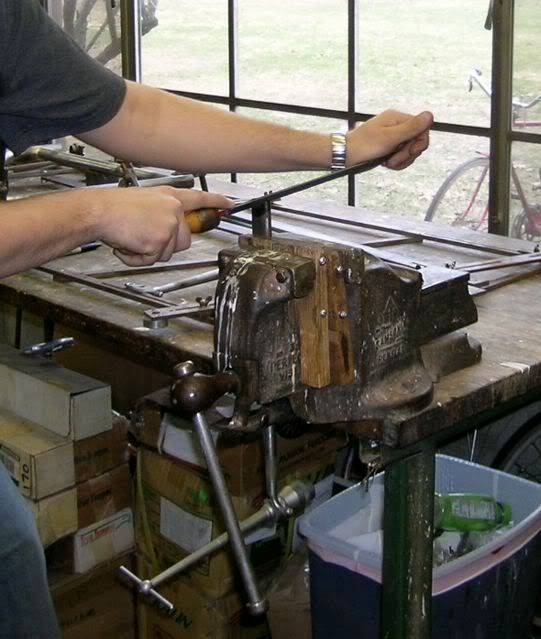
I wanted to keep some orange reflector to keep it legal. so I decided to cut it at the curve of the flat part of the blinker. My second choice would be to cut it at an angle to match the back keeping only about an inch. If someone tries this please post pics. I then used a dremal and sandpaper to cut and smooth of the blinker.
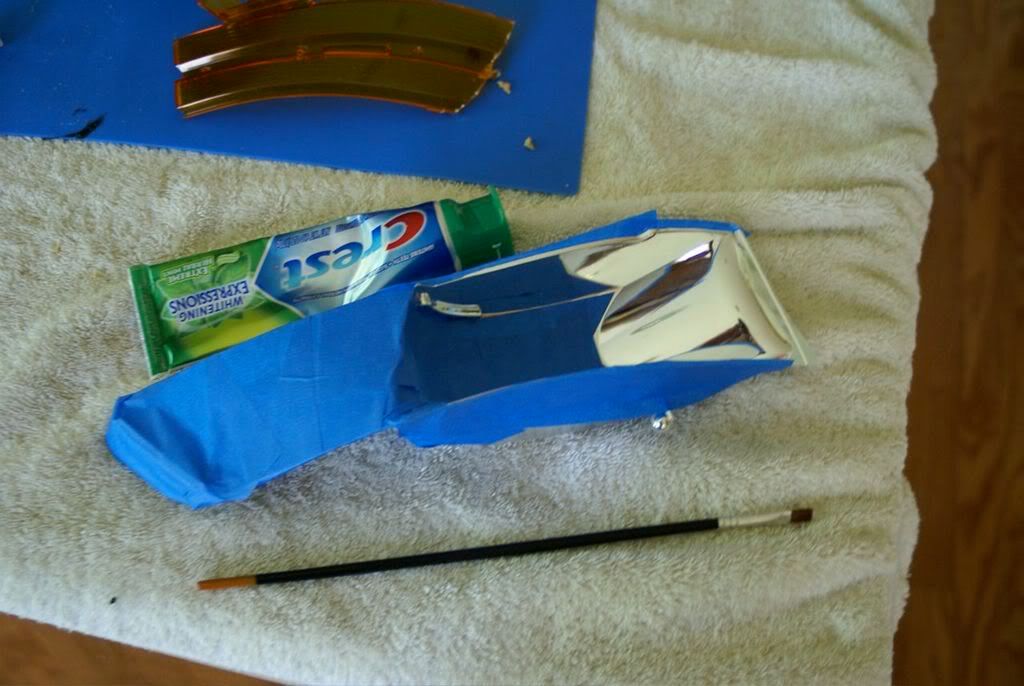
Next I decided I wanted to paint some of the blinker housing so I used a trick from when I built and painted custom bikes. For very fine detailed work you can use toothpaste. First you tape close to the edge you want to keep then you use a brush and paint on the toothpaste up to the line. Paint it on thick. If there is any toothpaste paint will not stick, so if you get it on a part you are going to paint then make sure you clean it.
With the toothpaste
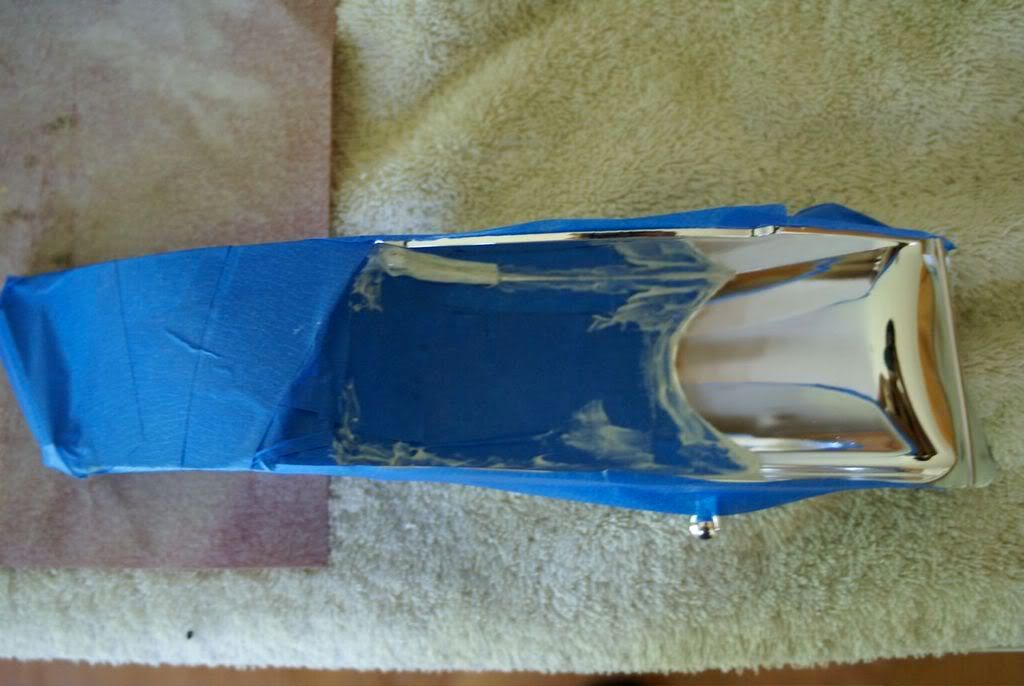
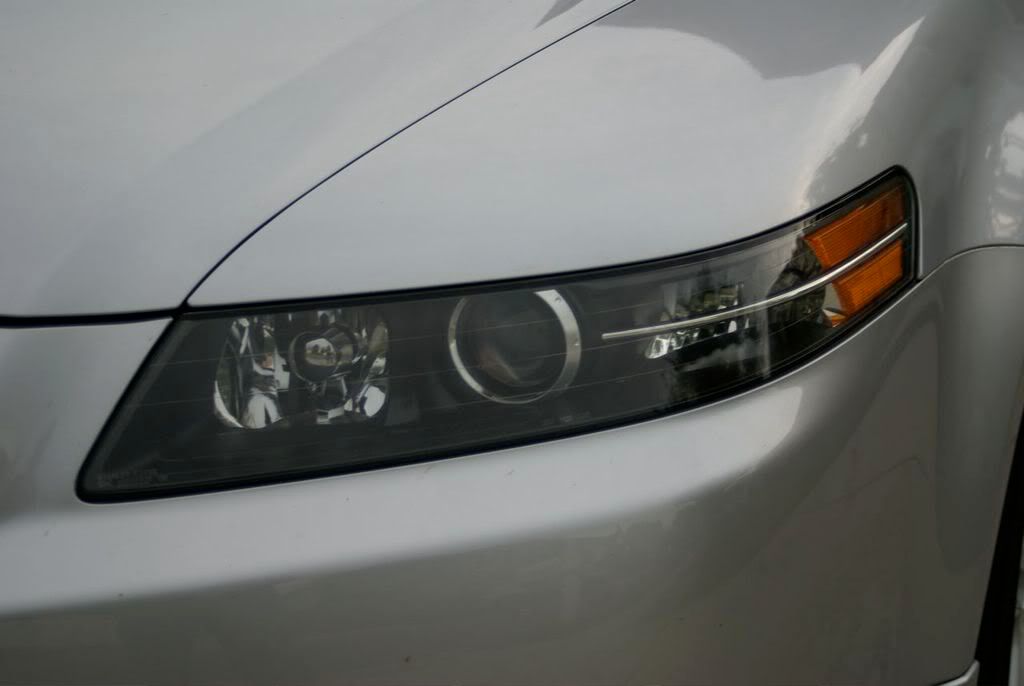
Then I painted the parts with spray paint I got from Autozone. It was semi-gloss black engine paint. Doing it again I would have painted the third piece of the light that is already black. It matched perfectly at first but it now seem darker, not bad just darker. After the paint dried I used a sharp razor and cut along the edge of the toothpaste. Removed both the tape and toothpaste and had a beautiful product.

Next it was time to work on gluing the reflector back on.
I used this stuff also from Autozone
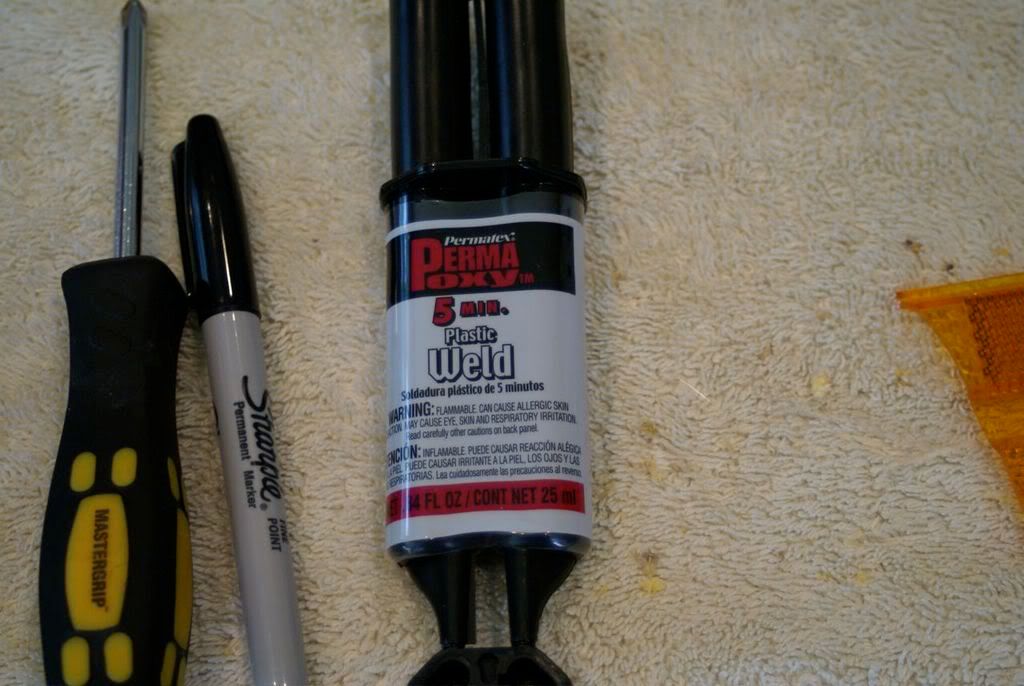
I glued both the silver strip and the reflector on with this. I also cut out the corner of the reflector so I could use the screw to put the light back together.
Then I put the headlight back together placed it in the oven for 10 min at 200 with no preheat. Once it came out I pushed and made sure the clips were secure. Then I applied a bead of silicone around the outside of the headlight with my finger.
I finished the second light and did the same. I worked on both lights at the same time.
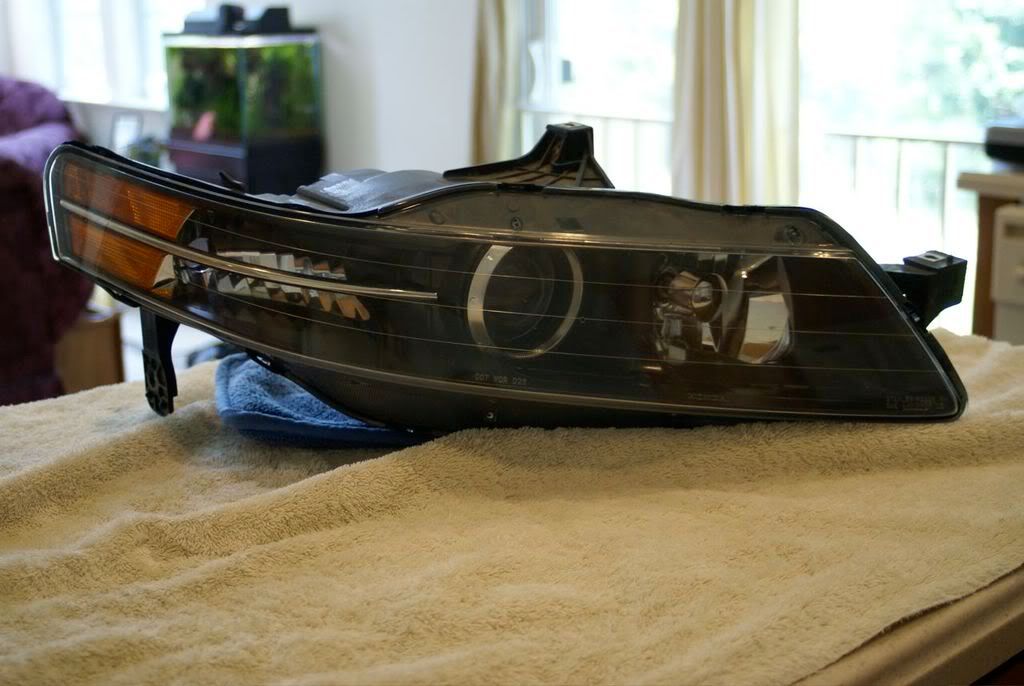
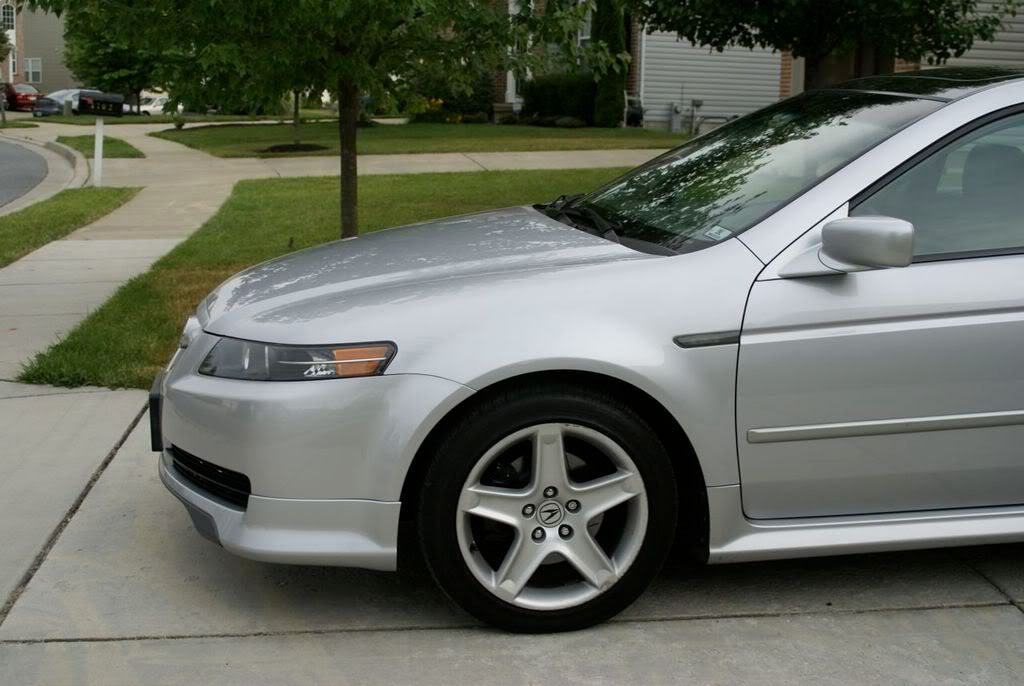
Reinstalled them and I was finished

The bumper is easy enough to take off. If you have the A-spec lip it helps if you drill a hole to access the screw in the wheel well without taking off the kit. It helps a lot. Make sure you have everything ready before you start.
I purchased these silicone sheets from Target.
When putting the headlight in the oven I didn't put the headlight in flat and the oven and some of the silicone stuck to the sheet. I did the second one flat with no problem. I had them in there for 20 min at 200 no pre-heat.
Pulling apart the headlight I started on the inside closest to the grill and cut the silicone with a razor blade as I went. I did this my self, the only problem I broke one clip. I did fix it later.
I wanted to keep some orange reflector to keep it legal. so I decided to cut it at the curve of the flat part of the blinker. My second choice would be to cut it at an angle to match the back keeping only about an inch. If someone tries this please post pics. I then used a dremal and sandpaper to cut and smooth of the blinker.
Next I decided I wanted to paint some of the blinker housing so I used a trick from when I built and painted custom bikes. For very fine detailed work you can use toothpaste. First you tape close to the edge you want to keep then you use a brush and paint on the toothpaste up to the line. Paint it on thick. If there is any toothpaste paint will not stick, so if you get it on a part you are going to paint then make sure you clean it.
With the toothpaste
Then I painted the parts with spray paint I got from Autozone. It was semi-gloss black engine paint. Doing it again I would have painted the third piece of the light that is already black. It matched perfectly at first but it now seem darker, not bad just darker. After the paint dried I used a sharp razor and cut along the edge of the toothpaste. Removed both the tape and toothpaste and had a beautiful product.
Next it was time to work on gluing the reflector back on.
I used this stuff also from Autozone
I glued both the silver strip and the reflector on with this. I also cut out the corner of the reflector so I could use the screw to put the light back together.
Then I put the headlight back together placed it in the oven for 10 min at 200 with no preheat. Once it came out I pushed and made sure the clips were secure. Then I applied a bead of silicone around the outside of the headlight with my finger.
I finished the second light and did the same. I worked on both lights at the same time.
Reinstalled them and I was finished


Thread Starter
Racer
Joined: Mar 2007
Posts: 404
Likes: 3
From: Baltimore, MD
The only thing I removed were the metal peaces that connected the bottom piece of the headlight to the frame. I also removed the blinker. Other than that all went in the oven. It is all still working now.

Trending Topics


Originally Posted by voigt
The bumper is easy enough to take off. If you have the A-spec lip it helps if you drill a hole to access the screw in the wheel well without taking off the kit. It helps a lot. Make sure you have everything ready before you start.
I know what you are talking about. I just cut that area out.
Thread Starter
Racer
Joined: Mar 2007
Posts: 404
Likes: 3
From: Baltimore, MD
I remember the first time I heard about clearing lights was in 96. The way we were told to do it back then was to use a hair dryer. That way sucks. For the TL I struggled for over a year thinking I couldn't do it. It was actually quite easy. You just need patience don't force anything. Don't rush the painting wait 10 to 15 min between each coat, paint thin coats. Then clean up every fingerprint. I was very surprised how easy it was. The last thing to be careful about is the silicone. Do not get it inside the light or on the lens. This is not hard the silicone comes out stringy not runny.
All together this job took me 6 hours from start to finish by my self. I didn't rush it and made sure I had the whole day to do the work.
If you don't have or cannot borrow a dremal then I think you could cut it straight with a hacksaw and then shape it with sandpaper. That would take a lot more work but it would not be to hard. Just draw a line where you need to stop and slowly work your way there. Make sure you have enough room to have the correct shape before you get to the line. Thats how we shape the chain-stays on bikes but we use files.
Sweet. Based on your pictures, I think I'm finally gonna try this out myself! Just need to get the proper supplies, a ZKW replica lens and new bulbs.
One question... when you were putting the assembly back together, you said you put a bead of silicone and spread it with your finger. Did you do this all around? I don't quite understand the reassembly process.
Thanks again for this!
One question... when you were putting the assembly back together, you said you put a bead of silicone and spread it with your finger. Did you do this all around? I don't quite understand the reassembly process.
Thanks again for this!

Thread Starter
Racer
Joined: Mar 2007
Posts: 404
Likes: 3
From: Baltimore, MD
To put the headlight back together start on the outside closest to the blinker. Make sure you have that end in first. than place it in the oven with the lens up for 10 min at 200. When you take it out seat the light in the rest of the way and make sure the clips are on. Now with some silicone (when I get home I will take a pic of what I used) run a bead around the crack that you just sealed. The key is to have a solid bead so water won't get in. I laid down a little silicone then ran my finger over it to make sure I covered the crack. Around the clips I used more silicone and filled in everything. Be careful around the blinker side. The plastic there is visible on the outside. I used very little silicone there. Then let it dry 24 hours before it gets wet. I installed them two hours after finishing the silicone.

Thread Starter
Racer
Joined: Mar 2007
Posts: 404
Likes: 3
From: Baltimore, MD
Originally Posted by joeybabyluvsu
that looks hot but I could never do such on my car...lol...i wish i had people around here that could do that stuff
Pro
Joined: Feb 2006
Posts: 725
Likes: 0
From: Montreal Canada
re
Did it happen to you that while your painting the chrome parts to find some dull spots, like whitish spots as if the paint aint sticking properly?
i scotched one right now and its doing this to me, but very little...maybe its becus i scotched it...maybe its better just going ahead and paint....
what do you think?
ps: im doing the process at this moment
i scotched one right now and its doing this to me, but very little...maybe its becus i scotched it...maybe its better just going ahead and paint....
what do you think?
ps: im doing the process at this moment
Instructor
Joined: May 2008
Posts: 232
Likes: 0
From: Roaming the 303
Love what you did. Your experience really helped out here! I can't wait to do this mod myself. Will be trying it this saturday! Did u install new blinker lights as well or is that how they look ith out the orange reflector. Great job!! Also u said taking off the bumper is simple to do, did you use the DIY thread to help? Thanks again!
Thread Starter
Racer
Joined: Mar 2007
Posts: 404
Likes: 3
From: Baltimore, MD
I am using SMT Tower II LED's from Autolumination.com. They are white while running and orange for the blinker. Unless you use a resistor the lights will blink fast. I like the fast blink. As for the bumper I did use the DIY. The only tricky part is where the bumper is clipped in above the grill on either side of the headlight. A flathead screwdriver will fit in there and you can pry it out. The only other part that made me second guess are the clips under the light. You have to pull pretty hard to get them out. Hope all goes well.
Running Lights
Blinker
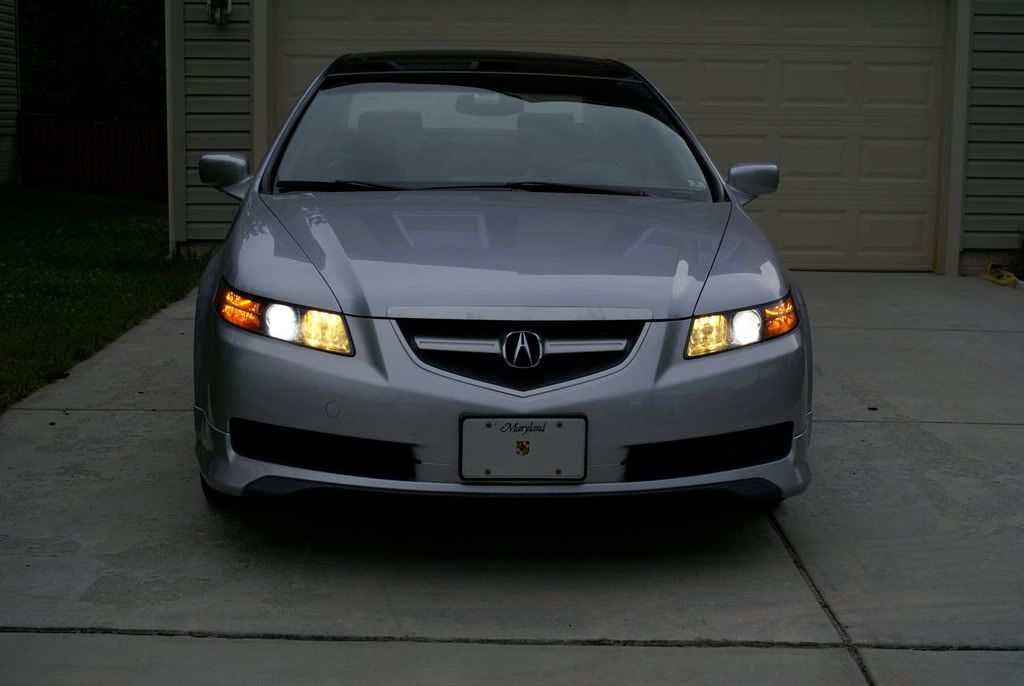
Running Lights
Blinker
Pro
Joined: Feb 2006
Posts: 725
Likes: 0
From: Montreal Canada
its all good the job is complete and back on the car, too bad i dont have my digicam with me...i practically blacked out the headlight, leaving all of the amber reflector in place, cus in this dam province of Quebec you cannot have headlight with no amber reflectors..so not to have problems i went legit...it went very well fairly easy job to do, i was skeptical about doin this mod from more than a yr now and id be wanting to repeat the experience.
Took me about 2 hours per light with the bakin and painting
Thumbs up to DIY guys
Took me about 2 hours per light with the bakin and painting
Thumbs up to DIY guys
Thread Starter
Racer
Joined: Mar 2007
Posts: 404
Likes: 3
From: Baltimore, MD
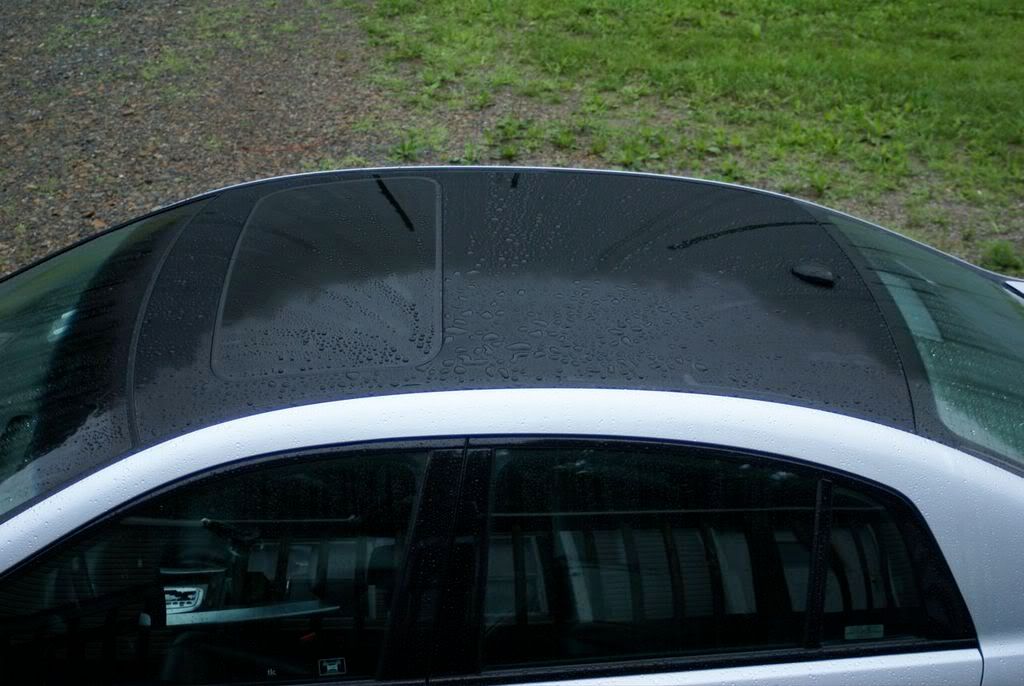
I had it painted by my friend. When he finished he had a customer who asked what TL's had glass roofs. I took it to the dealer for a wiper recall and all the sale's people came out. One said to someone else, "man that glass roof looks good on silver." The other replied, "its called a panoramic roof." Then someone else chimed in, "Acura's don't come with panoramic roof's." The first two guys, "Really? did he have it custom installed?" I had a good laugh.
TL Nub
Joined: Jul 2008
Posts: 97
Likes: 2
From: Atlanta, GA
So it isn't vinyl? Sweet! Do you have any other pics of the top of your SSM? My wife thinks I am crazy for wanting to do it but all of these WDPs looks sweet. I think your SSM is only the 2nd that I've seen with it.