When you click on links to various merchants on this site and make a purchase, this can result in this site earning a commission. Affiliate programs and affiliations include, but are not limited to, the eBay Partner Network.
You just need to de-pin the wires from the old plug and fit back on a new one, you don't need to replace the entire harness. When my trans got rebuilt, the rebuilder somehow put 2 zip ties around one of the clutch shift solenoid. I thought he did that because the clip is broken on that connector so I purchased the exact same connector off ebay and practiced taking out the wires and plugging the wires back in, it's extremely easy when done with care. You need to insert a small pocket screwdriver from the back side behind the wire to de-pin the wires. I purchased the new connector + wires from ebay. You need to identify exactly the connector you need first.
I just replaced the switches in my 08 TL and reset the transmission. But it honestly feels slightly more rough on the upshifts than before.
Tools:
small pliers, 10mm, 12mm, 7/8 deep sockets, screwdrivers, socket extensions
To help future people I've attached some pictures.
The 28610-RKE-004 the one accessible through front left wheel well. The connector is black. This was probably the hardest one to reach for me even having small hands, had to use pliers to squeeze the clip.
The 28600-RKE-004, two of them, they are beige; one under the intake box and the other at the back of the transmission by the firewall.
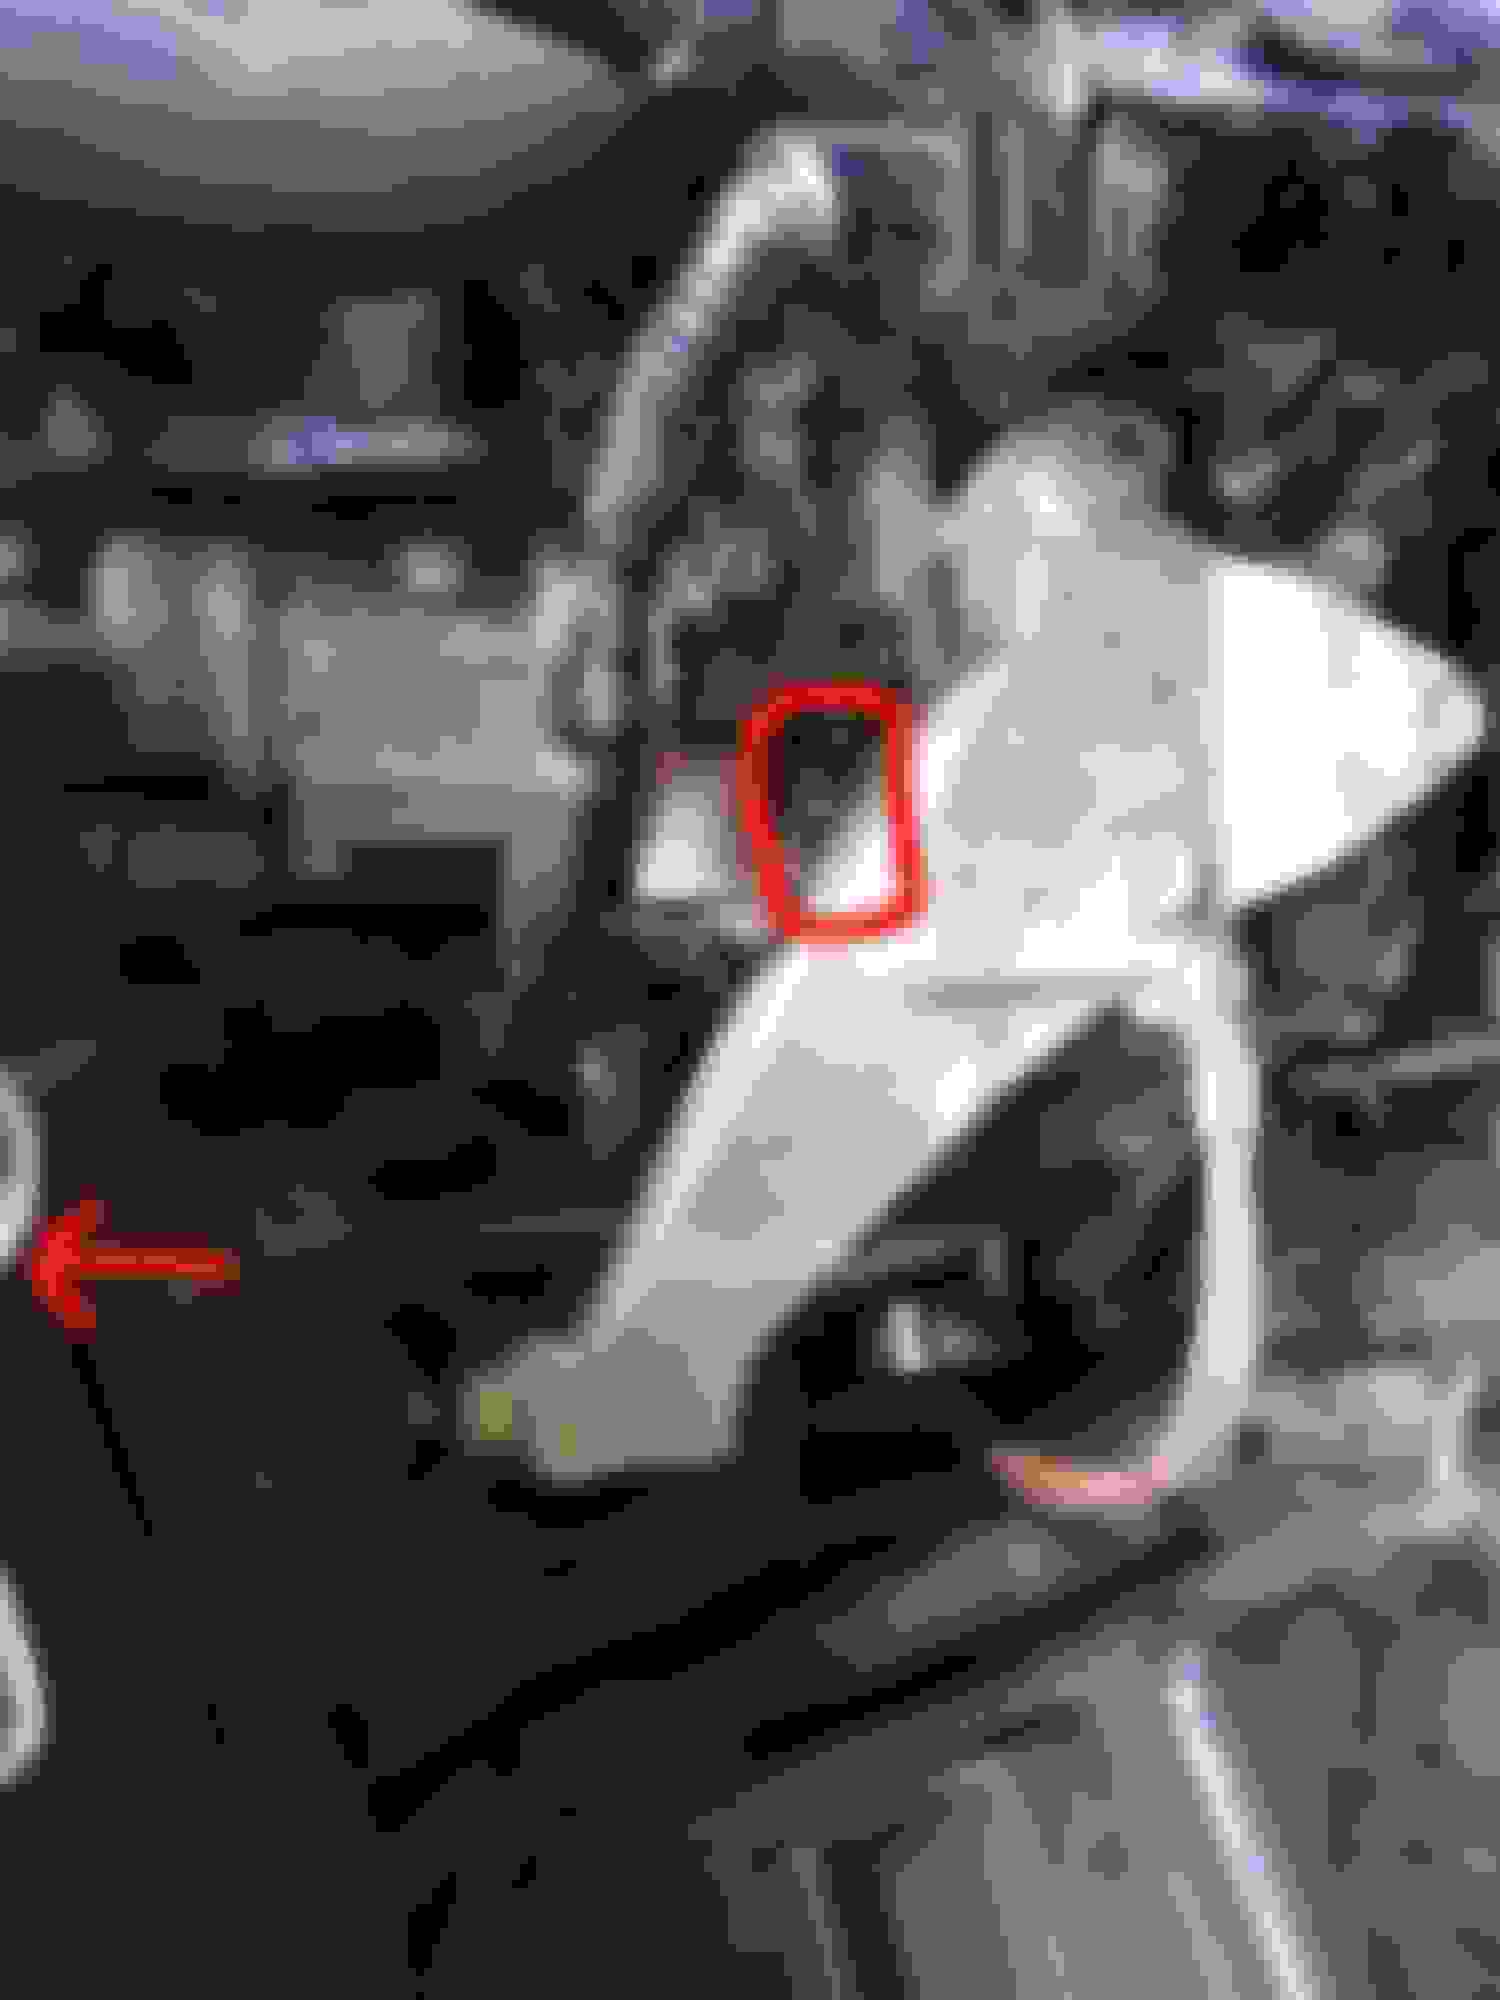
3rd gear switch, black connector, arrow is front of the car (28610-RKE-004) I zip tied the harness out of the way so it was easier to get my hands in there. If your transmission is topped off, this switch will leak the most fluid even when jacked up. Be prepared for that.
Switch under the intake box, red arrow is the front of the car. I had to remove the strut brace to get the fuse box out of the way and it was easier to reach the switch in the back of the transmission.
Switch in the back of the transmission. I had to kneel on the intake manifold to be able to reach this.
Recommend you consider changing your transmission fluid if you didn't. When I did mine I also did a series of 3x3 fluid change. I now have 260K miles on my TL and it shifts really well.
This is also posted in the original 3rd and 4th gear thread but it is easier to have it separated. By now a lot of us have learned that the position of the switches in the 07-08 TL differ from the 04-06 TL. I used the information that was posted by JDM RICe. His pics are a lot better than mine so I stole some of them.
Mods....if you disagree with having a separate thread, please feel free to delete this one.
I have driven the car for about 12000 miles since I replaced the switches. I have also done a total of three 1x3 over a 15K mile stretch. The transmission shifts a lot cleaner than when I purchased the car.
Parts Needed:
2 x 28600-RKE-004
1 x 28610-RKE-004
3 x 90471-PW7-A00
Floor Jack - DO NOT SUPPORT THE CAR WITH JUST THE FLOOR JACK.
Jack Stands
10 mm Socket
7/8 Deep Socket
Screwdrivers
Breaker Bar (PLEASE BE CAREFUL WHEN USING BREAKER BAR)
I started with the sensor on the bottom of the transmission.
Quote:
Originally Posted by JDM RICe
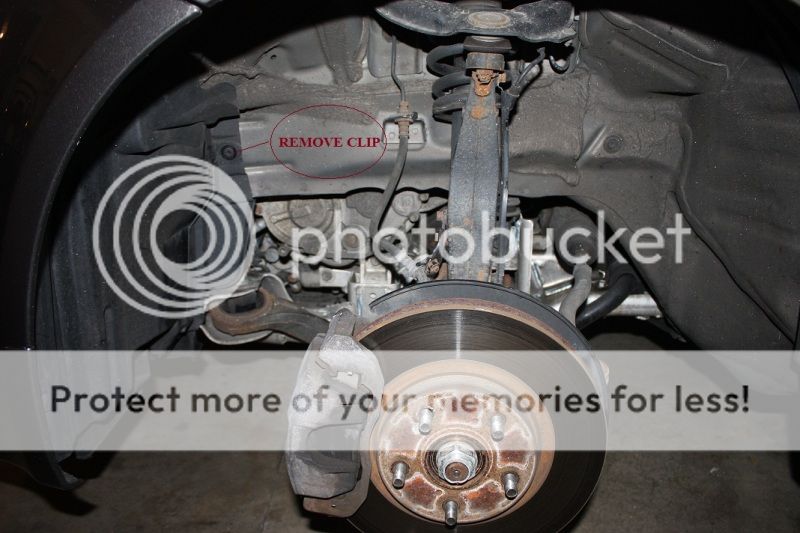
I accessed the sensor through the driver side wheel well. Remove tire. Please use jack stands for support.
Once the cover was moved you will see a wire harness and a couple plugs.
Be careful when removing the sensor. I used a deep 7/8 socket and a 16 inch extension. I did not need to use a breaker bar for this sensor. When you remove the sensor there will be some transmission fluid that leaks out. Wipe clean before replacing the sensor.
Plug everything back in and DOUBLE CHECK before mounting the wheel and lowering yourcar.
Second one I did was the one under the intake. Removing the intake is simple. My pics sucked again.
Quote:
Originally Posted by JDM RICe
This one was very simple. I did not need to remove the 10 mm bolts above, but it will not hurt to remove them. Again I used a 7/8 deep socket and a 3 inch extension. I did use a breaker bar for this one.
The last one I did was the sensor in the back of the transmission.
I removed the hose in the image below to get a bit more room to get my hands down to the sensor. It is tough to see in the pics but that sensor is about 12 inches from the top of the engine.
Overall it took me about 2 hours to replace the three sensors. I also did a 1x3 this weekend.
I drove about 150 miles since I replaced the fluid and the sensors. The up and down shifting is a lot smoother than before. When I floor it the shifting is a lot cleaner. I have 2 long road trips this week and I will have a better chance to test it out.
I just wanna make sure I got this right. The switch underneath the top transmission mount is the tan/beige and the other two are black correct?
Before you troubleshoot, record all freeze data and any on-board snapshot, and review General Troubleshooting Information.
This code is caused by an electrical circuit problem and cannot be caused by a mechanical problem in the transmission.
Turn the ignition switch to ON (II).
Clear the DTC with the HDS.
Start the engine, and warm it up to normal operating temperature (the radiator fan comes on).
Drive the vehicle in the 3rd gear in M, and verify that the SHIFT CONTROL indicates 3rd in the DATA LIST with the HDS.
Check the 3rd PRESSURE SWITCH in the DATA LIST with the HDS.
Is the 3rd PRESSURE SWITCH ON?
YES - Go to step 6.
NO - Go to step 8.
Test-drive the vehicle in 3rd gear in M for at least 2 seconds.
Monitor the OBD STATUS for P0848 in the DTCs MENU with the HDS.
Does the screen indicate FAILED?
YES - Go to step 8.
NO - If the screen indicates PASSED, intermittent failure, the system is OK at this time. Check for poor connections or loose terminals between the 3rd clutch transmission fluid pressure switch and the PCM. If the screen indicates NOT COMPLETED, go to step 6.
Turn the ignition switch to LOCK (0).
Disconnect the 3rd clutch transmission fluid pressure switch connector.
Turn the ignition switch to ON (II).
Measure the voltage between the 3rd clutch transmission fluid pressure switch connector terminal and body ground.
Is there about 5 V?
YES - Replace the 3rd clutch transmission fluid pressure switch, then go to step 13.
NO - Go to step 12.
Measure the voltage between PCM connector terminal C9 and body ground.
Is there about 5 V?
YES - Repair open in the wire between PCM connector terminal C9 and the 3rd clutch transmission fluid pressure switch, then go to step 13.
NO - Go to step 20.
Reconnect all connectors.
Turn the ignition switch to ON (II).
Clear the DTC with the HDS.
Start the engine, and warm it up to normal operating temperature (the radiator fan comes on).
Drive the vehicle in 3rd gear in M for at least 2 seconds, then upshift to 4th gear, and drive in 4th gear for at least 2 seconds.
Check for DTCs with the HDS.
Is DTC P0848 indicated?
YES - Check for poor connections or loose terminals between the 3rd clutch transmission fluid pressure switch and the PCM, then go to step 1.
NO - Go to step 19.
Monitor the OBD STATUS for P0848 in the DTCs MENU with the HDS.
Does the screen indicate PASSED?
YES - Troubleshooting is complete. If any other DTCs were indicated in step 18, go to the indicated DTC's troubleshooting.
NO - If the screen indicates FAILED, check for poor connections or loose terminals between the 3rd clutch transmission fluid pressure switch and the PCM, then go to step 1. If the screen indicates NOT COMPLETED, go to step 16.
Update the PCM if it does not have the latest software, or substitute a known-good PCM.
Start the engine, and warm it up to normal operating temperature (the radiator fan comes on).
Drive the vehicle in 3rd gear in M for at least 2 seconds, then upshift to 4th gear, and drive in 4th gear for at least 2 seconds.
Check for DTCs with the HDS.
Is DTC P0848 indicated?
YES - Check for poor connections or loose terminals between the 3rd clutch transmission fluid pressure switch and the PCM. If the PCM was updated, substitute a known-good PCM, then go to step 21. If the PCM was substituted, go to step 1.
NO - Go to step 24.
Monitor the OBD STATUS for P0848 in the DTCs MENU with the HDS.
Does the screen indicate PASSED?
YES - If the PCM was updated, troubleshooting is complete. If the PCM was substituted, replace the original PCM. If any other DTCs were indicated in step 23, go to the indicated DTC's troubleshooting.
NO - If the screen indicates FAILED, check for poor connections or loose terminals between the 3rd clutch transmission fluid pressure switch and the PCM. If the PCM was updated, substitute a known-good PCM, then go to step 21. If the PCM was substituted, go to step 1. If the screen indicates NOT COMPLETED, go to step 21.
General Description
The 3rd clutch transmission fluid pressure switch is installed in the hydraulic pressure circuit to the 3rd clutch. When hydraulic pressure is supplied to the 3rd clutch, the switch is turned ON. When hydraulic pressure is not supplied to the 3rd clutch, the switch is turned OFF. The signal from the 3rd clutch transmission fluid pressure switch is input to the powertrain control module (PCM). The PCM detects the hydraulic pressure supply conditions at the gear change to 3rd gear (2nd -> 3rd, 4th -> 3rd) to reduce the shock that occurs at the gear change. If the 3rd clutch transmission fluid pressure switch is OFF while the rotation speed ratio of the input/output pulses is that of 3rd gear, the PCM detects a malfunction in the 3rd clutch transmission fluid pressure switch and stores a DTC.
Monitor Execution, Sequence, Duration, DTC Type, OBD Status
Enable Conditions
Malfunction Threshold
The input signal from the 3rd clutch transmission fluid pressure switch to the PCM is high when driving in 3rd gear.
Driving Pattern
Start the engine, and drive the vehicle in the D position and 3rd gear for at least 2 seconds .
Drive the vehicle in this manner only if the traffic regulations and ambient conditions allow.
Diagnosis Details
Conditions for illuminating the MIL
When a malfunction is detected, the MIL comes on and the DTC and the freeze frame data are stored in the PCM memory.
Conditions for clearing the MIL
The MIL will be cleared if the malfunction does not recur during three consecutive trips in which the diagnostic runs.
The MIL, the DTC, and the freeze frame data can be cleared by using the scan tool Clear command or by disconnecting the battery.
� 2013 ALLDATA LLC. All rights reserved.Terms of Use
If anyone is SoCal is experienced doing this lmk where you are and how much you would charge. Thanks


 03-29-2020, 08:13 AM


 His pics are a lot better than mine so I stole some of them.


 Log Out | HelpSEWELL INFINITI OF FORTWORTH

 A L L Diagnostic Trouble Codes ( DTC )
  Automatic Transmission


