

[DIY] Detailed Guide to installing Inspire Fog Lights
 05-11-2015, 12:25 PM
#1
Race Director
Thread Starter
iTrader: (8)
[DIY] Detailed Guide to installing Inspire Fog Lights

1.0 Introduction
I can't recall there being a full writeup for installing Inspire fog lights. I have however seen people post very nice pictures of their install journey, but those are scattered in random threads.
I've performed the install once before but I can't find the pictures of it, so today I had the chance to install them on Popee's car and decided to make this DIY.
Since this is a retrofit and there are many different ways and outcomes, here is how I perform the install.
If you're interested in accord fogs, you may find this DIY useful:
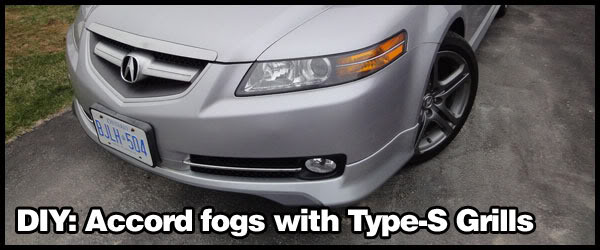
https://acurazine.com/forums/third-g...-06-tl-817615/
2.0 Materials
+ Dremel (with cutting bit, sanding bit, drill bit)
+ Various Screws and screwdrivers that you probably have in your garage.
+ 10mm socket, and 12mm socket.
+ Safety Goggles (you DO NOT want pieces of plastic in your eyes)
3.0 Parts
+ Inspire fog lights, commonly found on eBay
4.0 Disclaimer
This mod requires cutting of your front bumper, and lower grills. It also deals with wiring.
I created this guide to help you through the install process as best as possible, but if you mess something up, I won't be held liable

Now that's out of the way, let's get started!
5.0 The Cutting
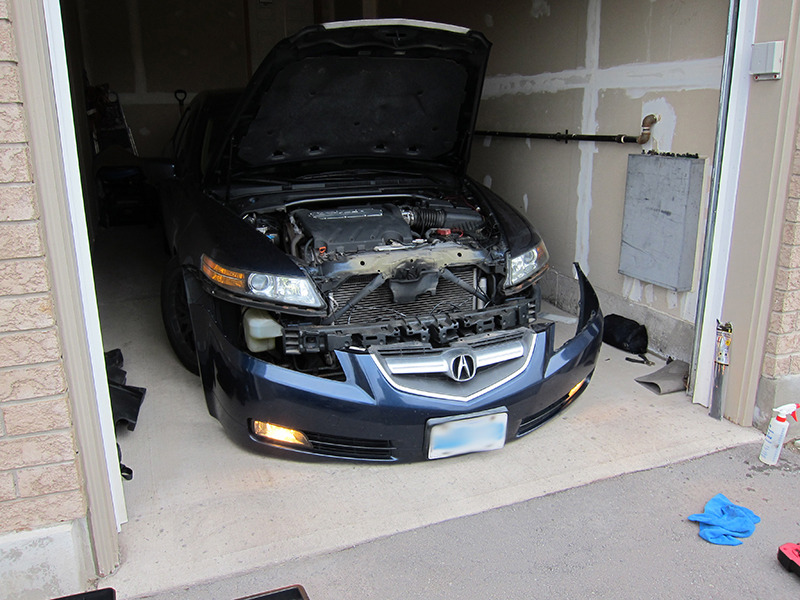
1. Remove the front bumper.
Video:
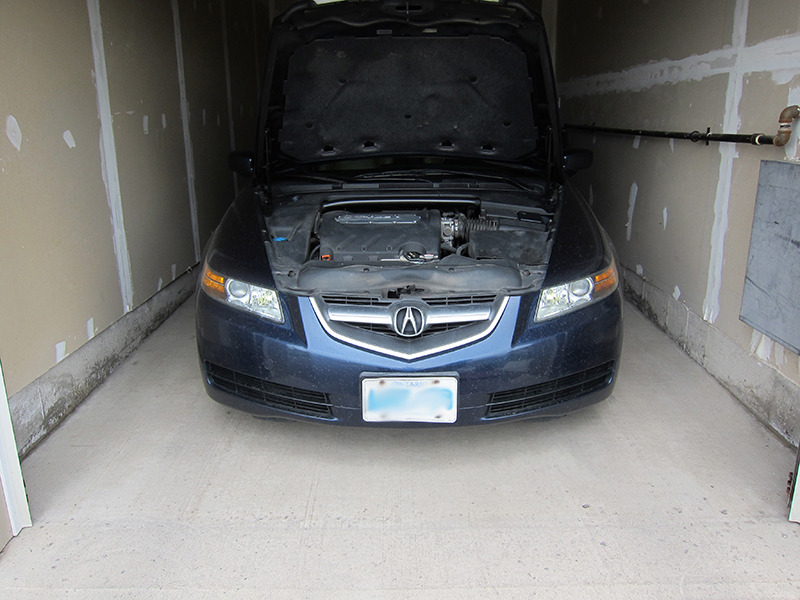
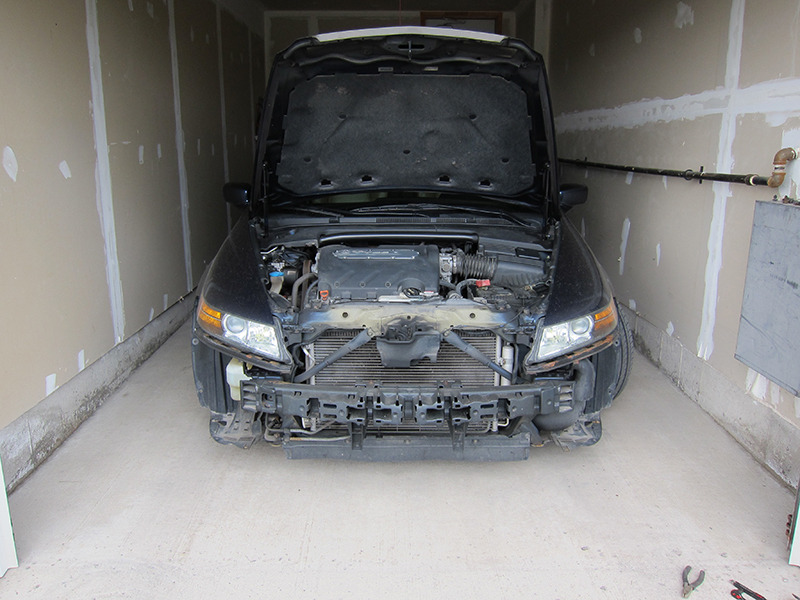
2. Bring it inside the house or an open environment where it will be easy to clean/vacuum.
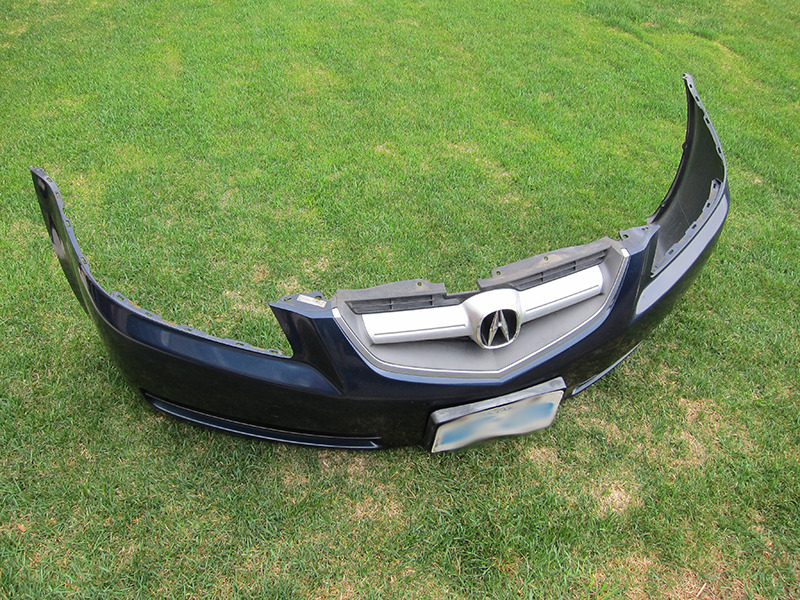
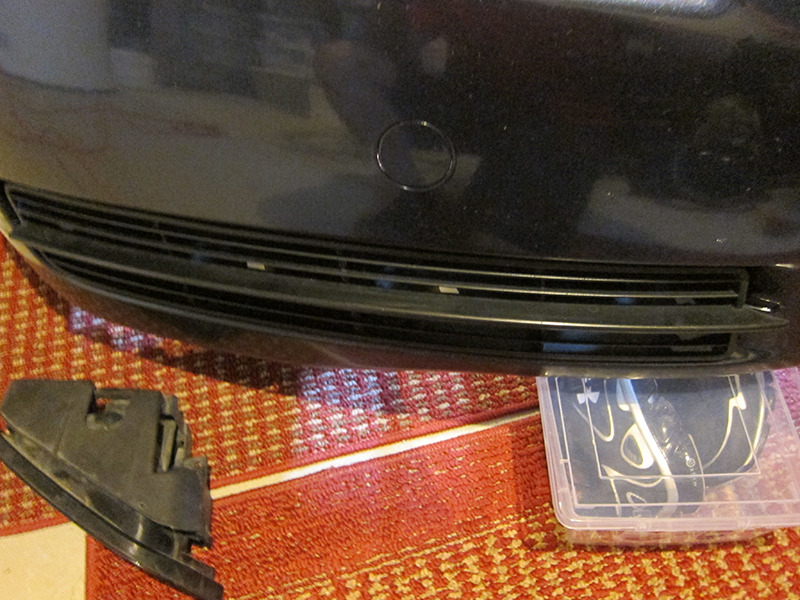
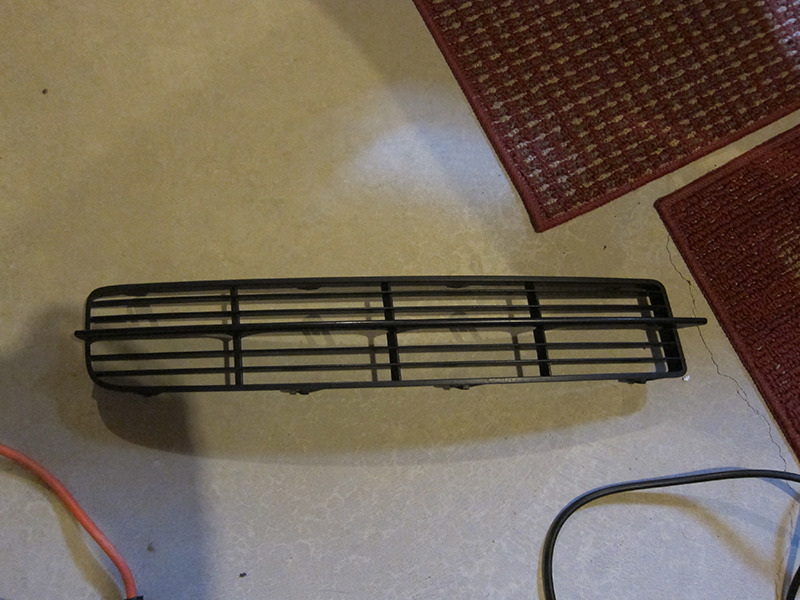
3. Remove the lower grills.
There are 4 tabs on the top and 4 tabs on the bottom of the lower grill.
If you have an A-Spec lip, you will need to partially remove it to allow the grill to come out.
Now we're ready to cut!
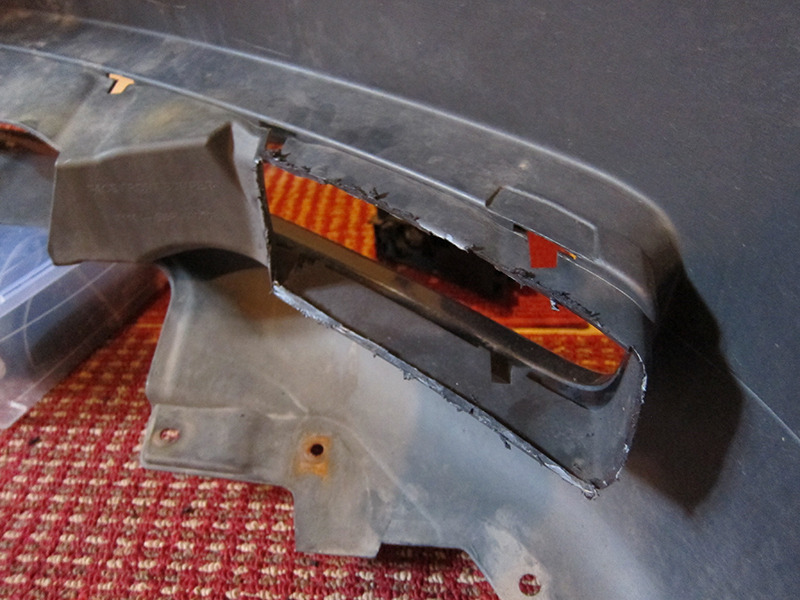
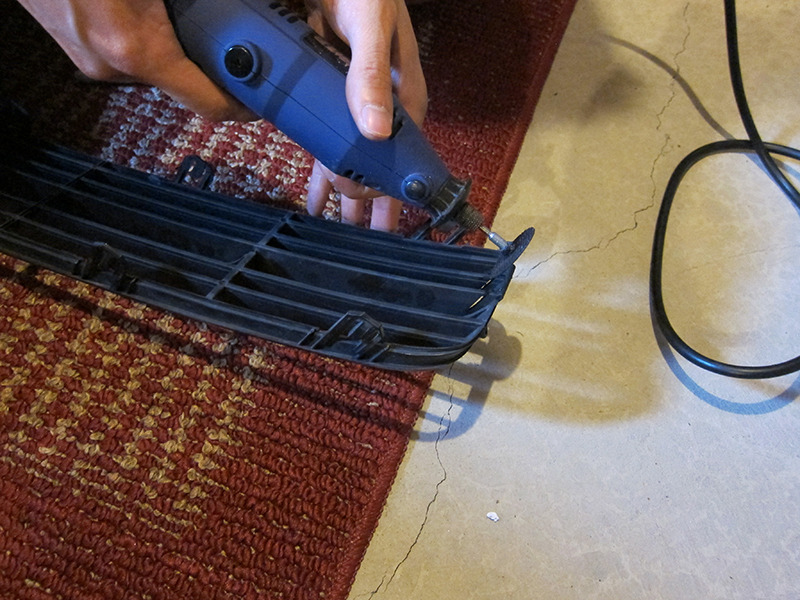
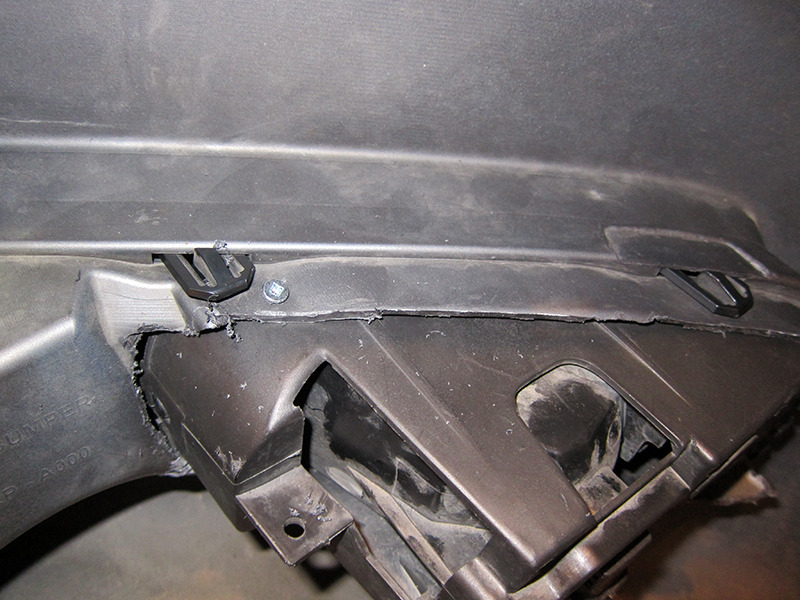
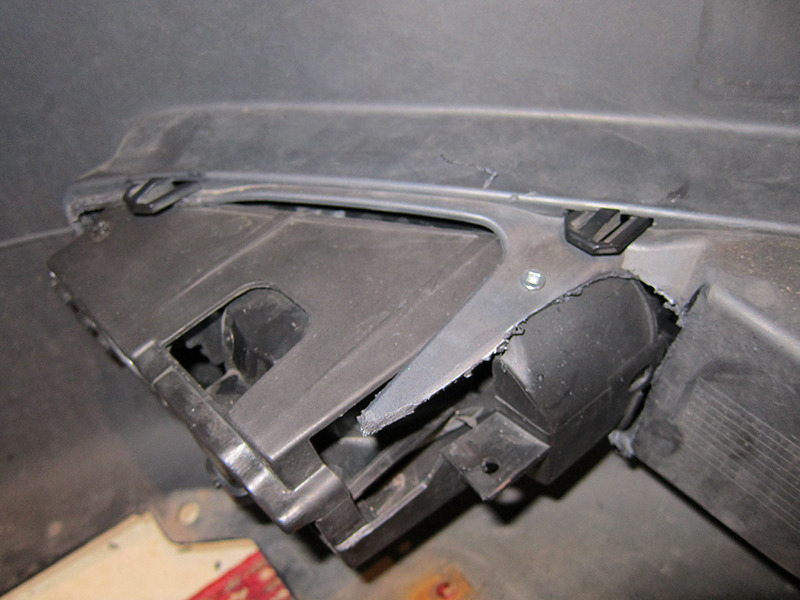
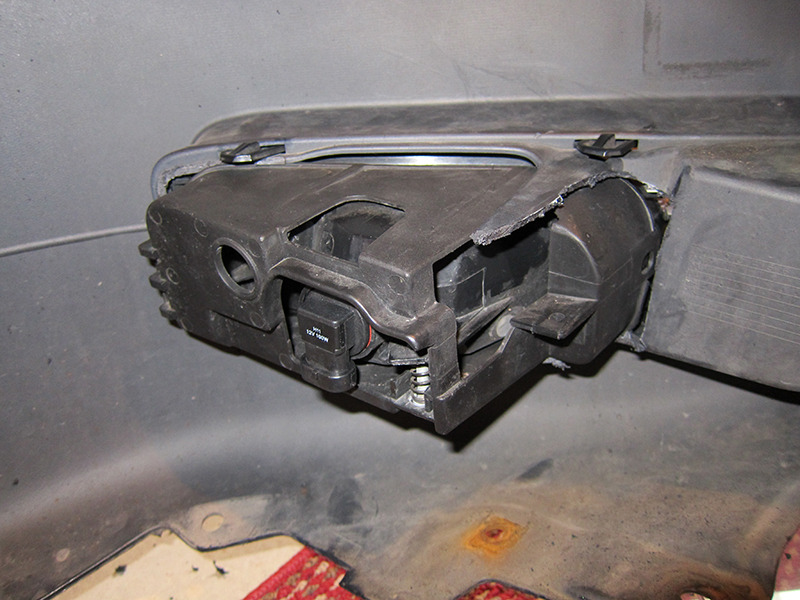
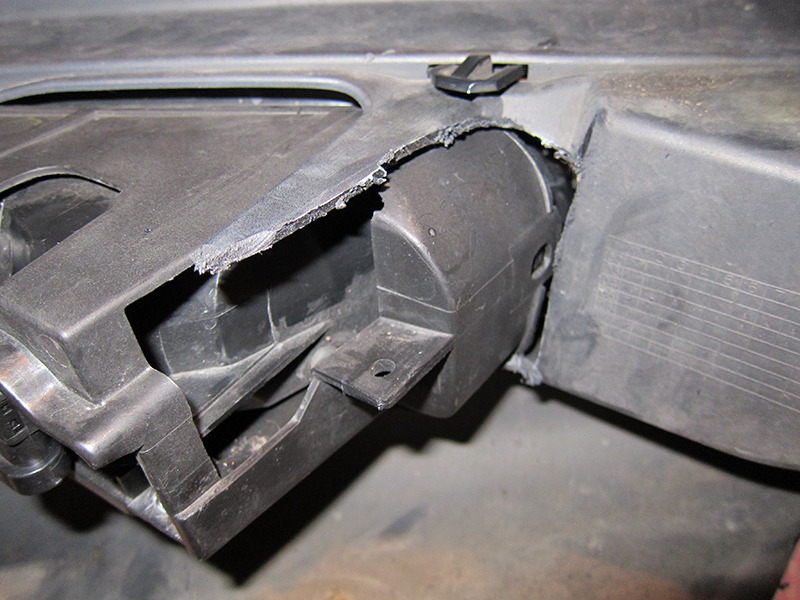
4. Take your dremel and attach the cutting bit.
I started on the right side, and here is where I started cutting.
The pictures are just for reference. I cut a bit more in the end, so be sure to check out the final results pictures posted further in the DIY.
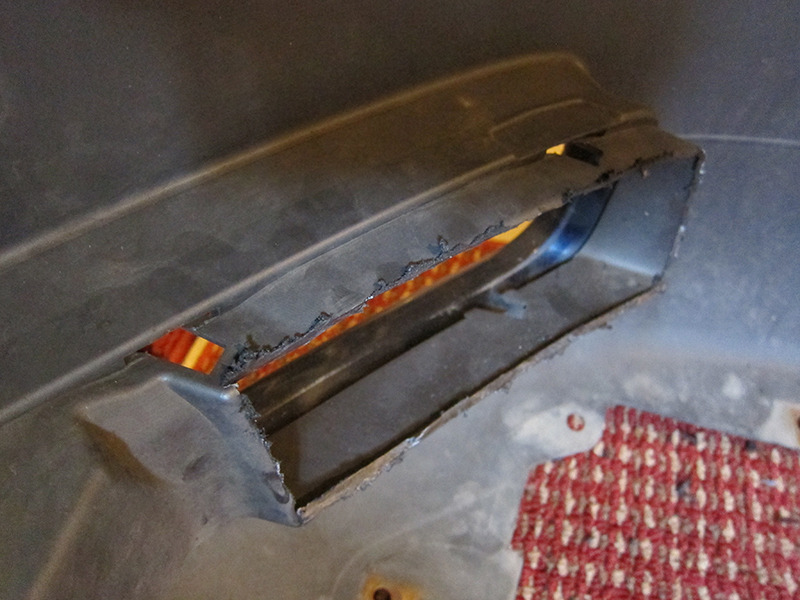
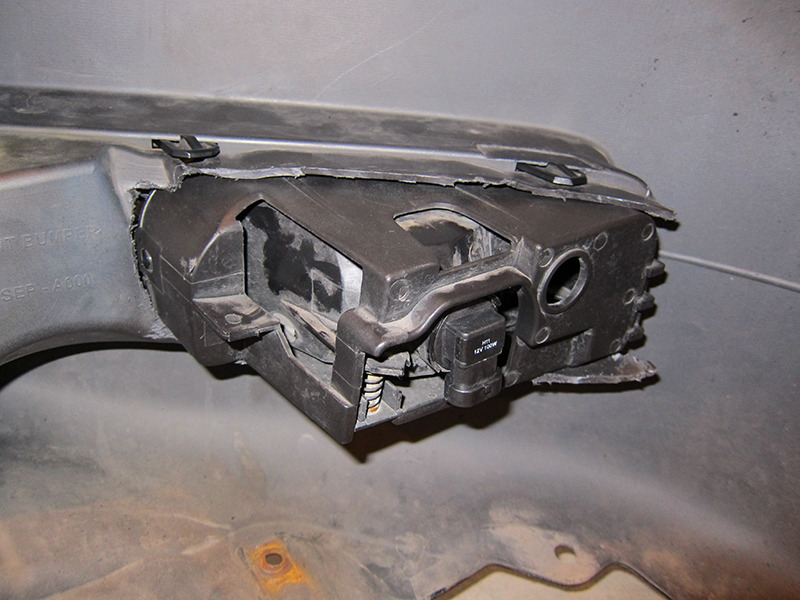
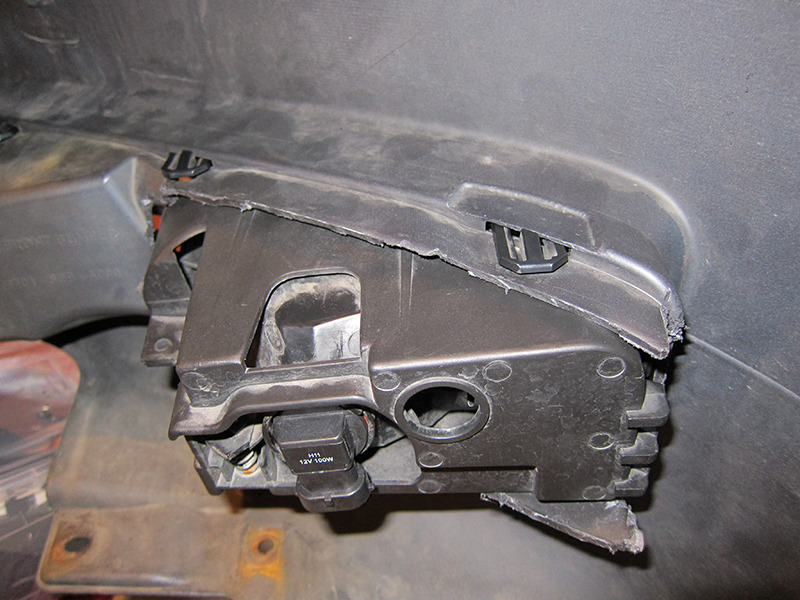
Test fit... still too tight.
Had to cut more off of the left and right.

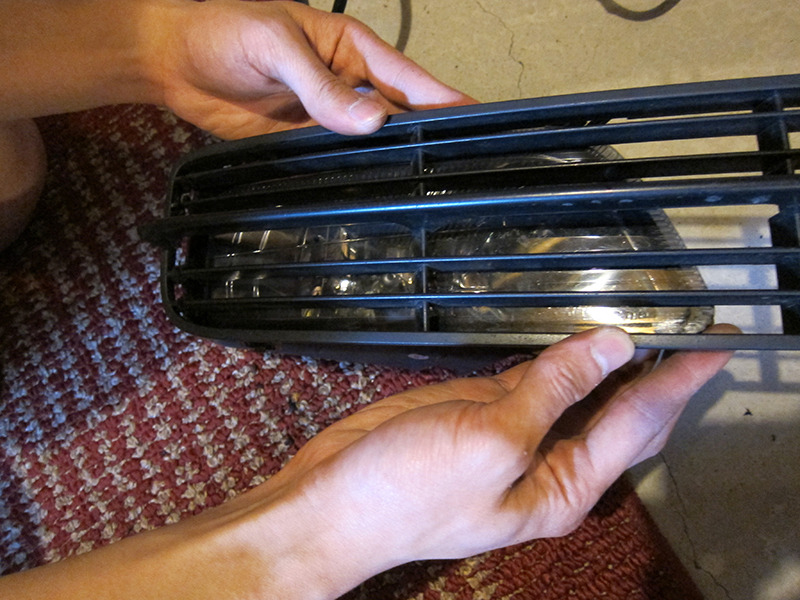
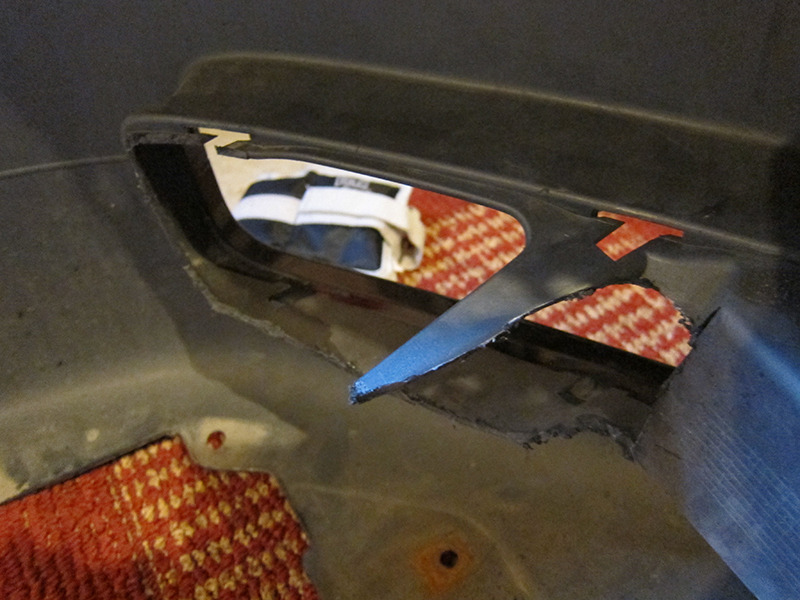
5. Once the fog light fits through the bumper, it is now time to cut the lower grill. I started by eyeballing the area that needs to come out, by holding the fog light behind the grill.
6. Grind down the grill lines that stuck out of the "bezel". We want the fog light to fit flush inside the outer bezel of the lower grill.


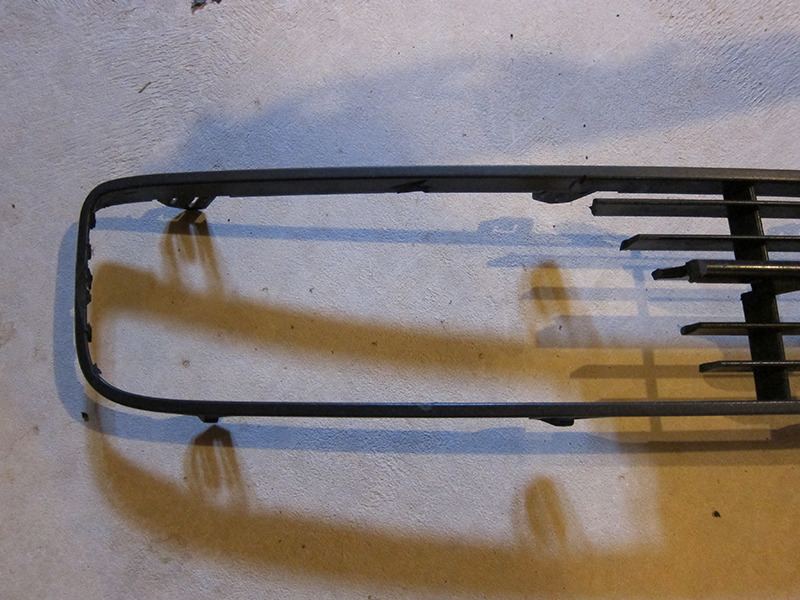
7. Here are measurements of where to cut, using the middle vertical grill line as reference. These measurements are safe, as I still had to dremel down the lines a bit so the bars wouldn't bend from being too tight.
There are 5 grill lines running horizontal.
From bottom to top:
3 cm
3.4 cm
4 cm
5.3 cm
6.7 cm
Refer to the image above this in step 6 to picture how it is...
8. If the fit is too tight and the grill lines bend, dremel it down more using the sanding bit.
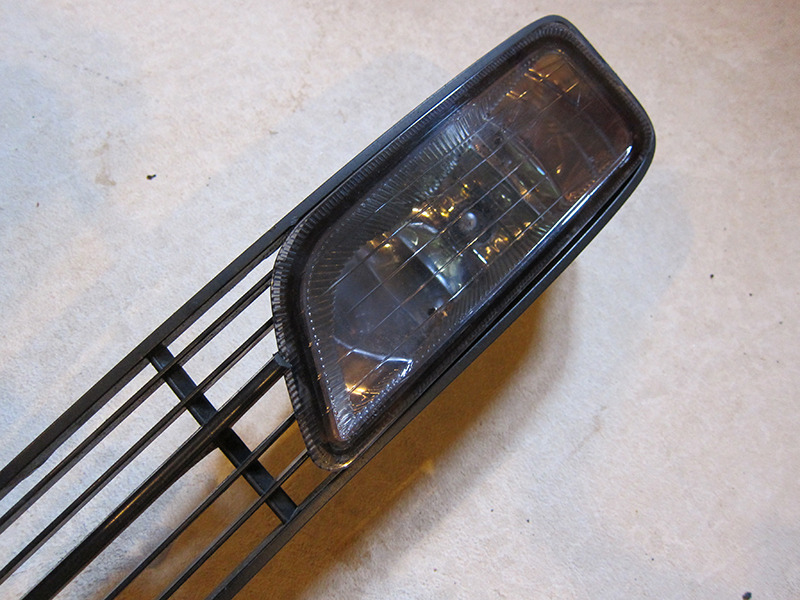
Perfect fitment. You can see how grill lines are not cut short, or bent from being too tight.

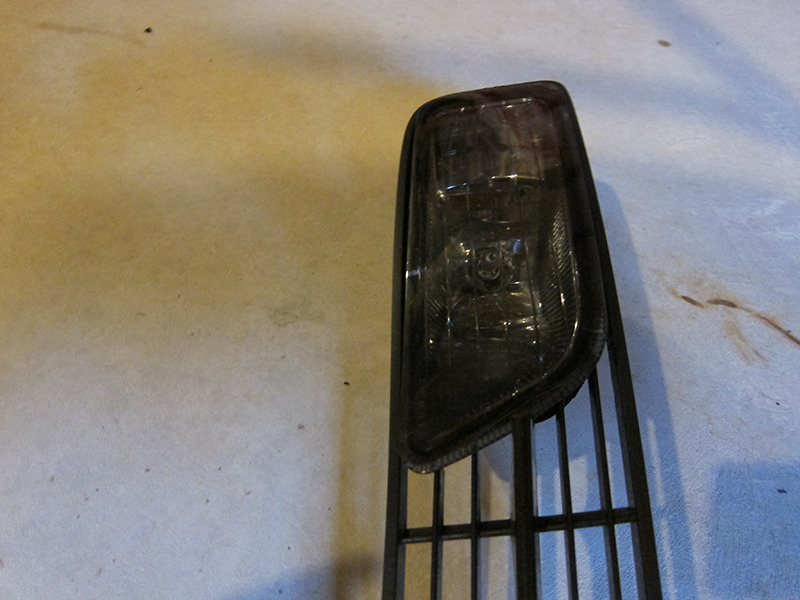
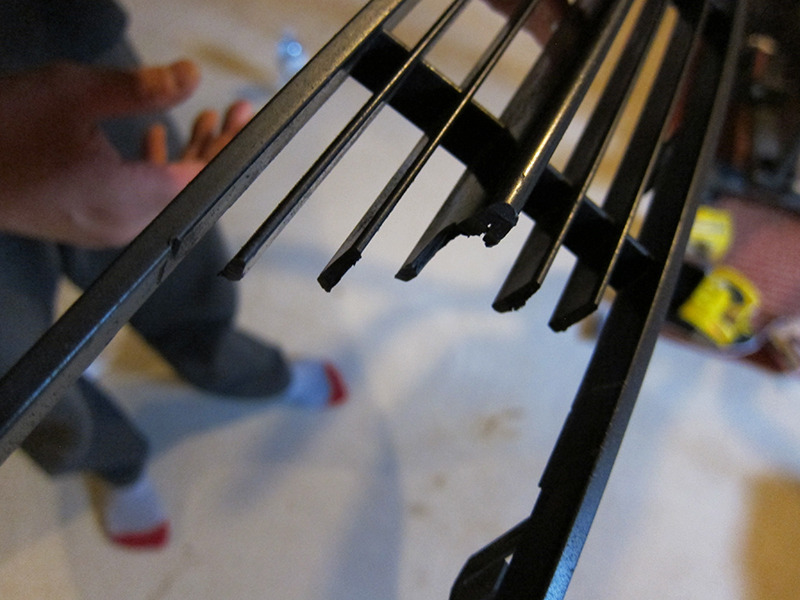
9. For the big middle grill line, I made a notch in the middle so the fog light can "notch" inside. This is because I've seen many installs where the big middle grill line looks too short. If you perform the notch, the grill line will still be long, but the fog light will be able to fit in place.
You can see the notch in the middle bar line if you look here:
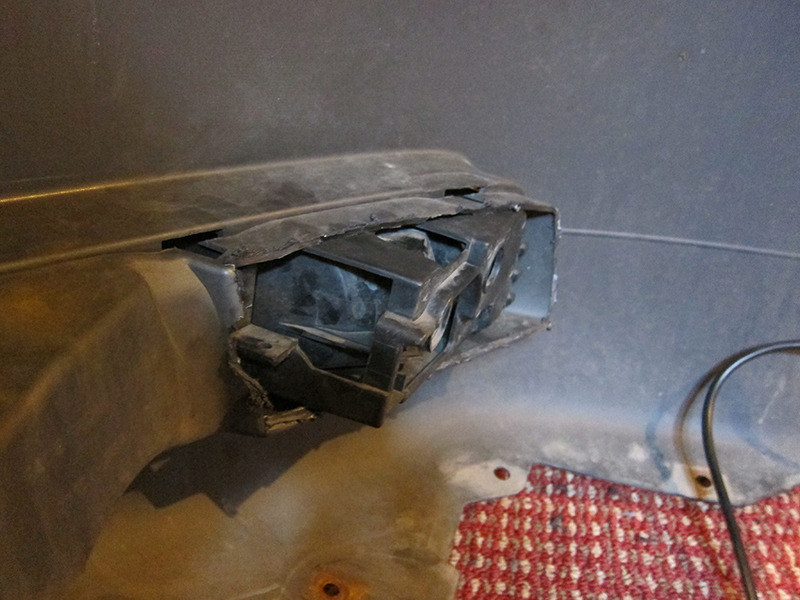
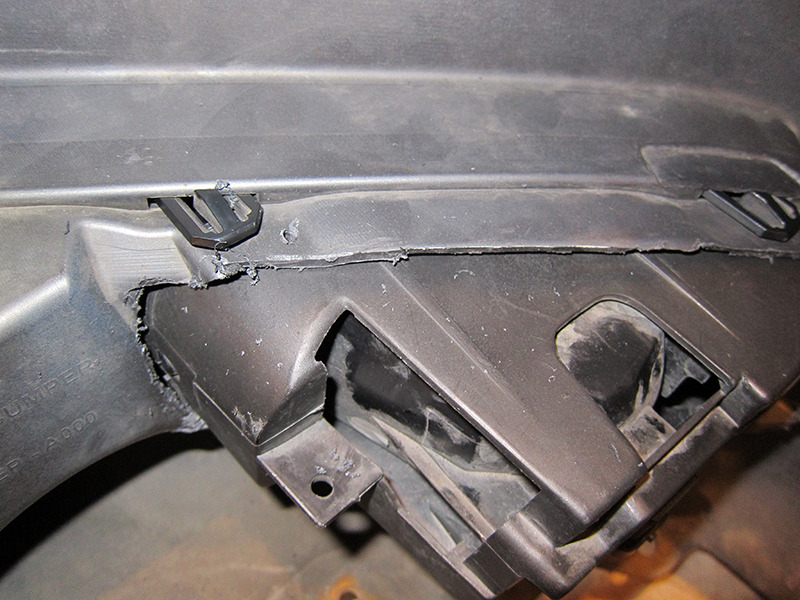
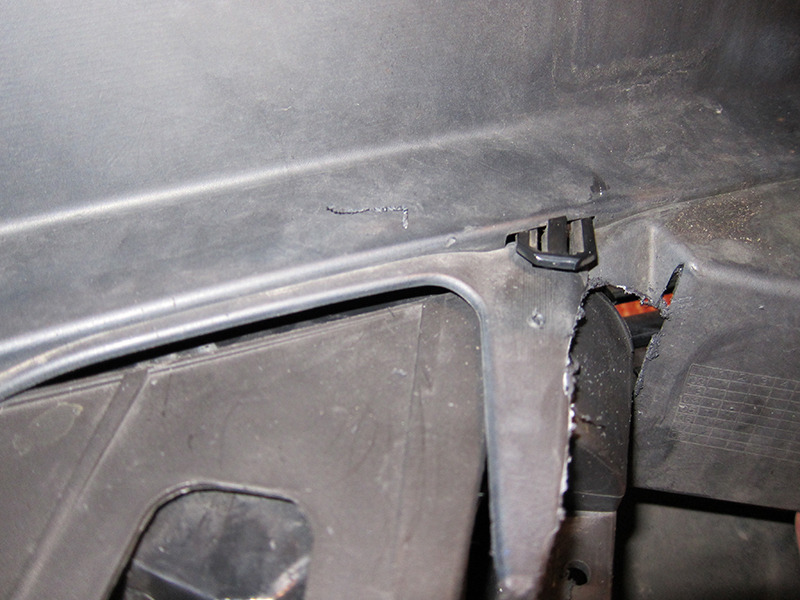
10. As a whole assembly, with the fog light fitted inside the lower grill, place it inside the bumper and snap in all tabs.
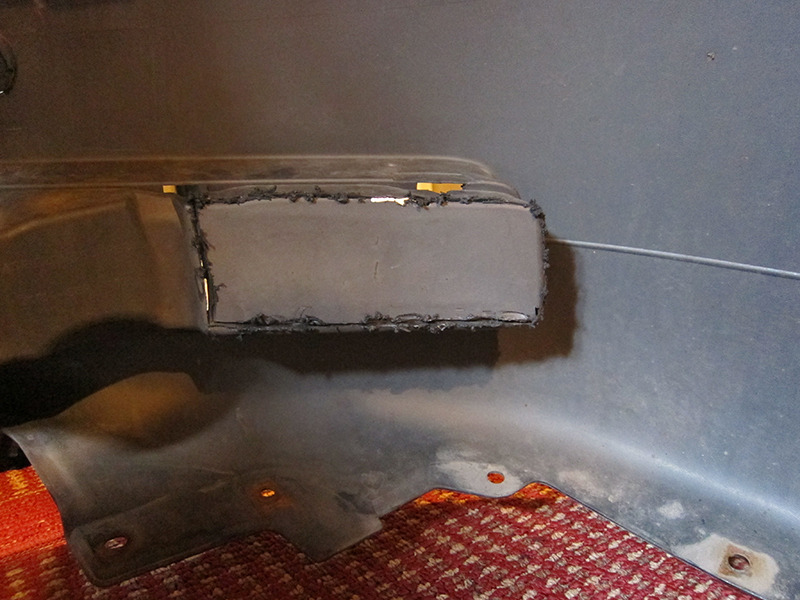
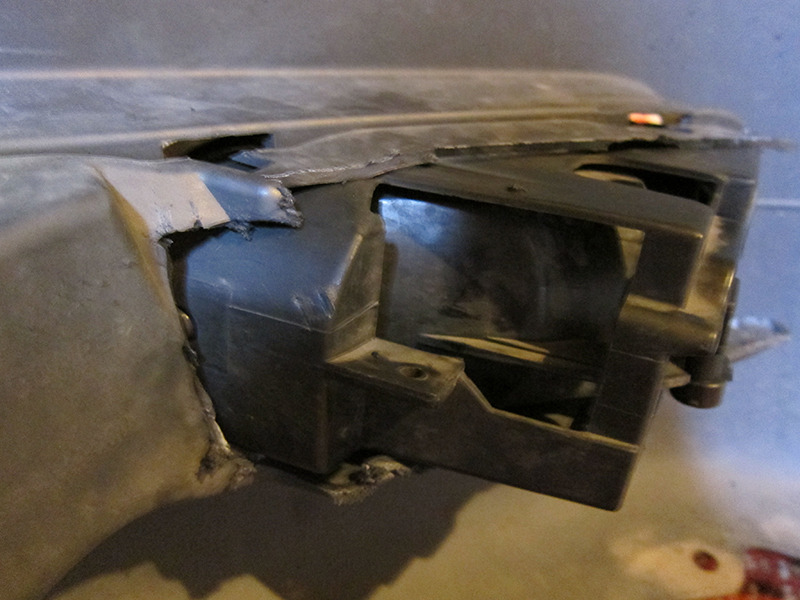
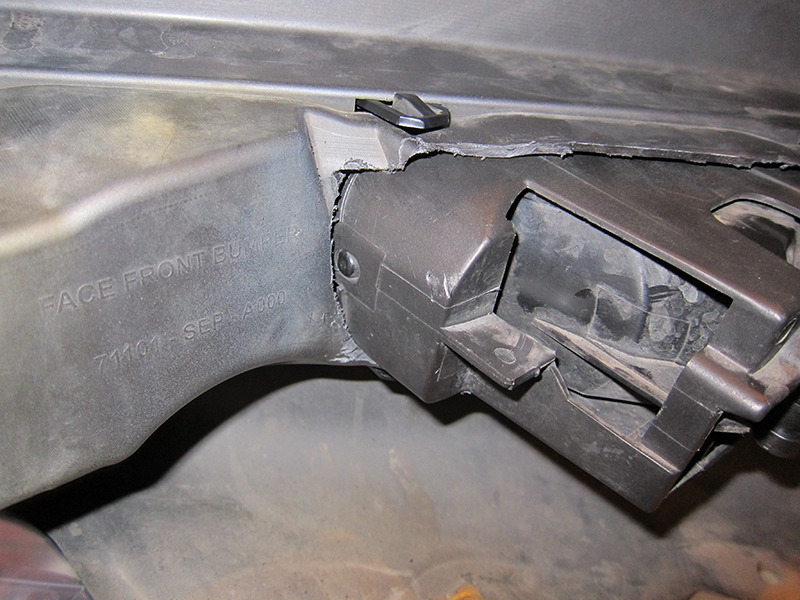
11. If it is too tight of a fit and the inspire fog pops out of the lower grill, that means you need to cut a little bit more in the back of the bumper.
Regardless of how much you cut, you will notice the fit is VERY tight and won't be going anywhere.
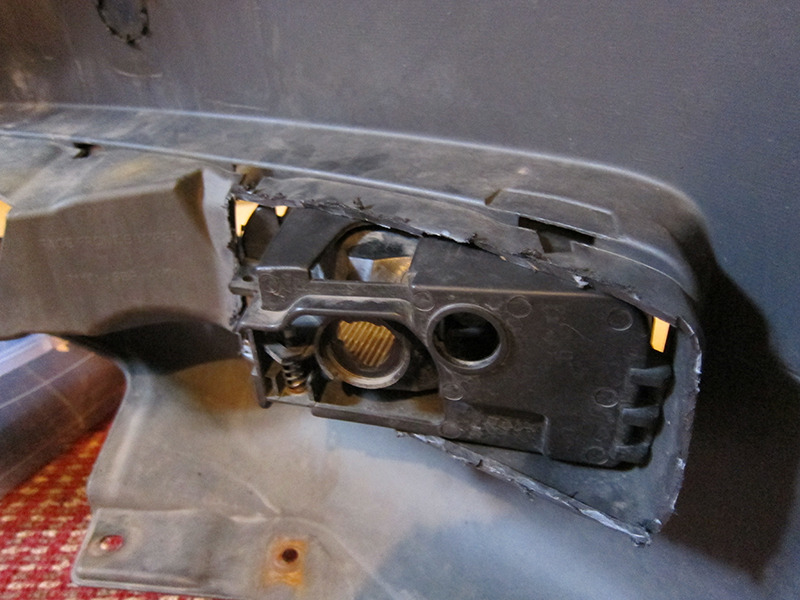
12. Once everything fits right, take a small drill bit and make a pilot hole for the screw to secure it. The fit is tight already without a screw, but the screw is just there for "security".
Take a small screw, I used a 8x1/2 screw, and put it through the bumper, and into the fog light housing.
13. Perform the same steps for the left side.
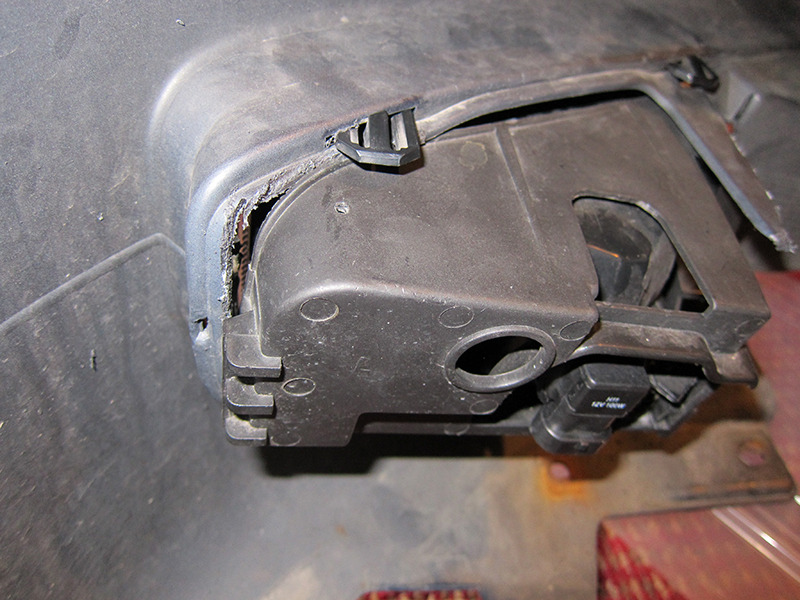
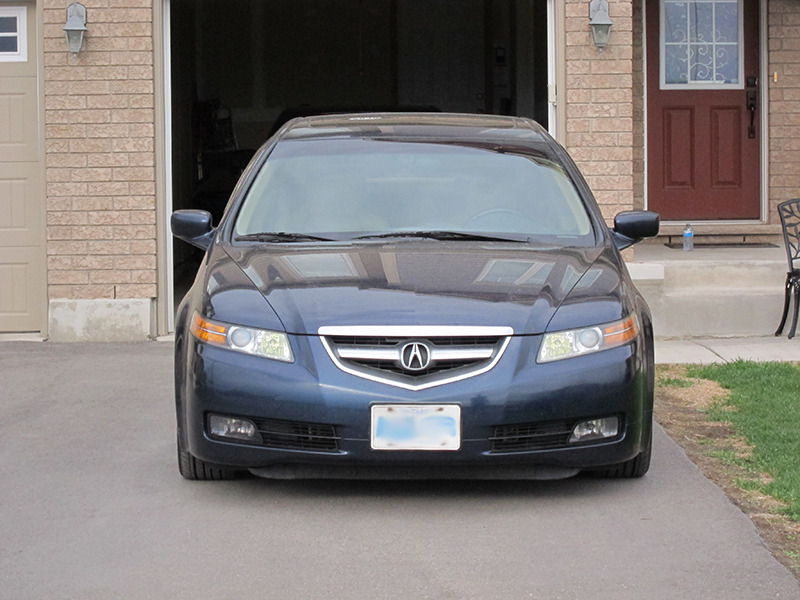
The pictures below show the final result of cutting.
You may notice where I had to cut some more from some of the pictures shown above.
Right side:
Left side:
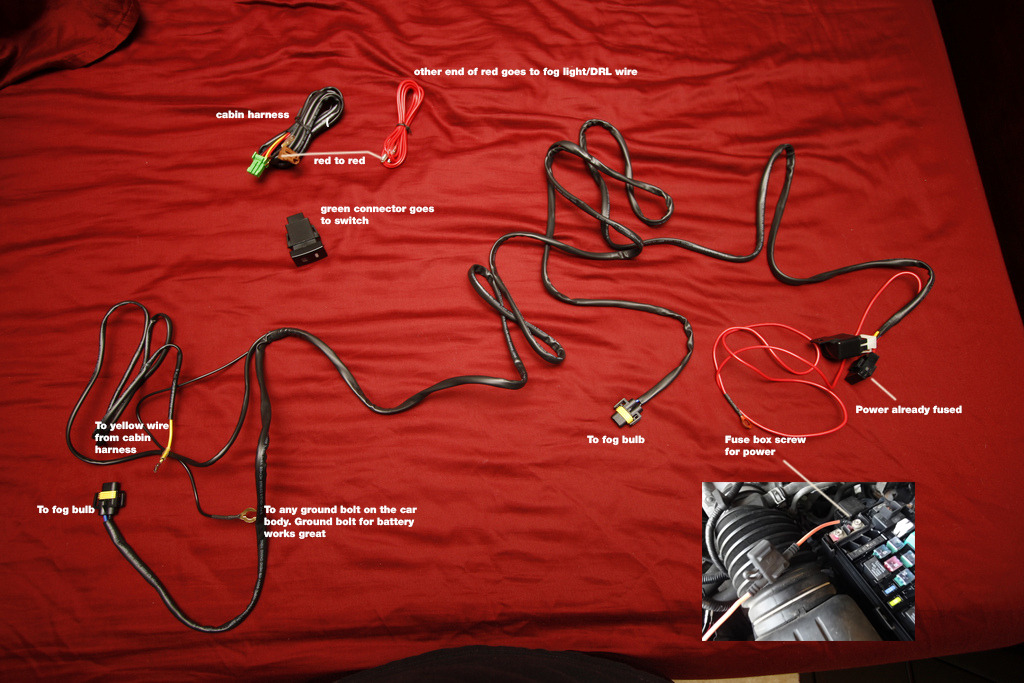
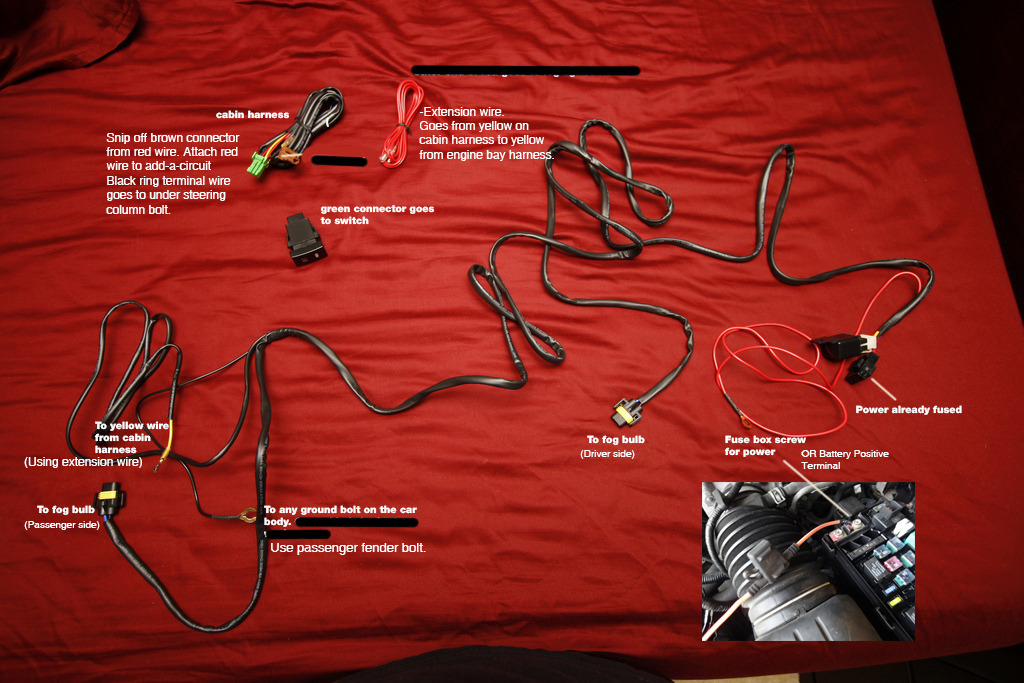
6.0 The Wiring
There are two harnesses.
Engine bay harness and cabin harness.
Engine Bay Harness:
+ Black ring terminal - Ground. This goes to any body ground. I used a passenger fender bolt.
+ Red wire with ring terminal - Positive. This goes to the positive battery terminal, or fuse box screw.
+ Yellow wire. This wire goes to the cabin harness' yellow wire.
It will need to connect through the firewall, using the provided red wire.
+ Fog light plugs - plug into fog light bulbs.
Cabin Harness
You will have to remove the lower dash kick panel.
+ Red wire - Positive. This is your trigger wire.
If you want independent control of your fogs, use an "add-a-circuit" and put it to fuse #32. If you want them triggered by parking lights, wire them to red/black stripe wire behind the lower dash.
+ Black wire, with ring terminal - ground. Use any body ground. I used the bolt under the steering column.
+ Yellow wire - Attach to yellow wire coming from engine bay using provided red wire.
+ Green plug connector - Attach to fog switch.
Pop out the blank switch beside mirror controls by removing lower dash, and replace with fog switch.
Here's a picture if you're a visual learner.
I hope this helps!
Last edited by guitarplayer16; 05-11-2015 at 12:36 PM.

The following 32 users liked this post by guitarplayer16:
02AEMCL (08-25-2021),
Anrico (01-20-2016),
ATN (05-11-2015),
AxelD7 (06-17-2021),
CLtotheTL32 (05-11-2015),
and 27 others liked this post.
The following 2 users liked this post by Popee:
David_BNSF (06-24-2021),
guitarplayer16 (05-11-2015)
The following users liked this post:
guitarplayer16 (05-11-2015)
The following 2 users liked this post by cust0mx:
David_BNSF (07-19-2021),
guitarplayer16 (05-11-2015)
05-11-2015, 01:13 PM
#5
Moderator
iTrader: (3)
Fantastic write-up as always GP! 
The following 2 users liked this post by CLtotheTL32:
guitarplayer16 (05-11-2015),
rockstar143 (02-09-2022)
The following users liked this post:
guitarplayer16 (05-11-2015)
The following users liked this post:
guitarplayer16 (05-11-2015)
The following users liked this post:
guitarplayer16 (05-11-2015)
The following users liked this post:
guitarplayer16 (05-11-2015)
The following users liked this post:
guitarplayer16 (05-11-2015)
05-11-2015, 11:17 PM
#12
Thanks for the DIY!
Following this wiring scheme, will it turn on and off independently once the parking lights are on and turn off regardless once the parking lights are off?
Following this wiring scheme, will it turn on and off independently once the parking lights are on and turn off regardless once the parking lights are off?
The following users liked this post:
guitarplayer16 (05-13-2015)
05-12-2015, 04:53 AM
#13
The following users liked this post:
guitarplayer16 (05-13-2015)
05-13-2015, 11:52 AM
#15
Race Director
Thread Starter
iTrader: (8)
Glad you guys find this useful.
I forgot to mention, the fogs in Popee's install are smoked.
I also should mention the wiring schematic I showed by picture is a bit wrong.
Follow my text as to where things should go, but I realized the picture says the "red extension wire" goes to the red wire on the cabin harness which is wrong.
The red extension wire goes to the yellow wire from the cabin harness and the other end goes through the firewall and to the yellow from the engine bay harness.
The red wire with the brown connector from the cabin harness goes to the add-a-circuit.
You'll have to snip off the brown connector obviously, and crimp it to the add-a-circuit.
Again, just follow my text instructions and you'll be fine, the picture is sort of wrong, which I will try to fix later.
Last edited by guitarplayer16; 05-13-2015 at 11:57 AM.
05-13-2015, 12:01 PM
#16
Senior Moderator
DIY needs moar dragons.. 
and more post-processing.. I'm much disappointed Thanh, you've let us down.
and more post-processing.. I'm much disappointed Thanh, you've let us down.
The following users liked this post:
guitarplayer16 (05-13-2015)
05-13-2015, 12:10 PM
#17
Race Director
Thread Starter
iTrader: (8)
Here is the fixed picture:
The following users liked this post:
David_BNSF (07-19-2021)
05-13-2015, 12:13 PM
#18
Race Director
Thread Starter
iTrader: (8)

 05-14-2015, 03:03 AM
#20
05-14-2015, 08:55 AM
#21
^^^ I think that's how gp16 has his wire up, on his accord fogs set up, might be best to pm him,
Mine are true independent, once the car is on, I control when I want to turn it off and on with a click of the button
Mine are true independent, once the car is on, I control when I want to turn it off and on with a click of the button
05-14-2015, 11:14 AM
#22
Race Director
Thread Starter
iTrader: (8)
If you'd like them to be dependent of the parking lights meaning they can only turn on/off when your parking lights are on, and if the parking lights are off, the fogs are off automatically, (pretty OEM-like), instead of using the add-a-circuit, you will put the red wire from the cabin harness and splice it into the parking light wire using a splice connector.
The parking light wire is ANY red with black stripe wire throughout the car.
The one I was taught to use was the one on the top left hand side behind the lower dash. I believe there are pictures of that location in my accord fog DIY.
Now since I've gotten a bit more intelligent since the accord fog DIY, I would just splice it into the parking light wire (red/black strip wire) coming from the VSA button.
Throughout many, if not, all Hondas and Acuras, the Red/Black stripe wire is known to be the parking light wire, which gets powered to illuminate the interior button backlighting.
Anything that lights up in your car as soon as your turn on your parking lights uses the red/black wire.
The following users liked this post:
David_BNSF (07-19-2021)
05-14-2015, 02:08 PM
#23
Race Director
iTrader: (1)
Great writeup as usual GP!
But man IMO they look so wrong on a 3G. The front end isn't near "blocky" enough for them to look right. I mean are they taller than the headlights? Lol
I hope you personally are still rocking the accords as they are much more suited for our cars.
But man IMO they look so wrong on a 3G. The front end isn't near "blocky" enough for them to look right. I mean are they taller than the headlights? Lol
I hope you personally are still rocking the accords as they are much more suited for our cars.
The following 2 users liked this post by maharajamd:
guitarplayer16 (05-15-2015),
hisost (05-16-2015)
05-14-2015, 10:56 PM
#24
If you'd like them to be dependent of the parking lights meaning they can only turn on/off when your parking lights are on, and if the parking lights are off, the fogs are off automatically, (pretty OEM-like), instead of using the add-a-circuit, you will put the red wire from the cabin harness and splice it into the parking light wire using a splice connector.
The parking light wire is ANY red with black stripe wire throughout the car.
The one I was taught to use was the one on the top left hand side behind the lower dash. I believe there are pictures of that location in my accord fog DIY.
Now since I've gotten a bit more intelligent since the accord fog DIY, I would just splice it into the parking light wire (red/black strip wire) coming from the VSA button.
Throughout many, if not, all Hondas and Acuras, the Red/Black stripe wire is known to be the parking light wire, which gets powered to illuminate the interior button backlighting.
Anything that lights up in your car as soon as your turn on your parking lights uses the red/black wire.
The parking light wire is ANY red with black stripe wire throughout the car.
The one I was taught to use was the one on the top left hand side behind the lower dash. I believe there are pictures of that location in my accord fog DIY.
Now since I've gotten a bit more intelligent since the accord fog DIY, I would just splice it into the parking light wire (red/black strip wire) coming from the VSA button.
Throughout many, if not, all Hondas and Acuras, the Red/Black stripe wire is known to be the parking light wire, which gets powered to illuminate the interior button backlighting.
Anything that lights up in your car as soon as your turn on your parking lights uses the red/black wire.
05-15-2015, 07:48 PM
#26
Race Director
Thread Starter
iTrader: (8)
You guys are all very welcome.
Please let me know how things work out!
I am still using accord fogs, I prefer them much more! 
Please let me know how things work out!
Great writeup as usual GP!
But man IMO they look so wrong on a 3G. The front end isn't near "blocky" enough for them to look right. I mean are they taller than the headlights? Lol
I hope you personally are still rocking the accords as they are much more suited for our cars.
But man IMO they look so wrong on a 3G. The front end isn't near "blocky" enough for them to look right. I mean are they taller than the headlights? Lol
I hope you personally are still rocking the accords as they are much more suited for our cars.
07-04-2015, 04:49 PM
#27

If you'd like them to be dependent of the parking lights meaning they can only turn on/off when your parking lights are on, and if the parking lights are off, the fogs are off automatically, (pretty OEM-like), instead of using the add-a-circuit, you will put the red wire from the cabin harness and splice it into the parking light wire using a splice connector.
The parking light wire is ANY red with black stripe wire throughout the car.
The one I was taught to use was the one on the top left hand side behind the lower dash. I believe there are pictures of that location in my accord fog DIY.
Now since I've gotten a bit more intelligent since the accord fog DIY, I would just splice it into the parking light wire (red/black strip wire) coming from the VSA button.
Throughout many, if not, all Hondas and Acuras, the Red/Black stripe wire is known to be the parking light wire, which gets powered to illuminate the interior button backlighting.
Anything that lights up in your car as soon as your turn on your parking lights uses the red/black wire.
The parking light wire is ANY red with black stripe wire throughout the car.
The one I was taught to use was the one on the top left hand side behind the lower dash. I believe there are pictures of that location in my accord fog DIY.
Now since I've gotten a bit more intelligent since the accord fog DIY, I would just splice it into the parking light wire (red/black strip wire) coming from the VSA button.
Throughout many, if not, all Hondas and Acuras, the Red/Black stripe wire is known to be the parking light wire, which gets powered to illuminate the interior button backlighting.
Anything that lights up in your car as soon as your turn on your parking lights uses the red/black wire.
Scott

The following users liked this post:
David_BNSF (07-19-2021)
07-04-2015, 06:04 PM
#28
Race Director
Thread Starter
iTrader: (8)
Wow, install looks perfect buddy
Glad I could help you
Glad I could help you
07-06-2015, 07:56 PM
#30
Racer

Thanks for the DIY. Just got mine installed into my bumper. Will try to remove my diffusers since the bumper is off, then install my Aspec up front and will post pictures. It's not the cleanest install, but it will do, and your pictures helped a ton


 07-13-2015, 04:53 PM
#34
So after just a few weeks of my install it looks like my relay crapped out. I purchased an aftermarket accessory relay kit and I would like to know if anyone knows what the colors on the original relay that came with the fog lights represent. Meaning the blue red white black and yellow wires. This way I can match them to the new relay and make sure they are connected correctly.
Thanks!
Scott
Thanks!
Scott


The following users liked this post:
David_BNSF (12-18-2021)
10-13-2015, 07:20 PM
#39
Race Director
Thread Starter
iTrader: (8)
All these installs are flawless I must say!
I'm glad the DIY was able to help
I'm glad the DIY was able to help
10-31-2015, 08:26 PM
#40
Racer

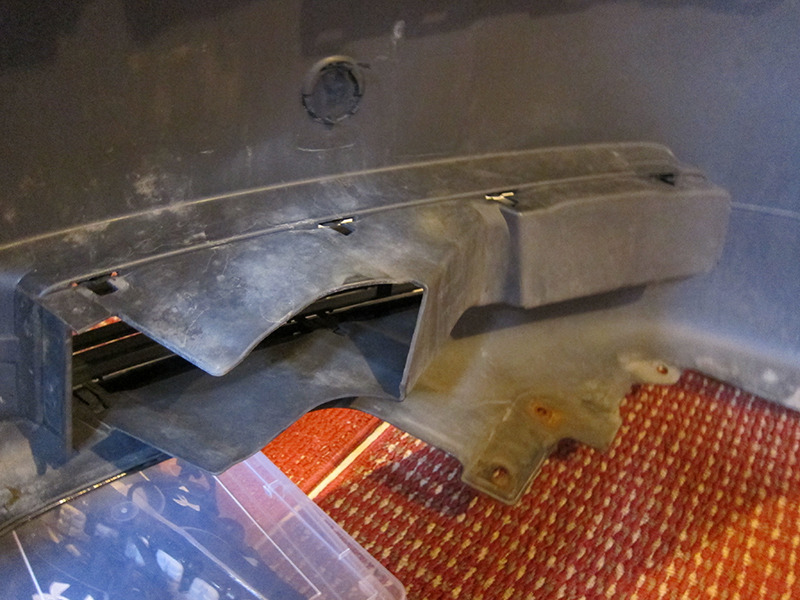
Did anyone run into bumper refittment issues once the inspire fogs were in? It seems my passenger side light is bumping into what I believe may be an airbag sensor, causing the bumper to not be properly aligned on the passenger side
The following users liked this post:
ttoy0707 (09-19-2016)