
Belt Tensioner
 07-01-2014, 08:50 AM
#1
WNC Real Estate Sales99TL
Thread Starter
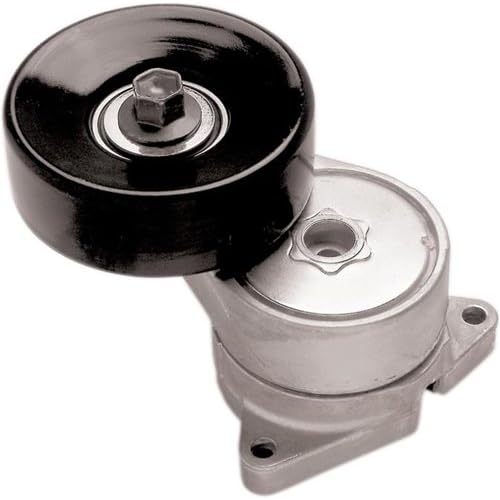
Belt Tensioner
Part # 31170-P8F-A01 Need to replace the belt tensioner on my 2003 Acura. Has anyone done this. The pulley is starting to make noise. I know the pulley can be replaced only. Can it be taken off without taking the complete tensioner assembly off? Please help! Tight space to get to it.
 07-01-2014, 11:36 AM
#2

did you ck the diy section?
do NOT attempt to replace the roller without the tensioner arm, that's crazy talk since the main action takes place inside the tensioner, and its critical
Buy it as a complete unit for under 100 bucks, aftermarket-online parts store or local store is fine, compare to dealer price and our sponsoring dealers price
access thru right fender inner liner area
A new belt is smart and needed with new tensioner
note mine went at 80kmiles, made noise a long time before replaced- when it rumbled
07-01-2014, 04:24 PM
#3
It is safest to replace the whole unit like 01tl4tl said, but pick either way you choose that fits you. I replaced the roller alone without any problem, but every situation is different.
Replacing the belt is easy, but you need to be very careful with the tension, and avoid to stand in its way if it goes wrong; safety first. Remove one bolt on the PS reservoir, and set it to the left for some room. Use an ~15deg offset 14mm closed wrench on the center roller bolt and push it towards the windshield, then remove the belt. How you choose to leverage the the 14mm wrench is up to you, but make sure you plan ahead to have room to set the tension to rest after the belt is removed; meaning the wrench will need to go down towards the radiator.
Removing the roller or the whole tension unit is tough, because the bolts are long. I don't remember exactly and don't think there is an easy way, and no chance you can do it from the top. You will have to remove the front passenger wheel, and access it from there. Hopefully someone else had better experience to chime in. And, don't get gatorback belt.
Roller bolt is reversed thread. I had hard time removing the roller bolt even when the unit was out.
Last edited by acutee; 07-01-2014 at 04:27 PM.
07-01-2014, 09:41 PM
#4
has this job made it to our DIY section yet? or that guy on youtube with all the Honda vids?
07-02-2014, 10:22 AM
#5
WNC Real Estate Sales99TL
Thread Starter
The placement of this tensioner on the Acura is different than the Honda motor. I've watched the you tube vid. on the Honda v6. Ours is more difficult. I'm trying to find someone that has done it. I also understand from another post the tensioner has to be rotated to remove it after you unbolt it. Just wondering how difficult it is. There is no clearence so I understand that you have to go in through the fender well to unbolt it. Just wondering if anyone has done this and how difficult it is. Garage wants $250. I can order the part for $90 from Acura and do myself if I know what I'm getting into.
07-02-2014, 10:52 AM
#6
I have done it. through the wheel well, remove plastic cover, you will need to remove 3 bolts on the unit, 2 on the sides and one in the middle. That is all it is. space is limited, so all it is is how to manouver your tool and to get the unit out. you don't need to rotate the unit to get it out.
The following users liked this post:
01tl4tl (07-03-2014)
07-03-2014, 10:42 AM
#7
my 01 went to a private speed shop, who found out it was different than the Hondas they normally did
charged 1.5 hours for a job that should take 30 minutes, I supplied part $85 a few years ago
just release tensioner and slip belt off, after noting route of belt
TAKE PICS and see hood label/diagram of belts
then remove RF wheel and secure car with jackstand or slide wheel under frame rail
Its just screws and bolts, don't let it beat you!
This is based on human with small to normal hand size
all others will shed 2-3 layers of skin in the process
Trending Topics
07-03-2014, 05:05 PM
#8

Drive belt tensioner.......
The placement of this tensioner on the Acura is different than the Honda motor. Ours is more difficult. Just wondering how difficult it is. There is no clearence so I understand that you have to go in through the fender well to unbolt it.
Garage wants $250. I can order the part for $90 from Acura and do myself if I know what I'm getting into.
Garage wants $250. I can order the part for $90 from Acura and do myself if I know what I'm getting into.
 Hey Luke7, for the labor savings you would spend replacing the tensioner.....it might be worth the effort "DIY" ing the job. Study the placement and have proper tools ready to assist in the removal of the old assembly.
 With some mechanical aptitude, finesse and patience, you can do it. Ya might need to loosen or move some other stuff to access it better. Adaptors, u-joints, offset and ratcheting wrenches may be helpful along the way. Just remember.....$250 for your effort.

PS: Take notes along the way to help others !!!
 07-04-2014, 08:27 AM
#9
WNC Real Estate Sales99TL
Thread Starter
I ordered the part / paid extra to have it shipped from an online Acura Garage in SC. Ordered it Tues. and still don't have it. FED say Monday delivery due to the 4th. Was $104 for the part. Could have gotten it from a FL Acura dealer for $96. They Charged a lot for shipping but I thought I'd get it today/sooner. Very mechanically adept here so no worries. I have different rachets and 6 sided sockets etc. The local garage that works on Acura's and Honda's wanted $135 labor and $111 (that's retail) for the OEM part. With tax=So $265. Why I'm doing it myself. I can find better ways to spend $161 dollars even if I scratch my big hands.
07-04-2014, 09:35 PM
#11
Just something to consider next time when wanting an OEM factory part.....get the part # and price, then try your local Acura or Honda dealeship's part dept. Often times if ya get the right person, they will match online prices and sometimes have the part available on the next day. Last time I didn't even have to pay any extra for shipping. They can set up an account for future discounted pricing if ya so desire. Great when ya wanna buy a case of DW1 or anything OEM.
07-05-2014, 07:11 AM
#12
WNC Real Estate Sales99TL
Thread Starter
Just something to consider next time when wanting an OEM factory part.....get the part # and price, then try your local Acura or Honda dealeship's part dept. Often times if ya get the right person, they will match online prices and sometimes have the part available on the next day. Last time I didn't even have to pay any extra for shipping. They can set up an account for future discounted pricing if ya so desire. Great when ya wanna buy a case of DW1 or anything OEM.
07-07-2014, 04:46 PM
#13
shops, especially the dealer, want the fastest most reliable way to get the car back on the road- and be able to provide the confidence of some warranty on the part.
Its faster to install a complete new/rebuilt part than to remove part from car, dismantle it and find problem, install repair parts, reassemble and install on car
If there is anything hidden- like a bearing problem- all that time was a waste to the shop who must now order a complete assembly and start over
Every minute is valuable to the shop, and usually the tech too!
07-08-2014, 07:07 AM
#14
WNC Real Estate Sales99TL
Thread Starter
shops, especially the dealer, want the fastest most reliable way to get the car back on the road- and be able to provide the confidence of some warranty on the part.
Its faster to install a complete new/rebuilt part than to remove part from car, dismantle it and find problem, install repair parts, reassemble and install on car
If there is anything hidden- like a bearing problem- all that time was a waste to the shop who must now order a complete assembly and start over
Every minute is valuable to the shop, and usually the tech too!
Its faster to install a complete new/rebuilt part than to remove part from car, dismantle it and find problem, install repair parts, reassemble and install on car
If there is anything hidden- like a bearing problem- all that time was a waste to the shop who must now order a complete assembly and start over
Every minute is valuable to the shop, and usually the tech too!
07-08-2014, 10:57 AM
#15
good job --did you get any pics to make a diy?
07-12-2014, 02:00 PM
#18
WNC Real Estate Sales99TL
Thread Starter
30 min job=I'm still laughing. Got it done today. Spent about 3 hours/mostly due to my over sized hands getting the oil dipstick bolt back on. Here's the drill. If I had to do it all again, it would probably take me an hour and some minutes.
1. There are 3 clips on the plastic guard on the inside of the wheel well. Then it just drops down.
2. Disconnect the power steering hose at the pump. Very little fluid comes out. Be careful NOT to disturb the fitting on the power steering pump. There's an O ring that I had to replace last year after bumping the hose. It started sucking air into the system and all that was needed was to replace the O ring on the fitting that goes into the power steering pump.
3. Unbolted the power steering fluid reservoir and moved it aside. Also unclipped the electric line that runs along the side of the engine. REMOVE THE BELT! Allows more space to work in for #4.
4. Unbolted the dipstick and removed. Just pull up on it. and it will come out. Make sure the O ring is still intact before you re-install it. There is a bolt holding it onto the engine. This will allow you access to the top bolt on the tensioner.
5. You'll need a 10MM socket to remove the upper and lower tensioner bolts. The center bolt is 8MM. Remove the top 10mm bolt from the upper engine housing. If you release the belt off the tensioner it's much easier to access it. Same with the oil dipstick bolt.
6. Access to the lower 2 bolts. One 10mm and one 8MM on the center of the tensioner from below the car. You'll need a 2" extension on your racket. 3" is too long. I had an extension socket that gave me an extra inch and 1/2 that worked for the 10mm bolt on the lower part of the tensioner. (Tight space)
7. Tensioner comes out after a few twists and turns from below the car.
8. I drew a diagram of the how the belt runs on the car. I have 14mm long wrench that (12") I used to push the belt tensioner toward the dashboard to release the tension. A short wrench would have made this much more difficult.
9. Remember to install the 10MM bolt on the top of the tensioner and re-install the bolt that holds the dipstick BEFORE YOU PUT THE BELT BACK ON. I ended taking the belt back off when I realized how much more access to this cramped area was available without the tensioner being pulled forward and the belt on. When there is no tension on the tensioner it's more out of the way to access these 2 bolts.
10. It's not that hard a job. Would be much easier the 2nd time around as are most projects in cramped spaces.
11. Remove the belt FIRST! Put it back on right before you re-attach the power steering hose and rebolt the reservior.
The following users liked this post:
3.2TLc (07-12-2014)
07-12-2014, 02:11 PM
#19
WNC Real Estate Sales99TL
Thread Starter
The new tensioner is nice and smooth. The one I replaced had bearings that were just starting to go bad. Also when the Air conditioner pump kicks on now there is a less noticeable jerk on the belt. It's all smoother now After 161,000 miles the old tensioner spring had worn in. I did spin the Alternator and Air conditioning compressor and the bearings on both seemed very smooth and tight. Sore hands from working in the tight spaces/but I saved $170 bucks!
07-12-2014, 03:25 PM
#20
excellent diy write-up! bolt/socket/extension sizes are very helpful
great reminder to always spin anything a belt attaches to !!
You never know when you find yourself stranded because an air pump seizing caused alternator to randomly run and stop- then belt starts to melt and shred = no, really----it was a fun cross country trip towing a race car with the ol beater truck
07-12-2014, 04:32 PM
#21
Moderator
Just a recommendation Goodyear sells a tensioner assembly for like less than 50bucks or so was when I bought it! Have been a pretty reliable unit since more than 50K now..
07-12-2014, 06:22 PM
#22
07-12-2014, 07:14 PM
#23
Moderator
^^ I'm still waiting for Fatty to add mine into the DIY section hahaha..
1.- High Beam + Fogs Mod (Written 4 Years Ago) https://acurazine.com/forums/2g-tl-1999-2003-98/diy-high-beam-fogs-mod-802817/
2.- A/C Air Mix Motor Repair (Written 2 Years Ago) https://acurazine.com/forums/2g-tl-1999-2003-98/diy-c-air-mix-motor-repair-848488/
1.- High Beam + Fogs Mod (Written 4 Years Ago) https://acurazine.com/forums/2g-tl-1999-2003-98/diy-high-beam-fogs-mod-802817/
2.- A/C Air Mix Motor Repair (Written 2 Years Ago) https://acurazine.com/forums/2g-tl-1999-2003-98/diy-c-air-mix-motor-repair-848488/
07-14-2014, 11:50 AM
#24
WNC Real Estate Sales99TL
Thread Starter
 07-14-2014, 02:57 PM
#25
many who replace a belt or part of a tensioner on our 150kmiles+ cars, find that soon after- the rest of tensioner fails!
maybe all those years in stress position -then released- then pressed back into action
would you do the timing belt and not replace its mission critical belt tensioner?
its failure means destruction of the powerplants internals
maybe all those years in stress position -then released- then pressed back into action
would you do the timing belt and not replace its mission critical belt tensioner?
its failure means destruction of the powerplants internals
07-14-2014, 04:37 PM
#26
Moderator
Just a few Facts:
GATES build the OEM Tensioner/Pulley for Honda ACC Belt.
Goodyear sells a Rebranded GATES unit.
GATES = GOODYEAR = OEM!
GATES:
http://www.oreillyauto.com/site/c/de...3309&ppt=C0331
GOODYEAR:
Both are same Price! Lower than the 80bucks Honda Unit!
Win! win! situation exactly like we do with the AISIN T-Belt Kit.
Last edited by Skirmich; 07-14-2014 at 04:43 PM.
07-14-2014, 10:49 PM
#27
there you go spouting facts again~ thanks for the info!!
07-21-2014, 08:37 AM
#28
WNC Real Estate Sales99TL
Thread Starter
Just a few Facts:
GATES build the OEM Tensioner/Pulley for Honda ACC Belt.
Goodyear sells a Rebranded GATES unit.
GATES = GOODYEAR = OEM!
GATES:
http://www.oreillyauto.com/site/c/de...3309&ppt=C0331
GOODYEAR:
Amazon.com: Goodyear 49248 Gatorback Tensioner: Automotive
Both are same Price! Lower than the 80bucks Honda Unit!
Win! win! situation exactly like we do with the AISIN T-Belt Kit.

Thread
Thread Starter
Forum
Replies
Last Post
rp_guy
Member Cars for Sale
9
07-16-2017 07:33 AM