
Painted Door Pillars

Thread Starter
Sippy Cup (x2)
Joined: Jun 2005
Posts: 1,961
Likes: 9
From: Virginia Beach, VA
Painted Door Pillars
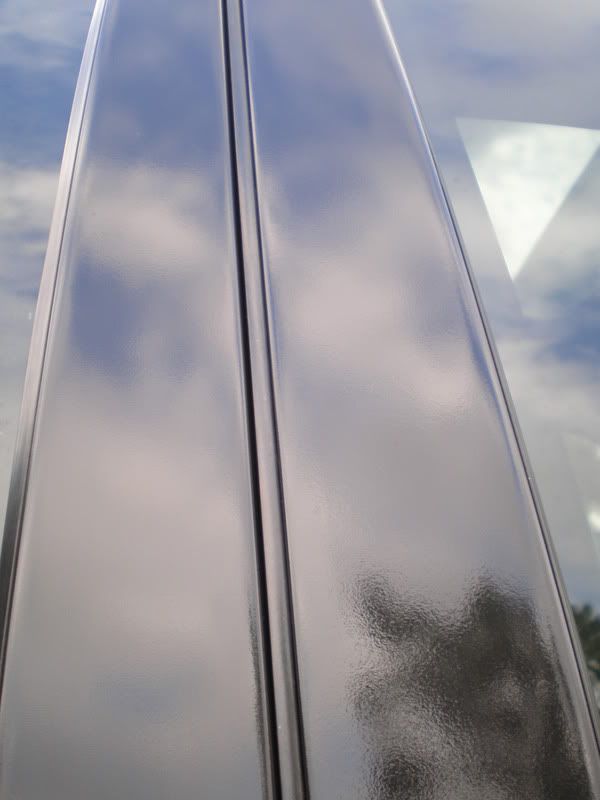
Well, I finally painted them. They came out okay (pics soon, I'm still at work) but I could not get them to look as smooth as the orginal ones. There is still some orange peel visible. I primed, sanded, painted, sanded, clear coat, then attempted to sand, but it took the clear coat off. I had about 3 coats of clear coat on there and wet sanded with 2000 grit paper. Is this normal? I've always thought that you could sand the clear coat and still keep it shiny, but I may have been wrong. So is there any other way to get rid of that orange peel that I have left? Again, pics will be up soon. I should be able to snap some when I get home from work.
T-Swzy
Joined: Jun 2007
Posts: 2,575
Likes: 0
From: Saint Paul, MN
i painted mine with some vinyl/gloss black paint, and it came out so nasty, there were wrinkles, really really deep and nasty ones, in the paint despite me spraying only very lightly each layer.
what kind of paint did u use?
what kind of paint did u use?
Thread Starter
Sippy Cup (x2)
Joined: Jun 2005
Posts: 1,961
Likes: 9
From: Virginia Beach, VA
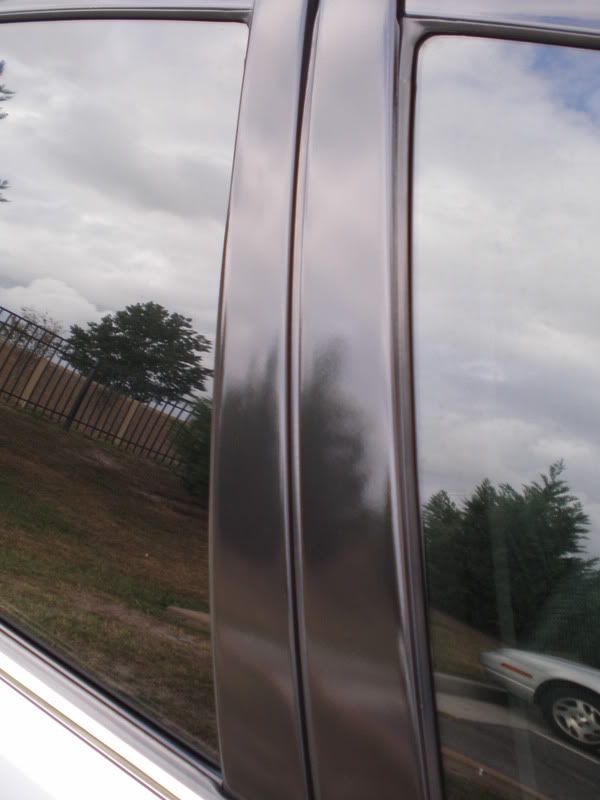
Before
Here is a pic that I borrowed from actright. His door pillars look better than mine did before I painted them, but of course I didn't take before pics because I painted them while I was at work. The after pics will be up this afternoon.

T-Swzy
Joined: Jun 2007
Posts: 2,575
Likes: 0
From: Saint Paul, MN
man thats a billion times better than mine, i'll go nab a few pix soon and show u lol
i dunno what the orange peel is, but it sounds like it's the slight orangw tint? if that's the case, try buffing it out with a rubbing compoud, 2.99 at autozone, if it doesnt work, then start from the top lol.
btw, did you remove the pillars when u did it? i tried to remove it via instructions from AZing but i couldnt find what the hell the pictures were pointing at
Trending Topics
Thread Starter
Sippy Cup (x2)
Joined: Jun 2005
Posts: 1,961
Likes: 9
From: Virginia Beach, VA
Originally Posted by Razzi
man thats a billion times better than mine, i'll go nab a few pix soon and show u lol
i dunno what the orange peel is, but it sounds like it's the slight orangw tint? if that's the case, try buffing it out with a rubbing compoud, 2.99 at autozone, if it doesnt work, then start from the top lol.
btw, did you remove the pillars when u did it? i tried to remove it via instructions from AZing but i couldnt find what the hell the pictures were pointing at
i dunno what the orange peel is, but it sounds like it's the slight orangw tint? if that's the case, try buffing it out with a rubbing compoud, 2.99 at autozone, if it doesnt work, then start from the top lol.
btw, did you remove the pillars when u did it? i tried to remove it via instructions from AZing but i couldnt find what the hell the pictures were pointing at
Orange peel are the little bumps that you see that make it so it's not completely smooth. It looks like it has the same dimples as an orange. I did remove mine, makes it a lot easier. I don't have any pics but all you have to do it pull the weather stripping off that goes around the inside of the door that the window meets up with. Pull that all off and you'll see 3 screws going into the side of the door pillar garnish. Then there is one more, if you open the door and pull back the weather stripping at the top of where the door pillar is on the inside of the door, there is one more screw back there. I don't have any pics, but if you can't get it, let me know and I'll try to snap some.
Kilos of yayo in
Joined: Jan 2005
Posts: 619
Likes: 1
From: Las Vegas
Well as far as I have heard orange peel is usually little specs of dust and whatnot that get caught in the paint while its drying. Unless you have a paint booth might be hard to avoid. They look pretty good to me man. Way better then my weather battered ones are looking. Call me crazy but on certain things I kind of like the orange peel look almost kind of textured. To me they look fine but I know how it is trying to get things perfect.
Prick of the month
Joined: Jan 2007
Posts: 527
Likes: 1
From: Southlake, TX
I did this a few weeks ago and the same problem, they all have the orange peel, i sanded and cleared 3 or 4 times...maybe I just suck at painting... It still looks better with the slight orange peel than it did before all flaking and chipping. I finally just gave up and put them back on, I was tired of driving around without them on, very noisy and quite ghetto looking. I did what some other members here have done and bought a roll of high gloss vinyl that I will cut and apply in a couple days.
It will be friday at the earliest that I have this done, I have some tests and a programming project due thursday, so I will be working on my car thursday night and all day friday. I'll post some pics friday afternoon of how it turned out and maybe a little DIY for it as well. The vinyl actually seems to match the window trim vinyl so I'm hoping this will turn out well.
It will be friday at the earliest that I have this done, I have some tests and a programming project due thursday, so I will be working on my car thursday night and all day friday. I'll post some pics friday afternoon of how it turned out and maybe a little DIY for it as well. The vinyl actually seems to match the window trim vinyl so I'm hoping this will turn out well.

Senior Moderator


Joined: Aug 2002
Posts: 81,385
Likes: 3,068
From: Appleton WI
Originally Posted by Billy Sacco
Well as far as I have heard orange peel is usually little specs of dust and whatnot that get caught in the paint while its drying. Unless you have a paint booth might be hard to avoid. They look pretty good to me man. Way better then my weather battered ones are looking. Call me crazy but on certain things I kind of like the orange peel look almost kind of textured. To me they look fine but I know how it is trying to get things perfect.
OK, Ill call you CRAZY. Orange peel is not desired in automotive paint finishes and why would you want a textured look on your car??
Senior Moderator
Joined: Aug 2002
Posts: 81,385
Likes: 3,068
From: Appleton WI
Originally Posted by 02TLSfan
I did this a few weeks ago and the same problem, they all have the orange peel, i sanded and cleared 3 or 4 times...maybe I just suck at painting... It still looks better with the slight orange peel than it did before all flaking and chipping. I finally just gave up and put them back on, I was tired of driving around without them on, very noisy and quite ghetto looking. I did what some other members here have done and bought a roll of high gloss vinyl that I will cut and apply in a couple days.
It will be friday at the earliest that I have this done, I have some tests and a programming project due thursday, so I will be working on my car thursday night and all day friday. I'll post some pics friday afternoon of how it turned out and maybe a little DIY for it as well. The vinyl actually seems to match the window trim vinyl so I'm hoping this will turn out well.
It will be friday at the earliest that I have this done, I have some tests and a programming project due thursday, so I will be working on my car thursday night and all day friday. I'll post some pics friday afternoon of how it turned out and maybe a little DIY for it as well. The vinyl actually seems to match the window trim vinyl so I'm hoping this will turn out well.

Kilos of yayo in
Joined: Jan 2005
Posts: 619
Likes: 1
From: Las Vegas
Originally Posted by fsttyms1
Thats not orange peel. Orange peel is usually caused by improper painting technique which causes it to flash off faster or laying paint on to heavy. If you have it it can be taken care of simply by wet sanding it till the surface is completely smooth and uniform, then polished.
OK, Ill call you CRAZY. Orange peel is not desired in automotive paint finishes and why would you want a textured look on your car??
OK, Ill call you CRAZY. Orange peel is not desired in automotive paint finishes and why would you want a textured look on your car??
 . My buddy just got a lotus and the damn thing has just a hint of ornage peel all over it.
Thread Starter
Sippy Cup (x2)
Joined: Jun 2005
Posts: 1,961
Likes: 9
From: Virginia Beach, VA
I'll try putting a few more coats of clear coat, then wet sand. I was using 2000 grit, is that fine enough or should I get something higher? When I sanded the clear coat before, it took the gloss off, will the polish bring that gloss back?
Prick of the month
Joined: Jan 2007
Posts: 527
Likes: 1
From: Southlake, TX
Originally Posted by fsttyms1
Dont paint sand paint sand etc... Simply paint, get all your coats on then Wetsand your clear smooth and polish.
Thread Starter
Sippy Cup (x2)
Joined: Jun 2005
Posts: 1,961
Likes: 9
From: Virginia Beach, VA
I got some info from this website and it seems like the idea of wetsanding is to get rid of the gloss, then buff it back to a shine. If you read through the whole page, it actually talks about wetsanding an entire vehicle. That's something i won't try anytime soon, but maybe someday I'll hone my wetsanding skills enough to give it a shot.
"The whole idea of wet sanding the entire vehicle is to make it look absolutely flawless. The buffing step is critical to achieving this goal. Having the correct buffing products, pads, and of course skill in buffing, is critical to achieving a perfect finish.
With the entire vehicle totally sanded, it will have no gloss. It will look horrible! The goal now is to buff the finish to perfection, remove every single scratch and mark, so the finish is absolutely perfect. This will take many steps and many hours. Your first goal is to completely remove all the sand scratch marks. Subsequent buffing steps will involve swirl mark removal and polishing for maximum gloss and clarity. You can't be in a hurry in any buffing step or you risk missing some imperfections such as sand scratches, or any other blemish in the paint. It needs to be flawless."

Thread
Thread Starter
Forum
Replies
Last Post
mlody
5G TLX (2015-2020)
85
Dec 4, 2019 02:11 PM
rp_guy
Member Cars for Sale
9
Jul 16, 2017 07:33 AM
detailersdomain
Wash & Wax
3
Oct 9, 2015 10:13 PM