
My Shot with Urethane Inserting.

Thread Starter
Moderator
Joined: Jan 2009
Posts: 6,509
Likes: 1,021
From: Baja, M�xico.
My Shot with Urethane Inserting.
So, My torque Side Mount is completely collapsed and like always that means my Front and Back Mounts are DEAD or getting ready to be. Since it would be a PITA to try to Insert Poly into the Hydraulic engine Mounts I repaired the Side Torque Mount to prevent excessive engine movement in the near future, Im saving to buy the complete kit @XLR8.
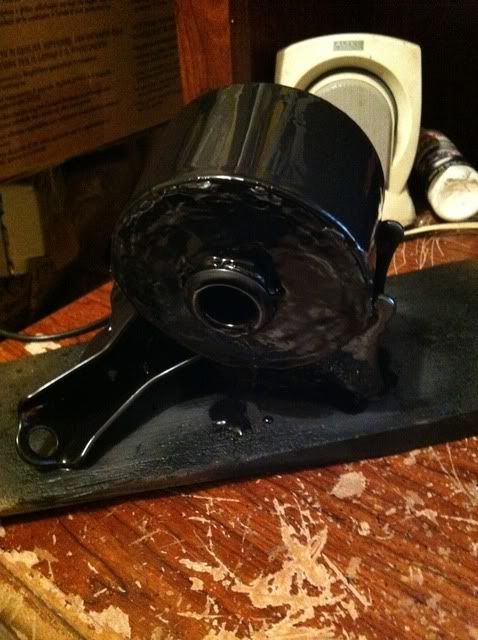
This is my FIRST Ever try at Poly-Urethane Inserting this is the Result:
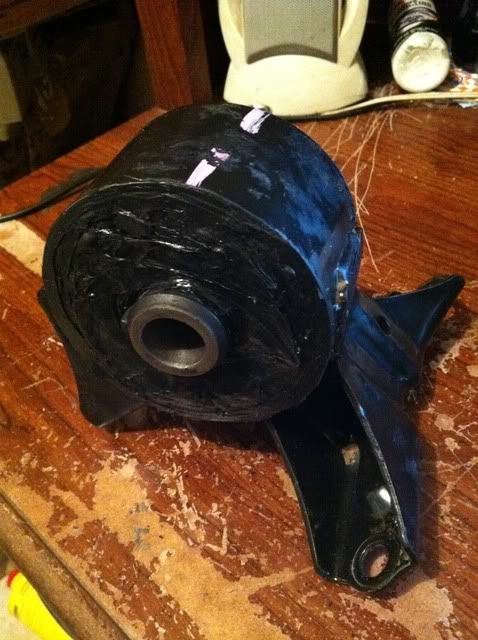
This is my old Mount (Beck & Arnley) that I was storing just exactly to do this!.. Now is curing 2 day I will install it Tomorrow just to be sure.
It turned out UGLY cuz the Poly just go wherever it wants to, Ill sand it and Paint it Flat Black.
NOTE: Working with Urethane in a Tube is a PITA my Caulk Gun (A Cheap, 2 Bucks One) was destroyed trying to get the sucker out of the tube.
Id recommend getting a reinforced Caulk Gun like this:
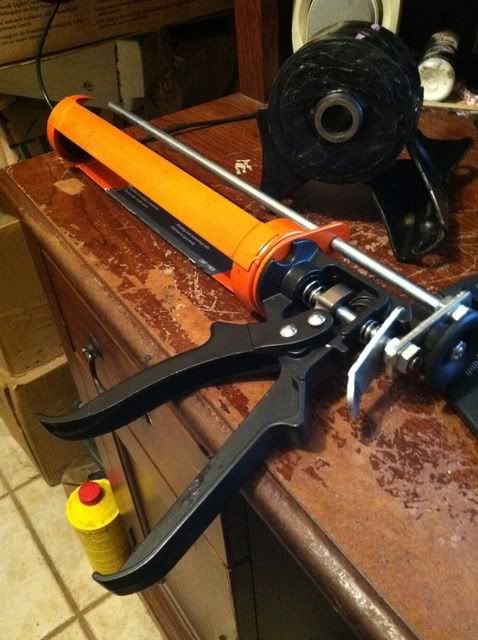
Cost me 5 bucks, Brand TRUPER.
So Ill wait until this cook out, and Install tomorrow (I Hope).
L8ters.
This is my FIRST Ever try at Poly-Urethane Inserting this is the Result:
This is my old Mount (Beck & Arnley) that I was storing just exactly to do this!.. Now is curing 2 day I will install it Tomorrow just to be sure.
It turned out UGLY cuz the Poly just go wherever it wants to, Ill sand it and Paint it Flat Black.
NOTE: Working with Urethane in a Tube is a PITA my Caulk Gun (A Cheap, 2 Bucks One) was destroyed trying to get the sucker out of the tube.
Id recommend getting a reinforced Caulk Gun like this:
Cost me 5 bucks, Brand TRUPER.
So Ill wait until this cook out, and Install tomorrow (I Hope).
L8ters.
Last edited by Skirmich; Jul 15, 2011 at 02:33 PM.
Thread Starter
Moderator
Joined: Jan 2009
Posts: 6,509
Likes: 1,021
From: Baja, M�xico.
Really? Well The thing is that I don't have a spare of F&R Mounts to play with and since I'm Buying the Kit it will be Useless now. I dunno about time tough every DIY on the Internet call a 2 day cure and 3 Overkill but if you have experience I will take the advice, I don't wanna be installing and removing mounts every week.
The tube is 3M Urethane Adhesive Window Well. It calls for 60A Hardness. Cost 19 bucks on my Local Home Depot.
The tube is 3M Urethane Adhesive Window Well. It calls for 60A Hardness. Cost 19 bucks on my Local Home Depot.
Thread Starter
Moderator
Joined: Jan 2009
Posts: 6,509
Likes: 1,021
From: Baja, M�xico.
HOLY, My side mount was Ridiculously Bad.
The Ring was completely detached from the Rubber running free in the Mount, There was Nothing Holding it together.
My TL is in COMA for Now Ill wait the week "fsttyms1" Recommended before throwing the Polyed Mount in.
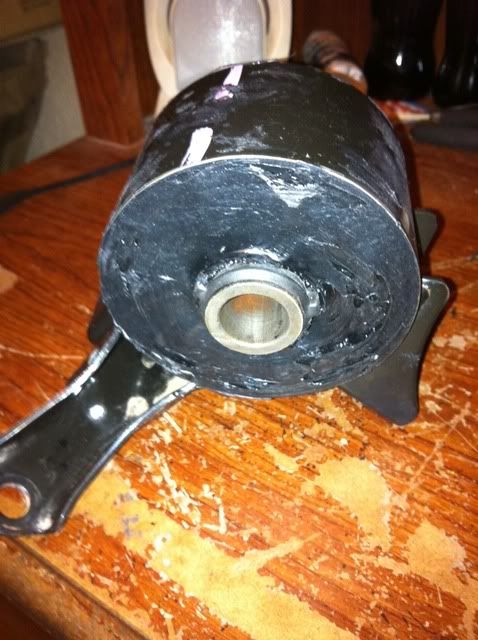
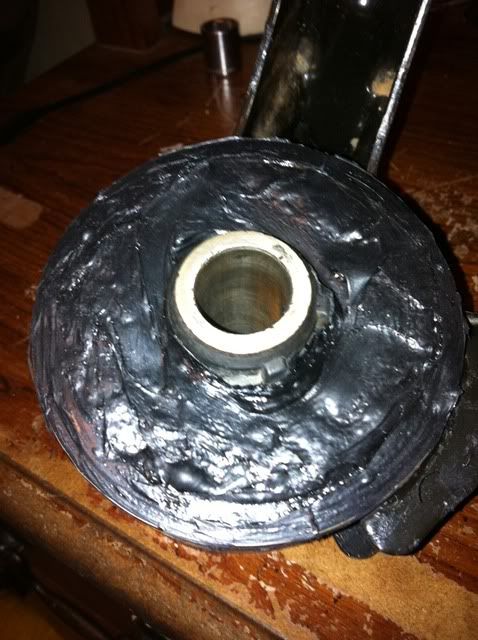
These are the Pics of the Old (The one Previously on the TL) Mount now Poly Inserted + Painted. The difference with this is that I fully clean it from the Rubber instead of Inserting it, So this could be properly called Poly Mount.
I perhaps used a Lil bit too much Paint on the Final Coat (The Glossy One).
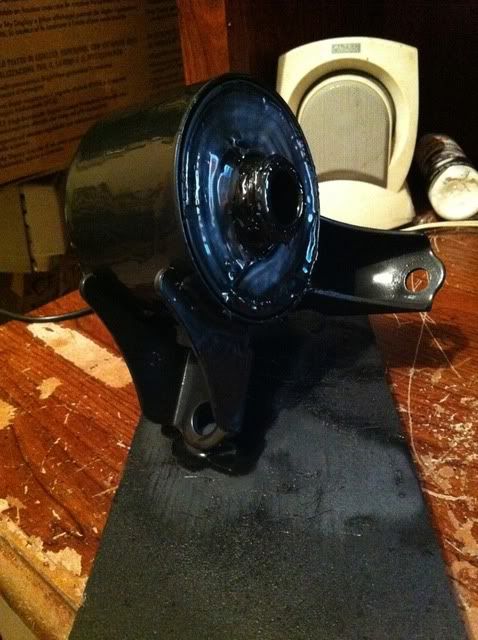
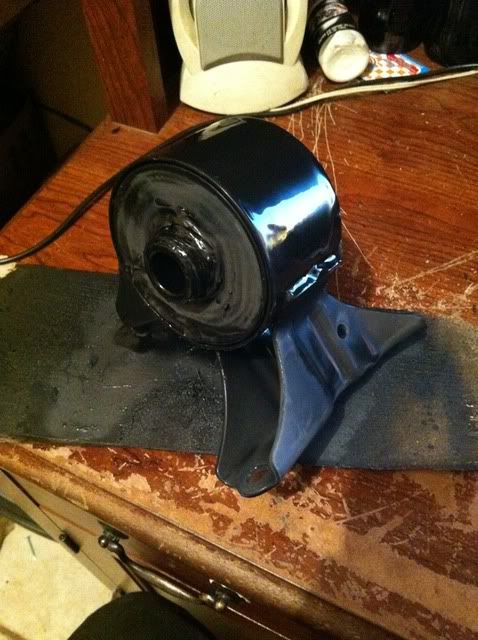
Now this sucker goes to the Oven to Cure all Paint + Poly....
Will Resume Review next Thursday when I Install the first one...
The Ring was completely detached from the Rubber running free in the Mount, There was Nothing Holding it together.
My TL is in COMA for Now Ill wait the week "fsttyms1" Recommended before throwing the Polyed Mount in.
These are the Pics of the Old (The one Previously on the TL) Mount now Poly Inserted + Painted. The difference with this is that I fully clean it from the Rubber instead of Inserting it, So this could be properly called Poly Mount.
I perhaps used a Lil bit too much Paint on the Final Coat (The Glossy One).
Now this sucker goes to the Oven to Cure all Paint + Poly....
Will Resume Review next Thursday when I Install the first one...
Senior Moderator


Joined: Aug 2002
Posts: 81,385
Likes: 3,068
From: Appleton WI
Really? Well The thing is that I don't have a spare of F&R Mounts to play with and since I'm Buying the Kit it will be Useless now. I dunno about time tough every DIY on the Internet call a 2 day cure and 3 Overkill but if you have experience I will take the advice, I don't wanna be installing and removing mounts every week.
The tube is 3M Urethane Adhesive Window Well. It calls for 60A Hardness. Cost 19 bucks on my Local Home Depot.
The tube is 3M Urethane Adhesive Window Well. It calls for 60A Hardness. Cost 19 bucks on my Local Home Depot.

Thread Starter
Moderator
Joined: Jan 2009
Posts: 6,509
Likes: 1,021
From: Baja, M�xico.
Perhaps is the Amount that it Took? Cuz on the Different DIYs they advise you to use Single Layers at the time to reduce drastically the amount of time it will take to cook. So Maybe the Hydro Mount is just too big to Cure in a Couple of Days.
I dunno but the Side Mount feels just too rigid Now, At the first day it was like you mentioned, Hard on the Outside but liquid on the inside.
But on the 2nd Day it wasnt like that anymore, Now its incredible Hard just like a Brand New Rubber Mount. But nonetheless I will take the week to cure it so there�s no comeback.
Thanks for your Replys Mega Mod!
Trending Topics
Thread Starter
Moderator
Joined: Jan 2009
Posts: 6,509
Likes: 1,021
From: Baja, M�xico.
So everything went up Straight No problems at all!
Results? WOW At last that clunky noise I have been getting on the front end disappeared! And the Response got Better too, Lately I have been feeling that the car lagged when I gas it but Not anymore Boy No! The car will burn all 1st and then some of 2nd Most of the Time! I regained My TL-S!!! just with a Single Mount!
I will try to do the Front and Back If I dont get the Money for the Kit Soon....

Thread
Thread Starter
Forum
Replies
Last Post
MrHeeltoe
1G TSX Tires, Wheels, & Suspension
20
Feb 23, 2023 01:54 PM
detailersdomain
Wash & Wax
3
Oct 9, 2015 10:13 PM
MrHeeltoe
2G TSX Tires, Wheels & Suspension
3
Sep 29, 2015 10:43 PM
MrHeeltoe
3G TL Tires, Wheels & Suspension
0
Sep 28, 2015 05:43 PM