
Finally decided to start on the stereo...

Thread Starter
Advanced
Joined: Jan 2007
Posts: 77
Likes: 0
From: Lancaster, CA
Finally decided to start on the stereo...
Well... have had my car for two weeks now....
And I'm itching to get my stereo installed!!
Was rolling with no stereo (or a very pathetic one) for a few months while i was in-between cars... I have a complete system that's just been wating for a new car to go in, so I finally went out and got a Metra kit and wiring harness to start on the HU.
I'll be modding it to fit my installation, but here is a list of all the items that will eventually go in the car (right now, just working on the HU).
02 ABP Type-S w/ Navi will be gettin...
Kenwood Excelon DDX8017
Front & Rear - (2) JL Audio VR650 CSI components (6.5 inch)
RF Power Amp 851X (110x4 rms @ 4ohm)
RF Power Amp 501bd (500x1 rms @ 2ohm)
Sub - DLS MW10 in custom ported box
Sirus Sat tuner
Dying to get it all in...
can't wait, can't wait, can't wait, can't wait!!
I will have to get some items custom installed, but I'm doing as much as I can to cut down on the installation costs. It'll look good, but I'm not going as much for "bling" as I am for just good sound! (Surround Sound baby!)
Will keep you posted and post as many useful pics as possible.
Thread Starter
Advanced
Joined: Jan 2007
Posts: 77
Likes: 0
From: Lancaster, CA
Well I got mt DDX8017 in the car last night.
Doesn't look as clean as I would like it to yet. The Metra kit I used (designed for single DIN) didn't work too well for my screen. After trimming it, and some sanding, and stuff, I got the screen to fit inside the metra kit; but without the plastic surround piece, my stereo has about a 1/4 inch gap on the left and right of the screen. There is NO noiticeable gap on the top and bottom though, so I couldn't use the trim ring that came with the stereo. I can't trim the top and bottom any more (to fit the trim ring) with out seriously impacting the structural integrity of the dash kit.
In summary, if you are installing a double-DIN HU, Don't even bother with a Metra kit. Without a trim ring that fits, you won't get the it looking very clean without some additional custom work. You could just as easily design and cut an new surround out of something else to fill in all the gaps (which is probably what I'll do).
I'll post some pics of my Metra modification, to give you some ideas what I did (might help anyone installing a single-DIN too). I don't have any "final" install pics because it was to dark to get a good exposure last night, but I'll try to get some up in the next fw hours.
Thread Starter
Advanced
Joined: Jan 2007
Posts: 77
Likes: 0
From: Lancaster, CA
Sorry for the quality... pics were taken with my Motorola SLVR. I don't own a digi cam.
First thing... I had to cut off the pocket right off the bat.
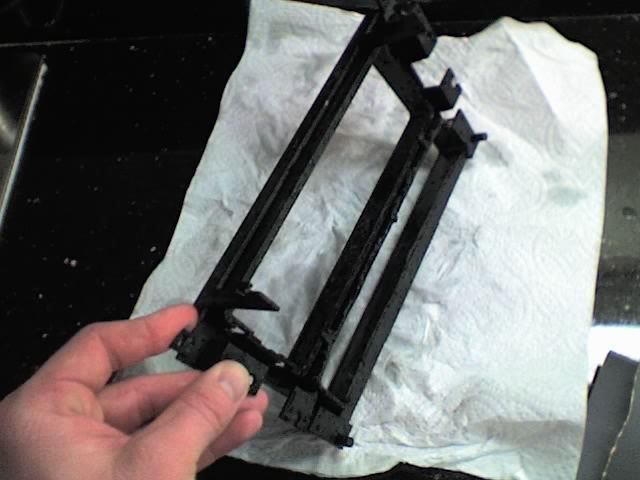
I left the piece in the middle in place just to support the surround while I was sanding it. I felt a bit more flimsy once I cut it out.
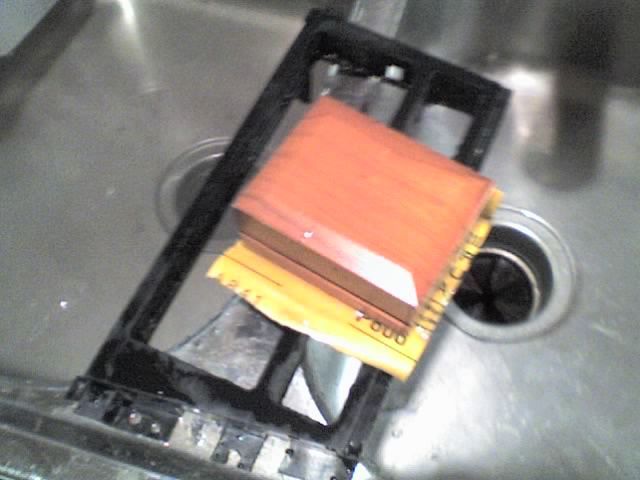
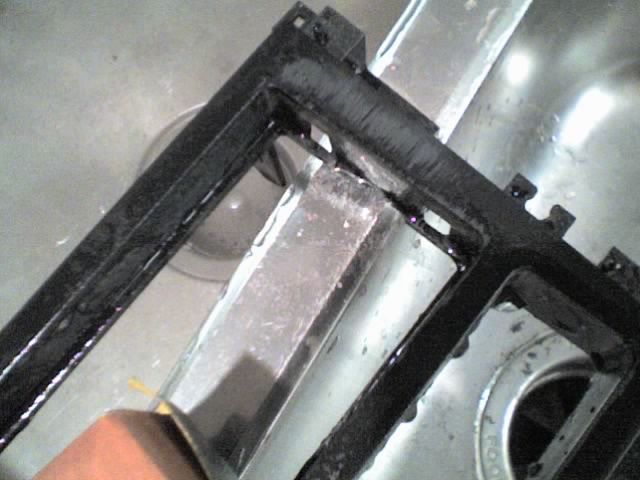
I sanded it starting with 400 grit, then 600, then 800 grit for the final texture.
USE A SANDING BLOCK! I started out without one... bad mistake. Took me a few hours of sanding to correct the errors I made without a block. Mainly the edges became slighlt beveled. There's a reason for using the block. While sanding, you'll be able see how the plastic "dust" settles on the face. It will look even unless you have an uneven spot where it will collect. The second picture shows no "dust" on the outside edges. It collects in the middle because that's what I had to sand down to make it even with the edges.
That's all I took of preping the kit. Once I cut out the center, I had to do some additional cutting, trimming, sanding, to get my HU to fit. I got too busy to care about pics from this point so I didn't get any.
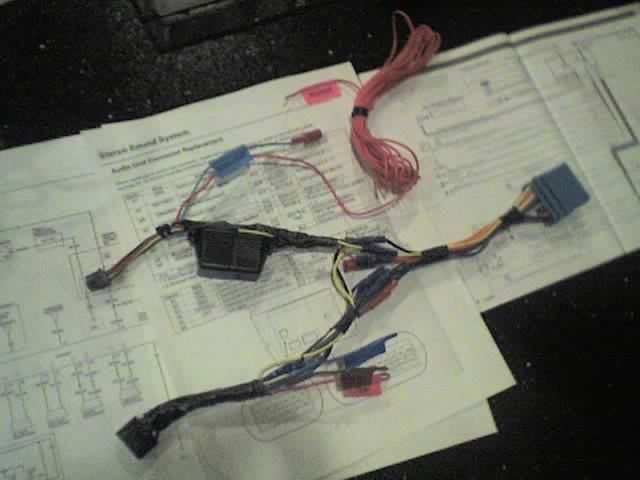
I did manage to snap a pic of my intermidate harness, once I wired the two together. The one on the left is the one that came with my stereo. Yes, It has two plugs. The one on the right is the one I got that pugs up to the OEM harness. About an hour or so of good work here to get it finished and taped up nicely. Left a few of the wires loose because I plan to go back and add a couple accesories later. I'll probably tear apart the dash 2 or 3 times more before I'm finished.
I'll get some pics of the "final" result here in a little while.
I'll custom design something else to fit before long, but at least I got my DVD/MP3, surround sound, etc capabilities back!
Next project is to install the speakers.
I'll be selling one set of my components and just installing coaxials in the back.
Cheaper to install/modify without much noticeable loss in SQ. The rear tweeter would be to close installing them in the front of the rear doors. Thought I'd be better off with a tweeter, in the door with the speaker, to make tuning a bit easier. If I can put my component tweeter down there, I just might do that too.
Well, that's all for now.
More details/pics to come later!
First thing... I had to cut off the pocket right off the bat.
I left the piece in the middle in place just to support the surround while I was sanding it. I felt a bit more flimsy once I cut it out.
I sanded it starting with 400 grit, then 600, then 800 grit for the final texture.
USE A SANDING BLOCK! I started out without one... bad mistake. Took me a few hours of sanding to correct the errors I made without a block. Mainly the edges became slighlt beveled. There's a reason for using the block. While sanding, you'll be able see how the plastic "dust" settles on the face. It will look even unless you have an uneven spot where it will collect. The second picture shows no "dust" on the outside edges. It collects in the middle because that's what I had to sand down to make it even with the edges.
That's all I took of preping the kit. Once I cut out the center, I had to do some additional cutting, trimming, sanding, to get my HU to fit. I got too busy to care about pics from this point so I didn't get any.
I did manage to snap a pic of my intermidate harness, once I wired the two together. The one on the left is the one that came with my stereo. Yes, It has two plugs. The one on the right is the one I got that pugs up to the OEM harness. About an hour or so of good work here to get it finished and taped up nicely. Left a few of the wires loose because I plan to go back and add a couple accesories later. I'll probably tear apart the dash 2 or 3 times more before I'm finished.
I'll get some pics of the "final" result here in a little while.
I'll custom design something else to fit before long, but at least I got my DVD/MP3, surround sound, etc capabilities back!
Next project is to install the speakers.
I'll be selling one set of my components and just installing coaxials in the back.
Cheaper to install/modify without much noticeable loss in SQ. The rear tweeter would be to close installing them in the front of the rear doors. Thought I'd be better off with a tweeter, in the door with the speaker, to make tuning a bit easier. If I can put my component tweeter down there, I just might do that too.
Well, that's all for now.
More details/pics to come later!
Thread Starter
Advanced
Joined: Jan 2007
Posts: 77
Likes: 0
From: Lancaster, CA
Oh! And another thing...
I used the factory mounting holes from the OEM HU the screw my DDX8017 into the the center console. Nice and rigid support. I like that!
However the DDX8017 was designed to stick out about a 1/4 inch more than OEM so that you can use the trim piece that came with it. Unfortunately I still can't use it because of the size, and I want the install to be flush with the center console, so I'll be going back in and re-drilling the holes about 1/4 inch back, until the face of my DDX8017 is flush with the center console.
I'll probably get some more pictures of that as I go...
Thread Starter
Advanced
Joined: Jan 2007
Posts: 77
Likes: 0
From: Lancaster, CA
OK... some pics of the DDX8017 installed.
See, doesn't look too bad. I just want to do some more customization to it looks even cleaner.
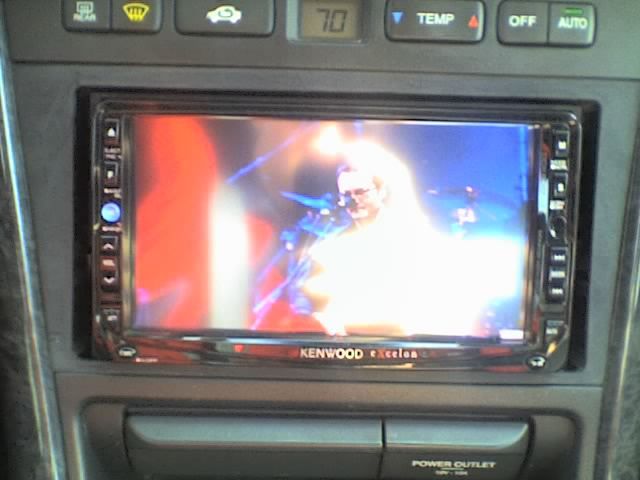
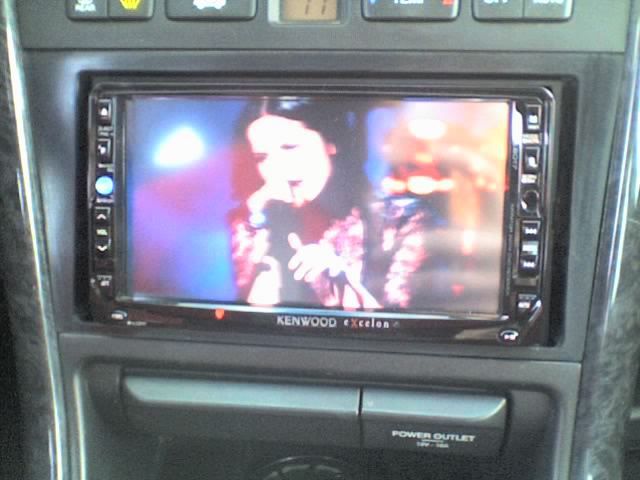
Lousy exposure... sun was almost down and I still got glare.
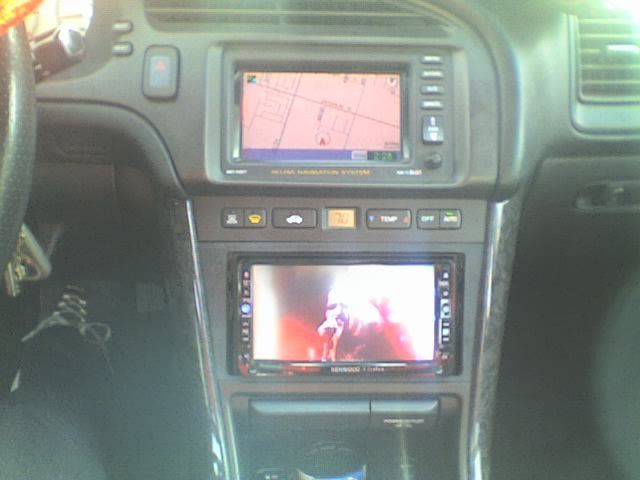
A back-up shot to show both my screens.
See, doesn't look too bad. I just want to do some more customization to it looks even cleaner.
Lousy exposure... sun was almost down and I still got glare.
A back-up shot to show both my screens.
Thread Starter
Advanced
Joined: Jan 2007
Posts: 77
Likes: 0
From: Lancaster, CA
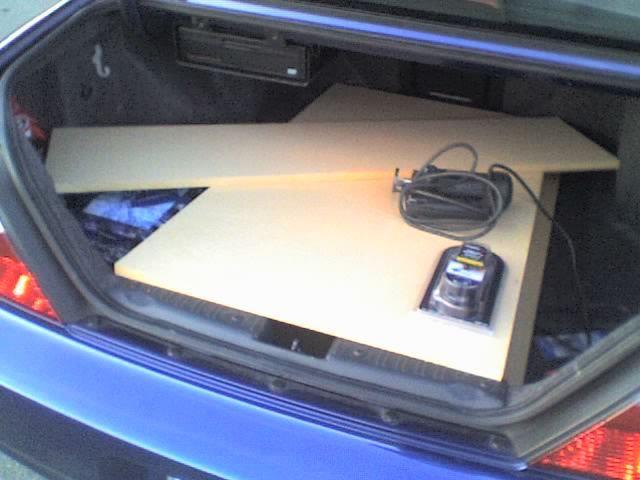
And for the next step of my project.... a little teaser for ya. 
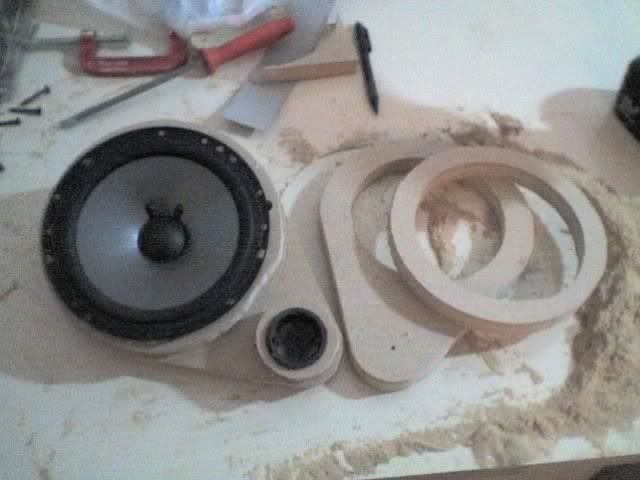
Got an entire sheet of 3/4" MDF (49" x 97") at Lowes and had them cut it so I could get it in my trunk.
There are 4 of the large sheets and that long narrow one is just extra.
Got an entire sheet of 3/4" MDF (49" x 97") at Lowes and had them cut it so I could get it in my trunk.
There are 4 of the large sheets and that long narrow one is just extra.
Trending Topics
Thread Starter
Advanced
Joined: Jan 2007
Posts: 77
Likes: 0
From: Lancaster, CA
Sorry, it's been awhile since last update...
WOW! What a weekend!
I completely stripped the interior out of the car (except dash) to install dynamat eXtreme in the floor and run all my wires for the amplifiers. This included my optima battery and running the power wire through the firewall. Oh, I got my crossovers mounted and all the wire run to the speaker locations as well, but I didn't have time to actually install the speakers yet.
Turned out to be a much bigger project than I thought it would be, but it'll be worth the effort when it's all finished.
I thought if I take all day saturday, I can install the dynamat, run the wires and install the component speakers!
Yeah right!
Was my first time doing the dynamat, so it took me longer than expected.
but it came out GREAT! I just didn't expect it to take me nearly 30 hours do the floor and run all my wires!!!
OK, well I had a few little complications along the way and had to do some improvising, so that could be why. And that also included some time shopping for tools and supplies I didn't have.
I just moved, so I'm still buying tools and items I previously had easy access to before I moved.
Don't worry, I DO have plenty of pictures! Between my friend and I, we took about 100 pictures at high quality (1-2 MB each). Some were just goofing around of course and many duplicates to get a better quality shot, but the majority covers a good amount of the install. I will eventually get some posted, but you can imagine it will take awhile to go through them and pic out the best ones as well as crop, annotate, and upload the ones I've chosen.
I am EXTREMELY busy over the next few days and will be out of town this weekend, so I probably won't get them up before then. But my goal is to have everything installed before the Meguiar's meet next weekend. Means I'll have to get the speaker rings cut, trimmed, & installed - Tweeters included. And get my amps custom mounted in the trunk, hook up all the wires, amps adjusted, and stereo tuned.
OK, well here a couple photos to keep you tied over...
Do I really need to show more of the process or is this good enough you think?!?!? *LOL*
More details to come later!
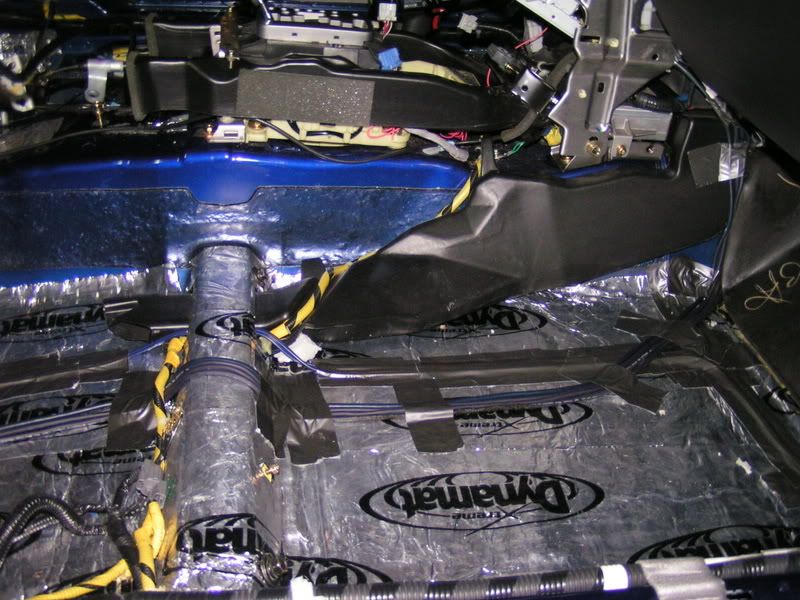
Floor Dynamat complete
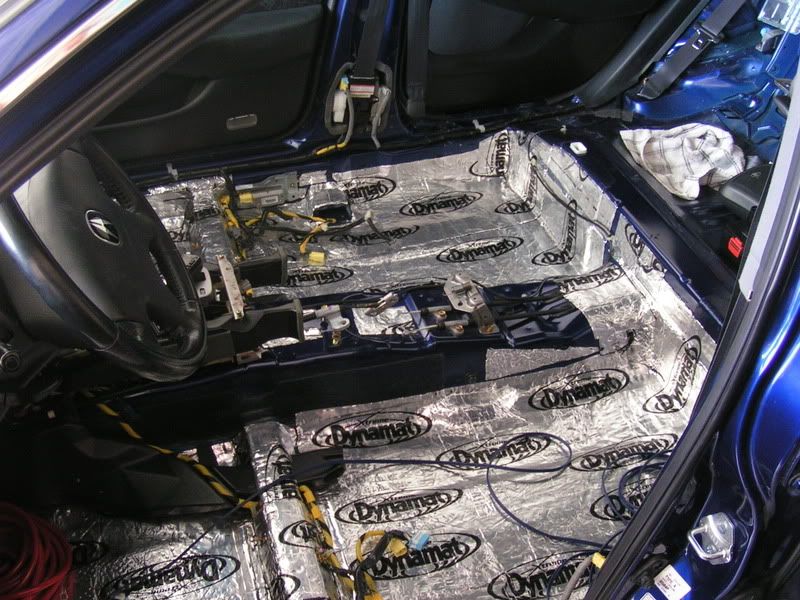
Running some wires...
WOW! What a weekend!
I completely stripped the interior out of the car (except dash) to install dynamat eXtreme in the floor and run all my wires for the amplifiers. This included my optima battery and running the power wire through the firewall. Oh, I got my crossovers mounted and all the wire run to the speaker locations as well, but I didn't have time to actually install the speakers yet.
Turned out to be a much bigger project than I thought it would be, but it'll be worth the effort when it's all finished.
I thought if I take all day saturday, I can install the dynamat, run the wires and install the component speakers!
Yeah right!
Was my first time doing the dynamat, so it took me longer than expected.
but it came out GREAT! I just didn't expect it to take me nearly 30 hours do the floor and run all my wires!!!
OK, well I had a few little complications along the way and had to do some improvising, so that could be why. And that also included some time shopping for tools and supplies I didn't have.
I just moved, so I'm still buying tools and items I previously had easy access to before I moved.
Don't worry, I DO have plenty of pictures! Between my friend and I, we took about 100 pictures at high quality (1-2 MB each). Some were just goofing around of course and many duplicates to get a better quality shot, but the majority covers a good amount of the install. I will eventually get some posted, but you can imagine it will take awhile to go through them and pic out the best ones as well as crop, annotate, and upload the ones I've chosen.
I am EXTREMELY busy over the next few days and will be out of town this weekend, so I probably won't get them up before then. But my goal is to have everything installed before the Meguiar's meet next weekend. Means I'll have to get the speaker rings cut, trimmed, & installed - Tweeters included. And get my amps custom mounted in the trunk, hook up all the wires, amps adjusted, and stereo tuned.
OK, well here a couple photos to keep you tied over...
Do I really need to show more of the process or is this good enough you think?!?!? *LOL*
More details to come later!
Floor Dynamat complete
Running some wires...


Thread Starter
Advanced
Joined: Jan 2007
Posts: 77
Likes: 0
From: Lancaster, CA
Well, I worked on the car more Monday! ALL DAY!
WOW, I had no idea it would be this much work!!
Last time I was able to install things piece by piece as I got them.
Now I'm trying to do an entire system all at once! Never again....
Anyway, all I managed to accomplish monday was cut all my MDF rings for the speakers - front and back (including the custom tweeter mounts for the back), installing the front speakers (woofers, no tweeters yet), temporarily wiring/hooking-up the amps and my subwoofer (wires were already in place).
Since my crossovers for the woofers bypass the entire OE wiring, I figured if I wanted my front speakers to work, I needed to hook up the amps. So at the moment the amps are just sitting in the trunk, with all the wires hooked up. I have them in a spot where they won't move around much, but they aren't fastened down or installed permanenly. But at least I have some subwoofer power so I got my bass back! (Oh and I pulled out the OE bose subwoofer to let some of the sound through.)
Sytem definately isn't tuned by any means. Especially with the front woofers hooked to the crossovers with no tweeters. Definately missing something.
But believe it or not, the rear OE speakers pick up some treble a bit. Still sounds off balance though.
So what do I have left?
Well, (#1) I have to mount the rear woofers and hook them up to the crossovers. Crossovers are already wired to the amps, so I just have to hook up the speakers. (#2) I have to mount my rear tweeters. I created a custom mount that will place them behind the rear speaker grilles (stock location), but I'll have to modify the door panel just a tad. (#3) Take the front tweeters to a local shop to have them installed. I want them to cut into the door panel or sail panels and custom mount them. I don't want to tear into that myself. (#4) Going to have my amps professionally mounted in a custom amp rack, right next to my subwoofer in the trunk. (#5) I want to recess the head unit just a bit more, so the screen is flush with the console, and then modify the surround (metra kit) some more to fill in gaps and give it a cleaner install. After that I think I'm getting blackwood kit just for the center console to cover it all up... (probably won't use the rest)
Have a few more pics on my phone. I didn't have the good camera this time, but I'll have to post those later. Not enough time right now. Just a quick update before I run off to bed.
Good night all! Be back with more soon!
WOW, I had no idea it would be this much work!!
Last time I was able to install things piece by piece as I got them.
Now I'm trying to do an entire system all at once! Never again....
Anyway, all I managed to accomplish monday was cut all my MDF rings for the speakers - front and back (including the custom tweeter mounts for the back), installing the front speakers (woofers, no tweeters yet), temporarily wiring/hooking-up the amps and my subwoofer (wires were already in place).
Since my crossovers for the woofers bypass the entire OE wiring, I figured if I wanted my front speakers to work, I needed to hook up the amps. So at the moment the amps are just sitting in the trunk, with all the wires hooked up. I have them in a spot where they won't move around much, but they aren't fastened down or installed permanenly. But at least I have some subwoofer power so I got my bass back!
(Oh and I pulled out the OE bose subwoofer to let some of the sound through.)Sytem definately isn't tuned by any means. Especially with the front woofers hooked to the crossovers with no tweeters.
Definately missing something.But believe it or not, the rear OE speakers pick up some treble a bit. Still sounds off balance though.
So what do I have left?
Well, (#1) I have to mount the rear woofers and hook them up to the crossovers. Crossovers are already wired to the amps, so I just have to hook up the speakers. (#2) I have to mount my rear tweeters. I created a custom mount that will place them behind the rear speaker grilles (stock location), but I'll have to modify the door panel just a tad. (#3) Take the front tweeters to a local shop to have them installed. I want them to cut into the door panel or sail panels and custom mount them. I don't want to tear into that myself. (#4) Going to have my amps professionally mounted in a custom amp rack, right next to my subwoofer in the trunk. (#5) I want to recess the head unit just a bit more, so the screen is flush with the console, and then modify the surround (metra kit) some more to fill in gaps and give it a cleaner install. After that I think I'm getting blackwood kit just for the center console to cover it all up...
(probably won't use the rest) Have a few more pics on my phone. I didn't have the good camera this time, but I'll have to post those later. Not enough time right now. Just a quick update before I run off to bed.
Good night all! Be back with more soon!
Thread Starter
Advanced
Joined: Jan 2007
Posts: 77
Likes: 0
From: Lancaster, CA
Got some more stuff for you guys!
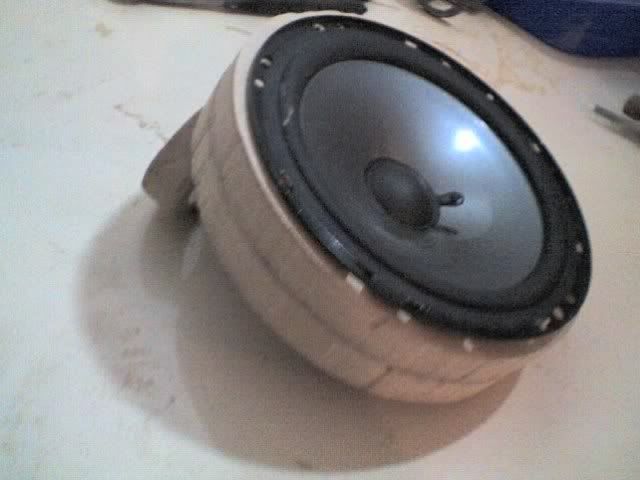
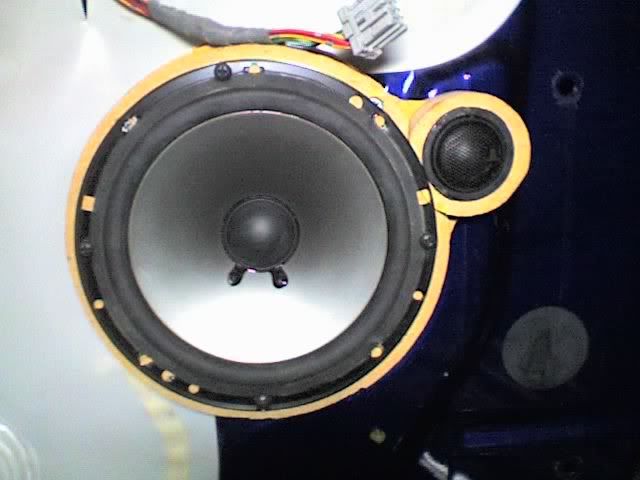
Got all the speakers in. Front was easy... just cut 2 rings, glued and screwed them togther. Screwed it to the door and mounted the speaker. Piece of cake. However it turns out my rings were a bit thik, so mu speaker is right up to the door panel. I'll have to remove the front speakers and trim the rings down a bit soon. The rattle the panel under with some bass...
Here's the front rings:
The back rings I made weren't quite so easy, but they came out real well. Had the same problem with being too close the the panel. I corrected it on the second rear door, but I'll have to pull off one and trim it down like the front.
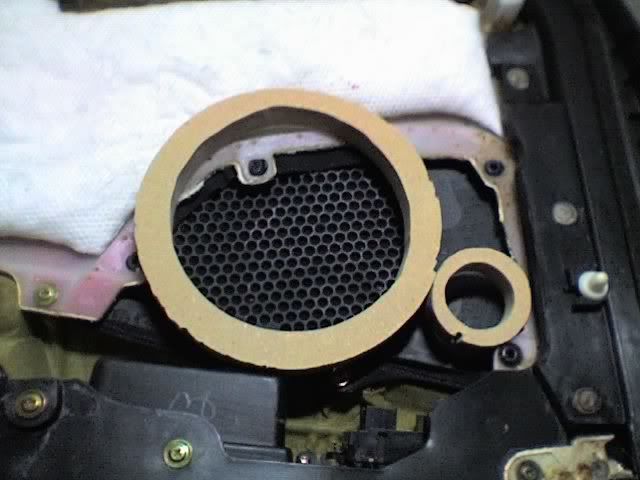
I started with 3 rings for the rear speakes. One for the woofer, one for the tweeter, and one large one to mount them both on.
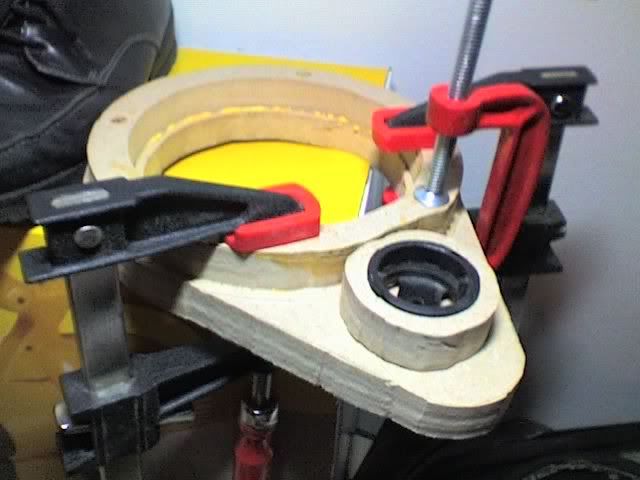
Then glued and screwed them together. Screws alone didn't seal it al the way around so I used some clamps to be sure it was cemented together evenly. (used some "ultimate" wood glue from Lowe's)
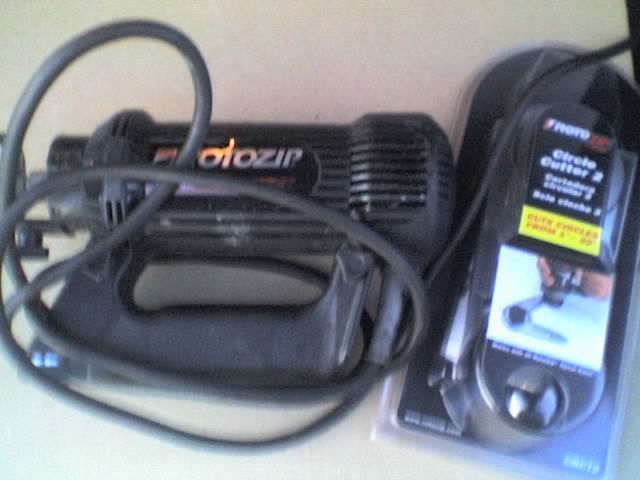
Then trimmed off the excess wood with the roto-zip, and mounted them to the door.
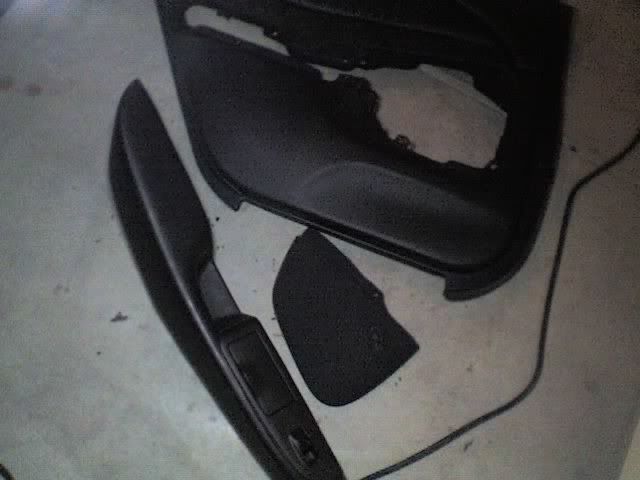
Test fit indicated it would be too large for the door panel, so I had to do some trimming.
Modified Left panel:
Unmodified right panel:
Got all the speakers in. Front was easy... just cut 2 rings, glued and screwed them togther. Screwed it to the door and mounted the speaker. Piece of cake.
However it turns out my rings were a bit thik, so mu speaker is right up to the door panel. I'll have to remove the front speakers and trim the rings down a bit soon. The rattle the panel under with some bass...Here's the front rings:
The back rings I made weren't quite so easy, but they came out real well. Had the same problem with being too close the the panel. I corrected it on the second rear door, but I'll have to pull off one and trim it down like the front.
I started with 3 rings for the rear speakes. One for the woofer, one for the tweeter, and one large one to mount them both on.
Then glued and screwed them together. Screws alone didn't seal it al the way around so I used some clamps to be sure it was cemented together evenly. (used some "ultimate" wood glue from Lowe's)
Then trimmed off the excess wood with the roto-zip, and mounted them to the door.
Test fit indicated it would be too large for the door panel, so I had to do some trimming.
Modified Left panel:
Unmodified right panel:
Thread Starter
Advanced
Joined: Jan 2007
Posts: 77
Likes: 0
From: Lancaster, CA
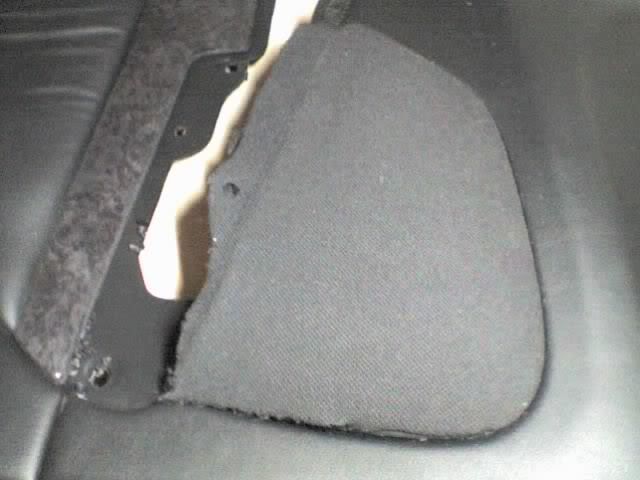
In the previous post, you'll notice there are no holes in the grill to let the sound through where the tweeter will be... I have that covered...
I got this great idea... I would pinch the fabric on the front and carefully drill the holes from the back so that the drill would not snag the cloth and tear it up. Sounded great in theory, but not in application. I botched up one of the grills.
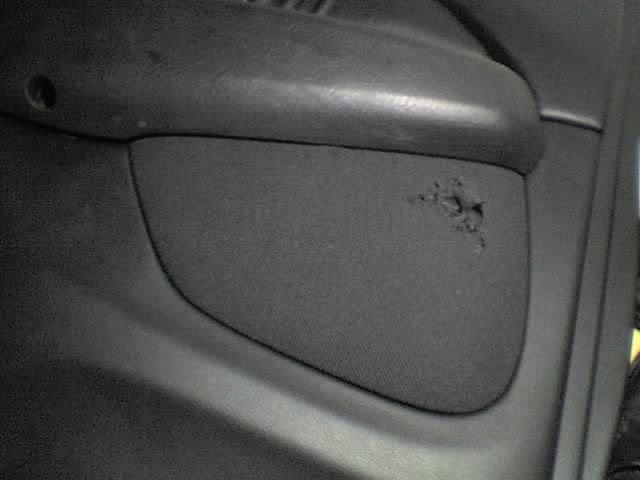
So I said, WTF and removed the grill from the panel completely and drilled holes on the whole thing to really open it up.
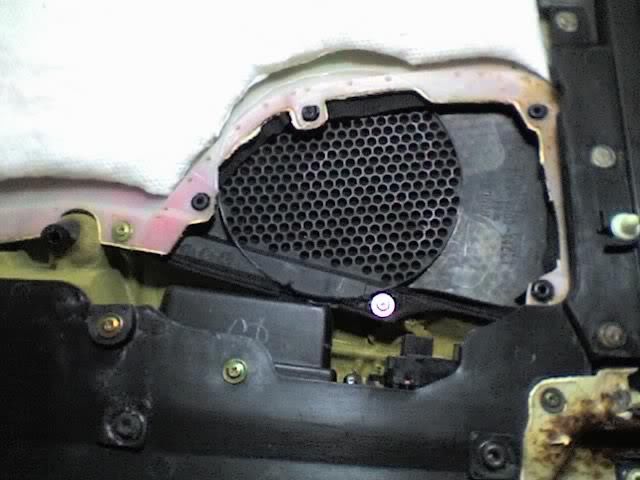
The other one I got a bit smarter. I carefully cut the fabric along the edge of the top and side after removing the armrest and one of the plasti-welds on the back. I then drilled the holes I needed to drill, then stretched the cloth back around, glued it and repaired the plasti-weld on the grill. (used my really cool digital heat gun to melt some plastic and used it like "putty" on the plasti-weld to repair it.)
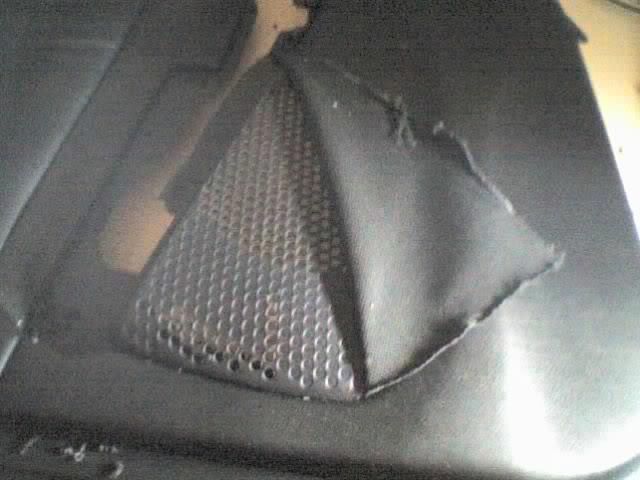
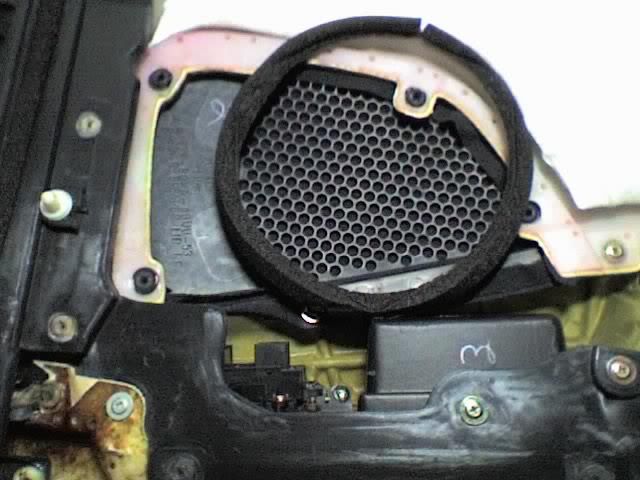
Partially drilled. I drilled out everything visible in this pic, was able to drill everything perfectly aligned to the OE holes. Came out nice, but not really visible once I reinstalled the door panel.
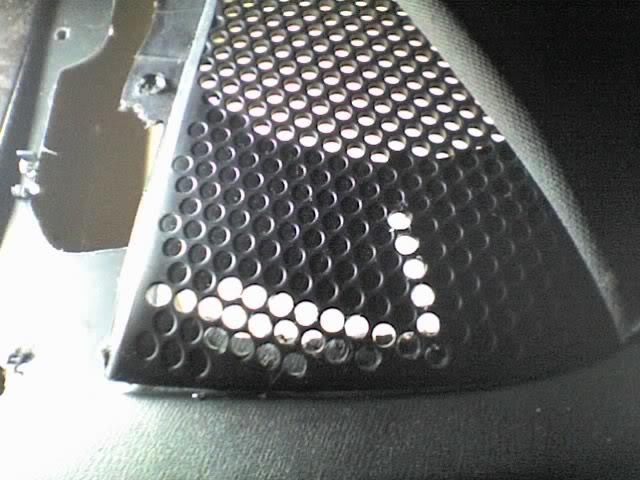
Once re-assembled, you couldn't really tell I did anything to the second one. Once I get around to re-covering the other grill with some new speaker fabric, I'll do both back ones, and maybe even both front ones. Depending on how well I match the fabric. I'll get a shot of the speaker through the grill to show the placement another day.
Front tweeters still need to be custom installed. (either in door or sail panel... haven't decided yet). As mentioned, amps all all wired up, but not permanently mounted, and my subwoofer is hooked up. I'll get a shot of the trunk later so show where I'm at on that. SO, except for the front tweeters and my Sirius unit, my entire system is installed. I still have some minor tweeks, to clean up the install a bit and get it sounding it's best, but it already blows the stock bose system away!!
If you want to see a TON of pictures of the install thus far,
I just uploaded all my 100+ photos my Photobucket account
(no I didn't do them 1 by 1... I used XP web publisher)
Check them out if you like.
http://s8.photobucket.com/albums/a45...reo%20install/
I got this great idea... I would pinch the fabric on the front and carefully drill the holes from the back so that the drill would not snag the cloth and tear it up. Sounded great in theory, but not in application. I botched up one of the grills.
So I said, WTF and removed the grill from the panel completely and drilled holes on the whole thing to really open it up.
The other one I got a bit smarter. I carefully cut the fabric along the edge of the top and side after removing the armrest and one of the plasti-welds on the back. I then drilled the holes I needed to drill, then stretched the cloth back around, glued it and repaired the plasti-weld on the grill. (used my really cool digital heat gun to melt some plastic and used it like "putty" on the plasti-weld to repair it.)
Partially drilled. I drilled out everything visible in this pic, was able to drill everything perfectly aligned to the OE holes. Came out nice, but not really visible once I reinstalled the door panel.
Once re-assembled, you couldn't really tell I did anything to the second one. Once I get around to re-covering the other grill with some new speaker fabric, I'll do both back ones, and maybe even both front ones. Depending on how well I match the fabric. I'll get a shot of the speaker through the grill to show the placement another day.
Front tweeters still need to be custom installed. (either in door or sail panel... haven't decided yet). As mentioned, amps all all wired up, but not permanently mounted, and my subwoofer is hooked up. I'll get a shot of the trunk later so show where I'm at on that. SO, except for the front tweeters and my Sirius unit, my entire system is installed. I still have some minor tweeks, to clean up the install a bit and get it sounding it's best, but it already blows the stock bose system away!!
If you want to see a TON of pictures of the install thus far,
I just uploaded all my 100+ photos my Photobucket account
(no I didn't do them 1 by 1... I used XP web publisher)
Check them out if you like.
http://s8.photobucket.com/albums/a45...reo%20install/
Thread Starter
Advanced
Joined: Jan 2007
Posts: 77
Likes: 0
From: Lancaster, CA
Now at this point I've kinda taken a sabbatacal from the stereo installed.
I've spent so much time on it, I'm feeling a little burned out physically and mentally, so I'm taking a short break to work on another project (don't worry, were only talking like a week... not months here)
I actually just got a new desk my brother gave me, but I don't like the color, so I'm stripping it down and I'm going to stain it a Red Mohogany. Haven't begun staining yet, but the sanding is almost done, and I think it'll come out pretty good when I'm done. Got some beginning photos of that on photobucket too. (Root folder, under "Desk") When I finish that and get it moved into the house, I'll rest up a few days and get back to the stereo install.
Too many of these really late nights are just kicking my butt!! Look at the post time! 12am and I got to be up at 5am!!
Been on this schedule for weeks!! time to slow down a bit...
...I'm off to bed.
ENJOY!!
Thread Starter
Advanced
Joined: Jan 2007
Posts: 77
Likes: 0
From: Lancaster, CA
Originally Posted by gaping46and2
Wow, this all looks awesome. I want to know how road noise sounds with all that dynamat. Are you also going to dynamat the doors?
Road noice is cut down quite a bit with just the floor done. And you hardly hear any sand or road debris hitting the bottom on regularly travelled roads (and some can be pretty bad out here). I'm not gonna run my car down a gravel road to see how well it reall works though. Sorry!
LOLBut I like it thus far... I'm just gonna have allot of tuning to do once I get this all in...
Thread Starter
Advanced
Joined: Jan 2007
Posts: 77
Likes: 0
From: Lancaster, CA
Originally Posted by Billy Sacco
If you are looking into dynamat go to secondskin.com. Much better and cheaper product.
Google is your friend!

I probably paid about $300 for 4 door kits (dynamat Extreme)... enough to dynamat the entire floor. Yes, I paid full retail, because it was easily available to me and I was too impatient to find a cheap place to order it from.
Had I looked around and been willing to wait for it, I could have gotten it from a cheaper source and would have probably gotten it for about the same price as what secondskin advertises. But instead paid the "retail" price... Convenience+impatience=$$$$
Dynamat has a pretty good name in sound deadening material and has many products to choose from, but they of course are not the only good product out there. There's dynamat, secondskin, b-quiet, eDead, Raammat, stinger and tons of others. Each has thier uses. Look around, there's tons of info online about them. Whatever works for you....

Thread
Thread Starter
Forum
Replies
Last Post
rockyboy
2G RDX (2013-2018)
171
Aug 4, 2024 10:35 AM