
D.I.Y. Non-Navi to Navi
 10-08-2007, 04:17 PM
#401

Originally Posted by 03duvalTL
Alpine fixed the unit for $158 dollars. That included UPS Ground shipping back to me. I sent the unit to them and they replaced the laser head unit and tracking circuit. They had it repaired in a couple days and then shipped it back to me in about four days (California to Florida). Let me know if you need the info and I will forward it on.
That seems pretty reasonable. I would like the additional details on sending a DVD unit to Alpine for repair. You can send me a PM or post the info here.
 10-10-2007, 04:20 PM
#402
10th Gear

Join Date: Jun 2007
Age: 37
Posts: 12
Likes: 0
Received 0 Likes
on
0 Posts
If you go to Paul Mooney's website, navhelp.com, and scroll down to the bottom of the first page to More Technical Details and Options. Click on the link and then scroll down to the link for the TSB. This will be the PDF for returns. I called the 800 number and talked to a receptionist and she gave me the info on returning the unit for repair.
10-10-2007, 04:31 PM
#403
Originally Posted by 03duvalTL
If you go to Paul Mooney's website, navhelp.com, and scroll down to the bottom of the first page to More Technical Details and Options. Click on the link and then scroll down to the link for the TSB. This will be the PDF for returns. I called the 800 number and talked to a receptionist and she gave me the info on returning the unit for repair.
Bob
01-20-2008, 08:38 PM
#404
Honda/Acura enthusiast

Join Date: Jan 2008
Location: Nashua
Age: 41
Posts: 3
Likes: 0
Received 0 Likes
on
0 Posts
Is the wiring also possible on a 5th gen Accord as well?
I have seen a 94-97 Accord with a complete working unit although the person who completed it never gave out the full details.
I've searched every where I could think of but I never could find a complete conversion for this car.

I have seen a 94-97 Accord with a complete working unit although the person who completed it never gave out the full details.
I've searched every where I could think of but I never could find a complete conversion for this car.
01-21-2008, 04:19 PM
#405
'03 ABP YA4-S 6MT

Join Date: Mar 2007
Location: Edmonton, AB
Age: 38
Posts: 1,192
Likes: 0
Received 18 Likes
on
18 Posts
hey guys,
to those that have done this conversion
instead of the OEM screen, do you think there is much room for an aftermarket double din navi unit (like the avic-d3)? it's about 6-7" in depth. i looked at some pictures but i cannot gauge the depth of the hole, and the acura touchscreen is about 2" in depth (not nearly enough for an aftermarket).
maybe another solution is a separate brain and touchscreen?
01-24-2008, 12:46 PM
#406
Instructor
Instead of making wires for this project it at all possible just to use the wire harness and the wires that came from the NAVI tl before and install it into the NON NAVI TL wire haness and wires. Sort of just like a plug and play solution if you we able to pull all the wiring out of the donor car.
01-24-2008, 04:17 PM
#407
Originally Posted by elproducto
Instead of making wires for this project it at all possible just to use the wire harness and the wires that came from the NAVI tl before and install it into the NON NAVI TL wire haness and wires. Sort of just like a plug and play solution if you we able to pull all the wiring out of the donor car.
 That's the way I did it in my CL. It takes a bit of time trying to sift through all the OEM wiring harnesses and picking out which wires you need and tossing the rest.
Thanks for the people who contributed to this thread. It really helped answer several questions I had.
 01-29-2008, 05:11 AM
#409
4th Gear

Join Date: Jan 2008
Age: 48
Posts: 4
Likes: 0
Received 0 Likes
on
0 Posts
Originally Posted by Bolamite
Here it is people, YES YOU CAN ADD NAV TO A NON NAV CAR, and heres how.
Special thanks to Paul Mooney, the resident Nav guru, and Acura North Scottsdale.
Before I start I gotta say, this project is not that hard if you have some audio video experience and know how to read a wiring diagram. I'm only gonna DIY the stuff thats directly related to the nav, you can get instructions for taking your console and dash apart from lots of places. This is for a 1999 TL-P and there are some differences in the model years but nothing big.
PARTS LIST:
Nav Display and DVD unit $????EBAY
Instrument Cluster Bezel $90
Left and Right Brackets for Nav Display,EQ, and Radio $20
Gps Antenna $115
Climate control unit (2 pieces) $115+$135
Hazard Light Switch $25
Bracket for Nav DVD unit $25
Wire: My Nav unit and display came with the cut off connectors so I just soldered wires to make a harness. I used about 15ft to run from trunk to dash, I recommend you use 17ft. If you can read a wiring diagram you'll know what you need to get. Read the whole DIY before you start so you know where all the wires go when you buy them. The only wires I didnt use were the Nav service connector and Alternator charging signal. I used 22 gauge for everything. I got 2 and 4 conductor/stranded/shielded wire from home depot for about 15 cents a foot, they also have primary wire. You dont have to shield everything so get some primary wire too. I recommend you ground your shields exactly where the diagram says, ESPECIALLY if it grounds to a pin in the module, better safe than sorry.
MAKE A WIRING DIAGRAM of your homemade harness so you dont get lost DONT SKIP THIS, YOU WILL BE SORRY IF YOU DO
Zip ties
Electrical tape
Theres also various screws and such, check out Paul Mooneys siteHERE for a parts diagram and you should be able to figure out what you need.
TOOLS:
Ratchet
Dykes(cutter)
Basic metric socket set
Philips Screwdriver
Set of Torx drivers or bits
Soldering tools
Multimeter
WIRING DIAGRAMS
Razor or wire stripper
Eyeglass screwdriver set will help you pull the pins out of the connectors.
First you need to take out your back seat. Pull up on the front edge of the seat itself and it should pop up, then you need to undo a 10mm bolt thats holds the seat in. Its in the middle/left between the seat and seatback. Pull the seatback up and out and you'll be looking at this.
Next remove the cover for the sub. For those of you who aren't familiar with removing trim pieces, it usually is just pulling firmly but gently on the piece and working it out. Remove the piece of trim on the left of it(drivers side is always left)and mount the GPS antenna like this
Make sure you run the wire through that hole so you can connect it to the Nav unit. Mount the Nav unit in the trunk so you can judge where to run the wires Then pull the trunk carpet trim back so you can run the wires
 Now take apart your passenger side sill trim front and back. Just pull it up gently and the clips will release, dont worry if the clips break, do worry if the trim breaks. Run your wiring harness behind the backseat and down the passenger side of the car, but first separate the Nav units ground, ILL and Back Lt and run those behind the left side of the trunk trim and splice them to the trailer lighting connector which has an ILL, and Back Lt circut and a Body ground right below it.
 Then separate the Nav unit ACC and run it to the middle of the backseat and use a coat hanger to slide it under the carpet so you can splice it to the ACC power in the center console.
 Make sure that you go behind the seatbelts and secure your harness to the harness thats already running down the passenger side with zip ties. Pull back the carpet and run the wires under the passenger footwell and up to the dash.


Now you need to do some splicing. The 99 uses a vsp sensor which only comes on Nav vehicles and only in 99, just splice your PCM speed signal instead. Your PCM is behind the radio on the floor and the front most connector is the one with the speed signal. Use wire color to make sure you have the right wire before you splice. The rest of the wires go behind the radio and display. When you take out the radio you need to take out the EQ and brackets because the new brackets will have nuts on the back to hold the bolts which mount the Nav screen. Thats the only difference in the brackets but it is very important so make sure you have the nav brackets. Take out the stupid CD/WTF is this/waste of space thing above the radio so you can put the new climate control unit in. All the connectors will plug in to the new stuff (climate, hazard) but the clock goes byebye. Use the clock wires for B+ for the Display and Nav unit, ground, ILL+and - for the display, and ACC for the Display. You need to put a 10 amp fuse in the clock circuit or it will just blow the 7.5 it has(passenger side fuse box). For the security signal cut into the radio and add the Nav display in series to the circuit so the signal goes through the nav display instead of straight to the multiplex unit. Pin A4 of the radio, you'll see what I mean. For the voice into the radio you should have 4 empty pins in the main radio connector. I went to Best Buy and bought a reverse wiring harness so I could get the pins to fill the slots, part #71-1721 I think. Make sure its the same connector that goes into the back of the radio. To get the pins out you need to pop open the little clip on the connector
  then use something VERY small, like a sewing needle, to lift the tab inside of the connector and pull out the wire. This is pretty hard to do if you dont know how but dont get frustrated, if you insert the needle into the front of the connector you can get it underneath the tab which holds the pin in and lift it enough to slide the pin out. Dont pull on the wire until you lift the tab because it will just get stuck. Once you have the pins out you can connect them to your harness and plug them into the radio connector, make sure you use 2big and 2small pins and put them in the right place. Run the wires to the appropriate place
 and put your car back together. Remember to check your system BEFORE you put it back together and dont forget to hook up the EQ when you test or you wont get sound from your radio
  Im sure I forgot something so if theres any Q's
HOLLA
Special thanks to Paul Mooney, the resident Nav guru, and Acura North Scottsdale.
Before I start I gotta say, this project is not that hard if you have some audio video experience and know how to read a wiring diagram. I'm only gonna DIY the stuff thats directly related to the nav, you can get instructions for taking your console and dash apart from lots of places. This is for a 1999 TL-P and there are some differences in the model years but nothing big.
PARTS LIST:
Nav Display and DVD unit $????EBAY
Instrument Cluster Bezel $90
Left and Right Brackets for Nav Display,EQ, and Radio $20
Gps Antenna $115
Climate control unit (2 pieces) $115+$135
Hazard Light Switch $25
Bracket for Nav DVD unit $25
Wire: My Nav unit and display came with the cut off connectors so I just soldered wires to make a harness. I used about 15ft to run from trunk to dash, I recommend you use 17ft. If you can read a wiring diagram you'll know what you need to get. Read the whole DIY before you start so you know where all the wires go when you buy them. The only wires I didnt use were the Nav service connector and Alternator charging signal. I used 22 gauge for everything. I got 2 and 4 conductor/stranded/shielded wire from home depot for about 15 cents a foot, they also have primary wire. You dont have to shield everything so get some primary wire too. I recommend you ground your shields exactly where the diagram says, ESPECIALLY if it grounds to a pin in the module, better safe than sorry.
MAKE A WIRING DIAGRAM of your homemade harness so you dont get lost DONT SKIP THIS, YOU WILL BE SORRY IF YOU DO
Zip ties
Electrical tape
Theres also various screws and such, check out Paul Mooneys siteHERE for a parts diagram and you should be able to figure out what you need.
TOOLS:
Ratchet
Dykes(cutter)
Basic metric socket set
Philips Screwdriver
Set of Torx drivers or bits
Soldering tools
Multimeter
WIRING DIAGRAMS
Razor or wire stripper
Eyeglass screwdriver set will help you pull the pins out of the connectors.
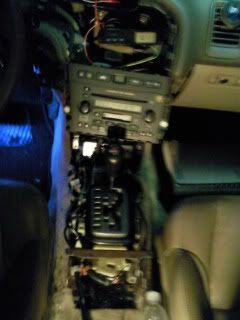
First you need to take out your back seat. Pull up on the front edge of the seat itself and it should pop up, then you need to undo a 10mm bolt thats holds the seat in. Its in the middle/left between the seat and seatback. Pull the seatback up and out and you'll be looking at this.

Next remove the cover for the sub. For those of you who aren't familiar with removing trim pieces, it usually is just pulling firmly but gently on the piece and working it out. Remove the piece of trim on the left of it(drivers side is always left)and mount the GPS antenna like this

Make sure you run the wire through that hole so you can connect it to the Nav unit. Mount the Nav unit in the trunk so you can judge where to run the wires
 Then pull the trunk carpet trim back so you can run the wires
 Now take apart your passenger side sill trim front and back. Just pull it up gently and the clips will release, dont worry if the clips break, do worry if the trim breaks. Run your wiring harness behind the backseat and down the passenger side of the car, but first separate the Nav units ground, ILL and Back Lt and run those behind the left side of the trunk trim and splice them to the trailer lighting connector which has an ILL, and Back Lt circut and a Body ground right below it.
 Then separate the Nav unit ACC and run it to the middle of the backseat and use a coat hanger to slide it under the carpet so you can splice it to the ACC power in the center console.
 Make sure that you go behind the seatbelts and secure your harness to the harness thats already running down the passenger side with zip ties. Pull back the carpet and run the wires under the passenger footwell and up to the dash.


Now you need to do some splicing. The 99 uses a vsp sensor which only comes on Nav vehicles and only in 99, just splice your PCM speed signal instead.
 Your PCM is behind the radio on the floor and the front most connector is the one with the speed signal. Use wire color to make sure you have the right wire before you splice. The rest of the wires go behind the radio and display. When you take out the radio you need to take out the EQ and brackets because the new brackets will have nuts on the back to hold the bolts which mount the Nav screen. Thats the only difference in the brackets but it is very important so make sure you have the nav brackets. Take out the stupid CD/WTF is this/waste of space thing above the radio so you can put the new climate control unit in. All the connectors will plug in to the new stuff (climate, hazard) but the clock goes byebye. Use the clock wires for B+ for the Display and Nav unit, ground, ILL+and - for the display, and ACC for the Display. You need to put a 10 amp fuse in the clock circuit or it will just blow the 7.5 it has(passenger side fuse box). For the security signal cut into the radio and add the Nav display in series to the circuit so the signal goes through the nav display instead of straight to the multiplex unit. Pin A4 of the radio, you'll see what I mean. For the voice into the radio you should have 4 empty pins in the main radio connector. I went to Best Buy and bought a reverse wiring harness so I could get the pins to fill the slots, part #71-1721 I think. Make sure its the same connector that goes into the back of the radio. To get the pins out you need to pop open the little clip on the connector
  then use something VERY small, like a sewing needle, to lift the tab inside of the connector and pull out the wire. This is pretty hard to do if you dont know how but dont get frustrated, if you insert the needle into the front of the connector you can get it underneath the tab which holds the pin in and lift it enough to slide the pin out. Dont pull on the wire until you lift the tab because it will just get stuck. Once you have the pins out you can connect them to your harness and plug them into the radio connector, make sure you use 2big and 2small pins and put them in the right place. Run the wires to the appropriate place
 and put your car back together. Remember to check your system BEFORE you put it back together and dont forget to hook up the EQ when you test or you wont get sound from your radio Im sure I forgot something so if theres any Q's
 HOLLA
also after my install mine says error unformatted disc.
is my drive no good already or is the disc is bad, but the disc looks really clean it the black ver.2.30. please let me know how to help me
01-29-2008, 10:08 AM
#410
Sippy Cup (x2)
Join Date: Jun 2005
Location: Virginia Beach, VA
Age: 43
Posts: 1,961
Likes: 0
Received 9 Likes
on
3 Posts
It was so long ago that I did this, but make sure that you buy that other harness and add those wires in. I'd have to look at the ETM again to see if I remember though. Not sure if that helps.
 06-10-2008, 01:44 PM
#414
1st Gear

Join Date: Mar 2006
Age: 52
Posts: 1
Likes: 0
Received 0 Likes
on
0 Posts
Would 24 AWG be okay to use? I can't find anything bigger, I have looked all over. I can use 22 AWG for the unsheilded wire but 24 AWG is the ONLY sheilded wire I can find in stores. I really wanted to get this project done before a trip I am taking this week-end so I may have to just try my luck unless somebody knows that 24 AWG would be a bad thing.
Thanks in advance!
Thanks in advance!
06-10-2008, 02:31 PM
#415
I wouldn't know but go try your local electronic store, they should have it. most stores in town here didnt' have it available for me too. go to a strictly electronic store not just a place that does stereo and computers.
06-24-2008, 05:44 PM
#416
Instructor

Join Date: Apr 2002
Location: bay area
Posts: 200
Likes: 0
Received 0 Likes
on
0 Posts
this install is 99% completed for me.
I just cant seem to figure out why the navi shows that i'm not moving. but after plenty of driving, it'll update itself to a current location.
essentially, i dont have 'real-time' movement with my navi. is there a wire failed to connect or incorrectly connected?
I just cant seem to figure out why the navi shows that i'm not moving. but after plenty of driving, it'll update itself to a current location.
essentially, i dont have 'real-time' movement with my navi. is there a wire failed to connect or incorrectly connected?
 08-18-2008, 11:05 PM
#419
The Dumb One
iTrader: (1)
What's the best thing to replace the stock nav. I hate this POS.... I wanna put something updated that has dvd capabilities... only things idk how I would work the AC =/ there's no manual controls...
07-10-2009, 10:23 PM
#420
Sitting Fressshhh

Join Date: Jul 2009
Location: Upstate NY
Posts: 163
Likes: 0
Received 0 Likes
on
0 Posts
sorry to bump a dead thread...but I had my own questions maybe someone can help...i have a non-navi single cd, do i have to buy a new deck?
and rockstar, i think the easiest (if not backwards) way to go about this would be to get a stock AC unit and install that in the navi position and then replace your deck with an aftermarket.
I can't think of anything else really, you need to install manual controls and that's the only way you can get it...
10-17-2009, 01:46 PM
#421

hey guys, great info here. Im starting to tackle this myself. I have wanted to do it for years and finally got the parts. I cut all the harness wires off but I have full access to the junked car's wiring so i may get the whole thing home and figure it out like that.
Also I need a new hazzard switch, some pic screws, new mounting plate for the DVD unit since mine was taken out of a TL. So far I have swapped out the AC controls and taken the dash apart.
any tips about wiring the radio and getting the navi powered up without having to touch the multiplexes?
Also I need a new hazzard switch, some pic screws, new mounting plate for the DVD unit since mine was taken out of a TL. So far I have swapped out the AC controls and taken the dash apart.
any tips about wiring the radio and getting the navi powered up without having to touch the multiplexes?
 10-28-2009, 01:59 AM
#424
The wires going to the onstar system confused me a little but its just a couple of audio wires. But it might be okay depending on the year TL you took yours out of. I took mine out of an 03 TL.
Taking as much of the wiring and harnesses is best. You can transfer the pins (add wiring) easier. Also, i just learned that the TL navi antenna is shorter then the CL antenna. So you can extend the wiring about 6 inches or trade for a CL antenna.
and the DVD drive bracket is different from the CL and TL. Mine was about 30 dollars new from wholesalepartsguy (kaleb).
Im just waiting for my hazard button, some nuts and bolts for the DVD drive bracket and then I gotta extend wiring from the trunk to the dash.
I half spliced the shield on the shielded wires so im not sure how that will affect things. I also used 18 guage auto wiring from walmart and bought a bunch of t-taps and butt connectors.
Last edited by aznboi2424; 10-28-2009 at 02:01 AM.
10-28-2009, 02:31 AM
#425
i got it out of a 03 as well but it didnt have onstar. i got the cl trunk bracket and i already have a antenna from a CL as well.
I took the dash out of the parts car and took the entire dash harness and entire side harness witch runs from driver side fuse panel all the way back.
I have everything except time right now since i am still in the middle of trying to make a 3g tranny work in the stupid car
I took the dash out of the parts car and took the entire dash harness and entire side harness witch runs from driver side fuse panel all the way back.
I have everything except time right now since i am still in the middle of trying to make a 3g tranny work in the stupid car
10-29-2009, 03:15 AM
#426
you'll also need the navi screen bracket. theres some wires coming from the screen to the AC controls that you'll need to pin and audio wires from the DVD unit to the stereo that needs to be pinned too.
I thought all 03 CL/TL with navi had onstar
I thought all 03 CL/TL with navi had onstar
05-03-2010, 08:19 PM
#427
I couldn't figure out how to edit my post so FYI. If you dont hook up the Alternator charging signal the display will shut off every five minutes. Theres a wire in the instrument cluster that carries the signal but I havent tried it yet. HOW THE FREAK DO I EDIT THE ORIGINAL POST?
 You saved me. I just pulled it all down to see what was left out. I did leave out the the blue (SCTY) and the Red ill- I thought that was my problem. Not sure were those two go. 01 CL S Type
Last edited by LECKEY73; 05-03-2010 at 08:23 PM.
05-04-2010, 04:10 PM
#428
red illumination wire is for switching down the back light when you turn on the headlights. you can tap it into the radio illumination wire.
the scty (security) wire is kinda tricky. i dont have the papers in front of me but you wire that to the radio. then theres another wire that goes from the radio into the multiplex. I think thats how the security wire is hooked up. also dont forget that some wires need to be "pinned" to the radio harness, the scty wire might be one of them.
the repair manual with electrial diagrams for the radio and navi are your best friend. they will tell you where to wire, tap and what color wire it is, thats on of the most important parts. I referred to the eletrical diagram more times then I remember, definately worth the money if your doing this project.
Last edited by aznboi2424; 05-04-2010 at 04:13 PM.
 anyone near Maryland do the swap?
 09-11-2011, 03:31 PM
#432
09-11-2011, 04:22 PM
#433
Rice Patrol
dual screens FTW. If you peruse enough pics you'll see people who've done it. you can even use the upper screen as a video monitor (it is afterall, just a video monitor)
there's a DIY somewhere
04-21-2015, 01:02 PM
#435

About to do the swap on mine. is the security code different on navigation than radio? if does the code go to the screen or the computer in the trunk? just need to know if i need to source the navi code from the person i get it on, on ebay.
Also although it might take longer would it be worth it to buy an entire wiring loom for the whole dash and cut off what i need or just switch the wiring?
Also although it might take longer would it be worth it to buy an entire wiring loom for the whole dash and cut off what i need or just switch the wiring?
04-21-2015, 01:07 PM
#436
Instructor

Join Date: Jan 2003
Posts: 117
Likes: 0
Received 0 Likes
on
0 Posts
About to do the swap on mine. is the security code different on navigation than radio? if does the code go to the screen or the computer in the trunk? just need to know if i need to source the navi code from the person i get it on, on ebay.
** the code is for the navi unit in the trunk. Yes you will need that pin so get it from the seller or give the serial number on the bottom to any Acura dealer.
Also although it might take longer would it be worth it to buy an entire wiring loom for the whole dash and cut off what i need or just switch the wiring?
04-21-2015, 01:15 PM
#437
04-21-2015, 10:16 PM
#438

the nav code is specific to each nav unit, and is entered via the radio buttons same as radio security code input
you will want the latest update of the DVD maps which is only avail thru acura and cost $150!!!!
to me- its crazy to install what is a relative POS when compared to modern portable units, at a fraction of the total price you are looking at
Even your phone has a better GPS/maps/points of interest than the acura nav unit
Its design is 20 years old! what even uses a dvd to hold the maps anymore! nothing~
04-22-2015, 11:45 AM
#439
As long as you have the pigtails with the ends of the wires attached, you just match the color of the wires up and run them from the DVD unit to the screen. That's what I did and I didn't bother messing with my original wiring too much. Either way, you will need to cut and splice a dozen wires. It just depends what kind of wiring you have now with the navi parts.
the nav code is specific to each nav unit, and is entered via the radio buttons same as radio security code input
you will want the latest update of the DVD maps which is only avail thru acura and cost $150!!!!
to me- its crazy to install what is a relative POS when compared to modern portable units, at a fraction of the total price you are looking at
Even your phone has a better GPS/maps/points of interest than the acura nav unit
Its design is 20 years old! what even uses a dvd to hold the maps anymore! nothing~
you will want the latest update of the DVD maps which is only avail thru acura and cost $150!!!!
to me- its crazy to install what is a relative POS when compared to modern portable units, at a fraction of the total price you are looking at
Even your phone has a better GPS/maps/points of interest than the acura nav unit
Its design is 20 years old! what even uses a dvd to hold the maps anymore! nothing~
04-22-2015, 08:19 PM
#440
The navi code is tied into the DVD unit in the trunk and not the screen.
As long as you have the pigtails with the ends of the wires attached, you just match the color of the wires up and run them from the DVD unit to the screen. That's what I did and I didn't bother messing with my original wiring too much. Either way, you will need to cut and splice a dozen wires. It just depends what kind of wiring you have now with the navi parts.
Tom, the navi code is entered into the navi screen and not the radio. The only way the navi and radio is connected is the voice directions going through the radio to get to the speakers. But you are right that the unit is poor compared to smartphone and portable units. I don't have any regrets though.
And I totally agree 01tl4tl it is a old poor design, but I have always loved how it looked and although I have a $300 garmin gps I would still rather have it built in.
Do yall know if it hooks into the empty plug on back of radio where the 6 disk external would go? Cause I have a GTA car kit hooked up to that. Or are there places where you slide conectors into the harness already there?