99' TL Red/Clear tails
 10-13-2009, 06:55 PM
#1
Banned
Thread Starter

Join Date: Oct 2009
Age: 33
Posts: 7
Likes: 0
Received 0 Likes
on
0 Posts
99' TL Red/Clear tails
Hey all,
I just got a TL a few days ago and I HATE the way the amber looks on the tail lights.
I've seen newer TL's with clear/red tails and love the look. But on the other hand, I was thinking it might be cool to go with an all red look, except for the reverse lights.
I had an Acura Legend before, and I found a guy on ebay who sold red sticker/film that was precut to cover all of the amber on the tail light. I put it on my car and it looked perfect; you couldn't even tell the difference between the film covered area and the actual red area.
Anyone have any ideas on how to do this or where I can find cheap red/clear tails? I looked on ebay and they had non oem pairs for around 165 shipped. seems steep for aftermarket...
 10-13-2009, 08:34 PM
#2

Well if you don't want to dish out for 03 taillights and you can't find the film, then you can always tint them yourself. It's quite easy and I did it on my old car.
Turned out quite good if you ask me.

Cost under $20 to do, let me know if your interested!
Turned out quite good if you ask me.
Cost under $20 to do, let me know if your interested!
10-13-2009, 10:15 PM
#5
The Dumb One
iTrader: (1)
165 shipped is fuggin cheap buddy..
this isnt a civic...
parts arent generally even made in the aftermarket... to get a set of tails shipped for under 200 is a great deal IMO...
this isnt a civic...
parts arent generally even made in the aftermarket... to get a set of tails shipped for under 200 is a great deal IMO...
10-13-2009, 10:19 PM
#6
Ya super quick to do.
Supplies:
Painters tape (the blue or green kind)
High grit sandpaper (like in the thousands)
Gloss clear coat*
Red tint spray*
Beer of your choice
*(model paint is fine, you can pick it up at a hobby store)
Steps:
*once taillights have been removed
1. Wet sand the taillights to remove clear coat. You can check to see if you missed any spots because it should look dull (should have no gloss / clear). There will be very very fine swirls from the sandpaper but it's no big deal once you paint / clear coat it.
2. Once dry, mask out the section(s) you don't want to paint (including the red area). Take your time masking it so you do it properly and make sure you firmly go around the edges (so the spray wont bleed underneath)
3. Do a light spray over the whole taillight. This is a important step so you don't get clumps or runs with the paint. The amber will slowly disappear with the red but make sure you get even coats.
4. Wait 15 - 20min to dry. Crack open that beer! Ziinngg!
5. Repeat #3 and #4 for 2nd coat and 3rd coat.
6. Once your satisfied with the coat over the amber (should look red now) remove the masked area over the red (still leave the white section covered).
If the shades of red are a bit off, do a quick spray over the whole light so it becomes a uniform shade of red. I did two coats.
7. After waiting for another 20min, remove all masked sections and wet sand lightly again so any 'ridges' formed from the masked tape area will be smoothed out.
8. Once dry, apply 2 - 3 coats of the clear over the whole light, again, wait approx 15min between each spray.
9. Finished! Enjoy your lights and take a picture of them on your couch like I did!
Hope that helps!
10-13-2009, 10:33 PM
#7
'13 Hyundai Sonata
That is a cool look if that is something that you like.
I would just buy 02-03 tails.
I paid $300 for my JDM tails in December of '07 and I was on a budget.
I would just buy 02-03 tails.
I paid $300 for my JDM tails in December of '07 and I was on a budget.
Trending Topics
10-13-2009, 11:17 PM
#8
Banned
Thread Starter
Join Date: Oct 2009
Age: 33
Posts: 7
Likes: 0
Received 0 Likes
on
0 Posts
i like the idea of tinting them too, but I found some film on ebay.
I may just go with that..although applying tint isn't easy i guess i'll have to try it out.
160$ isn't bad if i really NEEDED tails but i sort of dont so I can't justify spending that kinda loot because it doesn't make a HUGE difference. although they look completely sex compared to the amber.
or...maybe i'm just a cheap/broke student. haha!
10-14-2009, 09:19 AM
#10
Just apply some soapy water (I use some water with car wash liquid) on the lense so when you apply the film you can move it around a bit. Then use a squegee (sp?) or whatever to flatten it out and remove the air bubbles and water from underneath. Use a blow dryer to heat it up a bit so it sets right on the curves etc. Once it dries it'll be good.
10-14-2009, 09:25 AM
#11
Intermediate
Join Date: Jun 2009
Location: Ontario
Age: 39
Posts: 31
Likes: 0
Received 0 Likes
on
0 Posts
I got some pics of my 2000 LGM with all-red tails (except reverse light). I'll throw em up later when I'm done at work. Testor's 1605 Candy Apple Red (4 coats) was almost a perfect match to the stock red.
Side Question: After clear coating, the tinted part of the tail still looks "duller" than the unsprayed portion. Will 1500-grit wetsand + Meguiar's polish help to shine em up a bit?
Side Question: After clear coating, the tinted part of the tail still looks "duller" than the unsprayed portion. Will 1500-grit wetsand + Meguiar's polish help to shine em up a bit?
10-14-2009, 10:34 AM
#13
Burning Brakes
iTrader: (2)
Join Date: Nov 2008
Location: Oklahoma
Age: 36
Posts: 883
Likes: 0
Received 0 Likes
on
0 Posts
yeah i've seen it on a riced out tl but the taillights do look pretty clean, i'd prbly do it but just scared of the whole thought of painting my tailights... i dont want like a gritty feeling left on it u know
10-14-2009, 10:52 AM
#14
I got some pics of my 2000 LGM with all-red tails (except reverse light). I'll throw em up later when I'm done at work. Testor's 1605 Candy Apple Red (4 coats) was almost a perfect match to the stock red.
Side Question: After clear coating, the tinted part of the tail still looks "duller" than the unsprayed portion. Will 1500-grit wetsand + Meguiar's polish help to shine em up a bit?
Side Question: After clear coating, the tinted part of the tail still looks "duller" than the unsprayed portion. Will 1500-grit wetsand + Meguiar's polish help to shine em up a bit?
After tinting the amber portion, did you wet sand, respray, and clear the whole light (not just the amber portion)? That's how I was able to get a full gloss on the light.
But yes, you can do a polish and it should shine them up. That's along the same method to restoring your headlights too.
The Testors paint you mentioned is the same one I used.
10-14-2009, 11:56 AM
#15
Intermediate
Join Date: Jun 2009
Location: Ontario
Age: 39
Posts: 31
Likes: 0
Received 0 Likes
on
0 Posts
After tinting the amber, I used 1000-grit (supsersoft), then cleared (I suppose skipping the reapplication of the Testor's?) just the part I had tinted.
I was worried as well about a dull finish to the light, but Imho even with the less-than-glass finished product, I am happy with 'em. Cost <$20, and I wouldv'e sold my left nut to get that amber outta there.
I was worried as well about a dull finish to the light, but Imho even with the less-than-glass finished product, I am happy with 'em. Cost <$20, and I wouldv'e sold my left nut to get that amber outta there.
10-14-2009, 12:47 PM
#16
^^
oh I see.. ya, after your satisfied with how the amber piece turned out, I would sand and clear the full light and then apply clear over the full light again so it becomes uniform. Know what I mean? From what I take you did, it was just the amber piece and you didn't do anything to the red part, hence the difference in shades / tint ..?
oh I see.. ya, after your satisfied with how the amber piece turned out, I would sand and clear the full light and then apply clear over the full light again so it becomes uniform. Know what I mean? From what I take you did, it was just the amber piece and you didn't do anything to the red part, hence the difference in shades / tint ..?
10-14-2009, 01:47 PM
#17
Intermediate
Join Date: Jun 2009
Location: Ontario
Age: 39
Posts: 31
Likes: 0
Received 0 Likes
on
0 Posts
^^
oh I see.. ya, after your satisfied with how the amber piece turned out, I would sand and clear the full light and then apply clear over the full light again so it becomes uniform. Know what I mean? From what I take you did, it was just the amber piece and you didn't do anything to the red part, hence the difference in shades / tint ..?
oh I see.. ya, after your satisfied with how the amber piece turned out, I would sand and clear the full light and then apply clear over the full light again so it becomes uniform. Know what I mean? From what I take you did, it was just the amber piece and you didn't do anything to the red part, hence the difference in shades / tint ..?
Once i put the 4th coat of Testor's on, I realized it wasn't getting any darker. So your saying if I sand down the whole light, and re-clear, it will achieve more uniformity?
I'm just worried about the outcome of clearing the lower half as I'd rather have the upper 20% look not-so-great but blend in, than have the entire tail lose it's lustre.
Sidenote - Would I need multiple grits, or would one 1000+ grit do the job? (ie. Follow the wetsand headlight DIY or is that unecessary?)
10-14-2009, 02:18 PM
#18
That is correct.
Once i put the 4th coat of Testor's on, I realized it wasn't getting any darker. So your saying if I sand down the whole light, and re-clear, it will achieve more uniformity?
I'm just worried about the outcome of clearing the lower half as I'd rather have the upper 20% look not-so-great but blend in, than have the entire tail lose it's lustre.
Sidenote - Would I need multiple grits, or would one 1000+ grit do the job? (ie. Follow the wetsand headlight DIY or is that unecessary?)
Can't wait to see the result.
10-14-2009, 02:57 PM
#19
Yep you're correct!
Just sand down the whole light and then re apply your clear coat over the whole light. It'll turn out good no worries, just make sure you get a very glossy clear coat (i got semi gloss by mistake) and it will look OEM. If you're still not satisfied you can go ahead and give it a polish like you said earlier. And yes, go for 1500 grit.
Just sand down the whole light and then re apply your clear coat over the whole light. It'll turn out good no worries, just make sure you get a very glossy clear coat (i got semi gloss by mistake) and it will look OEM. If you're still not satisfied you can go ahead and give it a polish like you said earlier. And yes, go for 1500 grit.
10-14-2009, 06:52 PM
#20
Intermediate
Join Date: Jun 2009
Location: Ontario
Age: 39
Posts: 31
Likes: 0
Received 0 Likes
on
0 Posts
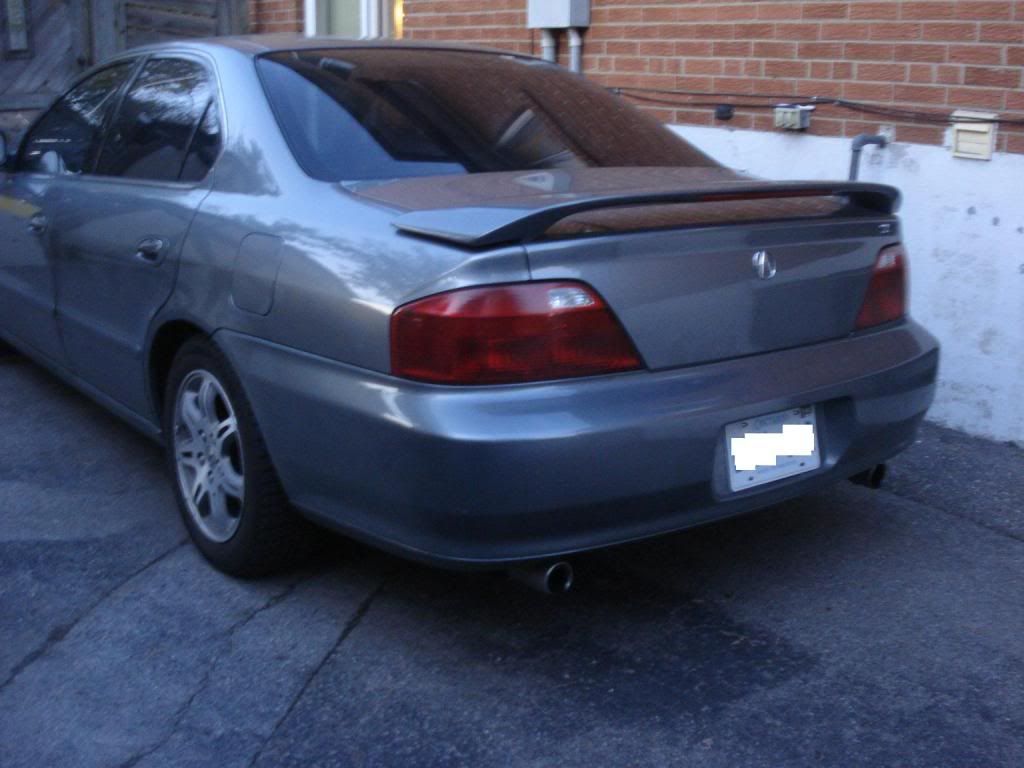
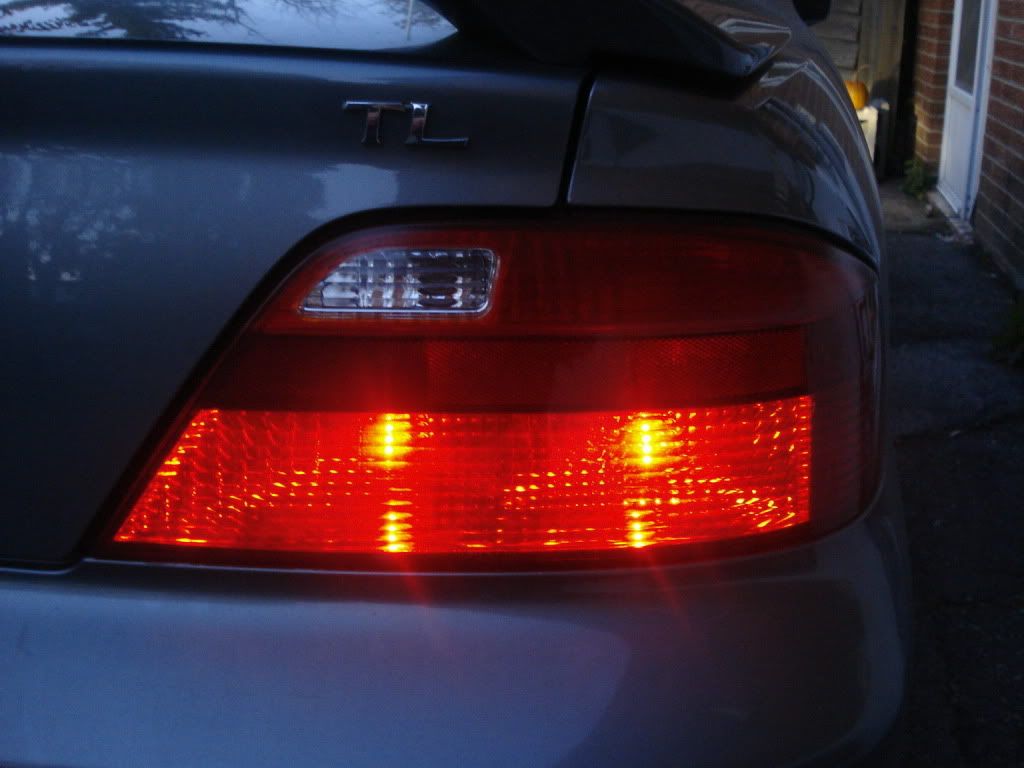
All-Red Tails V1.0
Hey guys,
Sorry for the delay, work was hectic as always.
Anyways, here are a couple of shots I got right before the darkness crept in. Hopefully tomorrow I can get some in the daylight and I'll up some more.
The lights were tinted with 4 coats of Testor's 1605, followed by 1000-grit wetsand, then 2 coats of clear. I would say they're 80% done. All that's left is another wetsand of clear, then I'll clear the whole taillight, and give em a good polish to bring out some shine .
.
As was suggested by Klectic, if after a wetsand and polish I'm still not satisfied, I'll give the whole tail a coat or two of the Testor's red to even out the reds.
From a distance:

Rear Angled:
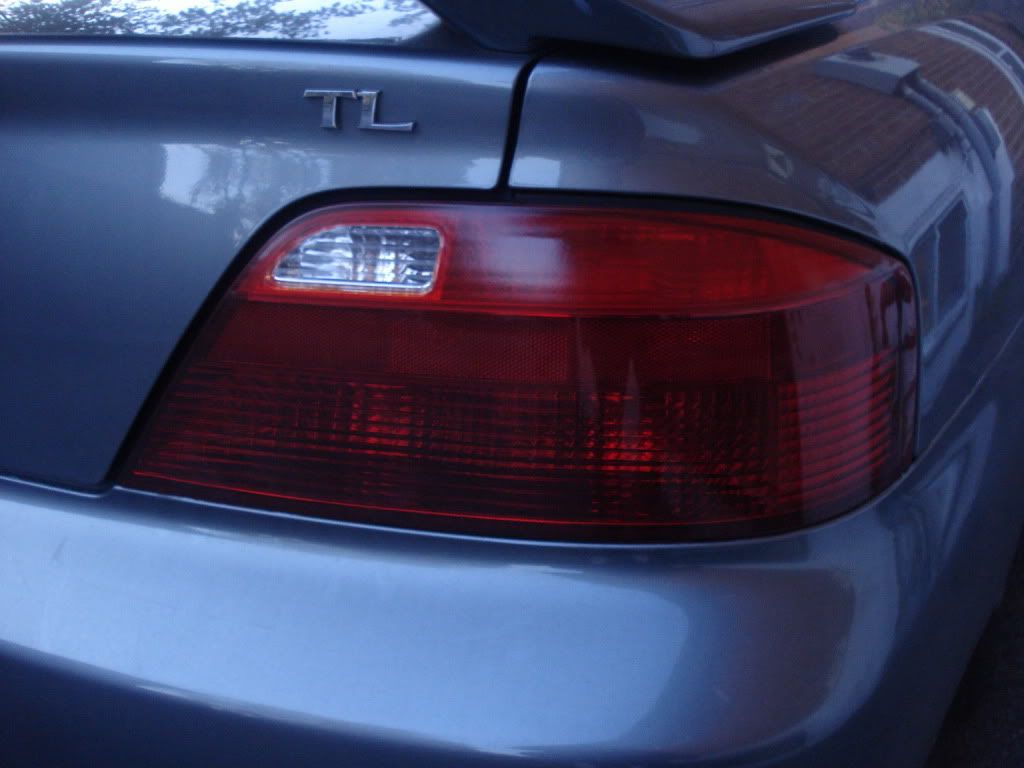
Up Close (and semi-dull )
)
Right Tail:
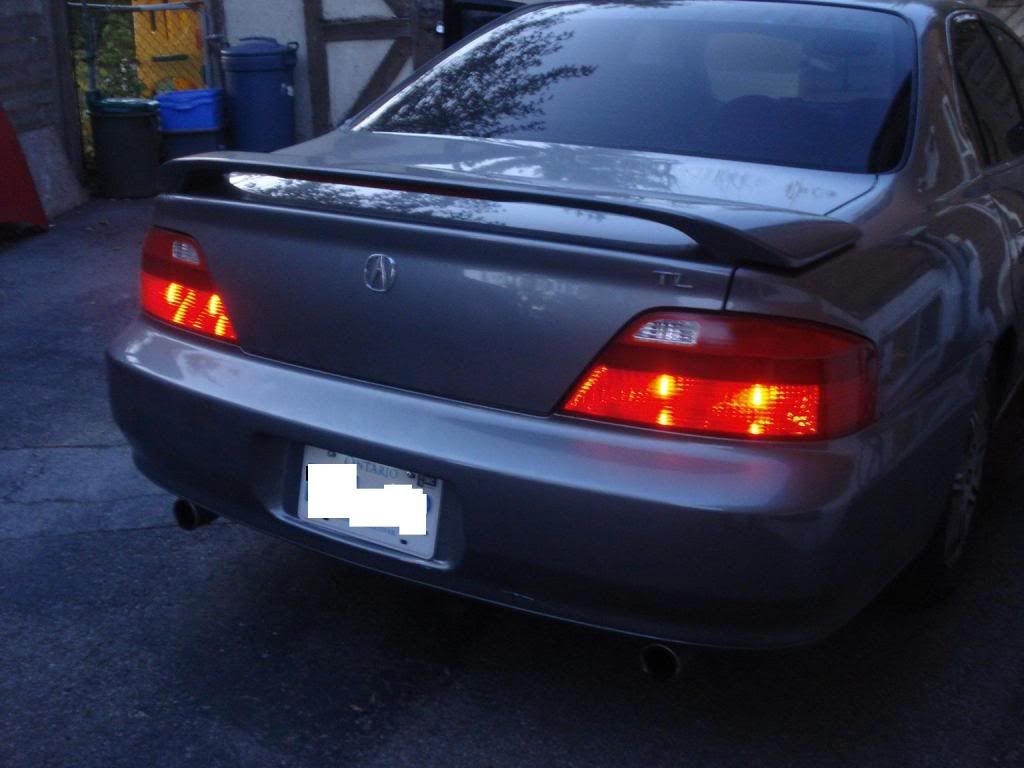
Lights On:
Another Close Up:
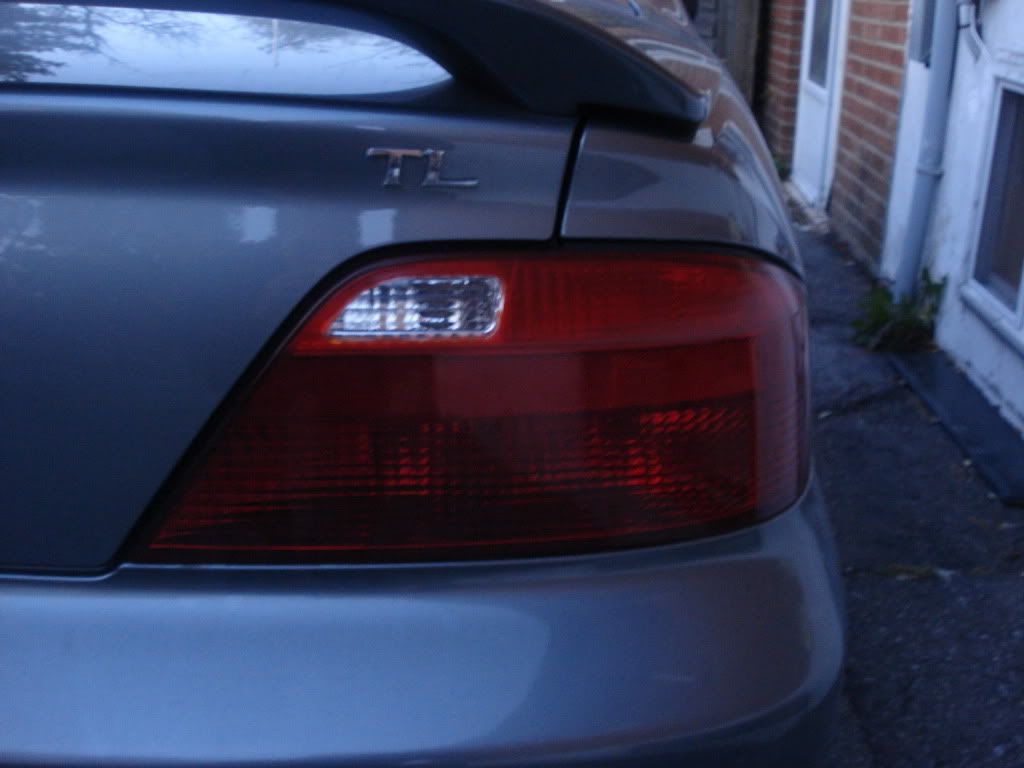
Up Close (Light On):
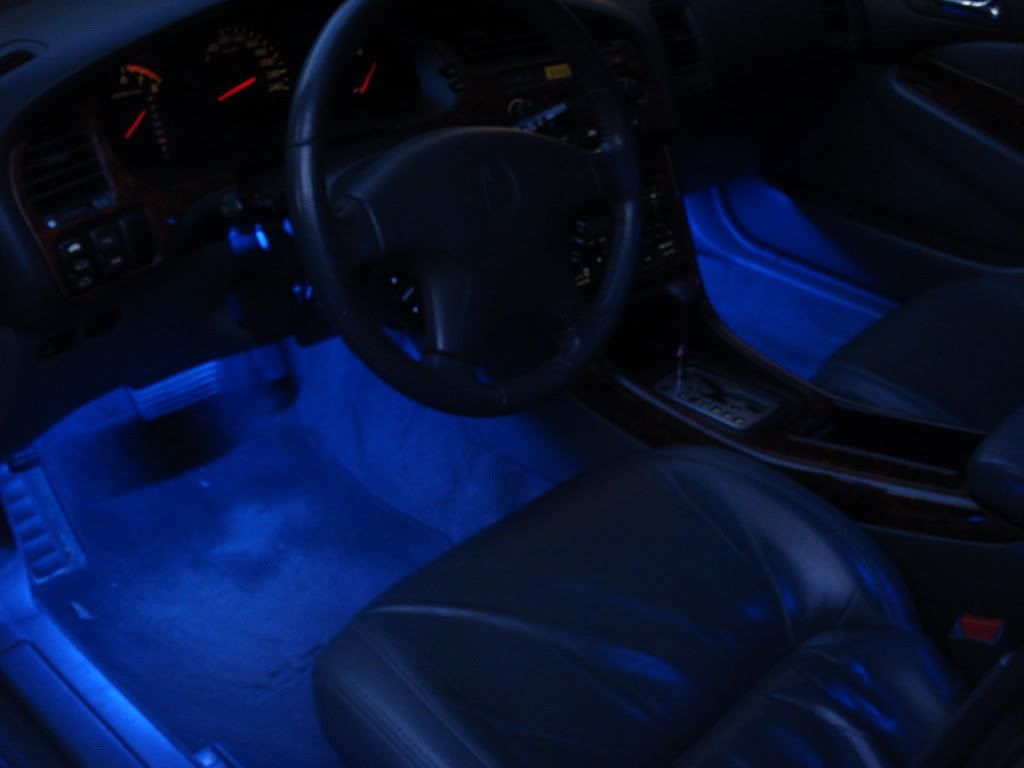
Footwell Lights ... figured I might as well throw it in here
Might not be everyone's cup of tea, but I prefer them to the amber's, and saved me $200 until I spring for some 02/03's!
Sorry for the delay, work was hectic as always.
Anyways, here are a couple of shots I got right before the darkness crept in. Hopefully tomorrow I can get some in the daylight and I'll up some more.
The lights were tinted with 4 coats of Testor's 1605, followed by 1000-grit wetsand, then 2 coats of clear. I would say they're 80% done. All that's left is another wetsand of clear, then I'll clear the whole taillight, and give em a good polish to bring out some shine
. As was suggested by Klectic, if after a wetsand and polish I'm still not satisfied, I'll give the whole tail a coat or two of the Testor's red to even out the reds.
From a distance:
Rear Angled:
Up Close (and semi-dull
)Right Tail:
Lights On:
Another Close Up:
Up Close (Light On):
Footwell Lights ... figured I might as well throw it in here
Might not be everyone's cup of tea, but I prefer them to the amber's, and saved me $200 until I spring for some 02/03's!
10-14-2009, 07:29 PM
#21
10th Gear

Join Date: Oct 2008
Posts: 11
Likes: 0
Received 0 Likes
on
0 Posts
Wow! Ontario, that looks REALLY nice. I think I would prefer the all-red look you have versus the strip of white. But too bad I literally JUST picked up a set of 03 clear/red tails and swapped them into my 2000 3.2 the past weekend.
10-14-2009, 08:32 PM
#23
8thcivic.com reppin'
Looks good! We with Civics have it easy haha
Precut tinted vinyl goes over the all white signal/reverse area.. will last 5 years in all weather and it's glossy, Looks like it's meant to be especially with my paint color.

Precut tinted vinyl goes over the all white signal/reverse area.. will last 5 years in all weather and it's glossy, Looks like it's meant to be especially with my paint color.
10-15-2009, 12:48 PM
#26
Intermediate
Join Date: Jun 2009
Location: Ontario
Age: 39
Posts: 31
Likes: 0
Received 0 Likes
on
0 Posts
Thx for the comments.
Still gotta do a final wetsand and clear - just waiting for the time
I'm not exactly impressed with the less than glass finish - so that's my main priority.
Still gotta do a final wetsand and clear - just waiting for the time
I'm not exactly impressed with the less than glass finish - so that's my main priority.
10-15-2009, 03:14 PM
#27
Banned
Thread Starter
Join Date: Oct 2009
Age: 33
Posts: 7
Likes: 0
Received 0 Likes
on
0 Posts
Those look great!
The only issue I have is that I'd rather not paint..does anyone know if there is a good, quality tint available for it?
If not, then this will be my project.
BTW ontario, you should DEFINITELY make a DIY with a list of everything you did. A lot of people would probably appreciate it (including myself). There are a few DIYs already available, but none that are TL specific.
10-15-2009, 08:17 PM
#30
uhh..did you not see what I wrote earlier? Post #6 my friend..

Thread
Thread Starter
Forum
Replies
Last Post
handsom-hustla
Car Parts for Sale
70
11-13-2015 05:04 PM
wusty23jd
3G TL Audio, Bluetooth, Electronics & Navigation
4
09-24-2015 11:41 AM