RL Foglight Dilemma
 03-03-2014, 08:21 PM
#1

RL Foglight Dilemma
I would like to upgrade the foglights but I'm still undecided on which route I want to go with. I've narrowed it down to three options:
1. Plug n Play HID Kit (5000K to match low-beams)
2. Plug n Play HID Kit w/projectors (5000K to match low-beams)
3. OSRAM Fog Breaker Yellows halogen bulbs
I love the whole projector retrofit thing but it's something that I cannot do on my own. I had them professionally done on my other car and the results are amazing which is why I'm looking to get my fogs done. On the other hand I'm thinking about function over form and getting the OSRAM 2600K FB bulbs. These have a deep golden yellow and are bright which should help with visibility in the rain and fog. I typically have my lows and fogs color matched so having yellow fogs would be a different look for me. Below are two pics of the OSRAM's taken using an iPhone. The person says the appearance is much better in person which the camera phone cannot fully capture. Looking for thoughts and opinions from you guys and even pics of yellow fogs on the RL. I've already seen pics here of 5K/6K HID fogs.
 03-03-2014, 10:47 PM
#2
Senior Moderator
Obviously, the easiest route is H11 yellow bulbs as they are plug and play. A few members have done PIAA Crystal Ion, including Heavy.

Not an RL, but a good pic of the color.

However, a proper retrofit may not be as hard as you are letting on. The Ford Fusion fog projectors use a 1.75" lens, have machined threads on each side, are cheap, and are a great quality. Carbon put them in his RL without the stock assembly, I put them in my Tundra inside the assembly, and many others have done retrofits with them.
Carbons:
With Morimoto 3000k:
My Tundra:

With Morimoto 5000k (fogs only):

The Fusion projectors can be had for less than $100. With $150 Mormoto HID kit, it can be done right for $250. Drop the front bumper and you can attach these easily in an hour.
Not an RL, but a good pic of the color.
However, a proper retrofit may not be as hard as you are letting on. The Ford Fusion fog projectors use a 1.75" lens, have machined threads on each side, are cheap, and are a great quality. Carbon put them in his RL without the stock assembly, I put them in my Tundra inside the assembly, and many others have done retrofits with them.
Carbons:
With Morimoto 3000k:
My Tundra:
With Morimoto 5000k (fogs only):
The Fusion projectors can be had for less than $100. With $150 Mormoto HID kit, it can be done right for $250. Drop the front bumper and you can attach these easily in an hour.
The following 5 users liked this post by oo7spy:
ChocBoyWonder (03-04-2014),
HEAVY_RL (03-05-2014),
justnspace (07-10-2014),
MrG4Life (03-05-2014),
tyrenith548 (05-05-2015)
03-05-2014, 07:04 AM
#3
Giddy up
Once ol' man winter decides to loosen his grip here then that'll be something I can tackle. To your knowledge, is there any additional mounting parts that I would need or something special that I'll need to do to get the Fusion fog projectors installed into the fog housing?
Once ol' man winter decides to loosen his grip here then that'll be something I can tackle. To your knowledge, is there any additional mounting parts that I would need or something special that I'll need to do to get the Fusion fog projectors installed into the fog housing?
03-05-2014, 01:00 PM
#5
Suzuka Master
iTrader: (1)
from the looks of it, I'd get the projector and retro fit it and I would take out the glass and put in lexan for protection.
Not sure if the pics are working here: https://acurazine.com/forums/2g-rl-photograph-gallery-91/aspec-front-lip-did-something-different-foglights-857938/
Glass replacement here: https://acurazine.com/forums/2g-rl-2005-2012-76/g-009-diy-rl-fog-light-glass-replacement-769528/
Not sure if the pics are working here: https://acurazine.com/forums/2g-rl-photograph-gallery-91/aspec-front-lip-did-something-different-foglights-857938/
Glass replacement here: https://acurazine.com/forums/2g-rl-2005-2012-76/g-009-diy-rl-fog-light-glass-replacement-769528/
03-05-2014, 01:26 PM
#6
from the looks of it, I'd get the projector and retro fit it and I would take out the glass and put in lexan for protection.
Not sure if the pics are working here: https://acurazine.com/forums/showthread.php?t=857938
Glass replacement here: https://acurazine.com/forums/showthread.php?t=769528
Not sure if the pics are working here: https://acurazine.com/forums/showthread.php?t=857938
Glass replacement here: https://acurazine.com/forums/showthread.php?t=769528
03-05-2014, 01:39 PM
#7
Senior Moderator
Here is what the projector assembly looks like:

The Fusion bracket is very strange and hard to modify to anything other than a perfectly molded plastic (like a Fusion bumper ). However, the bracket attaches to the projector on each side (this allows the projector to be aimed up or down), and the bracket can be popped off. This leaves you with just the projector housing which has machined threads on each side. For the Tundra, I cut off the back of my fog light assembly, drilled a hole on each side, put the projector inside the assembly, and put a machined screw through the outside into the projector. Again, this allows for the projector to be aimed.
Here is the RL assembly:
You can see the same idea I am trying to convey with the screw on each side. Maybe Carbon has some pictures or can chime in with tips. I don't know the best way to apply it to the RL, but if you are okay with dropping the bumper for a day and running to the hardware store for unexpected supplies, I think you can do it easily.
I guess I should also add that the projector is an H11 halogen setup. Obviously, you can run them with HID bulbs no problem, but you can also run them with high quality halogen bulbs too like the OSRAMs mentioned in the OP.
More pics of the projectors:
The Fusion bracket is very strange and hard to modify to anything other than a perfectly molded plastic (like a Fusion bumper
). However, the bracket attaches to the projector on each side (this allows the projector to be aimed up or down), and the bracket can be popped off. This leaves you with just the projector housing which has machined threads on each side. For the Tundra, I cut off the back of my fog light assembly, drilled a hole on each side, put the projector inside the assembly, and put a machined screw through the outside into the projector. Again, this allows for the projector to be aimed.Here is the RL assembly:
You can see the same idea I am trying to convey with the screw on each side. Maybe Carbon has some pictures or can chime in with tips. I don't know the best way to apply it to the RL, but if you are okay with dropping the bumper for a day and running to the hardware store for unexpected supplies, I think you can do it easily.
I guess I should also add that the projector is an H11 halogen setup. Obviously, you can run them with HID bulbs no problem, but you can also run them with high quality halogen bulbs too like the OSRAMs mentioned in the OP.
More pics of the projectors:
Last edited by oo7spy; 03-05-2014 at 01:49 PM.
The following 3 users liked this post by oo7spy:
Trending Topics
03-05-2014, 03:15 PM
#8
Thanks for chiming in with the pics 007. I'm going to try this mod. I just wasn't sure about replacing the cracked lens. This looks straight forward and fairly simple. I'll see what I can get a replacement unit for from a scarp yard or something and then have at it. Oh also when old man winter decides to chill.
03-07-2014, 10:40 PM
#9
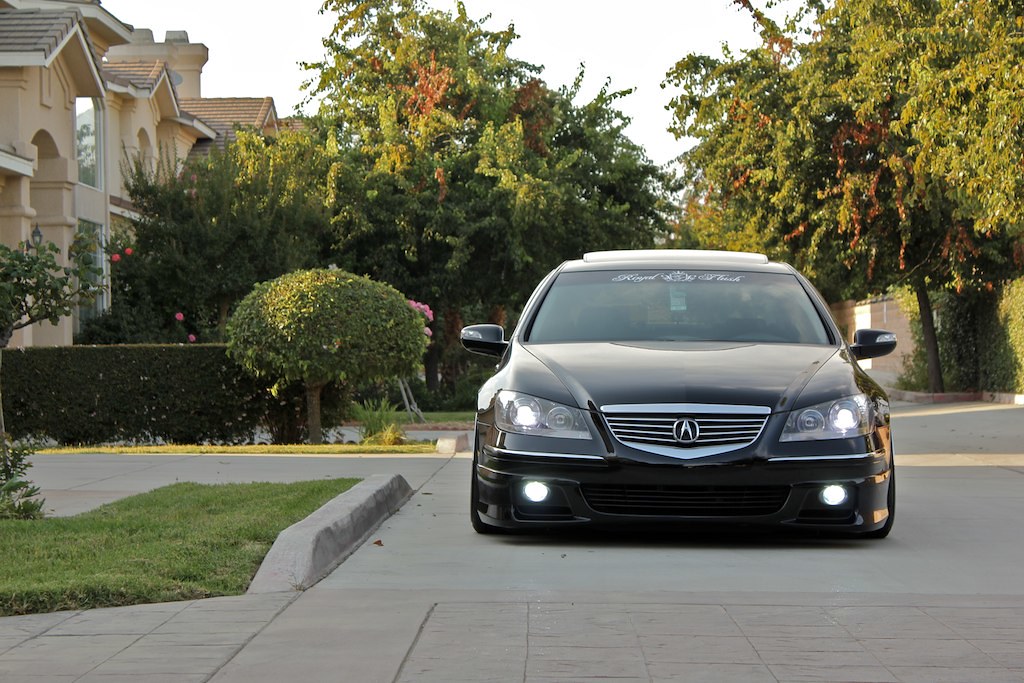
I've decided to do the projector setup for my fogs. I was able to scoop a pair of those Ford Fusion projector fogs that was recommended here. It looks like that I'll be matching the color of my low beams so I will not be getting the 3000K yellow HID's. I saw this picture from another thread that oo7 posted and I just love the clean matching look of having the same color fogs and low beams. I'll tackle this project hopefully next month when its consistently warm out.
The following users liked this post:
oo7spy (03-08-2014)
03-08-2014, 03:52 PM
#11
Senior Moderator
 05-30-2014, 10:59 AM
#13
Senior Moderator
I took off the bumper and zip tied mine to the frame/sub body. The splash guards keep the water out, but the ballasts can handle moisture.
05-31-2014, 08:23 AM
#15
Moderator
iTrader: (2)
Join Date: Apr 2012
Location: Buffalo Grove, IL
Age: 34
Posts: 2,681
Received 612 Likes
on
490 Posts
I actually just finished up a Fusion fog retrofit myself not too long ago. Honestly, it's 100% worth it. I've done a retrofit on my Camry before, so I was comfortable with the idea of doing it myself. This retrofit is MUCH better than doing headlights, since the the bumper hides a LOT of stuff. The only thing I wasn't expecting was the housing to be metal, which made cutting harder than anticipated. Because of that, I set them as far forward as I could.
05-31-2014, 10:30 PM
#17
Moderator
iTrader: (2)
Join Date: Apr 2012
Location: Buffalo Grove, IL
Age: 34
Posts: 2,681
Received 612 Likes
on
490 Posts
I'm debating cutting off the peg since it isn't anchored that way to the car, but I haven't come up with a passable shroud solution yet that would justify cutting it off. It's still a work in progress. Again, because of the tight shape of the bowl, it forced it in that position to minimize the amount of metal work I had to do. It leveled off well with the A-spec kit in my case, don't know how well it would be without though.


 06-01-2014, 02:49 PM
#18
Drifting
I have a question for you guys about the projector fog retrofit. While it would be more expensive in the end, can this retrofit be done using universal parts like these Morimoto projectors and some shrouds: http://www.theretrofitsource.com/com...l#.U4uCUfldWa8
The reason I ask is that, if I were to do this, I would want a cleaner install. I'm not a fan of all the empty space around the projector housing and the bumper cut-outs or the exposed pegs. I'm not opposed to spending a little more to create a more OEM look.
The reason I ask is that, if I were to do this, I would want a cleaner install. I'm not a fan of all the empty space around the projector housing and the bumper cut-outs or the exposed pegs. I'm not opposed to spending a little more to create a more OEM look.
The following users liked this post:
projektvertx (06-01-2014)
06-01-2014, 03:19 PM
#20
Moderator
iTrader: (2)
Join Date: Apr 2012
Location: Buffalo Grove, IL
Age: 34
Posts: 2,681
Received 612 Likes
on
490 Posts
I have a question for you guys about the projector fog retrofit. While it would be more expensive in the end, can this retrofit be done using universal parts like these Morimoto projectors and some shrouds: http://www.theretrofitsource.com/com...l#.U4uCUfldWa8
The reason I ask is that, if I were to do this, I would want a cleaner install. I'm not a fan of all the empty space around the projector housing and the bumper cut-outs or the exposed pegs. I'm not opposed to spending a little more to create a more OEM look.
The reason I ask is that, if I were to do this, I would want a cleaner install. I'm not a fan of all the empty space around the projector housing and the bumper cut-outs or the exposed pegs. I'm not opposed to spending a little more to create a more OEM look.
 Every shroud I've explored involves cutting to fit the top part since it's an oval shape hole. My camry retrofit came out much much cleaner since I had much more space to set it however I wanted. I'll post pics of that later.
The fact that it's metal housing makes things much, much harder in the retrofit sense. I was talking with Carbon Legend, he did custom brackets.
06-01-2014, 03:27 PM
#21
Moderator
iTrader: (2)
Join Date: Apr 2012
Location: Buffalo Grove, IL
Age: 34
Posts: 2,681
Received 612 Likes
on
490 Posts
Also, the.bumper cutouts I left untouched. That's the factory opening. One solution I've been debating is a shroud that would make things flush with the bumper, but again, nothing I've found is plug and play so far. Any suggestions? or should I go custom?
06-01-2014, 07:45 PM
#22
Senior Moderator
This probably doesn't help you, projekt, but I had to grind my supports with a rasp. I probably took off about half of the peg with 5 min of work.
The following users liked this post:
projektvertx (06-01-2014)
06-01-2014, 08:41 PM
#23
Moderator
iTrader: (2)
Join Date: Apr 2012
Location: Buffalo Grove, IL
Age: 34
Posts: 2,681
Received 612 Likes
on
490 Posts
To be completely honest, when Carbon told me he did custom brackets, I realized I was jumping off the deep end with this one. At this point it isn't completely done, and I realize it's flawed at where it's at, but I do intend to see it thru until the end
I realize I'm probably the second person after Carbon Legend to do this on an RL with almost no guidance  As soon as I realized the housing was metal, I realized this would be much harder than how I planned to do it, but I told myself "F**k it, I got this far, I'll see this thru until the end."
I'm working on solving BDoggPrelude's concern though, I made some measurements and I'm heading over to the salvage yard tomorrow to see what my buddy pulled for me. I've got two shrouds that I have my eye on that might work, one ironically off another F-L-M car.
At this point, I want to finish the job to finish it, but I also want to open a door for people here since we don't have much aftermarket support. You boys have come thru for me more than once in the two years I've had this car, I at least want to try to return the favour once
Anyways, enough of my ramblings, here are some pics of my Camry retro, maybe they will restore you guys' faith in the type of results I get, even with the delays! The last two pics are when I hadn't done any work to the corners yet.


The following users liked this post:
BDoggPrelude (06-02-2014)
06-01-2014, 08:46 PM
#24
Moderator
iTrader: (2)
Join Date: Apr 2012
Location: Buffalo Grove, IL
Age: 34
Posts: 2,681
Received 612 Likes
on
490 Posts
Will update tomorrow on my shroud findings.
06-01-2014, 10:09 PM
#25
Drifting
Thanks for the PM and all of the info, projektvertx. So I'm assuming none of these shrouds would work:
http://www.theretrofitsource.com/com...s/shrouds.html
Also, is it necessary to use the stock fog light housings? Seems like you would have a lot more room to mount the projectors however you wanted if you just completely removed the stock fog lights and started fresh.
http://www.theretrofitsource.com/com...s/shrouds.html
Also, is it necessary to use the stock fog light housings? Seems like you would have a lot more room to mount the projectors however you wanted if you just completely removed the stock fog lights and started fresh.
06-02-2014, 06:59 AM
#26
Completely missed this, my bad! Did you document your process on HIDplanet? I might have stumbled on your thread while looking into this... To be honest, I wasn't that pleased with the Lexan sheets I had on these fog lights, they bubbled weird... On that note, I was looking for a solution that wouldn't involve that. And Fusion fogs are MAD cheap to get ahold of in Detroit since it's practically the official vehicle of metro Detroit! Will update tomorrow on my shroud findings.
Will update tomorrow on my shroud findings.
06-02-2014, 07:23 AM
#27
Moderator
iTrader: (2)
Join Date: Apr 2012
Location: Buffalo Grove, IL
Age: 34
Posts: 2,681
Received 612 Likes
on
490 Posts
Thanks for the PM and all of the info, projektvertx. So I'm assuming none of these shrouds would work:
http://www.theretrofitsource.com/com...s/shrouds.html
Also, is it necessary to use the stock fog light housings? Seems like you would have a lot more room to mount the projectors however you wanted if you just completely removed the stock fog lights and started fresh.
http://www.theretrofitsource.com/com...s/shrouds.html
Also, is it necessary to use the stock fog light housings? Seems like you would have a lot more room to mount the projectors however you wanted if you just completely removed the stock fog lights and started fresh.

Hypothetically, you could also use something like that on the mounting screws on either side to control how far forward the projector is set.
The biggest problem with the shrouds I've encountered is the dimensions of the opening which are 3" H X 4" W. Most of the dimensions with the TRS shrouds wouldn't allow for it to fit, unless you had something like the E46-R shrouds where the slant of the shrouds would allow any excess shroud material to slide into and hide behind the bumper. The mini Gatling Gun shroud has a little too much diameter for the height portion. However, the Mini Graphite is the only one that I've seen that could work so far on their site.
I'll give the mounting plate idea a try this evening, depending on how early I get off and how much time I have left over after shroud hunting. Hopefully I should be able to get to at least one side today. That's why I held onto the pegs, in case I needed to revise things
 To be completely honest, when I was doing this, once I saw that the height adjustment didn't match up, I closed that door without another thought It's entirely possible that mounting it on the factory bracket would give more choice as far as shrouds.
My bad, I thought it was your thread! Please do if you can! You might spot something I didn't! On that note, if you were to use the factory bracket with mounting plates, and if the projector where set far back enough, it would allow you to use the Lexan polycarb on the bumper as well. Although I'm slanted against the Lexan after the way mine starting bubbling... I'll give BDoggPrelude's idea a shot, since I have everything at hand for the most part and report back ASAP with how that turns out.
06-02-2014, 10:05 AM
#29
Moderator
iTrader: (2)
Join Date: Apr 2012
Location: Buffalo Grove, IL
Age: 34
Posts: 2,681
Received 612 Likes
on
490 Posts
Yup, it's the material in the DIY, which is polycarbonate, not glass. I'm not sure what caused it to bubble up, but it bubbled only in the exposed area of the foglight. I might have gotten a bad sheet. I don't think it would be possible since the foglight housing is wider than the opening on the bumper. So the housing pushes the glass/housing joint against the bumper if that makes sense.
06-02-2014, 11:13 AM
#30
I have a question for you guys about the projector fog retrofit. While it would be more expensive in the end, can this retrofit be done using universal parts like these Morimoto projectors and some shrouds: http://www.theretrofitsource.com/com...l#.U4uCUfldWa8
The reason I ask is that, if I were to do this, I would want a cleaner install. I'm not a fan of all the empty space around the projector housing and the bumper cut-outs or the exposed pegs. I'm not opposed to spending a little more to create a more OEM look.
The reason I ask is that, if I were to do this, I would want a cleaner install. I'm not a fan of all the empty space around the projector housing and the bumper cut-outs or the exposed pegs. I'm not opposed to spending a little more to create a more OEM look.
In a few weeks I will be doing some led foglight testing and seeing what can be done for the RL. I will do my best do document it. Maybe even try to figure out a simple mounting bracket so people can DIY install the new led fogs which will be plug and play and no power relay harness will be needed.
The following users liked this post:
projektvertx (06-02-2014)
06-02-2014, 07:04 PM
#31
Crap it's been just about three months since I created this thread and I have nothing to show for the recommendations that were made here for my fogs. I have all the parts that I need to take this on but I've been so damn preoccupied with other things. Now with the weather being warm again and clearing up the issues with my other car I should be able to get going with this. I'll be sure to post pics of the install and end result.
06-02-2014, 10:21 PM
#32
Moderator
iTrader: (2)
Join Date: Apr 2012
Location: Buffalo Grove, IL
Age: 34
Posts: 2,681
Received 612 Likes
on
490 Posts
Hot off the press, I made a custom bracket using some plates from Home Depot. Helped recess things much better. I used a 4 inch mending plate combined with a two wholed L on the outer edge to match the OEM mounting point onto the fusion fog, the levels things off perfectly to use a small standard L on the inner side of the fog to mount things. It also opens the door to more shrouds, I already have one on the way that should work!

EDIT: For the height adjustment, I slight bent the factory height adjustment and used another L adapter in combination with a long bolt (not pictured). That allowed the bolt to come straight up into the fusion foglight height adjustment location.


EDIT: For the height adjustment, I slight bent the factory height adjustment and used another L adapter in combination with a long bolt (not pictured). That allowed the bolt to come straight up into the fusion foglight height adjustment location.

Last edited by projektvertx; 06-02-2014 at 10:35 PM.
The following 2 users liked this post by projektvertx:
BDoggPrelude (06-02-2014),
oo7spy (06-02-2014)
06-02-2014, 10:36 PM
#33
Drifting
Hot off the press, I made a custom bracket using some plates from Home Depot. Helped recess things much better. I used a 4 inch mending plate combined with a two wholed L on the outer edge to match the OEM mounting point onto the fusion fog, the levels things off perfectly to use a small standard L on the inner side of the fog to mount things. It also opens the door to more shrouds, I already have one on the way that should work!
The following users liked this post:
projektvertx (06-02-2014)
06-02-2014, 10:40 PM
#34
Moderator
iTrader: (2)
Join Date: Apr 2012
Location: Buffalo Grove, IL
Age: 34
Posts: 2,681
Received 612 Likes
on
490 Posts
I thought about that, whether or not other projectors were designed to be used inside headlight and would not fair well with the element.
Nice! Much better! Can't wait to see if you can get some shrouds in there to clean everything up. Personally, I would try to paint the shrouds to match the black bumper inserts.
Nice! Much better! Can't wait to see if you can get some shrouds in there to clean everything up. Personally, I would try to paint the shrouds to match the black bumper inserts.
06-02-2014, 10:49 PM
#35
Senior Moderator
Ninjas kick ass!

The following users liked this post:
projektvertx (06-03-2014)
06-18-2014, 01:55 PM
#36
Moderator
iTrader: (2)
Join Date: Apr 2012
Location: Buffalo Grove, IL
Age: 34
Posts: 2,681
Received 612 Likes
on
490 Posts
OK, I'm getting a little frustrated, none of the shrouds I've tried have worked  I tried cutting the Lexan sheets to size and thought of painting them. It turned out to look too much like a hack job to be honest. I've been bouncing the idea around of talking to a machine shop to make me a prototype that would fit it...
I tried cutting the Lexan sheets to size and thought of painting them. It turned out to look too much like a hack job to be honest. I've been bouncing the idea around of talking to a machine shop to make me a prototype that would fit it...
07-10-2014, 12:40 PM
#38
Moderator
iTrader: (2)
Join Date: Apr 2012
Location: Buffalo Grove, IL
Age: 34
Posts: 2,681
Received 612 Likes
on
490 Posts
Sorry for the brief reply in advance, I'm typing this on my phone I used 4 inch 4 hole mending plates with a 2 hole L shaped bracket on the side of the oem fog light bracket facing the grille and a 2 inch 2 hole mending plate on the outer side with a 4 hole L bracket attached to it. Welding the bracket and plate together would be best once.you have a good setup. For my height adjustment I used a similar combination of 4 inch mending plate with 2 L shaped brackets. Make sure to have a really long screw with two ts to attach to the height adjustment bracket on the fusion fog lights height adjustment location (if that makes.sense?). If you need clarification let me know, I'm not sure how clear my explanation is
I used 4 inch 4 hole mending plates with a 2 hole L shaped bracket on the side of the oem fog light bracket facing the grille and a 2 inch 2 hole mending plate on the outer side with a 4 hole L bracket attached to it. Welding the bracket and plate together would be best once.you have a good setup. For my height adjustment I used a similar combination of 4 inch mending plate with 2 L shaped brackets. Make sure to have a really long screw with two ts to attach to the height adjustment bracket on the fusion fog lights height adjustment location (if that makes.sense?). If you need clarification let me know, I'm not sure how clear my explanation is
The following users liked this post:
ChocBoyWonder (07-10-2014)
07-10-2014, 04:01 PM
#39
Senior Moderator
Clear as mud. 