
Need clarification/help on valve adjustment

Thread Starter
Racer
Joined: Aug 2009
Posts: 364
Likes: 4
From: Broward County, FL
Need clarification/help on valve adjustment
Well just got the valves exposed and adjusted cylinder 1 when I realized one of the exhaust rocker arm bearings on my cylinder 4 was GONE, preventing me to continue! Found about 3/4's of the bearing, I can't believe the car has been running so well with this issue! I got lucky.
Now my question... I searched and couldn't come up with an answer to this. I'm following the Helm's manual throughout this process. However I notice that when I insert the feeler gauge their is a little play on the rocker (approx. 1 mm?). This play seems to be in addition to the normal clearance but I'm not sure it is because the valves are off. Helm's doesn't mention anything, but should I leave the rocker arm alone, or should I pull it up all the way and take all the extra slack out by tightening the screw? It seems like that would result in some rather large adjustments so I figured I'd check. Thanks.
'03 CL-S6


Racer
Joined: Jun 2004
Posts: 318
Likes: 27
From: ca
Yes you take up all the slack. You should feel a slight drag when moving the feeler gauge in and out. You should be able to "feel" the bottom of the rocker adjuster and the top of the valve rubbing the feeler gauge at the same time.
But that rocker, is the outer part of the bearing missing or is it worn? What does the cam lobe look like? You'll need to replace the rocker arm and if the the cam lobe isn't perfectly smooth like the others, you'll have to replace the cam. Also look around the area for the missing pieces so they don't damage anything else.
But that rocker, is the outer part of the bearing missing or is it worn? What does the cam lobe look like? You'll need to replace the rocker arm and if the the cam lobe isn't perfectly smooth like the others, you'll have to replace the cam. Also look around the area for the missing pieces so they don't damage anything else.
Trending Topics
Thread Starter
Racer
Joined: Aug 2009
Posts: 364
Likes: 4
From: Broward County, FL
Yes you take up all the slack. You should feel a slight drag when moving the feeler gauge in and out. You should be able to "feel" the bottom of the rocker adjuster and the top of the valve rubbing the feeler gauge at the same time.
But that rocker, is the outer part of the bearing missing or is it worn? What does the cam lobe look like? You'll need to replace the rocker arm and if the the cam lobe isn't perfectly smooth like the others, you'll have to replace the cam. Also look around the area for the missing pieces so they don't damage anything else.
But that rocker, is the outer part of the bearing missing or is it worn? What does the cam lobe look like? You'll need to replace the rocker arm and if the the cam lobe isn't perfectly smooth like the others, you'll have to replace the cam. Also look around the area for the missing pieces so they don't damage anything else.

Oh, I did find just under 3/4 of a bearing hanging out :/ Got that removed the other part seems to have gone down an oil port.
As stated above, the cam seems to be fine. I'll check more carefully tomorrow but I definitely don't have the skill/workspace/money to replace the camshaft right now! Will keep my fingers crossed on that.


Thread Starter
Racer
Joined: Aug 2009
Posts: 364
Likes: 4
From: Broward County, FL
Many thanks. I've been warned to err on the side of being too loose but didn't realize about the codes. I'll check that first thing when I fire her up.

Advanced
Joined: Feb 2009
Posts: 78
Likes: 2
From: Chicago,IL
I have to do my valves too. Im at 128xxx and i hear ticks but they go away once i get passed ~1500 rpms... no misfires or codes. As for CLSspeedx glad everything turned out okay and no ticking. id drop the oilpan and see if the rest of the bearing is just laying there.
Last edited by 03CL-S6SMike; Mar 19, 2011 at 12:25 AM.
6mt swapped..smart
Joined: Apr 2007
Posts: 686
Likes: 88
From: CT
My car broke a rocker arm back about 2 yrs ago and I got it replaced, but I still hear a loud ass grinding noise after 6500rpm and sometimes if i continue to rev it out in tiptronic I'll get a flashing cel and sometimes it will stay on. Codes come back as a random misfire on EVERY cylinder. I have been driving the car like this for the last 50k and all is fine otherwise. Compression test came back a-ok.. I just don't bring it past 6500 anymore so it sucks, anyone have any ideas?
Thread Starter
Racer
Joined: Aug 2009
Posts: 364
Likes: 4
From: Broward County, FL
God I guess I missed keeping up with this thread, a litle delayed LOL 
I just loosened the nut and adjusted each valve with the feeler gauge so it had the ever slightest bit of drag... so on the loose side as suggested... then I went back and kept checking and rechecking.
It wasn't hard a little time consuming though. It was my first time though. The hardest part was accessing the back valves I'd have to say. I have big hands lol. Good luck if you haven't done it yet. If you have I hope it solved your tick! 
Thats not a bad idea. I never did find the damn thing. But at least I got the biggest portion of it.
I can't imagine its common but I guess it could be ? I was shocked I didn't have more noise and that no damage was caused. Had I not decided to adjust my valves I would have not had any signs!
I can't imagine was could cause it to misfire and different cylinders all the time. How much of the rocker were they able to retrieve? Was it the rocker arm or just the bearing like in my case?
I have to do my valves too. Im at 128xxx and i hear ticks but they go away once i get passed ~1500 rpms... no misfires or codes. As for CLSspeedx glad everything turned out okay and no ticking. id drop the oilpan and see if the rest of the bearing is just laying there.
My car broke a rocker arm back about 2 yrs ago and I got it replaced, but I still hear a loud ass grinding noise after 6500rpm and sometimes if i continue to rev it out in tiptronic I'll get a flashing cel and sometimes it will stay on. Codes come back as a random misfire on EVERY cylinder. I have been driving the car like this for the last 50k and all is fine otherwise. Compression test came back a-ok.. I just don't bring it past 6500 anymore so it sucks, anyone have any ideas?


I did my valve adjustment lately. It was quick took me like an hour to adjust all the valves then start it and its soooo quite now. No more ticking sound. It was my first time and to be honest i was sure how to tight them properly with that screw driver but i think i did good job its running fine and quite. All the valves were loose that i could put 2 sizes bigger guage in there.
Thread Starter
Racer
Joined: Aug 2009
Posts: 364
Likes: 4
From: Broward County, FL
I did my valve adjustment lately. It was quick took me like an hour to adjust all the valves then start it and its soooo quite now. No more ticking sound. It was my first time and to be honest i was sure how to tight them properly with that screw driver but i think i did good job its running fine and quite. All the valves were loose that i could put 2 sizes bigger guage in there.
I think about 1/2 of mine seemed in spec but I tweaked them all and I definitely heard a difference (buy not hearing the tick!).


Cruisin'
Joined: Nov 2004
Posts: 18
Likes: 0
From: Ontario
I got a quote on a valve adjustment from Acura yesterday, they say 5 hours labour. Does that seem about right?? The mechanic there basically said it wasn't worth it if the car was running fine (no power loss etc). The engine has a lot of km's on it and runs great but it does tick.
5h is too much i could do it from start to finish in 3 hours easy. And i also painted the covers. It was my first time though. I've seen acura techs doing timing belt in 1.5-2h... My brother work at the acura dealer. I would go to honda/acura shop and get the quote from them. As long as nothing is wrong with valves rockers etc it should be around 200-250$
Last edited by StreetKA; Aug 8, 2011 at 05:34 AM.
I got a quote on a valve adjustment from Acura yesterday, they say 5 hours labour. Does that seem about right?? The mechanic there basically said it wasn't worth it if the car was running fine (no power loss etc). The engine has a lot of km's on it and runs great but it does tick.
5h is too much i could do it from start to finish in 3 hours easy. And i also painted the covers. It was my first time though. I've seen acura techs doing timing belt in 1.5-2h... My brother work at the acura dealer. I would go to honda/acura shop and get the quote from them. As long as nothing is wrong with valves rockers etc it should be around 200-250$
Thread Starter
Racer
Joined: Aug 2009
Posts: 364
Likes: 4
From: Broward County, FL
Yes I temporarily lost access to my AllData account so I can't tell you how many hours the job books at, but most dealers will charge you book, even if the tech gets it done in 1.5 hours. It's definitely DIY if you have patience and are mechanically inclined. However if you are worried I agree with StreetKA that an independent mechanic shouldn't be more than the 200-250 range.
I was told 240 last week at a shop I go to all the time but,he said he would do it for 200 so guesses are close.
I'm going to adjust mine today since I don't want to spend 200 when I can just adjust them myself for free besides my time.
Starting to get some ticking from cylinder 1.
I'm going to adjust mine today since I don't want to spend 200 when I can just adjust them myself for free besides my time.
Starting to get some ticking from cylinder 1.
Make sure u check all the rockers and bearing for damage just in case but you got automatic so you valve should be good there is practicly no possibilty to overrev engine also automatic shifts sooner than 6spd
I checked everything and it was all ok.
It took me under just under 3 hours to do from begining to start up in the hot sun with a 5 min break to guzzle down a soda after everything was taking apart and was set to #1.
On start up the car seams quieter. it definitly seams like it's running better and feels like it has a little more pull.
It took me under just under 3 hours to do from begining to start up in the hot sun with a 5 min break to guzzle down a soda after everything was taking apart and was set to #1.
On start up the car seams quieter. it definitly seams like it's running better and feels like it has a little more pull.
Thread Starter
Racer
Joined: Aug 2009
Posts: 364
Likes: 4
From: Broward County, FL
I checked everything and it was all ok.
It took me under just under 3 hours to do from begining to start up in the hot sun with a 5 min break to guzzle down a soda after everything was taking apart and was set to #1.
On start up the car seams quieter. it definitly seams like it's running better and feels like it has a little more pull.
It took me under just under 3 hours to do from begining to start up in the hot sun with a 5 min break to guzzle down a soda after everything was taking apart and was set to #1.
On start up the car seams quieter. it definitly seams like it's running better and feels like it has a little more pull.
Definitely... x2
I think I'm going to recheck mine again when I get it back... this damn impala (rental) is driving me insane!

someone please do a DIY write up. mine is ticking. i'm fairly mechanically inclined. did most of my own bolt ons, but would feel better with a step by step write up that i can refer to.
Not a diy since I did not take a bunch of pics but once you have the valve covers off like this.
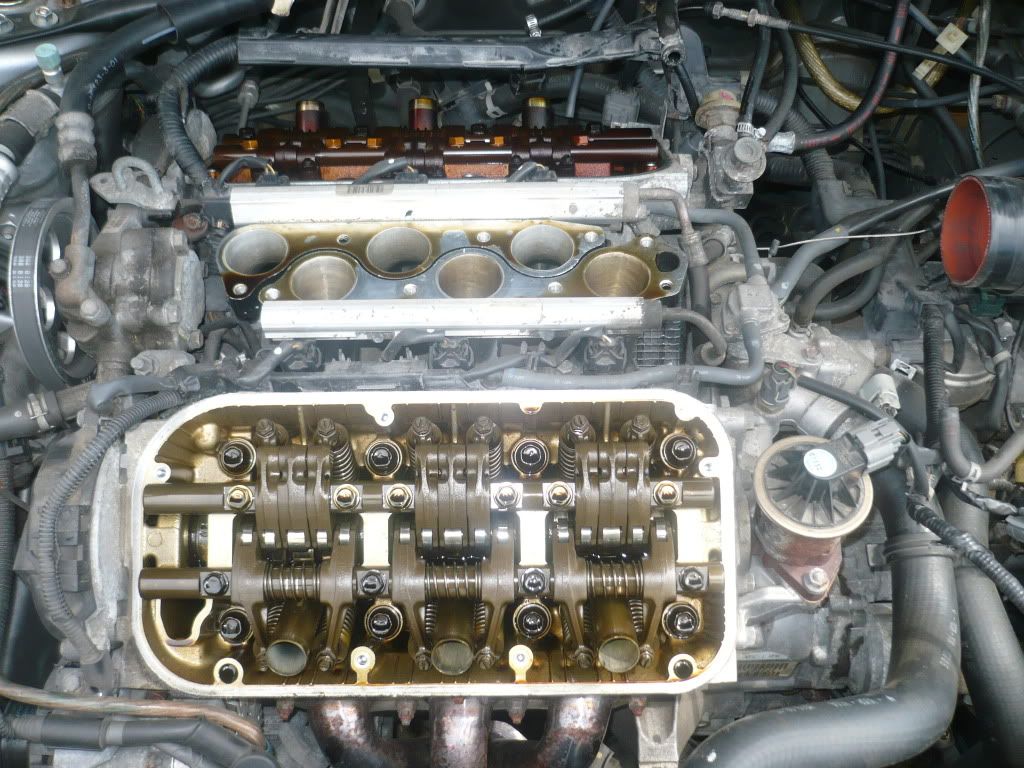
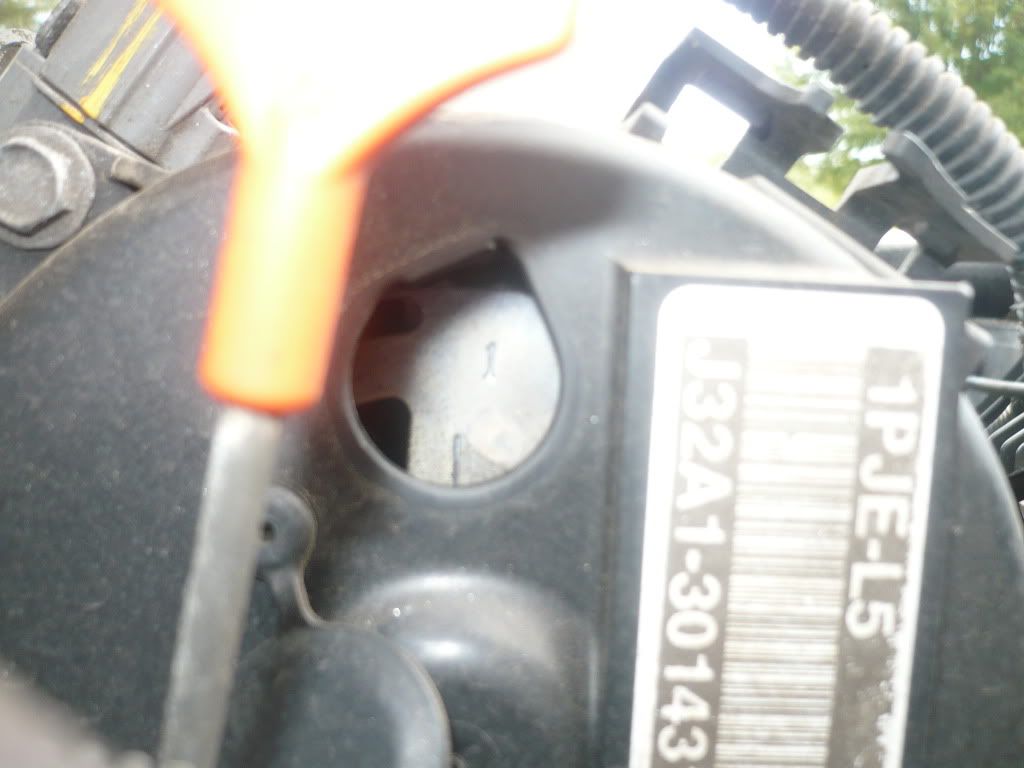
Pop open the tab on the front cam gear cover and turn the crankshaft manually with a 18 or 19mm wrench(forget witch) clock wise till you reach #1 with the pointer.
Then go to #1 cylinder valves and adjust
intake .008
exhaust.012
Then you turn the crank again till you come up on the next # with the cam gear reading.It will be 4 so then you do the same as you did cylinder #1. And continue on till you have all cylinders done.
The order is 1 4 2 5 3 6
rear head from pully side 123
front head from pully side 456
Not a diy ,just a quick guide.Hope it helps
Last edited by richardparker; Aug 12, 2011 at 10:15 AM.
Thread Starter
Racer
Joined: Aug 2009
Posts: 364
Likes: 4
From: Broward County, FL
Thats it in a nutshell! Good summary Richard!
I'd add that you check the clearance first, and loosen the nut on top of the valve, if necessary, set the clearance (if necessary) with the small screen on top. The tighten the nut down to hold it.
I checked and rechecked, then did a final check at the end as sometimes they can move a bit when you tighten them down. Also, as indicated many times, better (safety-wise as to not damage the engine) to err on the side of being a little too loose versus too tight.
I think I read a DIY here, maybe on the TL forum. But I just followed the service manual to make sure I did the correct cylinders since it was my first time.
Thread Starter
Racer
Joined: Aug 2009
Posts: 364
Likes: 4
From: Broward County, FL
Street is right, its a good idea to replace the valve cover gaskets. I personally reused mine and just put a light coat of oil on the rubber before retorquing and haven't had a problem.
Because you remove the intake, you also take off the metal intake gasket, and the throttle body. The TB's gasket is paper only, the intake one is metal and can usually be reused, just be careful with it.
Next time I take everything off, I think I'm going to order all new oem gaskets and a thermo spacer too. But I haven't had problems reusing the gaskets yet the few times I've removed everything (egr clean, valve cover painting, CAI install...)
The metal honda gaskets are great. I've had my manifold off 4 times and have never replaced any of the gaskets besides when up grading to thermo's.
and the thremo's have never been replaced in between removal/installs either.
I just spent time cleaning them very well.
I even re used the metal header gaskets and so far so good with those.
My motor build will have all new gaskets though, not going to mess around there.
Also I did not take the TB off of the manifold. Just left it on there. No sense to make extra work when It did not need to come off the to adjust the valves.
Thread Starter
Racer
Joined: Aug 2009
Posts: 364
Likes: 4
From: Broward County, FL
The metal honda gaskets are great. I've had my manifold off 4 times and have never replaced any of the gaskets besides when up grading to thermo's.
and the thremo's have never been replaced in between removal/installs either.
I just spent time cleaning them very well.
I even re used the metal header gaskets and so far so good with those.
My motor build will have all new gaskets though, not going to mess around there.
Also I did not take the TB off of the manifold. Just left it on there. No sense to make extra work when It did not need to come off the to adjust the valves.
and the thremo's have never been replaced in between removal/installs either.
I just spent time cleaning them very well.
I even re used the metal header gaskets and so far so good with those.
My motor build will have all new gaskets though, not going to mess around there.
Also I did not take the TB off of the manifold. Just left it on there. No sense to make extra work when It did not need to come off the to adjust the valves.
Good point on not having to remove the Intake. I was just trying to make more room and wound up cleaning the EGR port at the same time and forgot that's why I took mine off.