
Trans Cooler Install
 03-04-2002, 06:34 PM
#1
Suzuka Master
Thread Starter
Join Date: Sep 2000
Location: Woodstock, GA
Age: 54
Posts: 9,431
Likes: 0
Received 0 Likes
on
0 Posts
Trans Cooler Install
I got the cooler installed but the lines aren't connected yet. Being cautious I wanted to be sure of clearance issues before hooking up the lines. But I'll get the fluid flowing tomorrow night as after driving it today there are no visible problems.
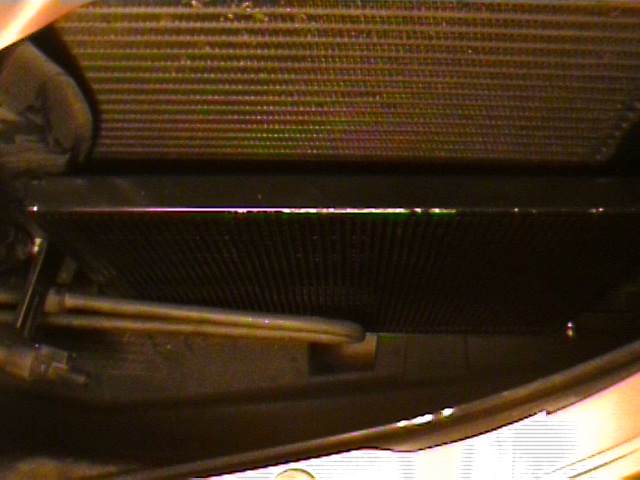
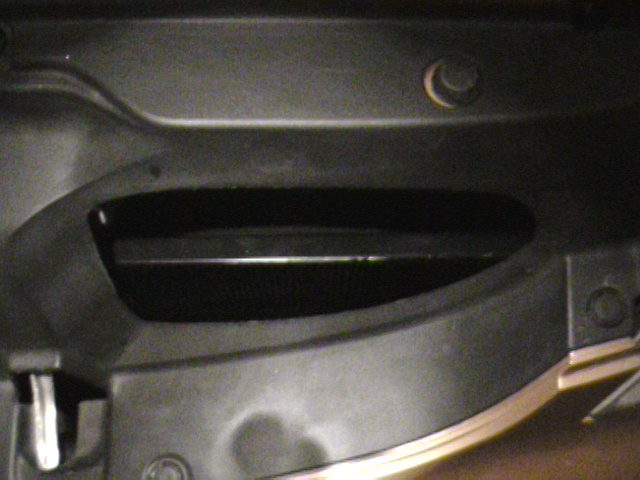
This is a monster cooler for our car, just 21.8k capacity but it sure takes up some room. Below are the pica, the first two are with the plastic cover removed and the last is with it installed.
Once finished I will do a write of the steps and pitfalls.
This is a monster cooler for our car, just 21.8k capacity but it sure takes up some room. Below are the pica, the first two are with the plastic cover removed and the last is with it installed.
Once finished I will do a write of the steps and pitfalls.
 03-04-2002, 06:52 PM
#4
Suzuka Master
Thread Starter
Join Date: Sep 2000
Location: Woodstock, GA
Age: 54
Posts: 9,431
Likes: 0
Received 0 Likes
on
0 Posts
Originally posted by TypeSDragoon
will this void any warranties?
will this void any warranties?
This is for preventative maintenance so should be OK...
03-07-2002, 08:16 PM
#5
Suzuka Master
Thread Starter
Join Date: Sep 2000
Location: Woodstock, GA
Age: 54
Posts: 9,431
Likes: 0
Received 0 Likes
on
0 Posts
OK, got it completed in full with the following pics and observations. Also below is hopefully enough description to help the other DIYs take on the task.
To begin this task you will need a trans cooler such as a B&M plate style cooler: B&M Cooler I would look at the 19k or 24k unit which will be more than enough for our car.
First remove the plastic cover between the radiator and the front bumper. A simple flat head screw driver and lift the clips.
You will also need extra hose as only about 5 feet come in most kits. Go to the local auto parts store and pick up about 10 feet of 3/8 Inch ID transmission cooler hose. This is all you will need extra for the install.
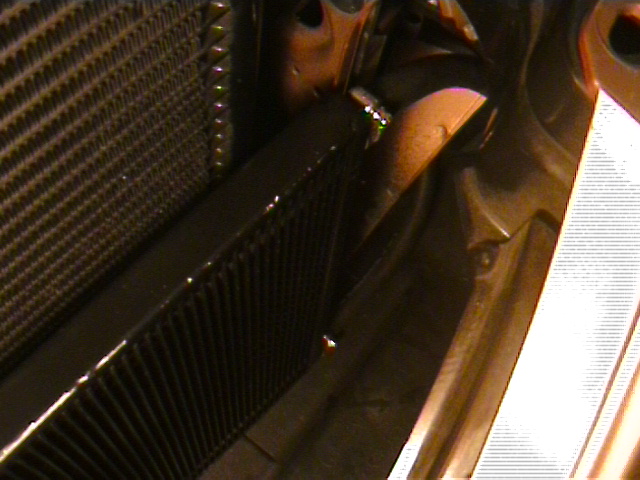
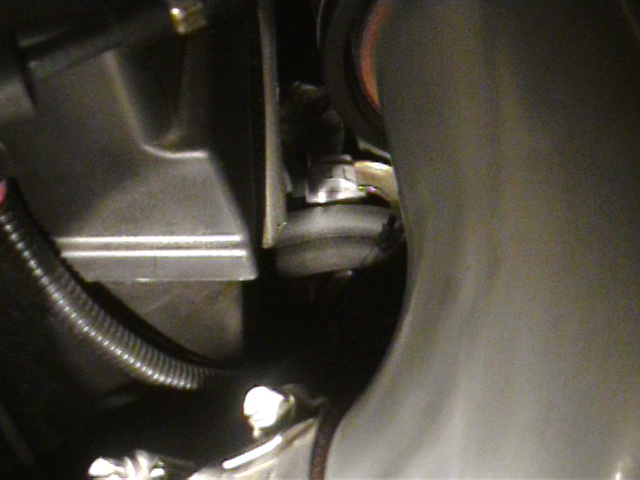
Depending on the size, the mounting methods of the cooler its self will vary. If small enough to mount against the radiator, follow the manufacturers� instructions. If it is too large (as with my case and shown on the pics) use the hoses in the chassis with proper straps to hold the cooler in place. BTW, always use the provided rubber pads to help against rubbing.
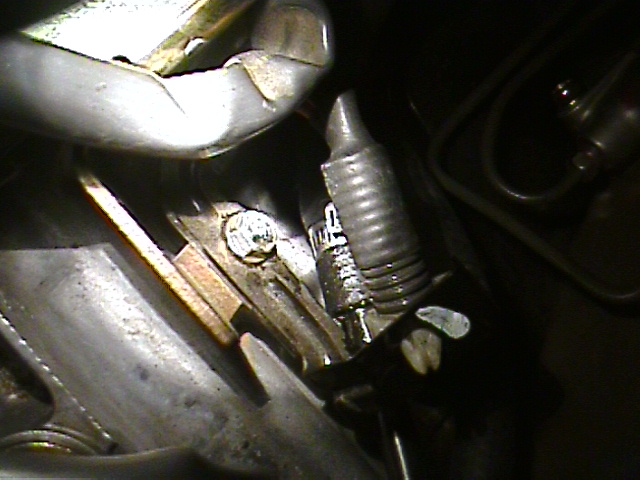
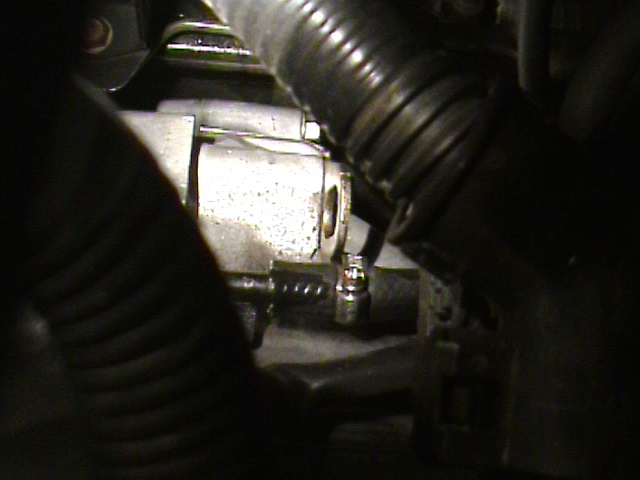
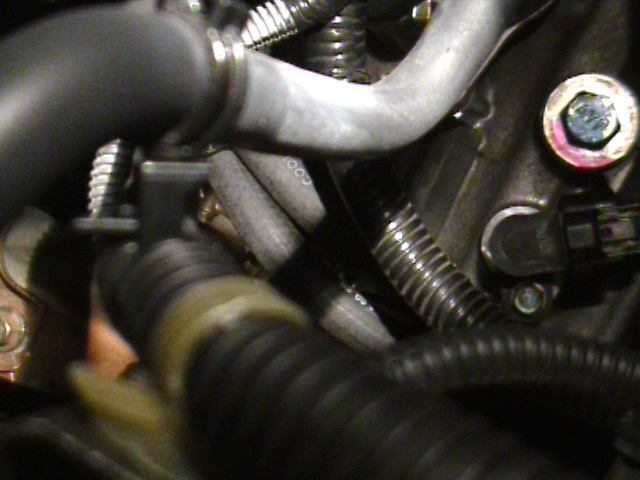
Once the cooler is mounted you can start on the lines. First you will need to remove the stock rubber connecting line as illustrated in the following thread: Pre-Cooler Thread . You will need to move the stock spring clamps in order to cut the hose for removal. I found it was easier to move the clamps towards one another as the rear one would be blocked if you attempt to move it to the end of the hose. Once moved just use a razor knife to slit the end to near the end of the metal tubing and it should come off fine.
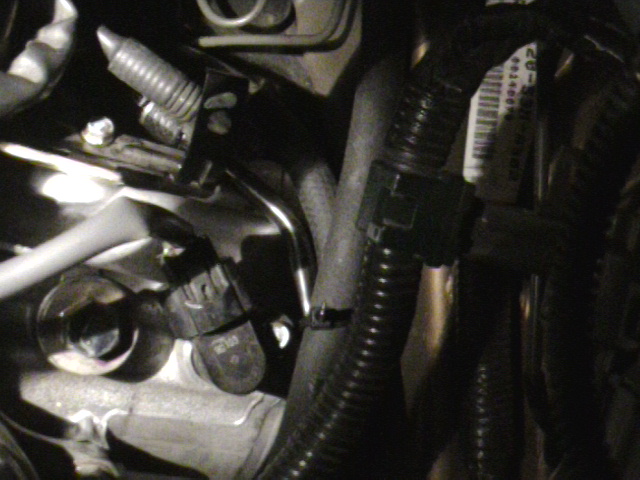
Next cut the 10 foot of 3/8 Inch ID hose in half and route to the right side of the cooler location just under where the stock air box would sit. You can actually reach both sides and route the hose with one hand behind the front bumper (from the opening created after removing the shroud) and one hand behind the radiator, under the battery. Route and secure the hose to the needed area.
I'd suggest lubricating the stock metal line points with some ATF fluid prior to connecting. From here make the connections as shown below. Then dress up the lines and tie to appropriate points to keep them still. Next cut off excess hose up at the cooler and clamps at the needed points.
Clean up tools, crank the car and CHECK FOR LEAKS. If all is set and not leaking is occurring, take it for a quick drive. Return and again check for leaks. If all is well check the fluid level. I was fine even with the greater capacity in place with the cooler and the level checked out. But to be sure, check your level.
Done!!
Observations:
Minimal at this point as I haven't put many miles on it; but I really do not expect a difference in feel as this is just a preventative installation.
But what I did find was that the cooler was hot very quickly. I started the car initially and let it idle for a few minutes and then took it for a drive. This drive was for about two miles at the most and upon return the cooler was too hot to touch for more than a couple of seconds.
But it was doing its job. The inlet hose was significantly warmer than the outlet hose on the cooler.
I'll report more on the affects as more miles are put on but at this point all seems to be fine and there was no detrimental affects of the install.

To begin this task you will need a trans cooler such as a B&M plate style cooler: B&M Cooler I would look at the 19k or 24k unit which will be more than enough for our car.
First remove the plastic cover between the radiator and the front bumper. A simple flat head screw driver and lift the clips.
You will also need extra hose as only about 5 feet come in most kits. Go to the local auto parts store and pick up about 10 feet of 3/8 Inch ID transmission cooler hose. This is all you will need extra for the install.
Depending on the size, the mounting methods of the cooler its self will vary. If small enough to mount against the radiator, follow the manufacturers� instructions. If it is too large (as with my case and shown on the pics) use the hoses in the chassis with proper straps to hold the cooler in place. BTW, always use the provided rubber pads to help against rubbing.
Once the cooler is mounted you can start on the lines. First you will need to remove the stock rubber connecting line as illustrated in the following thread: Pre-Cooler Thread . You will need to move the stock spring clamps in order to cut the hose for removal. I found it was easier to move the clamps towards one another as the rear one would be blocked if you attempt to move it to the end of the hose. Once moved just use a razor knife to slit the end to near the end of the metal tubing and it should come off fine.
Next cut the 10 foot of 3/8 Inch ID hose in half and route to the right side of the cooler location just under where the stock air box would sit. You can actually reach both sides and route the hose with one hand behind the front bumper (from the opening created after removing the shroud) and one hand behind the radiator, under the battery. Route and secure the hose to the needed area.
I'd suggest lubricating the stock metal line points with some ATF fluid prior to connecting. From here make the connections as shown below. Then dress up the lines and tie to appropriate points to keep them still. Next cut off excess hose up at the cooler and clamps at the needed points.
Clean up tools, crank the car and CHECK FOR LEAKS. If all is set and not leaking is occurring, take it for a quick drive. Return and again check for leaks. If all is well check the fluid level. I was fine even with the greater capacity in place with the cooler and the level checked out. But to be sure, check your level.
Done!!
Observations:
Minimal at this point as I haven't put many miles on it; but I really do not expect a difference in feel as this is just a preventative installation.
But what I did find was that the cooler was hot very quickly. I started the car initially and let it idle for a few minutes and then took it for a drive. This drive was for about two miles at the most and upon return the cooler was too hot to touch for more than a couple of seconds.
But it was doing its job. The inlet hose was significantly warmer than the outlet hose on the cooler.
I'll report more on the affects as more miles are put on but at this point all seems to be fine and there was no detrimental affects of the install.
 03-07-2002, 08:36 PM
#7
Suzuka Master
Thread Starter
Join Date: Sep 2000
Location: Woodstock, GA
Age: 54
Posts: 9,431
Likes: 0
Received 0 Likes
on
0 Posts
Originally posted by JRock
I know this isn't your RES thread but I'm curious how your RES is coming along.
I know this isn't your RES thread but I'm curious how your RES is coming along.
Thread
Quote:
BTW, has Doug reported any gas mileage issues?? It seems that I went throug this last tank of fuel rather quickly with the spacer plate on the car. Oh also, after having fixed the center divider wall seal issues things seems to be much better now at all revs. But I haven't driven the car for a couple of days since there is no rubber line on the external transmission fluid lines (everyone is out of 3/8" trans cooler hose).
I would rather reserve comments on current power increases but they do seem to be present. It will be confirmed or denied in the near future with some dyno pulls.
Now with the cooler done I will start on the small circuit to alter the MAP, ECT and IAT signals but only at WOT. This will probably take a couple of weeks and then I'll get to the dyno for all measurements.
Trending Topics
 03-07-2002, 08:44 PM
#9
Suzuka Master
Thread Starter
Join Date: Sep 2000
Location: Woodstock, GA
Age: 54
Posts: 9,431
Likes: 0
Received 0 Likes
on
0 Posts
Originally posted by JRock
Please be sure to pull at least one or two dynos with just the RES!
Please be sure to pull at least one or two dynos with just the RES!
03-07-2002, 09:22 PM
#11
Racer

scalbert, ever think of using stainless braided hose? I'm sure it won't make much of a difference and adds a few dollars, but something to think about if someone else is going to do this.
Summit sells Aeroquip hose. (3/8"ID=-6 AN)
Summit sells Aeroquip hose. (3/8"ID=-6 AN)
03-07-2002, 09:28 PM
#12
Suzuka Master
Thread Starter
Join Date: Sep 2000
Location: Woodstock, GA
Age: 54
Posts: 9,431
Likes: 0
Received 0 Likes
on
0 Posts
Originally posted by EricS
scalbert, ever think of using stainless braided hose? I'm sure it won't make much of a difference and adds a few dollars, but something to think about if someone else is going to do this.
Summit sells Aeroquip hose. (3/8"ID=-6 AN)
scalbert, ever think of using stainless braided hose? I'm sure it won't make much of a difference and adds a few dollars, but something to think about if someone else is going to do this.
Summit sells Aeroquip hose. (3/8"ID=-6 AN)
Heck, considering the times I have been in Aeroquip plants and the products we have sold then I really should be pushing for the braided.


Thread
Thread Starter
Forum
Replies
Last Post
Skirmich
2G TL (1999-2003)
37
09-15-2015 06:41 PM
asahrts
Member Cars for Sale
0
09-04-2015 05:55 PM