
My HID fog project
 04-03-2009, 11:53 AM
#1
Pro
Thread Starter
Join Date: Aug 2007
Location: Maryland
Age: 41
Posts: 575
Likes: 0
Received 0 Likes
on
0 Posts
My HID fog project
OK i know some people have tried this and failed but I'm going to give this a shot and post some Pict's through the processes. I've been working on this as of 12:30 yesterday and come to a stop on my first invention, as you will see. This is my progress so far.
Please feel free to voice your opinions
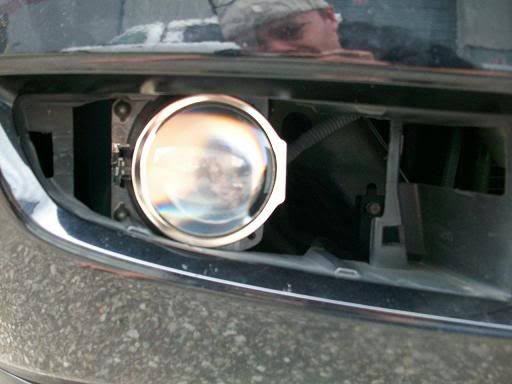
First i dremmeled out the parts where the socket locked into the lamp and inserted steal pipe to fit in the hole to give me some space between the front of the lens, so i don't melt the plastic
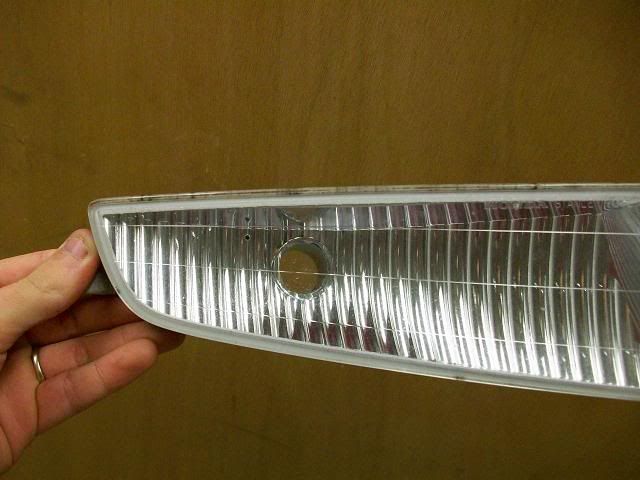
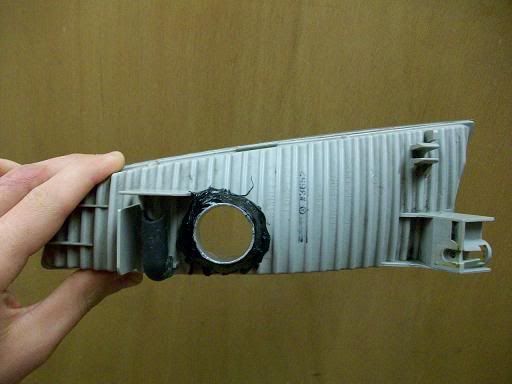
Second I glued the pipes in place with "Quick-Set One Minute," than painted them with a silver high temp. paint for reflection.
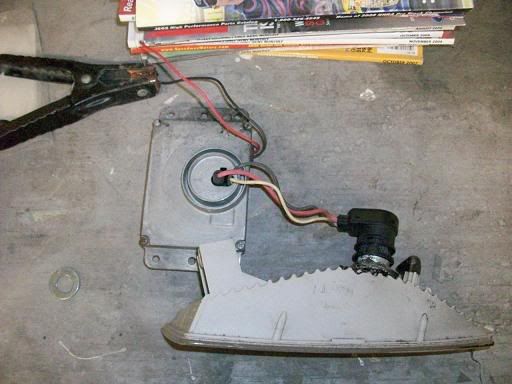
After I waited for the paint to dry I fitted the DR2 bulb. I then hooked the ballast up to a jump box so i could see the effects of the bulb for long term usage and to see if it would burn up.
bright as HELL!!!
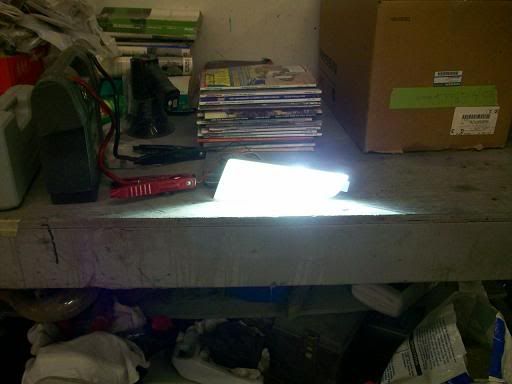
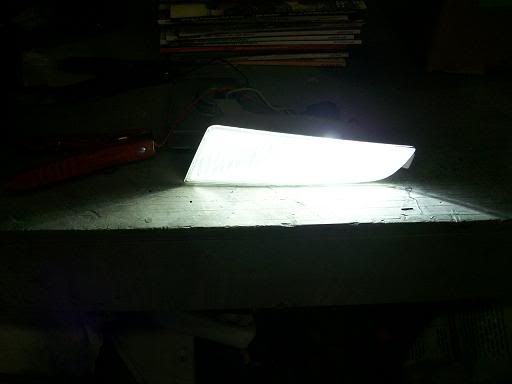
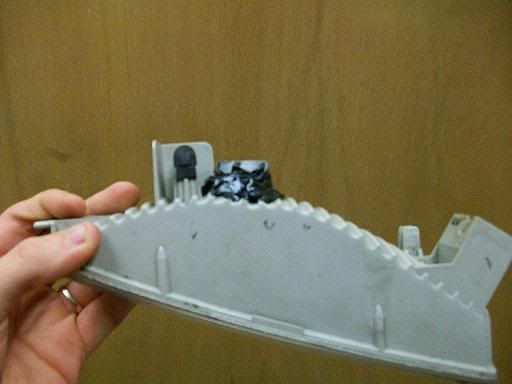
Thirdly I came to the conclusion that this wasn't going to work. I let it sit for about 15 minutes and it was smoking. It looked sexy for that short period of time but.... the top of the lamp was so dam hot. It had melting the chrome plated insides of the housing. So I had to pull the plug on this project. The bulb gives off way too muck heat.
So i sure this was what the others had figured out as well. But i wasn't going to let slow me down. I decided to take it to the next level. I forgot had some goodies in the back i was saving for something special.
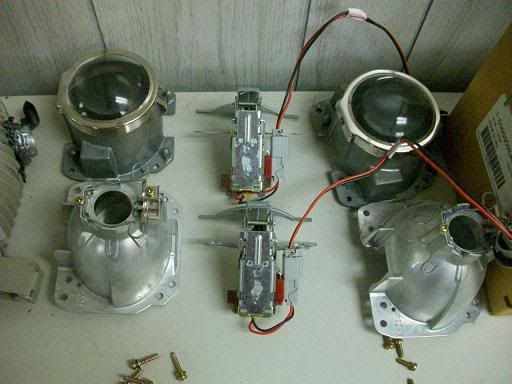
06 TL fixtures and "Cat eyes" as i like to call them. Now this will give me the stability for the hid to sit in and stay put but will they be to big? We have a lot of room behind the driving lamps so i don't think I'll have an issue other than mounting the ballast box. I have ordered a new set of bumper fog pocket that you guys have for the 03's. I'll somehow mount the "Cat Eyes" in the pockets.
Once i get them in on Monday I'll get back to work....
Please feel free to voice your opinions
First i dremmeled out the parts where the socket locked into the lamp and inserted steal pipe to fit in the hole to give me some space between the front of the lens, so i don't melt the plastic
Second I glued the pipes in place with "Quick-Set One Minute," than painted them with a silver high temp. paint for reflection.
After I waited for the paint to dry I fitted the DR2 bulb. I then hooked the ballast up to a jump box so i could see the effects of the bulb for long term usage and to see if it would burn up.
bright as HELL!!!
Thirdly I came to the conclusion that this wasn't going to work.
I let it sit for about 15 minutes and it was smoking. It looked sexy for that short period of time but.... the top of the lamp was so dam hot. It had melting the chrome plated insides of the housing. So I had to pull the plug on this project. The bulb gives off way too muck heat. So i sure this was what the others had figured out as well. But i wasn't going to let slow me down. I decided to take it to the next level. I forgot had some goodies in the back i was saving for something special.
06 TL fixtures and "Cat eyes" as i like to call them. Now this will give me the stability for the hid to sit in and stay put but will they be to big? We have a lot of room behind the driving lamps so i don't think I'll have an issue other than mounting the ballast box. I have ordered a new set of bumper fog pocket that you guys have for the 03's. I'll somehow mount the "Cat Eyes" in the pockets.
Once i get them in on Monday I'll get back to work....
 04-03-2009, 11:58 AM
#2
Wait...I just blacked out
Join Date: Oct 2006
Location: Gainesville Florida
Age: 39
Posts: 639
Likes: 0
Received 0 Likes
on
0 Posts
have you retrofitted your headlights yet? If I were to do projectors I would just retro them in the headlights, or do you not want to do that?
Man, those first pics got me excited that it was going to work!
Man, those first pics got me excited that it was going to work!
Trending Topics

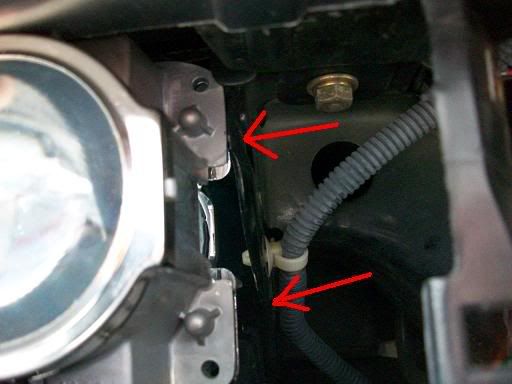
 is this where you made the holes in yours?..................it was you wasnt?


 04-06-2009, 10:34 AM
#16
Pro
Thread Starter
Join Date: Aug 2007
Location: Maryland
Age: 41
Posts: 575
Likes: 0
Received 0 Likes
on
0 Posts
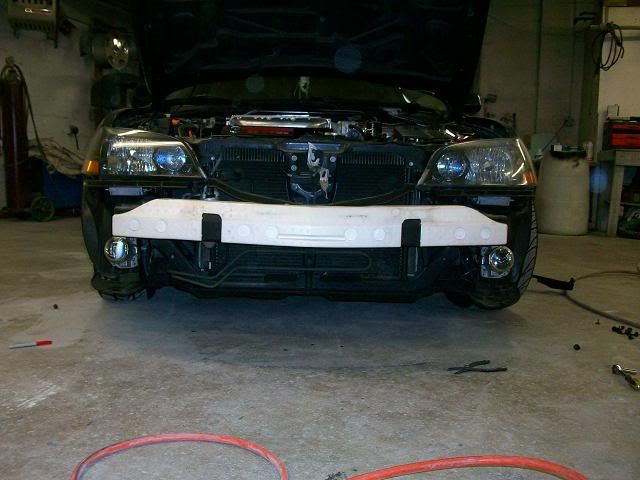
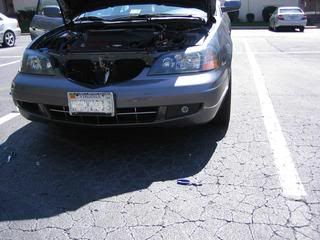
OK, so i was working on this almost all day Saturday and this his my progress
First i fitted the lamps in the bumper and marked where i needed to make my holes.
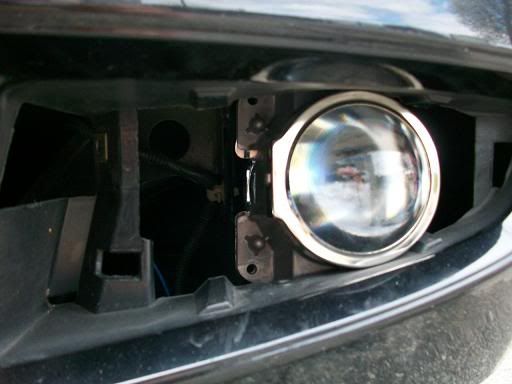
After that I started to take the bumper off and fabricate up some brackets to which the lamp could be mounted the the end of the frame rail and not wiggle around. I forgot to take a Pict of that. Made out of aluminum and made to move them up and down, back and forth. I was proud of my craftsmanship on these bitches.
Now came the headache... Once I had the lamps mounted and kinda in place i wanted to wire them up. I mounted the ballasts boxes and put some power to the hid's and BAM. The fuse blew. It took me a better half of an hour to find out where the fuse box was. I thought i knew where all the fuse panels were on my car... NOPE, i then discovered their was a panel on the passengers side dash. OMG i could have shot someone. I was under the hood pulling fuses and in the drivers panel pulling them. So i finally found the 15 amp fuse that was blown.
I know why it blew now. I didn't know it at the time, and why would I, but the Power locks, dash lights, alarm system, door panel lights, parking lights, and fog's are all running off the same fuse. When i put the hid's in the same relay it couldn't handle that much power. I than messed around with that doe a while and came to the conclusion that i would have to wire them up to a separate power source. I didn't want to put a 30 amp fuse in it like my buddy was suggesting... that would melt the wires and probably melt the fuse board. I made that mistake a long time ago and wasn't pretty.
O yeah and to top it off, i blew the fuse again and i forgot the keys were in the car and both doors were shut so i didn't run down the battery. So it took me some time to braking back into my car.
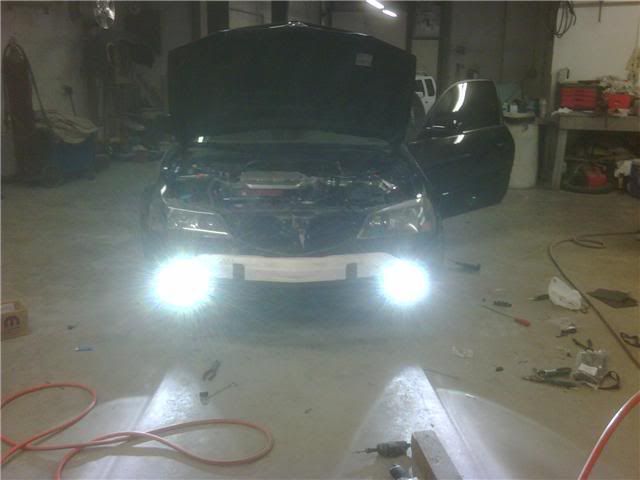
but here are the lights mounted and powered up
I had to mount a switch in the inside on one of the non used option panels in the dash and I'm not to happy about that but I'll change it out in the near future. It's OK for now.
Here is the almost finished project
I also made some interest to go in place of the old lamp to hid the open spaces around the new lamp. I still have to make tabs so they can fit in the old slide in spots. but that coming. Here's what they look like
backs
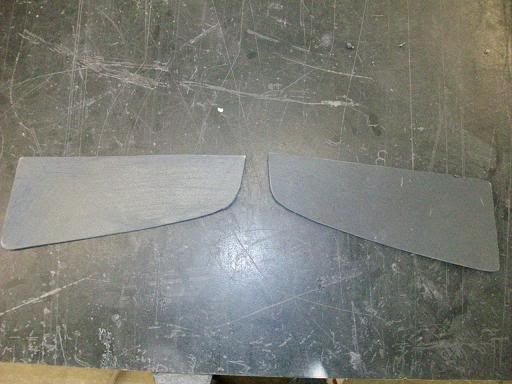
side
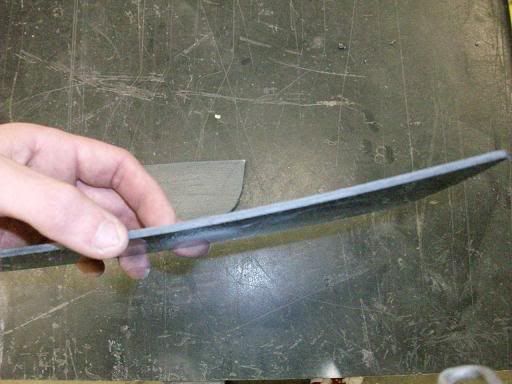
fronts
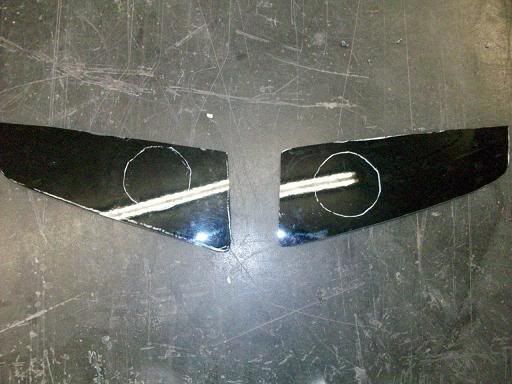
and they are already painted the NBP (B92P). I will post some more when i have the inserts cut out and fitted
First i fitted the lamps in the bumper and marked where i needed to make my holes.
After that I started to take the bumper off and fabricate up some brackets to which the lamp could be mounted the the end of the frame rail and not wiggle around. I forgot to take a Pict of that. Made out of aluminum and made to move them up and down, back and forth. I was proud of my craftsmanship on these bitches.
Now came the headache... Once I had the lamps mounted and kinda in place i wanted to wire them up. I mounted the ballasts boxes and put some power to the hid's and BAM. The fuse blew. It took me a better half of an hour to find out where the fuse box was. I thought i knew where all the fuse panels were on my car... NOPE, i then discovered their was a panel on the passengers side dash. OMG i could have shot someone.
I was under the hood pulling fuses and in the drivers panel pulling them. So i finally found the 15 amp fuse that was blown. I know why it blew now. I didn't know it at the time, and why would I, but the Power locks, dash lights, alarm system, door panel lights, parking lights, and fog's are all running off the same fuse. When i put the hid's in the same relay it couldn't handle that much power. I than messed around with that doe a while and came to the conclusion that i would have to wire them up to a separate power source. I didn't want to put a 30 amp fuse in it like my buddy was suggesting... that would melt the wires and probably melt the fuse board. I made that mistake a long time ago and wasn't pretty.
O yeah and to top it off, i blew the fuse again and i forgot the keys were in the car and both doors were shut so i didn't run down the battery. So it took me some time to braking back into my car.
but here are the lights mounted and powered up
I had to mount a switch in the inside on one of the non used option panels in the dash and I'm not to happy about that but I'll change it out in the near future. It's OK for now.
Here is the almost finished project
I also made some interest to go in place of the old lamp to hid the open spaces around the new lamp. I still have to make tabs so they can fit in the old slide in spots. but that coming. Here's what they look like
backs
side
fronts
and they are already painted the NBP (B92P). I will post some more when i have the inserts cut out and fitted
 04-06-2009, 12:11 PM
#20
Wait...I just blacked out
Join Date: Oct 2006
Location: Gainesville Florida
Age: 39
Posts: 639
Likes: 0
Received 0 Likes
on
0 Posts
I like that idea of the projectors and then the inserts around them. very nice. I'm interested in doing something like this pretty soon
04-06-2009, 02:17 PM
#22
Senior Moderator
Regional Coordinator
(Mid-Atlantic)
Regional Coordinator
(Mid-Atlantic)
iTrader: (6)
Nice work, I assume your car was already wired for fogs
Hope you are using the cutoffs, or those will blind some people
Hope you are using the cutoffs, or those will blind some people
 04-17-2009, 08:15 AM
#27
Pro
Thread Starter
Join Date: Aug 2007
Location: Maryland
Age: 41
Posts: 575
Likes: 0
Received 0 Likes
on
0 Posts
Thanks everyone for the compliments, I'm almost done. I F'ed up on the covers that were to lay over the lamps... so I'm going to make them out of a lower grill off a 09 Lexus IS 250. It should look HOT.
I just removed it but it was another members idea to use 1" garage door seal. It dose look good and a cheep solution for a front lip. Only cost 8 dollars. My car sits so low that i don't want to invest in a lower lip yet because i know I'll brake it right off 
04-17-2009, 08:21 AM
#28
B A N N E D
iTrader: (1)

Join Date: Feb 2001
Location: The grande.. Riverdale NJ.. Hopefully moving to skyline village in Lincoln park NJ..yes dirty jersey
Age: 45
Posts: 4,657
Likes: 0
Received 3 Likes
on
3 Posts
Looks good so far.. Maybee you should get 05 accord fogs off ebay and use the black plastic off that to fill in the gaps!
04-17-2009, 03:43 PM
#30
Pro
Thread Starter
Join Date: Aug 2007
Location: Maryland
Age: 41
Posts: 575
Likes: 0
Received 0 Likes
on
0 Posts
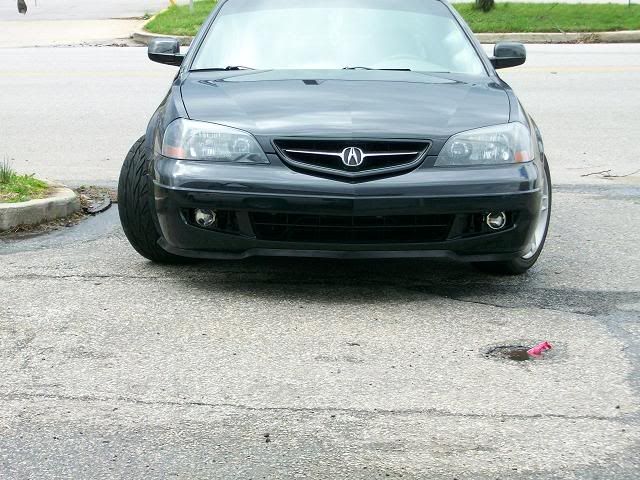
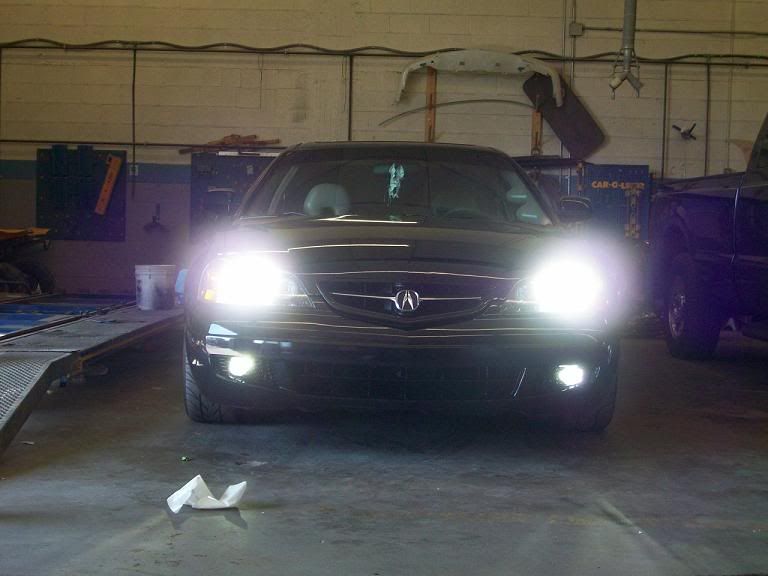
OK well I'm done. I took a little while and a lot of patience but I can finally say it was well worth it.
Like i said in the above post i mest up the layover cut outs, it was a pain in the ass to fit than cut fit than cut... you get the idea, but i ended up using the lower front grill portion of an 09 Lexus IS 250.
I painted the bumper black first with extra B92P to hide the old mounting brackets for the OEM driving lights
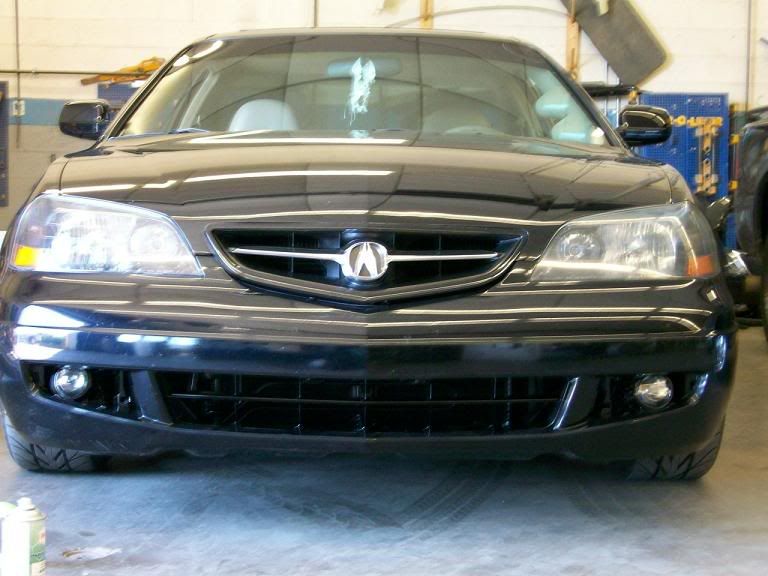
Than i paint the grills the same.... I wish I had enough mesh to put in middle but i ran out. But this is the end result.
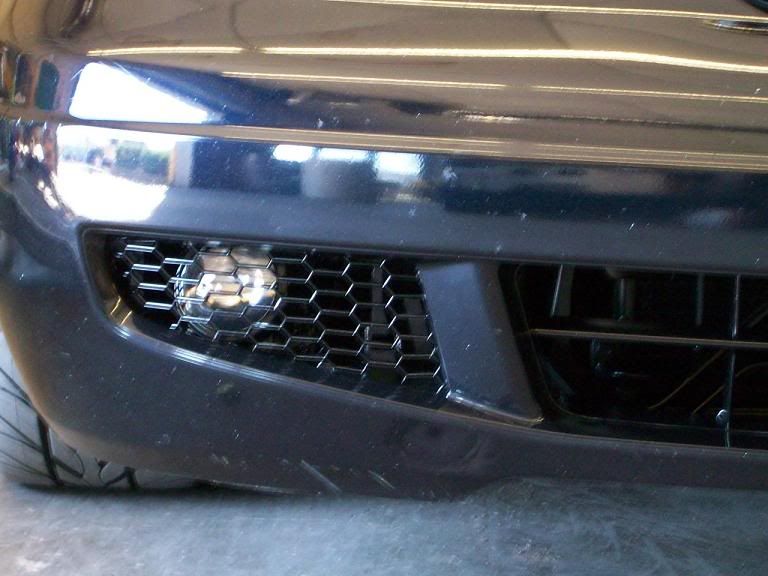
Right side,
yes i know i have a lot of scratches on this side...
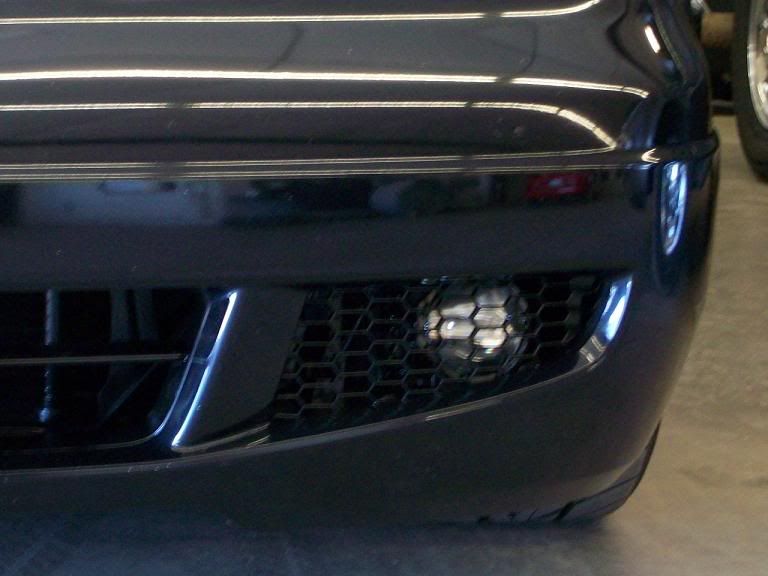
Left side,
now the hole front
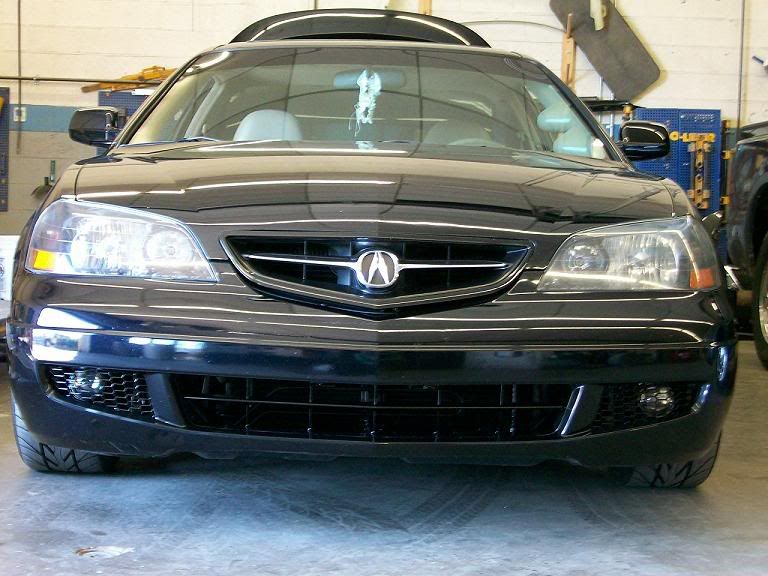
lights on
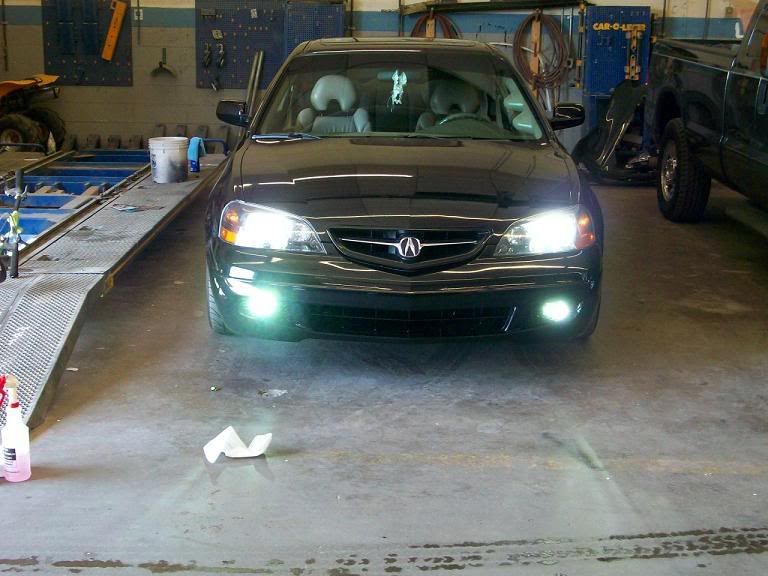
I'll have to go out this weekend and grab some night shots
Like i said in the above post i mest up the layover cut outs, it was a pain in the ass to fit than cut fit than cut... you get the idea, but i ended up using the lower front grill portion of an 09 Lexus IS 250.
I painted the bumper black first with extra B92P to hide the old mounting brackets for the OEM driving lights
Than i paint the grills the same.... I wish I had enough mesh to put in middle but i ran out. But this is the end result.
Right side,
yes i know i have a lot of scratches on this side...
Left side,
now the hole front
lights on
I'll have to go out this weekend and grab some night shots
04-20-2009, 02:36 AM
#37
is planing PrisonBreak in
Join Date: Dec 2007
Location: VA
Posts: 83
Likes: 0
Received 0 Likes
on
0 Posts
dude those fogs are friggin awsome but whts up with the mesh  and why hide those beautiful things behind it
u got to do something about that here check out this link may be something like this
https://acurazine.com/forums/2g-cl-2001-2003-50/hella-micro-de-fog-install-455969/
or those inserts like u were trying before, i know that could be pain cause i did it
sorry honest opinion
but whts up with the mesh and why hide those beautiful things behind it u got to do something about that here check out this link may be something like this
https://acurazine.com/forums/2g-cl-2001-2003-50/hella-micro-de-fog-install-455969/
or those inserts like u were trying before, i know that could be pain cause i did it
sorry honest opinion
04-20-2009, 08:13 AM
#38
Pro
Thread Starter
Join Date: Aug 2007
Location: Maryland
Age: 41
Posts: 575
Likes: 0
Received 0 Likes
on
0 Posts
dude those fogs are friggin awsome but what's up with the mesh and why hide those beautiful things behind it
u got to do something about that here check out this link may be something like this
https://acurazine.com/forums/showthread.php?t=455969
or those inserts like u were trying before, i know that could be pain cause i did it
but what's up with the mesh and why hide those beautiful things behind it u got to do something about that here check out this link may be something like this
https://acurazine.com/forums/showthread.php?t=455969
or those inserts like u were trying before, i know that could be pain cause i did it
I think i would look better if the middle was the same way
Thanks to everyone for staying with me through this project... I'm still open to thoughts and comments or ideas so keep them coming, I love to make stuff
Last edited by 02CLNOS; 04-20-2009 at 08:17 AM.

Thread
Thread Starter
Forum
Replies
Last Post