


Fresh wash, wax and wetsanded headlight pics!


Thread Starter
Racer
Joined: Apr 2006
Posts: 392
Likes: 0
From: North Florida
Fresh wash, wax and wetsanded headlight pics!
this morning I decided to wetsand my headlight housings, with f-ing great results. I started out w/600 grit, then moved up to 800, and finally 2,000 grit paper. after that I used mequire's plastic wax (most likely a liquid compound agent), and polished them up with my buffer at 1,800 rpm. Man, it does the trick well. I had alot of little knicks and scratches and miscellaneous shit from the previous owner, they are all gone and clear at hell! Everyone should try it! Not to mention how much better our HID's look through a clear lense. <p> I'll take more pics soon, since the temperature outside was dropping (58 degrees, which is cold to us floridians).
<p>

<p>

<p>

<p>

<p>

<p>

<p>
<p>
<p>
<p>
<p>
<p>




Trending Topics



Thread Starter
Racer
Joined: Apr 2006
Posts: 392
Likes: 0
From: North Florida
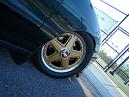
Dnd - i guess they are some kind of TL knockoffs, i got'em off of ebay. I wanted some wider wheels, and these were going for $435 (just search on ebay for "17 acura sport wheels) i think they are pretty sweet, and they keep a some-what stock look.
I live in ocala, but my first job out of UF was in Jax-vegas...I lived off of beach blvd and kernan. good times.
wet sanding is an easy process, but it takes work.
1.) tape off your lights w/masking tape (probably blue so you know how close you're getting to your paint, you dont want to scuff it, also, it's easier to do it w/the hood up so you dont have to tape that part of your paint.
2.) start off with 800-grit sandpaper, and a squirt bottle of water w/some type of soap (dishwashing soap is perfect). wet down the housing you are starting with by using the squirt bottle. Start sanding firmly-usually circular, but linear motion works, too. you know when it is working when the plastic starts wearing down and the water starts to turn a milky-white color. also, your housing will turn dull as hell (trust me, it's scary at first-but the final step corrects this).
you will have to sand alot if you have a lot of dings and road rash (gravel, dirt marks) like i did. sand that till the entire housing is completely hazy, do it more for big scratched/pitted areas. this taking about 10-20 minutes per housing dpending on how bad they are.
3.) then hose down the housing with a hose, but not a "jet" setting, I just took the nossle off and let it gently rinse the excess plastic away.
4.) next, move up to a 1000-grit paper and do the same thing (here, you are smoothing out the larger scratches that you made w/the 800 grit). once again, the plastic you're shedding will produce a milky-whitish color as you squirt the soapy water constantly. once again, rinse housing with the hose gently.
5.)next, move up to a 2,000 grit paper and sand the shit out of the housing once again, and make sure you do each housing for atleast 10 min, so that every inch of the surface has been sanded.
6.) finally, rinse gently w/hose again-here you have to make sure that there is no dirt or particles left on the housings, since it is time to dry them.
6.5)Dry the housings well. This is the step where you will polish the housing for that brand-spanking-new look. I do not recommend doing this part by hand. I used a high-speed buffer (1,800 rpm) to polish the housings. I used meguire's plastic polish, and all you have to do is dabb a little bit straight from the bottle on the housing, a little here, a little there (I basically dabbed it all over the housing) and then buff that mofo. it will take 3-4 coats of this to fully do the job, and it IS instantaneous! You will see the results right away.
7.) I would suggest washing atleast the front of the car really well to get all of the milky stuff off. Then you can dry the car and apply regular wax by hand-but it's best to use the buffer again.
8.)You'll be pimpin' again in no time...and remember......don't ever spend $400+ for new housings, it takes about $10 for the 3 different grits of sandpaper, $5 for the meguire's plastic polish, $5 for some wax, and about 3-4 hours to do it right....and I think you can always borrow a buffer from someone, or buy one $60 +/- and take it back when you're done.
I live in ocala, but my first job out of UF was in Jax-vegas...I lived off of beach blvd and kernan. good times.
wet sanding is an easy process, but it takes work.
1.) tape off your lights w/masking tape (probably blue so you know how close you're getting to your paint, you dont want to scuff it, also, it's easier to do it w/the hood up so you dont have to tape that part of your paint.
2.) start off with 800-grit sandpaper, and a squirt bottle of water w/some type of soap (dishwashing soap is perfect). wet down the housing you are starting with by using the squirt bottle. Start sanding firmly-usually circular, but linear motion works, too. you know when it is working when the plastic starts wearing down and the water starts to turn a milky-white color. also, your housing will turn dull as hell (trust me, it's scary at first-but the final step corrects this).
you will have to sand alot if you have a lot of dings and road rash (gravel, dirt marks) like i did. sand that till the entire housing is completely hazy, do it more for big scratched/pitted areas. this taking about 10-20 minutes per housing dpending on how bad they are.
3.) then hose down the housing with a hose, but not a "jet" setting, I just took the nossle off and let it gently rinse the excess plastic away.
4.) next, move up to a 1000-grit paper and do the same thing (here, you are smoothing out the larger scratches that you made w/the 800 grit). once again, the plastic you're shedding will produce a milky-whitish color as you squirt the soapy water constantly. once again, rinse housing with the hose gently.
5.)next, move up to a 2,000 grit paper and sand the shit out of the housing once again, and make sure you do each housing for atleast 10 min, so that every inch of the surface has been sanded.
6.) finally, rinse gently w/hose again-here you have to make sure that there is no dirt or particles left on the housings, since it is time to dry them.
6.5)Dry the housings well. This is the step where you will polish the housing for that brand-spanking-new look. I do not recommend doing this part by hand. I used a high-speed buffer (1,800 rpm) to polish the housings. I used meguire's plastic polish, and all you have to do is dabb a little bit straight from the bottle on the housing, a little here, a little there (I basically dabbed it all over the housing) and then buff that mofo. it will take 3-4 coats of this to fully do the job, and it IS instantaneous! You will see the results right away.
7.) I would suggest washing atleast the front of the car really well to get all of the milky stuff off. Then you can dry the car and apply regular wax by hand-but it's best to use the buffer again.
8.)You'll be pimpin' again in no time...and remember......don't ever spend $400+ for new housings, it takes about $10 for the 3 different grits of sandpaper, $5 for the meguire's plastic polish, $5 for some wax, and about 3-4 hours to do it right....and I think you can always borrow a buffer from someone, or buy one $60 +/- and take it back when you're done.
Originally Posted by bhurlbut
Dnd - i guess they are some kind of TL knockoffs, i got'em off of ebay. I wanted some wider wheels, and these were going for $435 (just search on ebay for "17 acura sport wheels) i think they are pretty sweet, and they keep a some-what stock look.
I live in ocala, but my first job out of UF was in Jax-vegas...I lived off of beach blvd and kernan. good times.
wet sanding is an easy process, but it takes work.
1.) tape off your lights w/masking tape (probably blue so you know how close you're getting to your paint, you dont want to scuff it, also, it's easier to do it w/the hood up so you dont have to tape that part of your paint.
2.) start off with 800-grit sandpaper, and a squirt bottle of water w/some type of soap (dishwashing soap is perfect). wet down the housing you are starting with by using the squirt bottle. Start sanding firmly-usually circular, but linear motion works, too. you know when it is working when the plastic starts wearing down and the water starts to turn a milky-white color. also, your housing will turn dull as hell (trust me, it's scary at first-but the final step corrects this).
you will have to sand alot if you have a lot of dings and road rash (gravel, dirt marks) like i did. sand that till the entire housing is completely hazy, do it more for big scratched/pitted areas. this taking about 10-20 minutes per housing dpending on how bad they are.
3.) then hose down the housing with a hose, but not a "jet" setting, I just took the nossle off and let it gently rinse the excess plastic away.
4.) next, move up to a 1000-grit paper and do the same thing (here, you are smoothing out the larger scratches that you made w/the 800 grit). once again, the plastic you're shedding will produce a milky-whitish color as you squirt the soapy water constantly. once again, rinse housing with the hose gently.
5.)next, move up to a 2,000 grit paper and sand the shit out of the housing once again, and make sure you do each housing for atleast 10 min, so that every inch of the surface has been sanded.
6.) finally, rinse gently w/hose again-here you have to make sure that there is no dirt or particles left on the housings, since it is time to dry them.
6.5)Dry the housings well. This is the step where you will polish the housing for that brand-spanking-new look. I do not recommend doing this part by hand. I used a high-speed buffer (1,800 rpm) to polish the housings. I used meguire's plastic polish, and all you have to do is dabb a little bit straight from the bottle on the housing, a little here, a little there (I basically dabbed it all over the housing) and then buff that mofo. it will take 3-4 coats of this to fully do the job, and it IS instantaneous! You will see the results right away.
7.) I would suggest washing atleast the front of the car really well to get all of the milky stuff off. Then you can dry the car and apply regular wax by hand-but it's best to use the buffer again.
8.)You'll be pimpin' again in no time...and remember......don't ever spend $400+ for new housings, it takes about $10 for the 3 different grits of sandpaper, $5 for the meguire's plastic polish, $5 for some wax, and about 3-4 hours to do it right....and I think you can always borrow a buffer from someone, or buy one $60 +/- and take it back when you're done.
I live in ocala, but my first job out of UF was in Jax-vegas...I lived off of beach blvd and kernan. good times.
wet sanding is an easy process, but it takes work.
1.) tape off your lights w/masking tape (probably blue so you know how close you're getting to your paint, you dont want to scuff it, also, it's easier to do it w/the hood up so you dont have to tape that part of your paint.
2.) start off with 800-grit sandpaper, and a squirt bottle of water w/some type of soap (dishwashing soap is perfect). wet down the housing you are starting with by using the squirt bottle. Start sanding firmly-usually circular, but linear motion works, too. you know when it is working when the plastic starts wearing down and the water starts to turn a milky-white color. also, your housing will turn dull as hell (trust me, it's scary at first-but the final step corrects this).
you will have to sand alot if you have a lot of dings and road rash (gravel, dirt marks) like i did. sand that till the entire housing is completely hazy, do it more for big scratched/pitted areas. this taking about 10-20 minutes per housing dpending on how bad they are.
3.) then hose down the housing with a hose, but not a "jet" setting, I just took the nossle off and let it gently rinse the excess plastic away.
4.) next, move up to a 1000-grit paper and do the same thing (here, you are smoothing out the larger scratches that you made w/the 800 grit). once again, the plastic you're shedding will produce a milky-whitish color as you squirt the soapy water constantly. once again, rinse housing with the hose gently.
5.)next, move up to a 2,000 grit paper and sand the shit out of the housing once again, and make sure you do each housing for atleast 10 min, so that every inch of the surface has been sanded.
6.) finally, rinse gently w/hose again-here you have to make sure that there is no dirt or particles left on the housings, since it is time to dry them.
6.5)Dry the housings well. This is the step where you will polish the housing for that brand-spanking-new look. I do not recommend doing this part by hand. I used a high-speed buffer (1,800 rpm) to polish the housings. I used meguire's plastic polish, and all you have to do is dabb a little bit straight from the bottle on the housing, a little here, a little there (I basically dabbed it all over the housing) and then buff that mofo. it will take 3-4 coats of this to fully do the job, and it IS instantaneous! You will see the results right away.
7.) I would suggest washing atleast the front of the car really well to get all of the milky stuff off. Then you can dry the car and apply regular wax by hand-but it's best to use the buffer again.
8.)You'll be pimpin' again in no time...and remember......don't ever spend $400+ for new housings, it takes about $10 for the 3 different grits of sandpaper, $5 for the meguire's plastic polish, $5 for some wax, and about 3-4 hours to do it right....and I think you can always borrow a buffer from someone, or buy one $60 +/- and take it back when you're done.








Uses turn signals in my
Joined: Jun 2006
Posts: 2,108
Likes: 2
From: South Florida
Thanks for the instructions. My friends and I plan to try it the wetsanding technique on my friend's mustang's headlights today. I'll take before and after pictures if I remember.




Got DEP???
Joined: Feb 2006
Posts: 664
Likes: 0
From: Lowell, MA
[QUOTE=bhurlbut]this morning I decided to wetsand my headlight housings, with f-ing great results. I started out w/600 grit, then moved up to 800, and finally 2,000 grit paper. after that I used mequire's plastic wax (most likely a liquid compound agent), and polished them up with my buffer at 1,800 rpm. Man, it does the trick well. I had alot of little knicks and scratches and miscellaneous shit from the previous owner, they are all gone and clear at hell! Everyone should try it! Not to mention how much better our HID's look through a clear lense. <p> I'll take more pics soon, since the temperature outside was dropping (58 degrees, which is cold to us floridians).[/QUOTE]
Wow, I had my windows open this morning because it was 39 degrees!
Take some pictures of the lenses. You can't see them that well...
Wow, I had my windows open this morning because it was 39 degrees!
Take some pictures of the lenses. You can't see them that well...

Thread Starter
Racer
Joined: Apr 2006
Posts: 392
Likes: 0
From: North Florida
i'll try to take some daytime pics tomorrow.
Also, if all goes well i'm buying some roadlamp/foglamps from Greenmachine. I'm going to wetsand those, too before I put them on.
I'm also going to take them apart and see if I can paint them black, and add some projectors in there, too.
Also, if all goes well i'm buying some roadlamp/foglamps from Greenmachine. I'm going to wetsand those, too before I put them on.
I'm also going to take them apart and see if I can paint them black, and add some projectors in there, too.

Moderator Alumnus
Joined: Jun 2004
Posts: 8,125
Likes: 11
From: Pacific Northwest, blah.
Originally Posted by bhurlbut
i'll try to take some daytime pics tomorrow.
Also, if all goes well i'm buying some roadlamp/foglamps from Greenmachine. I'm going to wetsand those, too before I put them on.
I'm also going to take them apart and see if I can paint them black, and add some projectors in there, too.
Also, if all goes well i'm buying some roadlamp/foglamps from Greenmachine. I'm going to wetsand those, too before I put them on.
I'm also going to take them apart and see if I can paint them black, and add some projectors in there, too.
Uses turn signals in my
Joined: Jun 2006
Posts: 2,108
Likes: 2
From: South Florida
Originally Posted by TCM 01 CL-S
Thanks for the instructions. My friends and I plan to try it the wetsanding technique on my friend's mustang's headlights today. I'll take before and after pictures if I remember.
Started with 600 grit (thats all my friend had, he didnt feel like getting anything else), sanded it down with water then hit it with a very very softy porous sponge disc he had on a drill with soap and then we got a buffer and we buffed it with plast-x. It looked like ass until we buffed it, then it cleared up almost as if it was brand new.
I didn't take any after pictures because it was too dark, but I'll get some tommorow, he lives down the street and I have to get him to send me some better before pictures.
 for wetsanding headlights that don't clear up with plast-x alone.

Originally Posted by mystikk
While this thread is still somewhat alive, you guys think it's worth it doing the same procedure to the roadlamps? I wonder if they'll be as clear as the headlights when done.


Originally Posted by distortedolskool
i would take them out from the bumper just because i would not take a chance on sanding the paint. but no, you do not have to dismantle the headlights.

an asshole from florida
Joined: Dec 2006
Posts: 9,405
Likes: 17
From: GO GATORS!
Im going to have to do this as well..well as soon as i get a job and get some money...which seems like something that will neverr happen
and to all the Haters
GO GATORS!!!!
first year up in UF
and to all the Haters
GO GATORS!!!!
first year up in UF
yes the headlights come out in one piece. actually to avoid extra work of removing the bumper you could just tape off really good around them and keep some running water nearby to rinse every so often. make sure to use the painters blue tape.
invisible-
sand paper is dirt cheap and the pastic X is like $10.
invisible-
sand paper is dirt cheap and the pastic X is like $10.
autozone or similar should have 2000. if not go to an auto body shop or a sherwin williams automotive. search around. they sell it somewhere in your town.
i would say you need the 2k paper. you might be able to get by with 1000 grit and plastic X with a porter cable orbital. but all by hand i would say the 2000 is needed. the slightest bit of haze is going to look like crap.
i would say you need the 2k paper. you might be able to get by with 1000 grit and plastic X with a porter cable orbital. but all by hand i would say the 2000 is needed. the slightest bit of haze is going to look like crap.
