Aem Cai? Diy?

Thread Tools
 
Search this Thread
 
Old Aug 31, 2004 | 03:44 AM
  #1  
Time For Sleeep's Avatar
Thread Starter
That's Racist
 
Joined: Aug 2004
Posts: 5,634
Likes: 0
From: San Diego native. UCLA resident. =)
Aem Cai? Diy?

From a 1-10, how easy of an install is an AEM CAI if you do it yourself?

-Could I save time and avoid risking the welfare of my car by paying $40/hr for a shop down here in Diego?

-And what's the best deal out there for the AEM?
Reply
Old Aug 31, 2004 | 04:16 AM
  #2  
bigguyonbike's Avatar
13.2 @ 104.76mph
 
Joined: Feb 2003
Posts: 583
Likes: 0
From: portland, or
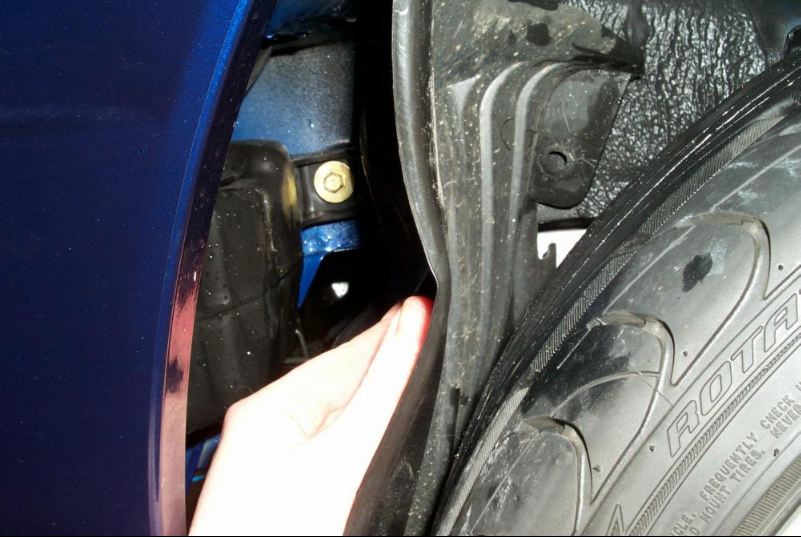
if 1(easy) and 10(hard), then it's probably a 2 or 3. follow the instruction that is given with the product and you should be fine. take the front driver side wheel and the splash guard off and you should have access to all the nuts and bolts that need to be remove. from there it's a piece of cake. i got my AEM CAI here: http://www.first-1.com/Merchant2/mer...roduct_Count=2

price is $165.95 with free shipping.
Reply
Old Aug 31, 2004 | 05:52 AM
  #3  
Chief F1 Fan's Avatar
Team Owner
25 Year Member
Photogenic
Liked
Loved
 
Joined: Jan 2001
Posts: 26,227
Likes: 8,064
From: Haudenosaunee Land
put it on yerself and begin the bond w/ yer whip! I'd say it's a 1-2, especially if you are mechanically inclined and you should be done in about an hour.
Reply
Old Aug 31, 2004 | 08:05 AM
  #4  
MisterMehoff's Avatar
If He Dies...He Dies
 
Joined: Jan 2003
Posts: 1,061
Likes: 0
From: Washington, DC
I give it a 2. It took me 30 mins to install my AEM. I had an Icebox on initially so I pretty much knew what went where.
Reply
Old Aug 31, 2004 | 08:13 AM
  #5  
phipark's Avatar
Not Asian
 
Joined: Jul 2003
Posts: 13,409
Likes: 1
From: St. Louis
This was the first thing that I have ever put on a car and I would rate it at about a 3 for a beginner.
Reply
Old Aug 31, 2004 | 08:26 AM
  #6  
Chief F1 Fan's Avatar
Team Owner
25 Year Member
Photogenic
Liked
Loved
 
Joined: Jan 2001
Posts: 26,227
Likes: 8,064
From: Haudenosaunee Land
I wonder how Amir would rate it???
Reply
Old Aug 31, 2004 | 10:27 AM
  #7  
racersky's Avatar
Burning Brakes
 
Joined: May 2004
Posts: 1,176
Likes: 0
From: Pennsylvania
it's pretty easy once you remove that bottom box which i think is called either the airbox or snorkel w/e. The bolts are on there like there's no tomorrow
Reply
Old Aug 31, 2004 | 10:30 AM
  #8  
MisterMehoff's Avatar
If He Dies...He Dies
 
Joined: Jan 2003
Posts: 1,061
Likes: 0
From: Washington, DC
You'll probably need a wrench extension attachment to get the bolts off the resonator box. It comes in handy.
Reply
Old Aug 31, 2004 | 10:59 AM
  #9  
Shawn S's Avatar
Team Owner
 
Joined: Oct 2000
Posts: 20,014
Likes: 0
From: Hellertown, Pa. USA
Originally Posted by MisterMehoff
You'll probably need a wrench extension attachment to get the bolts off the resonator box. It comes in handy.
The BEST way to get the rear resonator bolt off is to access it through the wheel well.

Reply
Old Aug 31, 2004 | 11:38 AM
  #10  
juniorbean's Avatar
Senior Moderator
iTrader: (5)
 
Joined: Oct 2000
Posts: 28,461
Likes: 1,760
From: The QC
This was the first mod I ever did myself and it took me about an hour and a half total. On a scale of 1-10, 10 being the hardest I'd give it a 3.

Good luck!!
Reply
Old Aug 31, 2004 | 01:21 PM
  #11  
evilone's Avatar
COME AT ME BRO!
 
Joined: Jun 2004
Posts: 9,796
Likes: 13
From: st.johns, NL (CANUKISTAN)
its easy just get a jack stand and take your front left tire off so you can get in the wheel well liner easy.. i would give it a 2.. tools needed jack stand, flat head, phillips head,jack, impact wrench or factory lug wrench, and i think thats it you might need a 10mm socket some where i dont remember its been like 2 years scene i put mine on.
Reply
Old Aug 31, 2004 | 06:57 PM
  #12  
racersky's Avatar
Burning Brakes
 
Joined: May 2004
Posts: 1,176
Likes: 0
From: Pennsylvania
lol i know i did that but there's that on bolt that's facing the front i think inside all the way up.
Reply
Old Aug 31, 2004 | 09:25 PM
  #13  
Time For Sleeep's Avatar
Thread Starter
That's Racist
 
Joined: Aug 2004
Posts: 5,634
Likes: 0
From: San Diego native. UCLA resident. =)
Thanks everyone. Looks like I'll save $40/hr.
Reply
Old Aug 31, 2004 | 11:11 PM
  #14  
NiteQwill's Avatar
Adventurist.
 
Joined: Jan 2004
Posts: 6,661
Likes: 58
From: Orange County, CA
Don't forget to bleed your coolant line for air.
Reply
Old Feb 20, 2010 | 12:16 PM
  #15  
Elijah J's Avatar
Racer
 
Joined: Apr 2007
Posts: 344
Likes: 1
Originally Posted by NiteQwill
Don't forget to bleed your coolant line for air.
I know this is old...but what?
Reply
Old Feb 20, 2010 | 12:28 PM
  #16  
civicdrivr's Avatar
Team Owner
15 Year Member
iTrader: (9)
 
Joined: Jul 2008
Posts: 36,860
Likes: 8,746
From: VA
I think he was talking about the coolant line in the throttle body, but Im not sure why anyone would undo those when installing a CAI.
Reply
Old Feb 20, 2010 | 12:43 PM
  #17  
Elijah J's Avatar
Racer
 
Joined: Apr 2007
Posts: 344
Likes: 1
that was I was thinking and wondering. I just bought a used cai for my CL MT and didnt get an installation manual. Im sure its pretty simple but it would be nice to have something check myself against, anyone have a DIY or a link to instructions?
Reply
Old Feb 20, 2010 | 12:52 PM
  #18  
civicdrivr's Avatar
Team Owner
15 Year Member
iTrader: (9)
 
Joined: Jul 2008
Posts: 36,860
Likes: 8,746
From: VA
Its quite simple. Just remove the stock air box and tube along with the resonator (best to do it from the wheel well).

Then put the new intake in. Its difficult to screw it up.
Reply
Old Feb 20, 2010 | 12:56 PM
  #19  
CL-S progression 01's Avatar
lowrd on tein CS biatch
iTrader: (2)
 
Joined: Apr 2009
Posts: 4,766
Likes: 138
From: Mississauga
it took me just under 1 hour. it was my first mod, I had NO instructions... and I removed my front bumper (which you do not need to do)
Reply
Old Feb 20, 2010 | 02:22 PM
  #20  
Rapture's Avatar
Safety Car
15 Year Member
Liked
Loved
Community Favorite
 
Joined: Feb 2009
Posts: 4,442
Likes: 214
I think with an Injen CAI you need to mess around with the coolant lines.
Reply
Old Feb 20, 2010 | 03:40 PM
  #21  
civicdrivr's Avatar
Team Owner
15 Year Member
iTrader: (9)
 
Joined: Jul 2008
Posts: 36,860
Likes: 8,746
From: VA
You shouldnt have to. There is a vent line from the front valve cover that you need to connect to the intake pipe, but no coolant lines.
Reply
Old Feb 20, 2010 | 04:38 PM
  #22  
CL-S progression 01's Avatar
lowrd on tein CS biatch
iTrader: (2)
 
Joined: Apr 2009
Posts: 4,766
Likes: 138
From: Mississauga
no coolant lines to redirect. it's a straight forward install. You get instructions to show you what to do on Injean and AEM(i think), and in my kit u get a hose to go from the intake to the front valve cover and then u remove the oem metal pipe and then attach a double male fitting to another line (forgot what it's called, but it goes to the other side of the intake). It's nothing really, just read and do slowly

But if u got the tb spacer and gaskets there bushing becomes too wide and there is no clearance so u need to do something. I cut my bushing in half and then fabricated a lil bracket to hold it in the same place by an inch closer to the frame.

Last edited by CL-S progression 01; Feb 20, 2010 at 04:40 PM.
Reply
Old Feb 20, 2010 | 06:21 PM
  #23  
Elijah J's Avatar
Racer
 
Joined: Apr 2007
Posts: 344
Likes: 1
Originally Posted by CL-S progression 01
no coolant lines to redirect. it's a straight forward install. You get instructions to show you what to do on Injean and AEM(i think), and in my kit u get a hose to go from the intake to the front valve cover and then u remove the oem metal pipe and then attach a double male fitting to another line (forgot what it's called, but it goes to the other side of the intake). It's nothing really, just read and do slowly

But if u got the tb spacer and gaskets there bushing becomes too wide and there is no clearance so u need to do something. I cut my bushing in half and then fabricated a lil bracket to hold it in the same place by an inch closer to the frame.
Right on dude. Thanks for the input. Being that I pick this puppy up used from a fellow Azine member, no written instructions were available. However, AEMintake.com does have a how-to posted. It looks like a nobrainer, I'm just looking for shortcuts. For example, you mentioned not needing to remove the front bumper.

Anyway, thanks dude. Ill knock it out tomorrow. The current is busted as shit and hums something fierce.

Any luck with the ebay filter?
Reply
Old Feb 20, 2010 | 08:02 PM
  #24  
CL-S progression 01's Avatar
lowrd on tein CS biatch
iTrader: (2)
 
Joined: Apr 2009
Posts: 4,766
Likes: 138
From: Mississauga
no i just went and got an Injen one and said to hell with it.

Costs a lot of money but I'm sure it's better a little bit. to what degree who knows but I am a brand loyal custy and i stick to ma gunz
Reply
Old Feb 21, 2010 | 11:20 AM
  #25  
Elijah J's Avatar
Racer
 
Joined: Apr 2007
Posts: 344
Likes: 1
Originally Posted by civicdrivr
You shouldnt have to. There is a vent line from the front valve cover that you need to connect to the intake pipe, but no coolant lines.
Originally Posted by CL-S progression 01
no coolant lines to redirect. it's a straight forward install. You get instructions to show you what to do on Injean and AEM(i think), and in my kit u get a hose to go from the intake to the front valve cover and then u remove the oem metal pipe and then attach a double male fitting to another line (forgot what it's called, but it goes to the other side of the intake). It's nothing really, just read and do slowly

But if u got the tb spacer and gaskets there bushing becomes too wide and there is no clearance so u need to do something. I cut my bushing in half and then fabricated a lil bracket to hold it in the same place by an inch closer to the frame.
This is the instal sheet from AEMintake.com. For the MT CLs, its calling for the coolant line to be relocated. Did you guys not do this?


Coolant line: http://www.aemintakes.com/instructio...1-509_inst.pdf
Reply
Old Feb 21, 2010 | 11:34 AM
  #26  
civicdrivr's Avatar
Team Owner
15 Year Member
iTrader: (9)
 
Joined: Jul 2008
Posts: 36,860
Likes: 8,746
From: VA
wtf?

I have an Icebox and didn't touch any coolant lines. What the point to in H isn't a coolant line, thats the breather hose.
Reply
Old Feb 21, 2010 | 12:04 PM
  #27  
Elijah J's Avatar
Racer
 
Joined: Apr 2007
Posts: 344
Likes: 1
Originally Posted by civicdrivr
wtf?

I have an Icebox and didn't touch any coolant lines. What the point to in H isn't a coolant line, thats the breather hose.
Hmm.
Reply
Old Feb 21, 2010 | 12:57 PM
  #28  
Rapture's Avatar
Safety Car
15 Year Member
Liked
Loved
Community Favorite
 
Joined: Feb 2009
Posts: 4,442
Likes: 214
Hmm indeed.
Reply
Old Feb 21, 2010 | 01:31 PM
  #29  
victorvu's Avatar
Pro
iTrader: (1)
 
Joined: Jan 2006
Posts: 735
Likes: 0
From: San Jose, CA
i think they're talking about coolant bypass when doing cai its recommended to do the bypass from keeping warm coolant from heating up your throttle body. If anyone in here has a CAI they probably have the bypass also.
Reply
Old Feb 21, 2010 | 04:08 PM
  #30  
2Fast4you's Avatar
Burning Brakes
iTrader: (1)
 
Joined: Sep 2008
Posts: 1,031
Likes: 2
From: NorthCarolina
doing the bypass makes my car warm up really slow in the winters and i get shit mileage because of that.
Reply
Old Feb 21, 2010 | 06:00 PM
  #31  
civicdrivr's Avatar
Team Owner
15 Year Member
iTrader: (9)
 
Joined: Jul 2008
Posts: 36,860
Likes: 8,746
From: VA
The bypass shouldnt have a damn thing to do with the engine warming up.
Reply
Old Feb 21, 2010 | 06:47 PM
  #32  
CL-S progression 01's Avatar
lowrd on tein CS biatch
iTrader: (2)
 
Joined: Apr 2009
Posts: 4,766
Likes: 138
From: Mississauga
bypass only screws with the idle (sometimes) I did this mod on my previous car and on cold days it'd act wonky.

Not saying it'll do that same, but it's just not my cup of tea.

The tb is designed to have the coolant go through it. I'm not a fan of tampering with that. Especially because we often have cold days in canada.
Reply
Old Feb 21, 2010 | 06:51 PM
  #33  
civicdrivr's Avatar
Team Owner
15 Year Member
iTrader: (9)
 
Joined: Jul 2008
Posts: 36,860
Likes: 8,746
From: VA
In cold climates I wouldnt suggest it. Ice can form in the throttle body then its not really fun for anyone involved.
Reply
Old Feb 21, 2010 | 06:53 PM
  #34  
CL-S progression 01's Avatar
lowrd on tein CS biatch
iTrader: (2)
 
Joined: Apr 2009
Posts: 4,766
Likes: 138
From: Mississauga
lol i didn't even think/know about that. that just ironically just reiterates my point for all of the
Reply
Old Feb 21, 2010 | 07:44 PM
  #35  
Elijah J's Avatar
Racer
 
Joined: Apr 2007
Posts: 344
Likes: 1
There are two nipples on the intake. 1 is for the breather hose, what about the other?
Reply
Old Feb 21, 2010 | 07:46 PM
  #36  
Elijah J's Avatar
Racer
 
Joined: Apr 2007
Posts: 344
Likes: 1
of those who've posted, who has put the aem cia on a six speed?
Reply
Old Feb 21, 2010 | 07:50 PM
  #37  
CL-S progression 01's Avatar
lowrd on tein CS biatch
iTrader: (2)
 
Joined: Apr 2009
Posts: 4,766
Likes: 138
From: Mississauga
there is only one there that size that can go on it anyways so it's like... impossible to screw it up
Reply
Old Feb 21, 2010 | 07:57 PM
  #38  
Elijah J's Avatar
Racer
 
Joined: Apr 2007
Posts: 344
Likes: 1
For the record, dont attempt this is all you have is a theatherman...real pain in fucking ass without proper tools(damn the bitch who stole my sockets).

Somethings not quite right. I followed the directions from http://www.aemintakes.com/instructio...1-509_inst.pdf .
But when I give it gas it goes to 4k rpms and stays. I need to fix this tonight. Who else has installed this with similar issues?
Reply
Old Feb 21, 2010 | 09:49 PM
  #39  
darkness_cl's Avatar
Instructor
 
Joined: Jul 2008
Posts: 110
Likes: 0
From: MN
not hard at all definately do-able by yourself without the help of a body shop. The hardest part is just looking for the 2nd bolt behind the resonator >.<
Reply
Old Feb 21, 2010 | 09:49 PM
  #40  
Elijah J's Avatar
Racer
 
Joined: Apr 2007
Posts: 344
Likes: 1


Is this process considered a coolant bypass?
Reply


All times are GMT -5. The time now is 11:14 AM.